How to Draw a Cartoon Cat
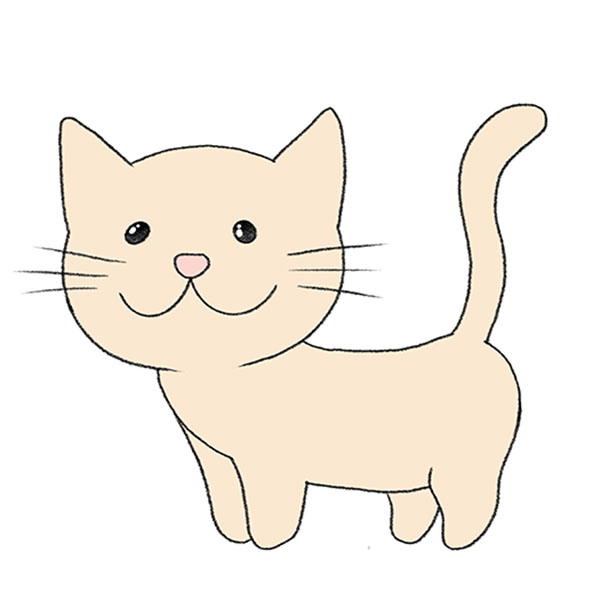
This tutorial on how to draw a cartoon cat will show you two simple methods and teach you the basics of creating cartoon animals.
How to Draw a Cartoon Cat: Introduction
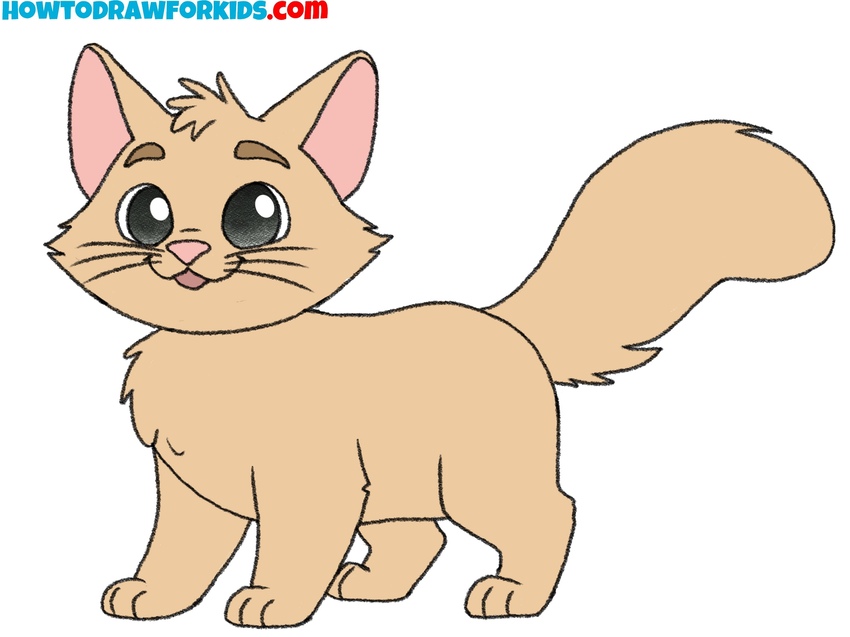
In this tutorial, you will learn step by step how to draw a cartoon cat. This guide will focus on creating a cartoonish animal design, different from my previous cat drawing tutorials.
Cartoons have a distinct style, and cartoonists use specific techniques to give characters and animals a unique appearance. In this tutorial on how to draw a cartoon cat, I will explain the methods used to achieve this look.
I will guide you step by step on how to create cartoon proportions, add facial features, and include the necessary details to give the drawing a cartoon appearance. Additionally, I will provide some extra tips for drawing a cartoon cat.
Like most of my tutorials, this lesson not only teaches you how to draw a cartoon cat but also helps you build a foundational skill for drawing cartoon characters. To improve this skill, we will begin with the main lesson and reinforce it with a follow-up practice session.
Cartoon Cat Drawing Tutorial
Materials
- Pencil
- Paper
- Eraser
- Coloring supplies
Time needed: 40 minutes
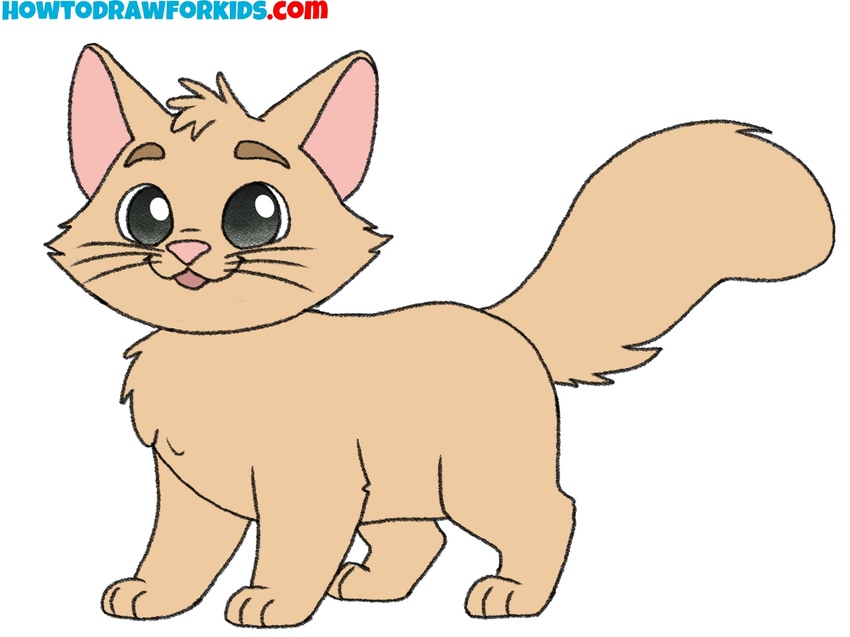
How to Draw a Cartoon Cat
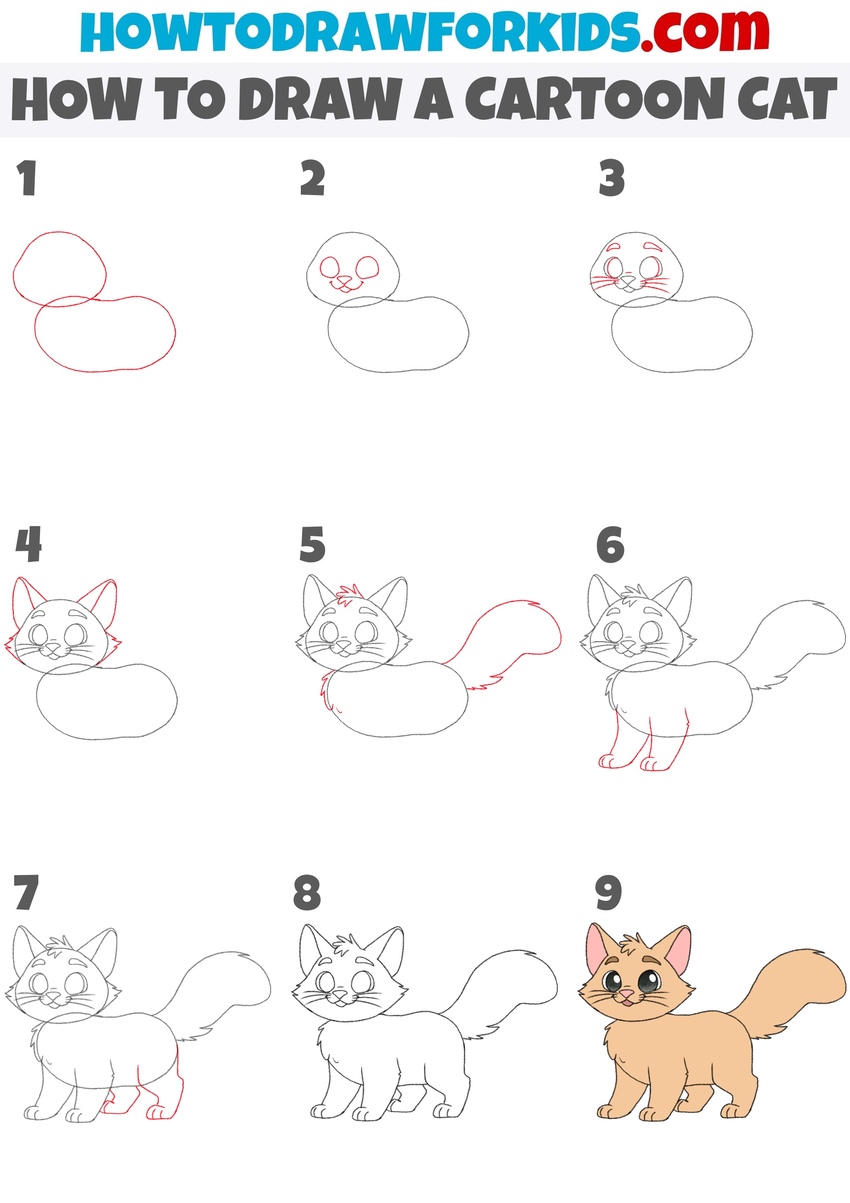
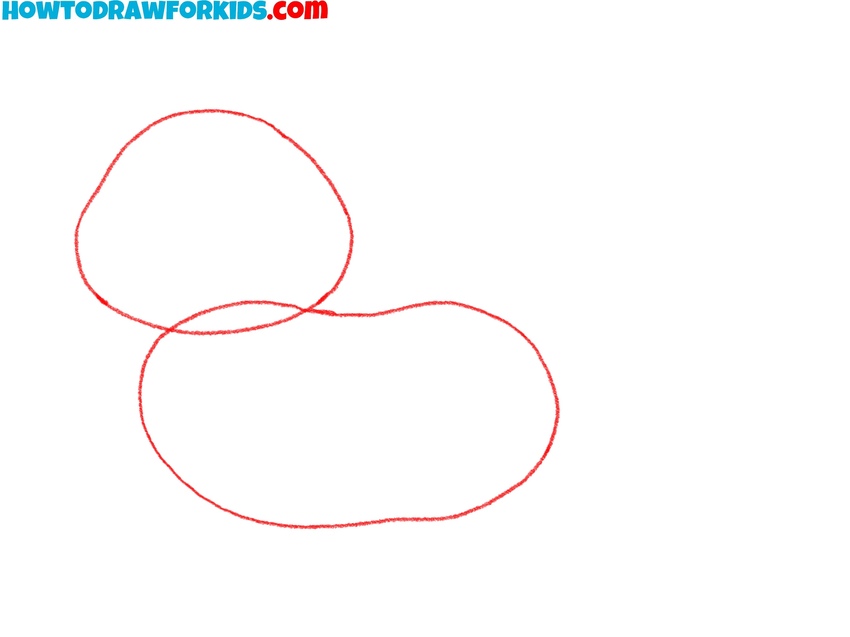
- Sketch the shapes of the head and torso.
Begin by drawing two basic shapes to create the foundation of the cartoon cat. Start with a large horizontal oval for the body. Then, draw a smaller oval above and slightly overlapping the body to represent the head. Use light pencil strokes to allow for adjustments in the following steps.
- Add the ears, nose, and mouth.
Inside the smaller oval, sketch two large vertical ovals near the upper half for the eyes. Place a small triangle or circle between the lower part of the eyes to form the nose of the cartoon cat. From the bottom of the nose, draw two curved lines extending outward to form the mouth.

- Detail the face of the cartoon cat.
Detail the eyes by adding rounded shapes inside them for the pupils. Sketch thin curved lines above each eye to create eyebrows. Around the nose, add short whiskers by drawing three curved lines on each side. To give your cat a cartoonish look, draw the facial details slightly anthropomorphic.

- Draw the ears and cheeks of the cartoon cat
Next, add two triangular shapes on top of the head to form the ears. Make the ears slightly tilted outward for a more natural look. Inside each triangle, draw smaller triangles to indicate the inner ear area. Next, draw the cartoon cat’s cheeks using jagged lines for the fur.

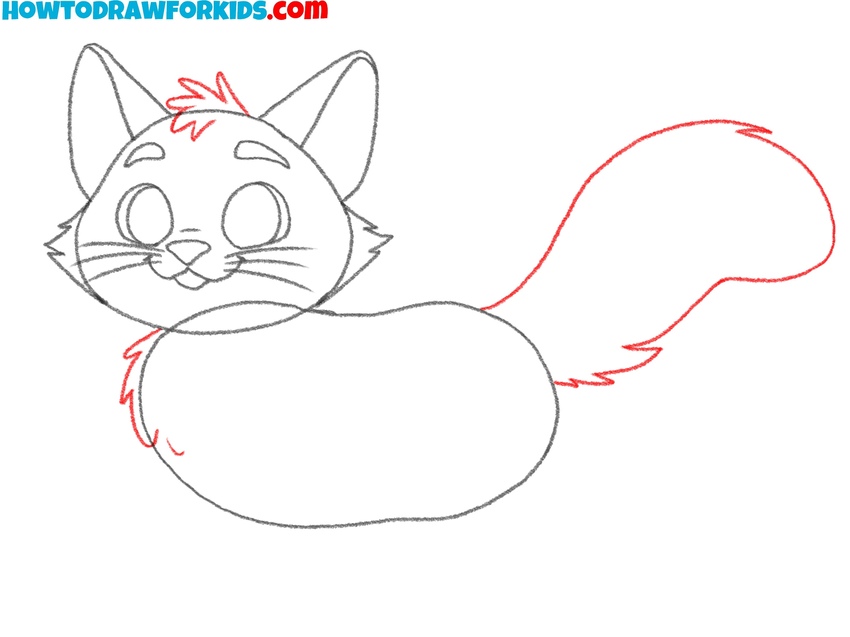
- Sketch the tail and detail the fur.
Draw short, curved lines along the neck and chest to create a fluffy effect. Then, sketch the tail at the back side of the body. Make the tail thick and fluffy to match the cat’s overall cartoon style. On the top of the head, draw short curved lines to represent the cartoon cat’s hairstyle.
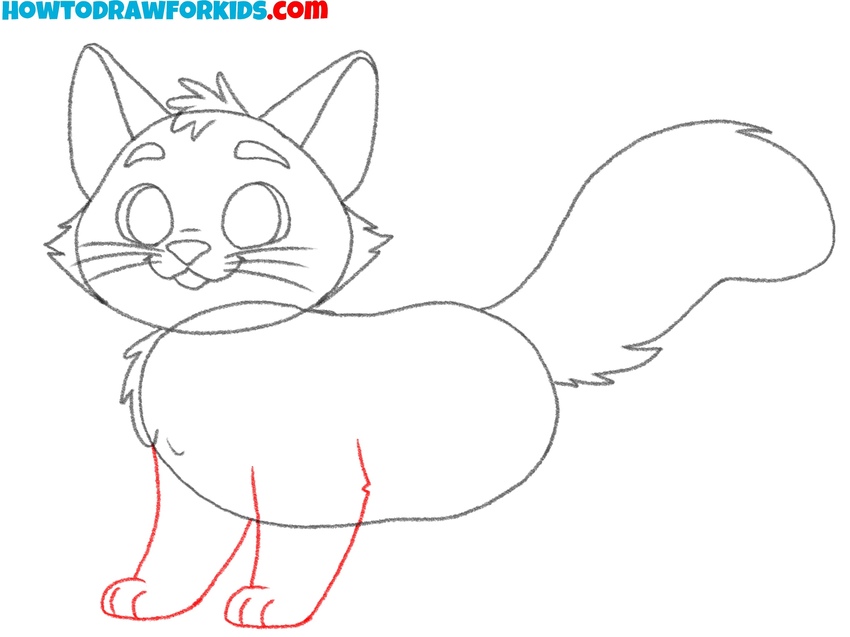
- Sketch the front legs and paws.
Below the body, draw two parallel, straight lines for each leg. Start from the bottom edge of the body and extend the lines downward. At the bottom of each leg, add a small rounded shape to form the paws. Next, draw the toes using several short, slightly curved lines.
- Add the back legs and paws.
Now, draw curved lines behind the front legs to indicate the back legs of the cartoon cat. Make the hind legs slightly thicker and more curved compared to the front legs to reflect natural anatomy. Add small oval shapes at the bottom for the back paws.

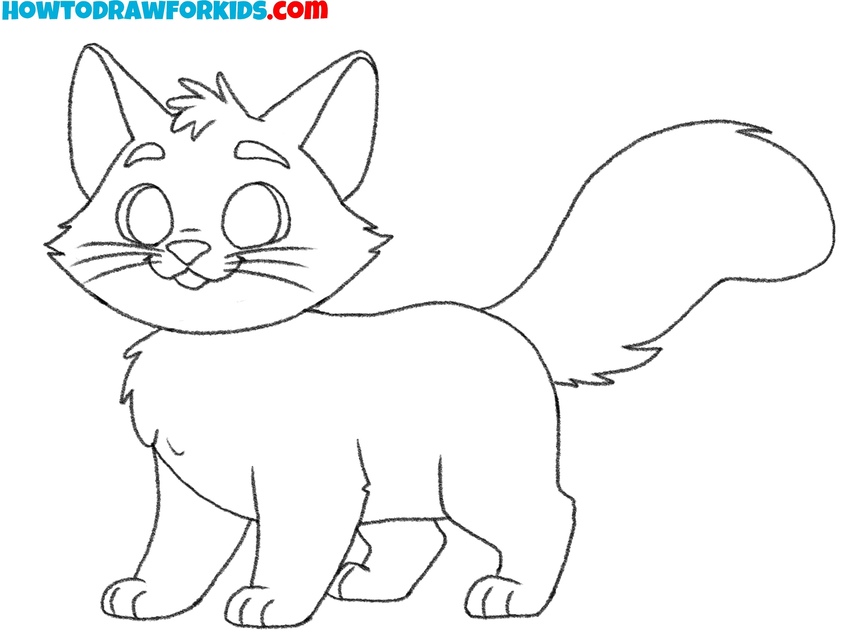
- Give the cartoon cat sketch a finished look.
Carefully erase any overlapping lines or initial guidelines that are no longer needed. Smooth out the edges of the body, head, tail, and legs to create a finished outline of the cartoon cat drawing. Revisit each part of the drawing to ensure all elements, such as the face, ears, and limbs, are well-defined and symmetrical.
- Add color to the cartoon cat.
Use a light base color for the body, such as beige or gray. For eyebrows, use a slightly darker shade. Use pink or lighter tones for the inner ears and nose to give the cartoon cat a cute appearance. For the eyes, color the pupils black and leave small white highlights.
Alternative Cartoon Cat Drawing Tutorial
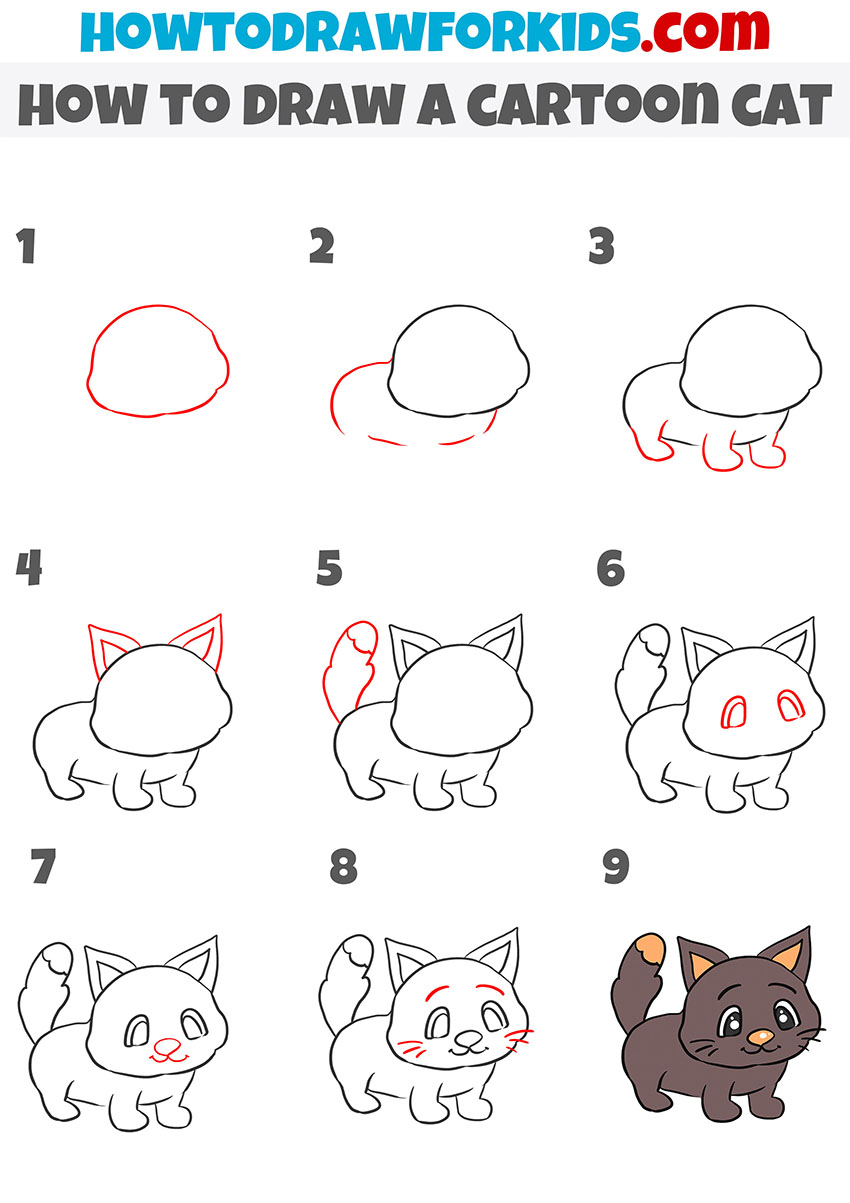
So, the main lesson of drawing a cartoon cat is completed, let’s consolidate the acquired knowledge with the help of additional instructions. The primary difference between this cartoon cat tutorial and the first one lies in its simplicity and shape. This version features a smaller, rounded body, shorter legs, and a larger head.
To draw a cartoon cat using this style, start with a round shape for the head and a slightly curved oval beneath it for the body. Add two short, rounded legs beneath the body. Next, draw triangular ears on top of the head and include smaller triangles inside for details. Extend a fluffy tail from the back of the body using curved lines.
For the face, sketch two large, rounded eyes on the head. Add a small triangular nose with a couple of soft curves for the mouth. Draw thin whiskers extending outward from both sides of the nose. Include simple curved lines above the eyes for eyebrows. Erase extra guidelines and add smooth outlines. Color the cartoon cat in your preferred shades.
Especially for your convenience, I have prepared a PDF file in which you can see a short version of this additional cartoon cat drawing tutorial. Download this file and you can return to this guide anytime, even if there is no Internet connection.
Conclusion
This was a simple yet detailed cartoon cat drawing tutorial. I hope it motivates you to practice drawing animals in this style. I also hope you will continue working on your skills and learn how to draw a dog and other animals using my simple instructions.
I trust that you have followed the steps successfully and are satisfied with the result. Feel free to share this tutorial with your friends. Do not forget to leave comments and share your thoughts about the lesson. Additionally, you can suggest ideas for a new drawing tutorial.

