How to Draw Nature
In this drawing tutorial, I’ll guide you through the serene process of how to draw nature, making the tranquil beauty of the outdoors accessible to your sketchpad. I’ve tailored this lesson to demystify the art of landscapes, simplifying it into easy, enjoyable steps that will allow you to capture the essence of the natural world.
How to Draw a Nature: Basic Information
Embracing the tranquility of the outdoors on paper, today I’m going to guide you on how to draw nature in a way that’s both simple and gratifying. This lesson distills the essence of a scenic landscape into approachable steps, perfect for those who wish to start their journey in nature drawing.
This method emphasizes the serene flow of natural landscapes, focusing on the gentle curves of hills and the organic outlines of trees. We progress gradually, adding elements to create depth, from the solitary tree standing proud to the full, lush canopy that characterizes a rich, natural scene.
By the end of this tutorial, you will not only learn to draw a nature scene but also appreciate the rhythm and balance in its composition. This drawing method is crafted for you to find joy in the details and the overall harmony of the landscape, nurturing a deeper connection with nature through your art.
Nature Drawing Tutorial
Materials
- Pencil
- Paper
- Eraser
- Coloring supplies
Time needed: 30 minutes
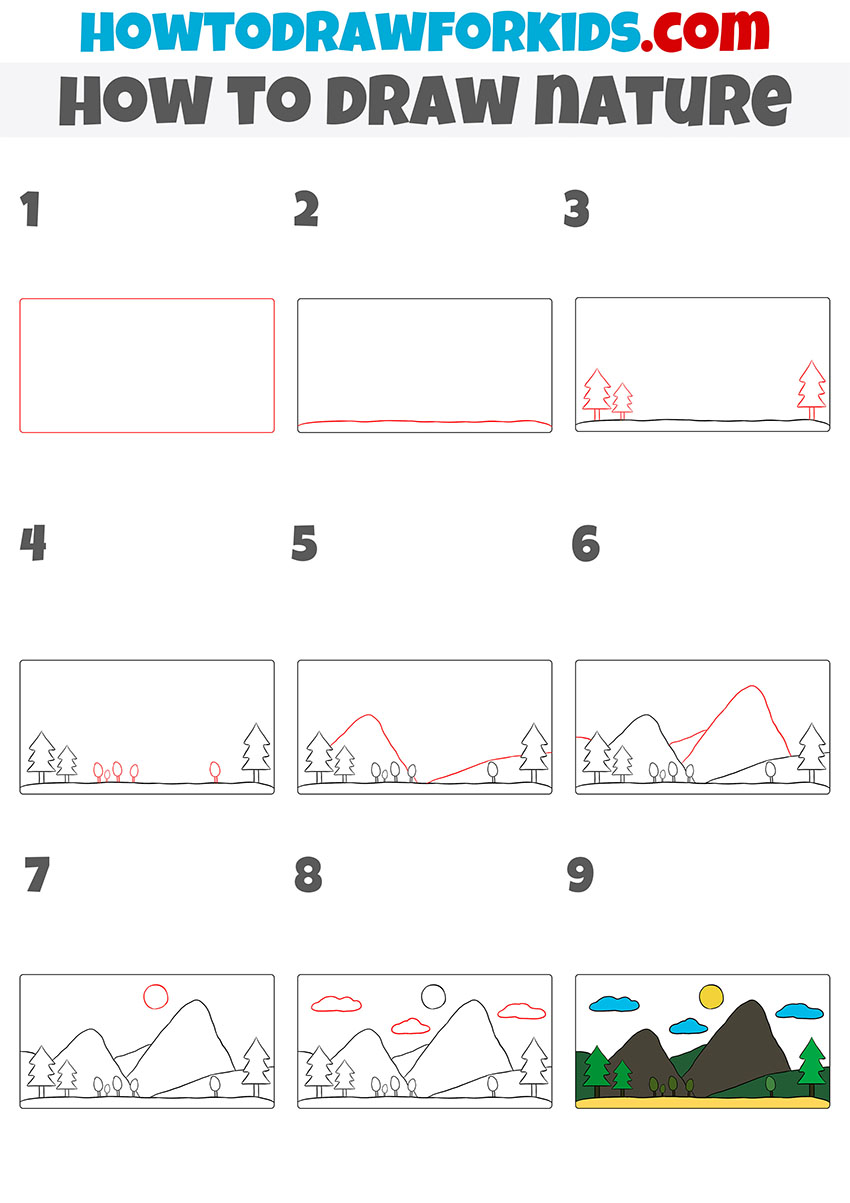
How to Draw Nature
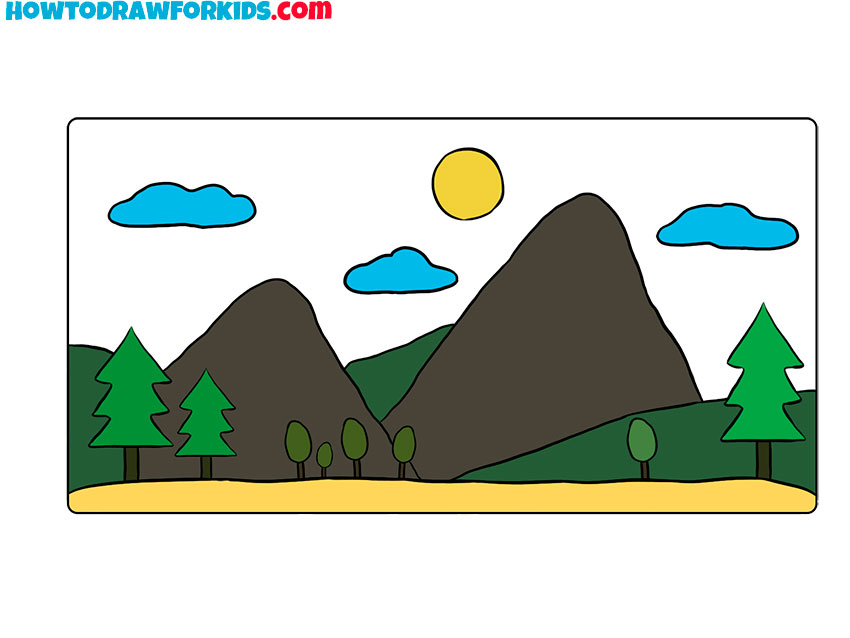
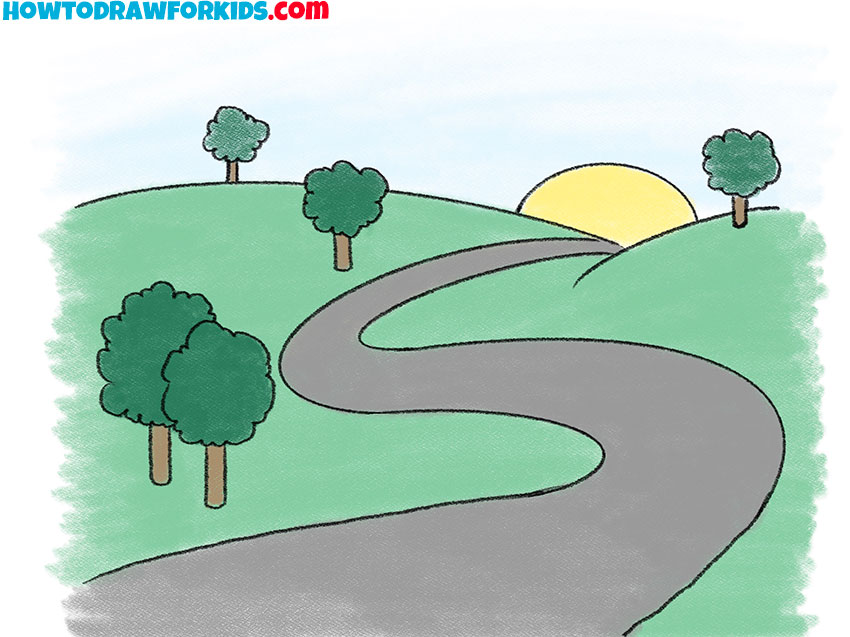
- Draw the frame.
Determine the size of the drawing, and use straight lines to draw an even rectangle.

- Depict the surface of the earth.
Draw a smooth line at the bottom of the frame.

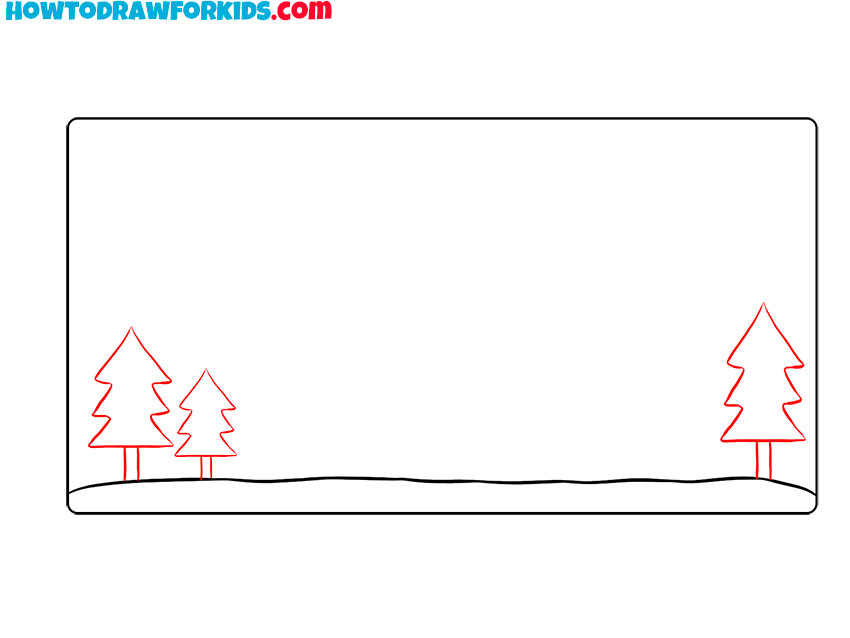
- Sketch out trees.
Add two small trees on the left side and one tall tree on the right side.
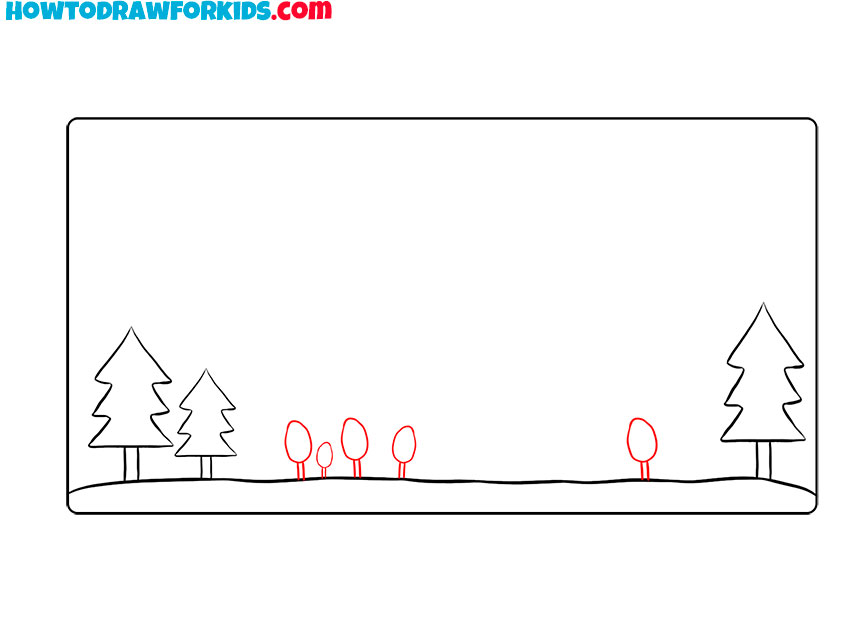
- Draw more trees.
At the bottom, draw the few trees that have the short trunk and an oval-shaped crown.
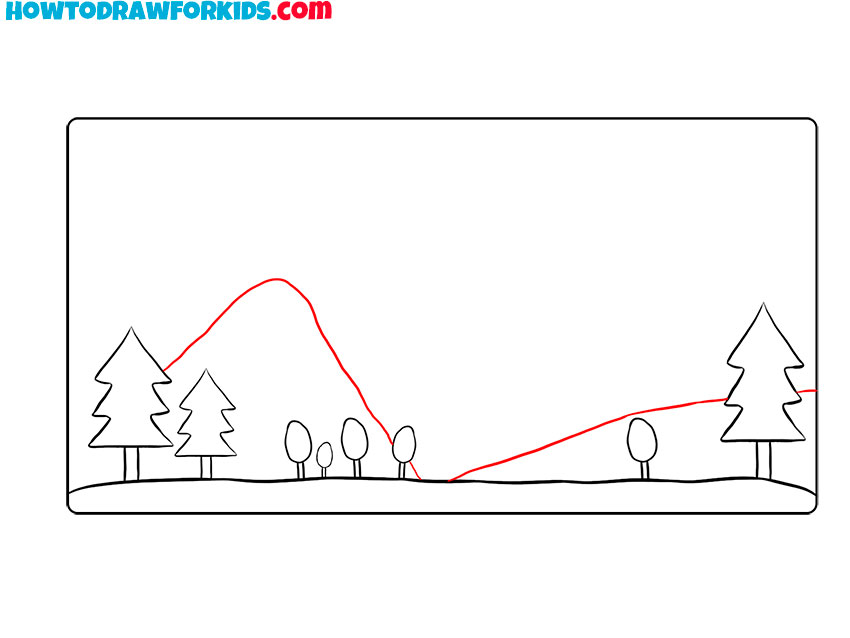
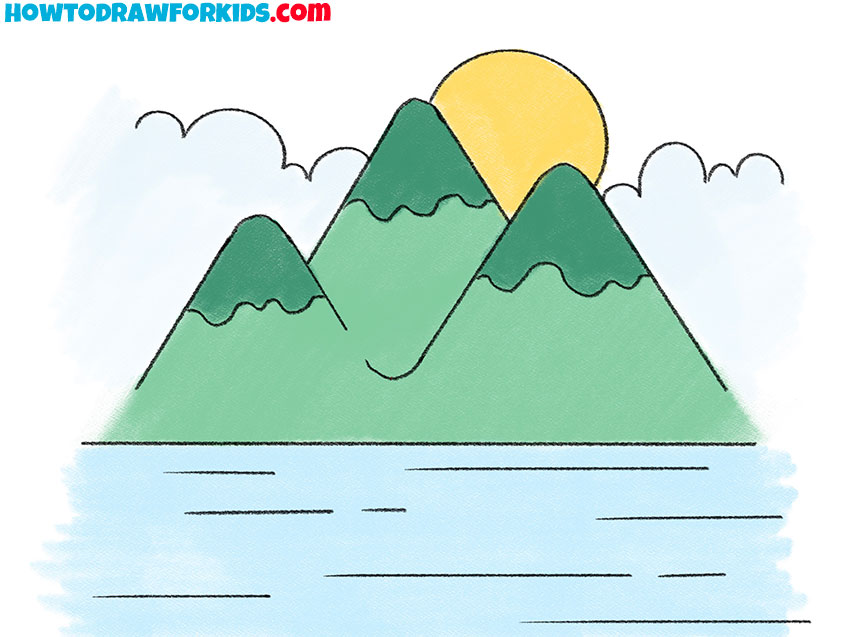
- Add the mountain and the hill.
With the help of smooth lines, draw the high triangular mountain and draw the hill next to it.
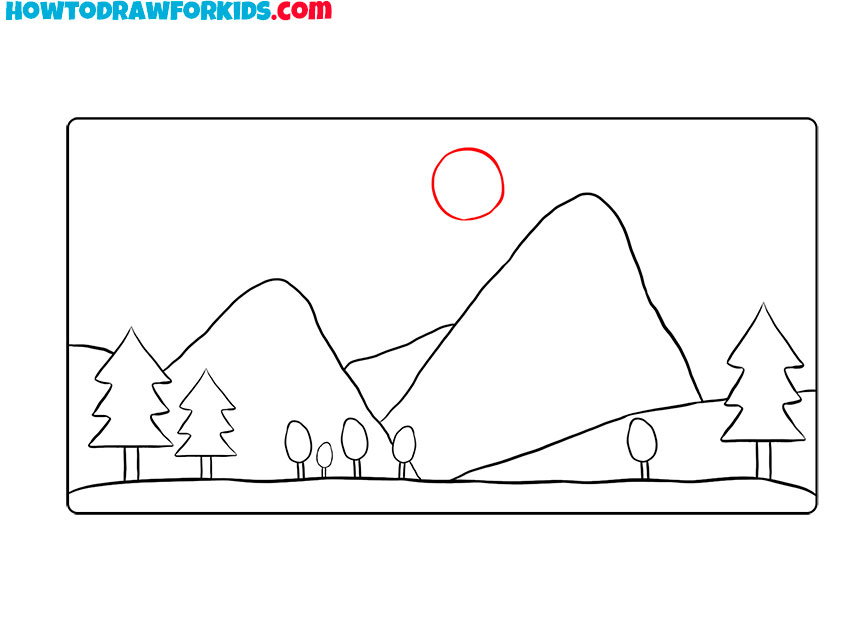
- Depict the second mountain and hills.
With smooth lines sketch out the high mountain and hills.

- Draw the sun.
Depict an even circle at the top of the drawing.
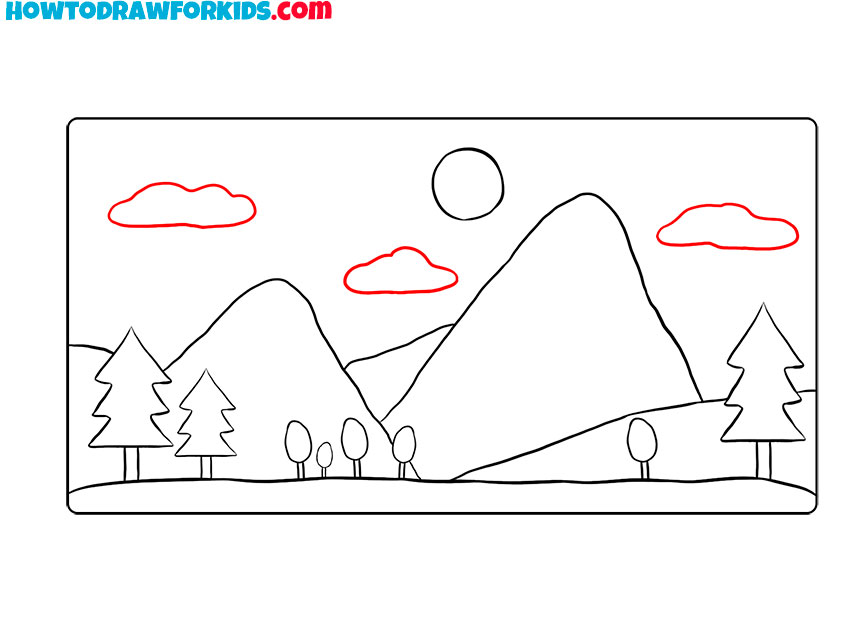
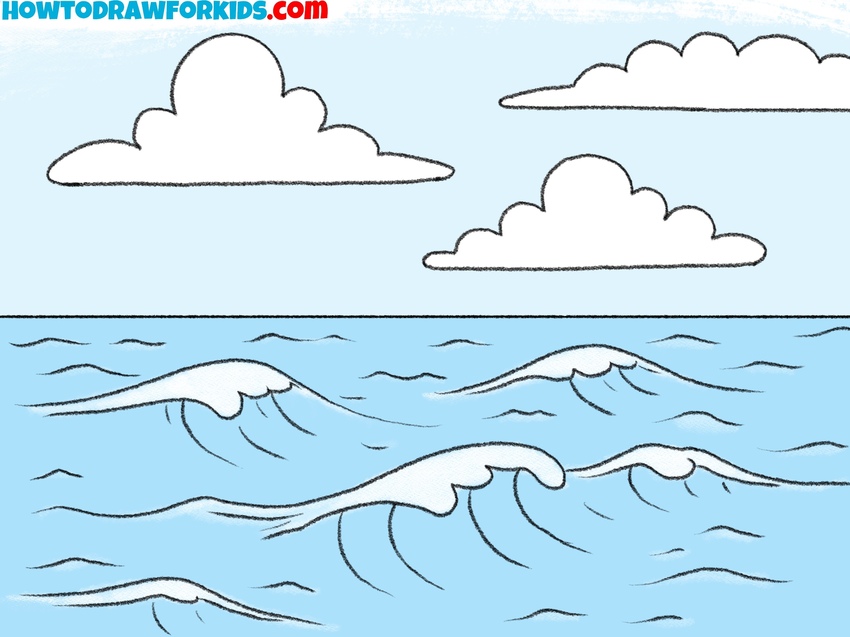
- Add clouds.
Draw some clouds using freeform lines.
- Color the drawing.
You will need gray, green, yellow and blue.
Additional Content
To enhance your artistic journey, I’ve crafted a free PDF file to accompany our nature drawing lesson. This succinct companion is designed for offline use, allowing you to continue practicing and perfecting your landscape skills wherever you may be, without the need for internet access.
Inside the PDF, you won’t find the step-by-step guidance that’s present in the main tutorial. Instead, it’s filled with additional material aimed at advancing your techniques and enriching your understanding of nature’s forms once you’ve grasped the fundamental concepts.
This downloadable guide is meant to be a resource for you to delve deeper into the art of drawing nature. It’s intended to challenge and inspire you to further develop your skills, ensuring that each tree, river, and leaf you sketch is infused with the beauty and intricacy of the natural world.
Advancing Your Nature Drawing Techniques
As we close the chapter on our nature drawing tutorial, it’s essential to reflect on how we can cultivate the seeds of skill we’ve planted today. Below are key points designed to help you nurture and grow your artistic abilities. They’re not mere suggestions but the water and sunlight that will help your talents flourish.
- Practice Consistency: Just as nature cycles through seasons, regular practice can lead to profound growth in your drawing skills.
- Study from Life: Observe the world around you. The best inspiration and lessons come from the nature you see and experience every day.
- Experiment with Textures: Trees, grass, water – they all have different textures. Use various pencil strokes to capture the essence of these textures.
- Use References: Collect photos or take your own. References are valuable for understanding how nature truly looks in different settings.
In the garden of your artistic journey, these points can serve as your guide to improvement. Just like a landscape changes and grows over time, so too will your skills with continued practice and dedication. Keep these tips in mind, and watch as your ability to draw nature evolves into something as beautiful and complex as the natural world itself.
Resolving Your Nature Drawing FAQs
With our nature drawing session coming to a close, your mind might be fertile ground for questions to grow. This list of frequently asked questions is harvested from the collective curiosity of many students like you, eager to deepen their understanding of the art form we’ve practiced today.
- How can I make my nature scenes look more three-dimensional? Consider the principles of perspective; objects closer to you should be larger and more detailed, while distant elements appear smaller and less defined.
- My trees always look flat. How can I add depth to them? Play with light and shadow. Imagine a light source and consistently apply shading on the opposite side of each branch and trunk to create volume.
- What techniques can I use to make water look more realistic in my landscapes? Water reflects and distorts what’s around it. Use wavy lines for reflection and add gentle horizontal strokes to suggest ripples.
- I struggle with making my nature drawings look lively. Any advice? Incorporate movement, such as leaves in the wind or a flowing river. This dynamic can be implied with directional strokes and varying line weight.
Concluding this session, remember that every question you entertain is a step forward in your artistic growth. These FAQs are not the end but rather waypoints on your continuous path to mastery. Keep them as your companions along the journey, and let your creativity blossom with every new piece you create.
Conclusion
This tutorial on how to draw nature marks just the beginning of our artistic journey together. My website hosts a plethora of other lessons, ranging from the majestic stride of a rhinoceros to the delicate bloom of a poppy. Each tutorial is a doorway to new skills and discoveries, inviting you to expand your artistic horizons.
To ensure you stay connected and informed about the latest tutorials and creative insights, follow my social media channels. Your thoughts and suggestions are incredibly valuable, so please leave a comment with any requests for future lessons. Together, we can explore the vast world of art, one drawing at a time.

How beautiful painting