How to Draw a Chicken
Chickens are a classic part of farm scenes, and in this guide you’ll learn how to draw a chicken win different techniques and styles.
How to Draw a Chicken: Introduction
A chicken has a very recognizable appearance, and if you show this animal to anyone, they will immediately identify it as a chicken.
In this lesson on how to draw a chicken, I will show you step by step how to create it in the simple yet convincing minimalist style that we often use on this site. I will also demonstrate several variations and styles of drawing a chicken so that you can choose the one that suits you best.
Before starting the lesson, it’s important to note a few key features that make a chicken recognizable in any style.
First, it has a small head with a relatively large and rounded body. Next is the triangular beak and the distinctive comb on the head. And finally, the thin legs give the figure its characteristic look. Keeping these points in mind will help you make your chicken drawing clear and accurate.
Chicken Drawing Tutorial
Materials
- Pencil
- Paper
- Eraser
- Coloring supplies
Time needed: 35 minutes
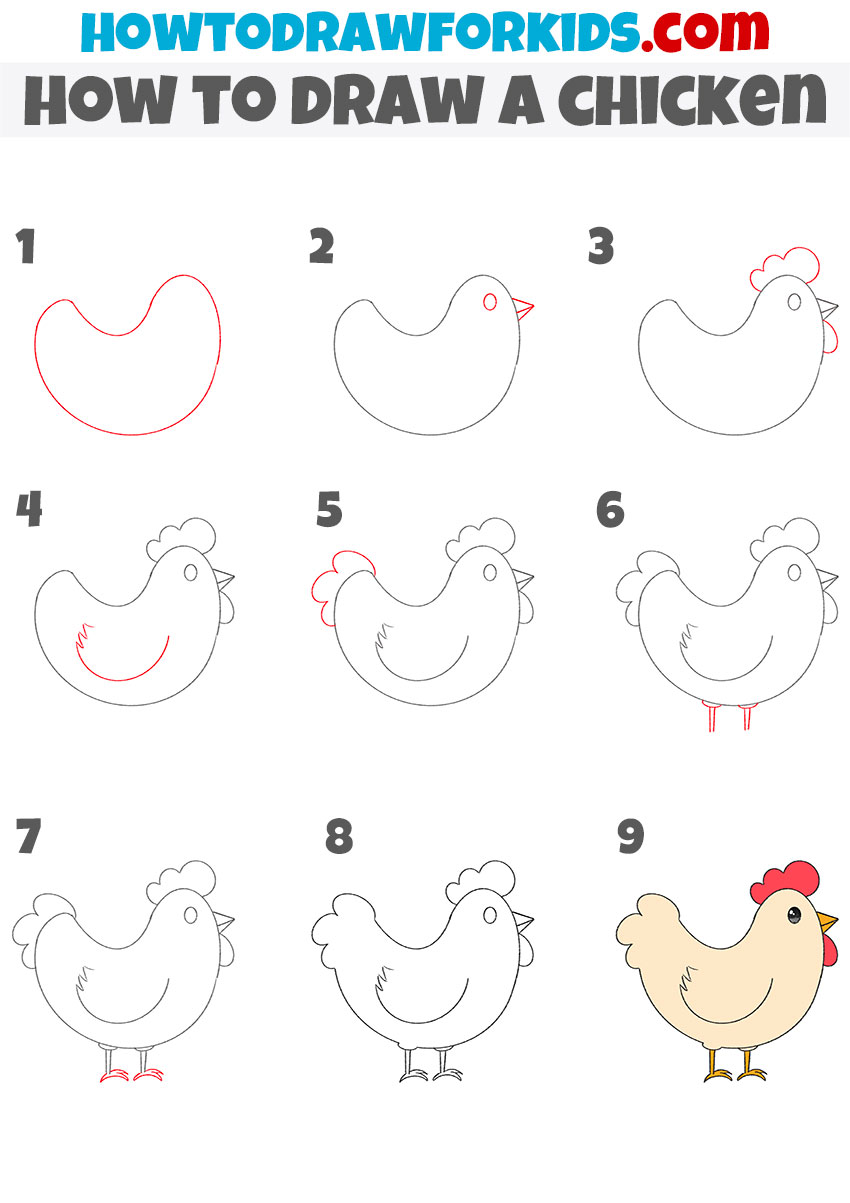
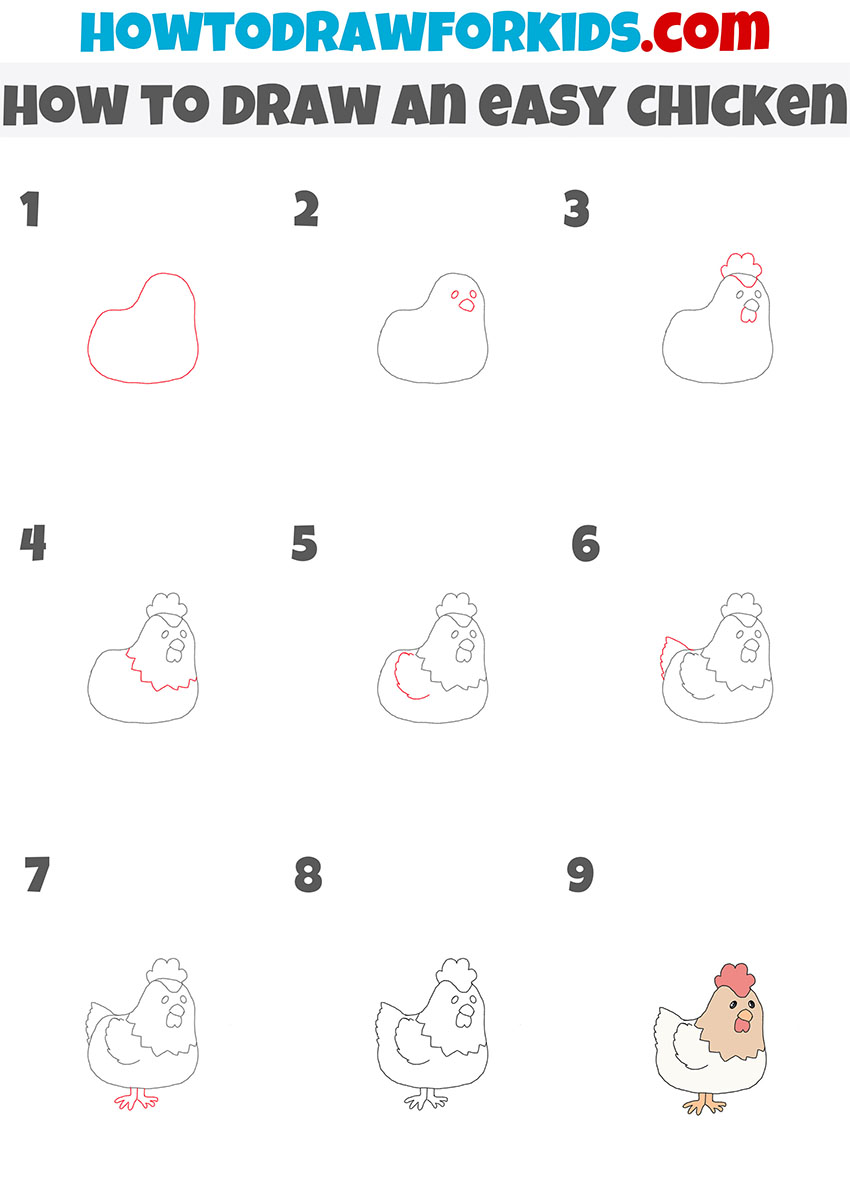
How to Draw a Chicken
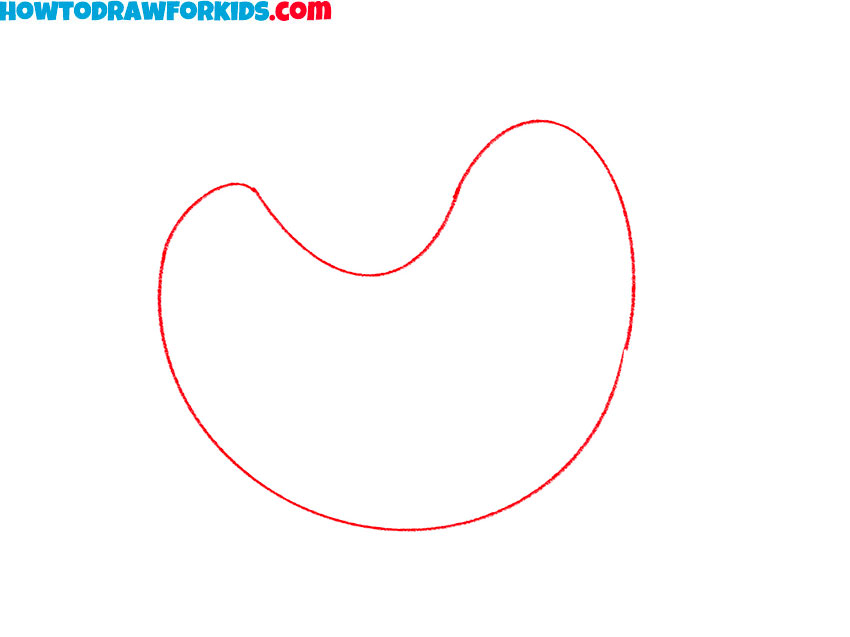
- Sketch the rounded body outline.
The drawing begins with a simple curved form resembling a bean or crescent. This is the chicken’s body and head combined into one flowing shape. Try to keep the curves smooth. You can make both ends of the shape equal, or draw the head part slightly smaller.
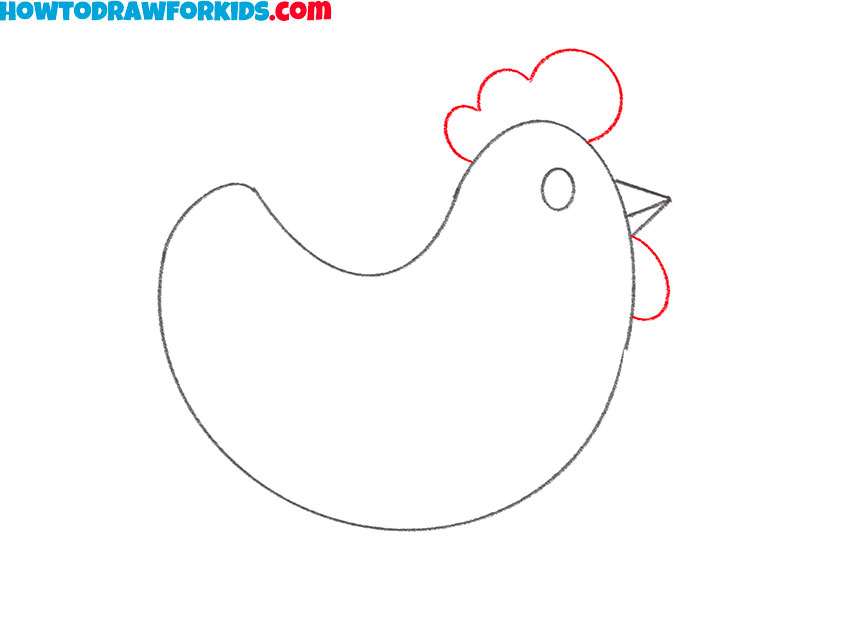
- Illustrate the beak and eye.
With the main body in place, draw the chicken’s face by sketching a small round circle for the eye and a simple triangular shape for the beak. The eye should sit closer to the top of the head curve. For the beak, sketch two triangles creating the top and bottom parts.

- Add the comb and wattle.
Moving to the top of the head, illustrate the comb by adding three rounded bumps above the eye. These should look like soft cloud shapes sitting on the head. Below the beak, sketch another small rounded shape for the wattle. Both the comb and wattle should have smooth curves.
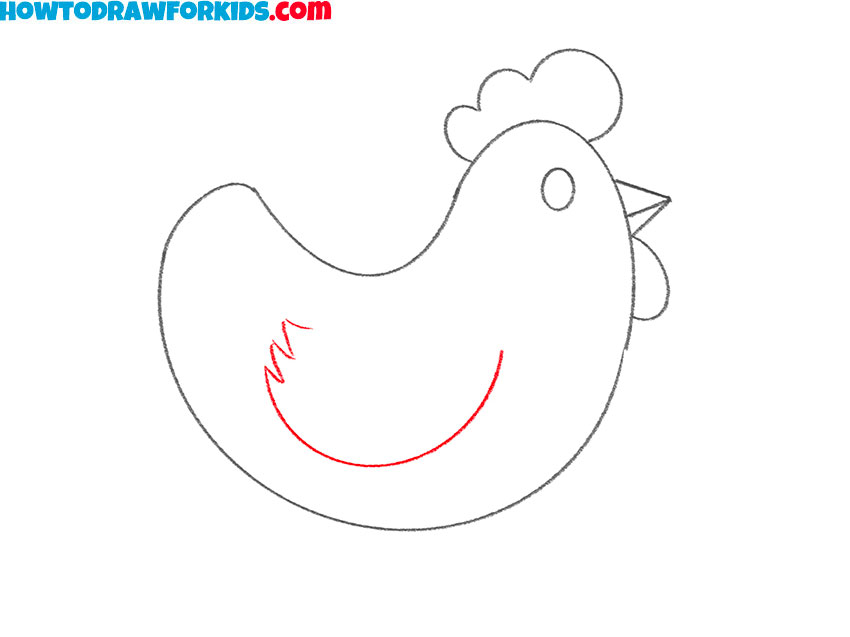
- Draw the chicken wing outline.
Now illustrate the wing along the body, using a smoothly curved line with a feather-like edge. The line should begin slightly below the neck area and move downward to the center of the body. To make this part look more detailed, you can add some features.
- Create the tail feathers.
At the back end of the body, draw rounded shapes to represent the tail feathers. These should resemble three soft bumps, slightly larger than the comb. Chicken are very different, so you can draw the tail longer or shorter.

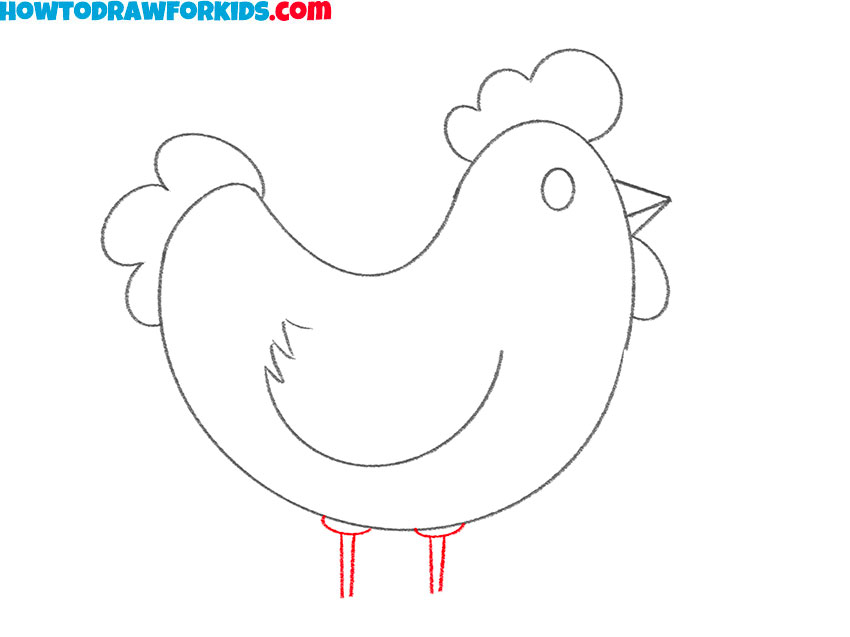
- Create the leg outlines.
Underneath the chicken’s body, sketch two small curves to indicate the top parts of the legs. After that, illustrate two thin straight lines for each leg. These should be placed fairly close together, with each leg made up of two parallel lines.
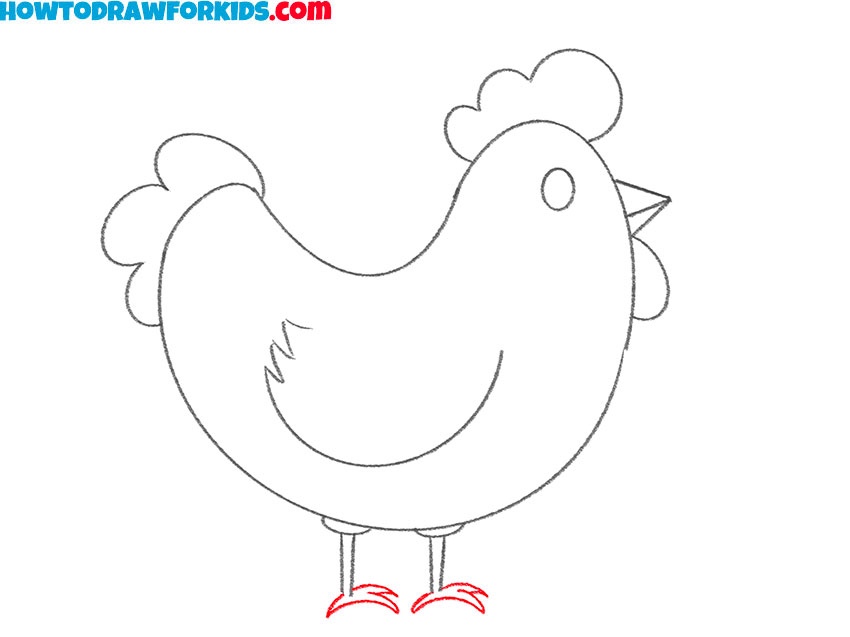
- Sketch the feet and claws.
At the bottom of each leg, draw three small curved shapes to form the claws of the chicken. Sketch the toes short and curved, avoiding too long or sharp lines. Check that the feet are about the same size on both sides. You can also add some short horizontal lines to the legs for more detail.
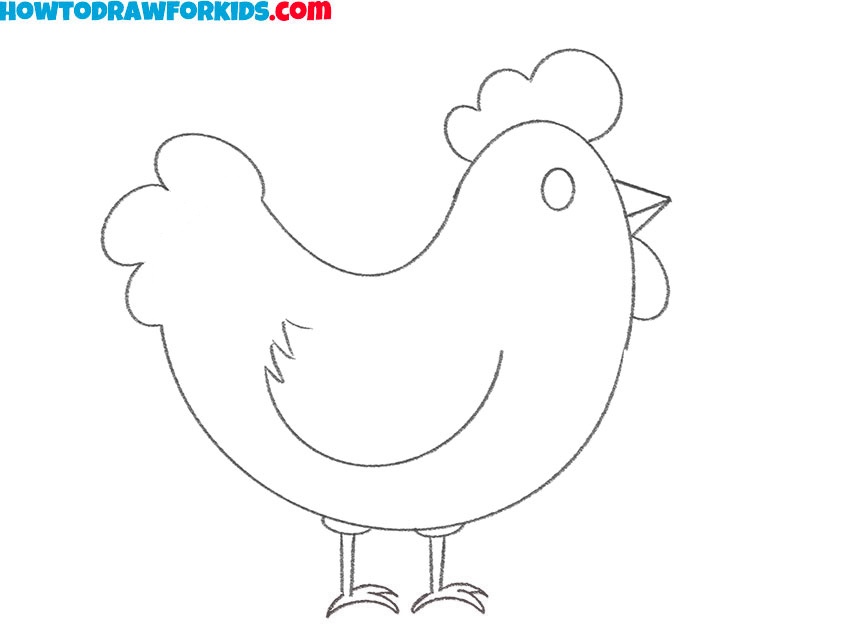
- Clean and adjust the chicken’s shape.
With all the main parts in place, it’s time to clean the chicken drawing. Erase any unnecessary construction lines so only the main shapes remain. This step also gives you the chance to double-check proportions and adjust it now before coloring.
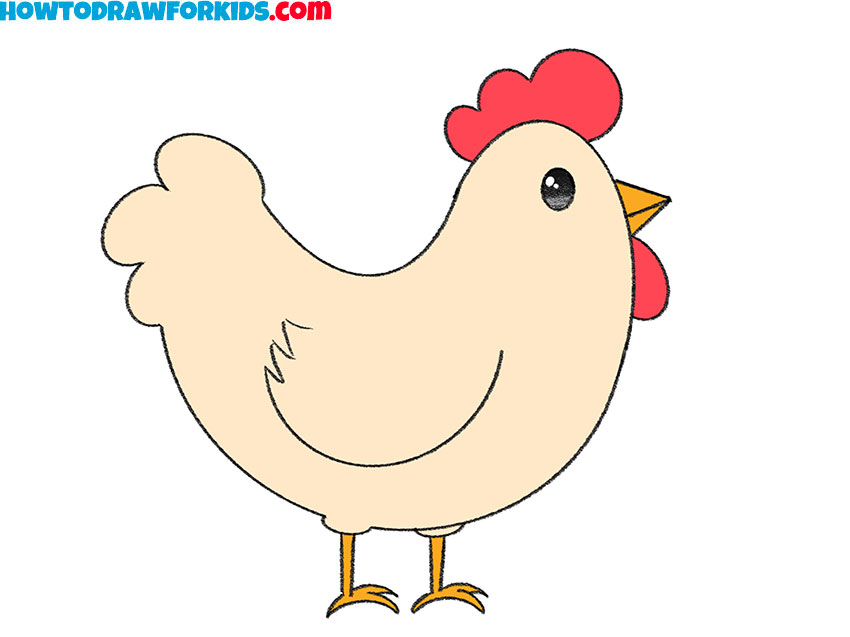
- Add natural colors to the chicken.
Paint the body with a soft beige or light brown tone. You can leave the wing and tail the same color or add darker or lighter tones. The comb and wattle should be colored red, while the beak is yellow or orange. The legs and feet also take on a yellow tone.

Additional Content
I’ve created a free PDF version of my chicken drawing lesson, just for you! It’s got all the steps from my online lesson, simplified into an easy-to-follow format that you can print out or view on any device. This way, you can practice drawing a chicken as many times as you like.
Alternative Drawing Techniques
Young creators, it’s time to add some new techniques to your drawing repertoire! I’ve put together a collection of alternative techniques for drawing chickens that are perfect for growing your talent.
These new methods will give you more practice and help you find different ways to sketch your feathery subjects.
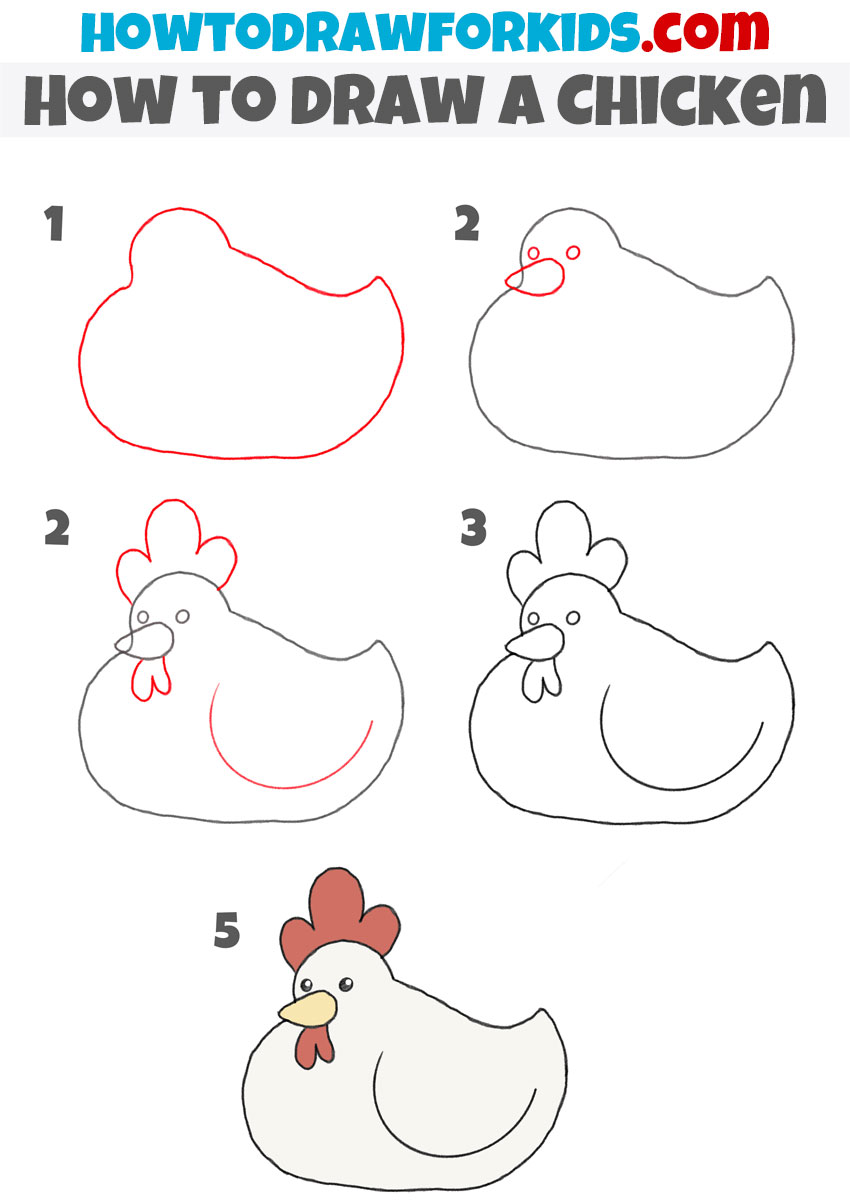
How to Draw a Chicken from a Different Angle
This technique presents a chicken from a side perspective, allowing young artists to explore a different angle and add more details to their drawings.
Block in the body as an oval with a smaller bump for the head. Add the eye and beak, then sketch the comb and wattle with curved lines. Indicate the feathered separation between the head and torso. Draw the tail feathers with several short lines and place the wing at the side. Sketch two straight legs downward and finish them with wide-spread toes. Clean the outline and remove unnecessary sketch lines. Use color to separate body, comb, and beak.
Alternative Chicken Drawing Tutorial
So, this method is similar to the previous one, offering a reinforcing practice session but with a twist: the chicken is depicted facing a different direction, and the steps are sequenced in a slightly varied order. This approach helps to understand the adaptability of basic shapes to create different poses and orientations of the same subject.
By adjusting the positioning of the chicken’s body and adding features like the beak and comb in a different sequence, young artists learn to visualize how shapes can be manipulated to capture various perspectives. It’s a great exercise to boost their understanding of form and direction in drawing.

How to Draw a Chicken for Kindergarten
Right here, we’ve got the easiest way to draw a chicken, perfect for the kindergarten crowd. In just five simple steps, little artists can easily draw a cute little bird.
Shape the body with a smooth outline that combines the head and torso in one form. Add two circles for the eye and beak placement. Place the comb on top, then add the wattle below the beak. Sketch the wing with a long curved line. Draw the tail with small curved lines. Outline the drawing carefully, correcting uneven lines. Color the body in light tones with the comb and wattle in red shades.
Easy Hen Drawing Tutorial
And the last variation you can try is a simple hen drawing shown again from the side. The subject here is another simplified hen.
Sketch the body as a single rounded form similar to the shape from the first tutorial. Add the eye and beak carefully. Place the comb on top with smooth rounded shapes, then add a wing with a few feather marks. Draw the tail feathers behind. Extend two short legs at the bottom and finish them with small toes. Outline the chicken drawing with a clean line and erase extra strokes. When coloring, use muted tones for the body and darker shades for the comb and tail.

I like how you did it like step by steps
Thanks, John. I’m glad you liked the step-by-step format.