How to Draw a Cloak
Let’s learn how to draw a cloak and find out in what situations and in what ways it can be used in your sketches.


In this tutorial I will show you how to draw a cloak. If you are planning to draw in the future, then this lesson will be very useful for you. Here you will learn how to draw elements of clothing and in the future you can easily draw a person wearing such a cloak.
A cloak is a wide long garment. In such clothes you can hide in bad weather and feel quite comfortable. If desired, you can wear a hood over your head.
So, prepare all the supplies you will need to complete this tutorial, and you can start the creative process.
Cloak Drawing Tutorial
Materials
- Pencil
- Paper
- Eraser
- Coloring supplies
Time needed: 15 minutes
How to draw a cloak step by step
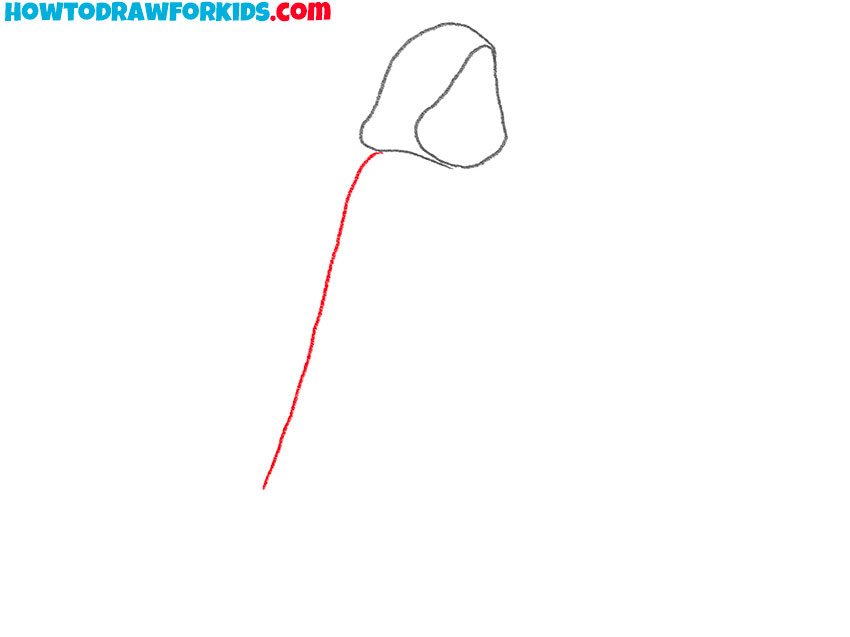
- Sketch the opening of the hood.
Begin by sketching the upper part of the cloak, which will later become the hood. Draw a small, rounded shape similar to a pear with irregular edges to represent the front opening where the face would appear. Use light pencil strokes at this step.

- Add the outer contour of the hood.
At the side of the shape drawn earlier, illustrate another curved contour following the left edge. This outer edge defines the beck outline of the hood and gives the form more recognizable look. You can make this part bigger or smaller depending on the style you choose.

- Sketch the flowing line of one side.
Extend a smooth, long line downward from the bottom of the hood to represent the back side of the cloak’s flowing fabric. Let the line curve naturally as it descends to represent the drape of soft material. The length of this line determines the overall height of the cloak.
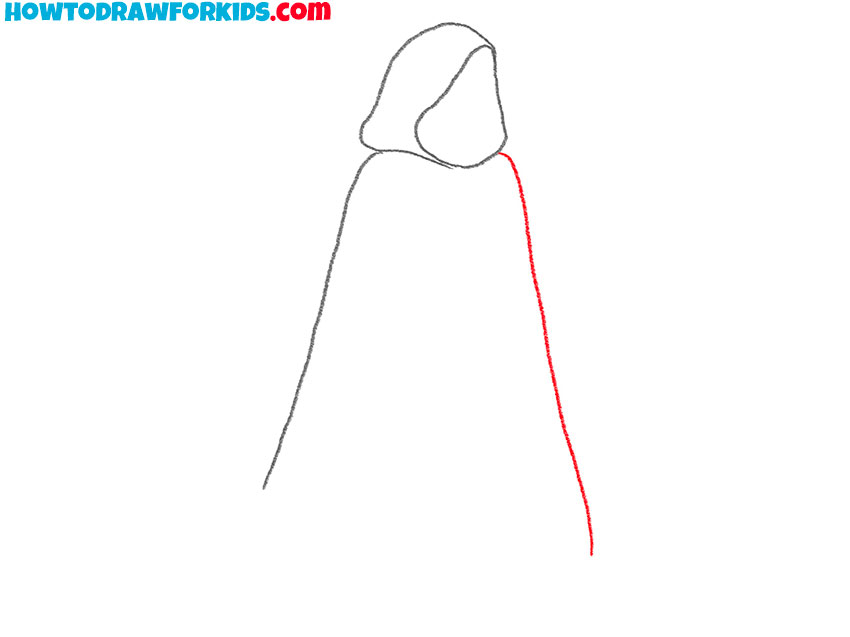
- Draw the opposite side of the cloak.
Now repeat a similar process on the other side of the hood to form the opposite edge of the cloak. Begin at the lower corner of the hood and extend a curved line downward. The curve should mirror the first one but not perfectly, small differences make the drawing feel more natural.
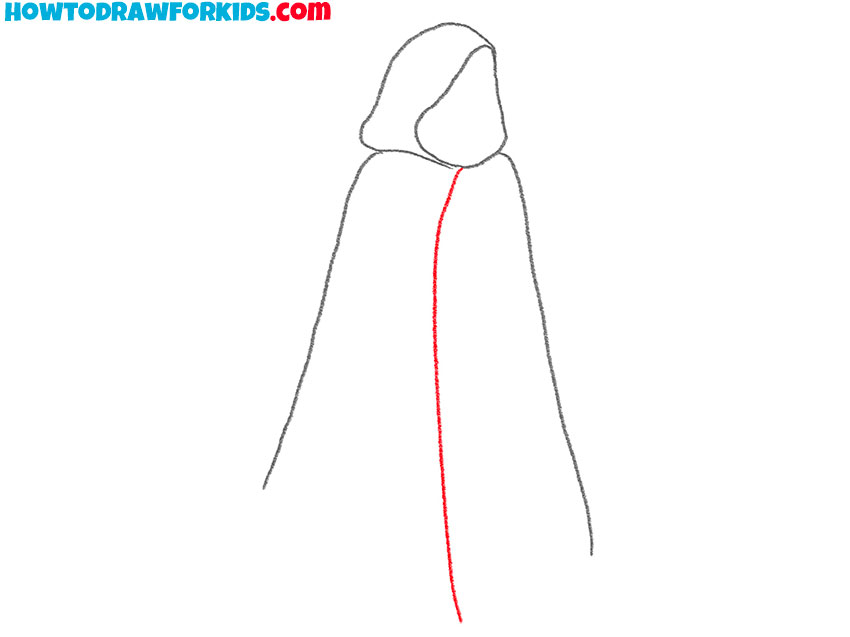
- Add the front opening line.
Add a vertical line running from the center of the hood downward between the two outer edges. This line represents the front opening of the cloak. It should start where the hood overlaps and extend approximately to the level of the previous lines.
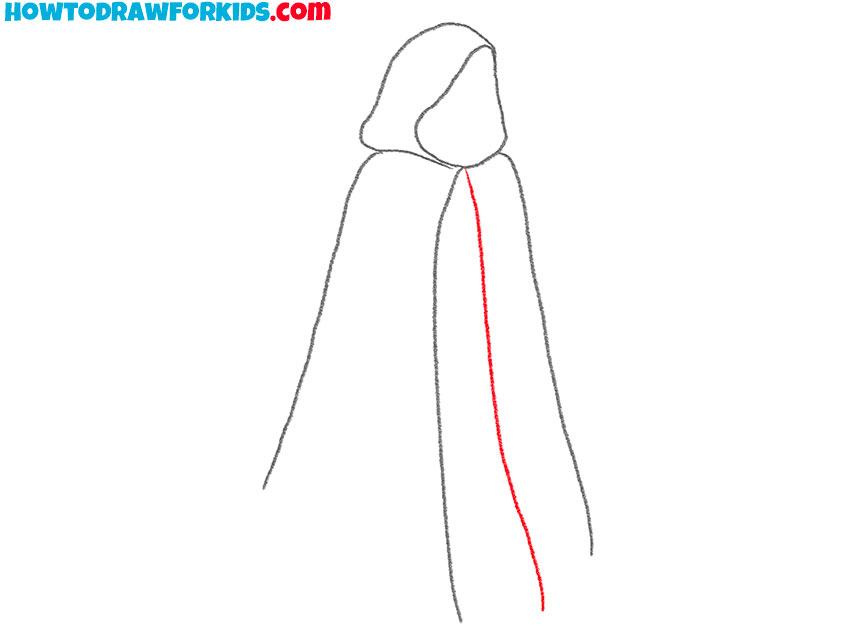
- Sketch the second front contour.
Next, create another vertical line just to the side of the previous one to indicate the second opening edge of the cloak. The line should closely follow the left side contour but end slightly lower. This line, in combination with the previous one, creates a cut in the front of the cloak.
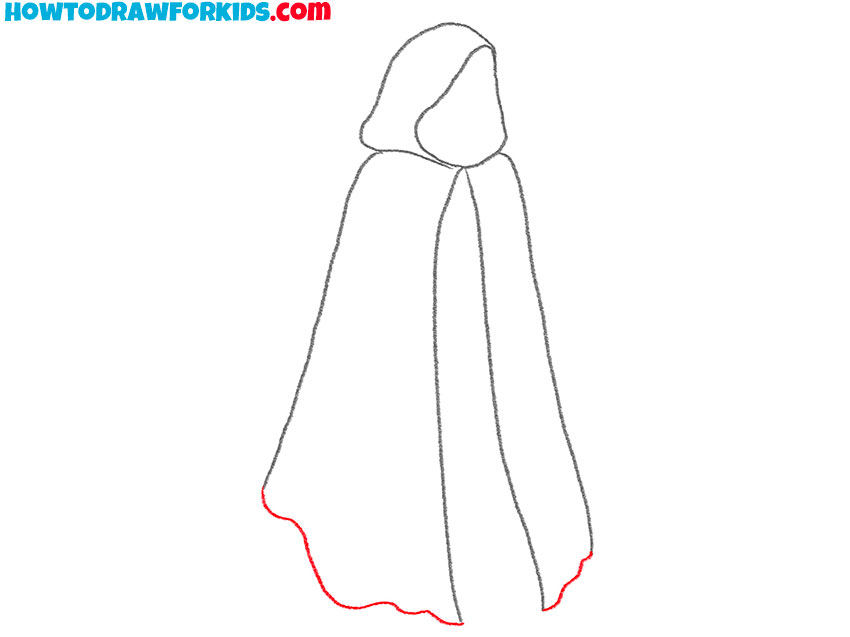
- Draw the lower edge of the cloak.
To complete the lower part, draw two wavy lines connecting the sides of the cloak. This bottom edge should have soft curves and small uneven dips to mimic natural fabric folds resting near the ground. You can draw fabric folds at the bottom for a more realistic look.
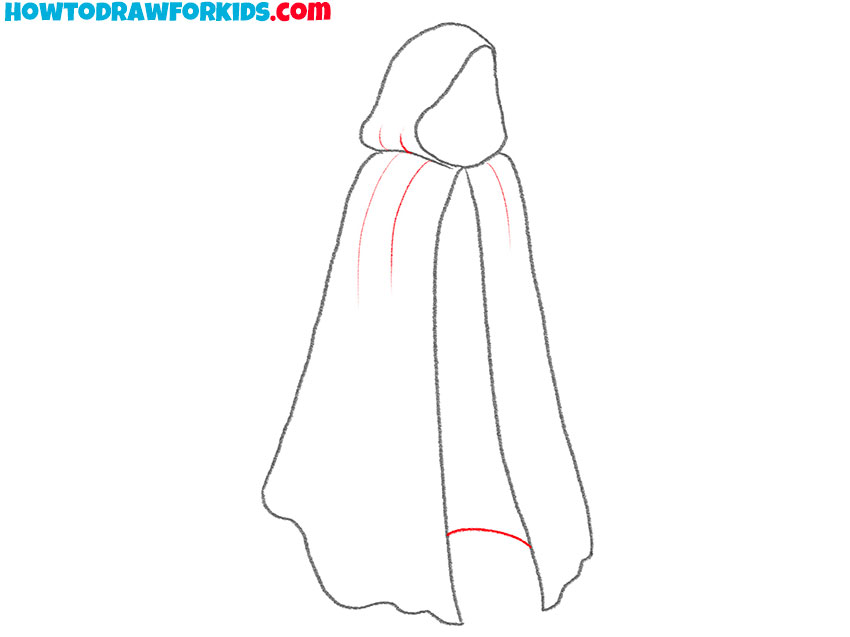
- Add vertical folds on the cloak.
Make the cloak drawing look more realistic by sketching several curved vertical lines starting near the shoulders and extending partway down. These lines represent folds and creases where the fabric naturally bends. Vary their lengths and spacing.
- Fill the cloak drawing with simple colors.
Apply a medium blue tone for the main area. Slightly darken the hood’s interior to show shadow. You can also experiment with deep reds, browns, or greens – any natural fabric shade works well. You can also add gentle highlights along the upper sections to represent light falling on the fabric.

For your convenience, I have prepared a short version of this walkthrough as a PDF file. You can download this file for free and return to the lesson at any time, even if you do not have Internet access.