How to Draw a Cone
The foundation of any artist’s knowledge is basic geometric shapes, one of which we will study in this lesson on how to draw a cone.
In this tutorial I will show you how to draw a cone. This is a great drawing object. Almost all novice artists begin their creative journey precisely with drawing geometric shapes. This is a very important step, because the final result depends on how well you know how to draw the base, that is, the initial outline.
This lesson will be one of the easiest, but you still need attention and accuracy. The lesson consists of six very simple steps, and at the end of the lesson you will see that drawing a cone is very simple.
Try to make straight lines and make sure that both sides of the cone are symmetrical. When the cone is done, you can paint it in one color or you can use several different shades to represent the shadows and highlights. Thus, your figure will look more realistic.
Materials
- Pencil
- Paper
- Eraser
- Coloring supplies
Time needed: 10 minutes
How to draw a cone step by step
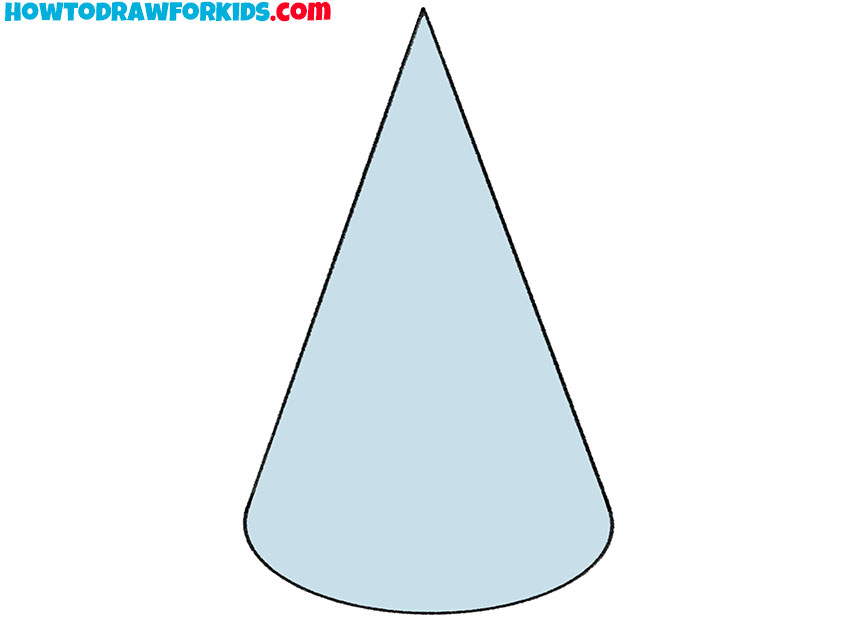
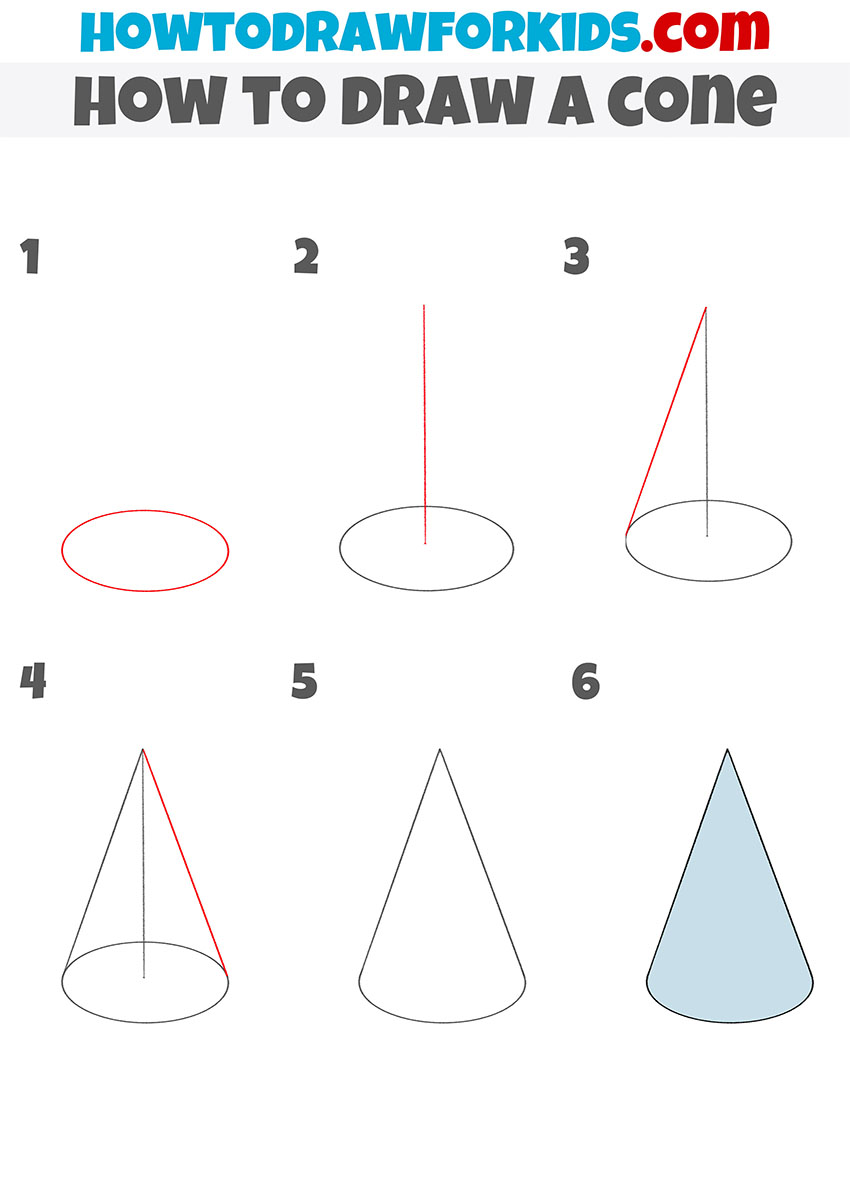
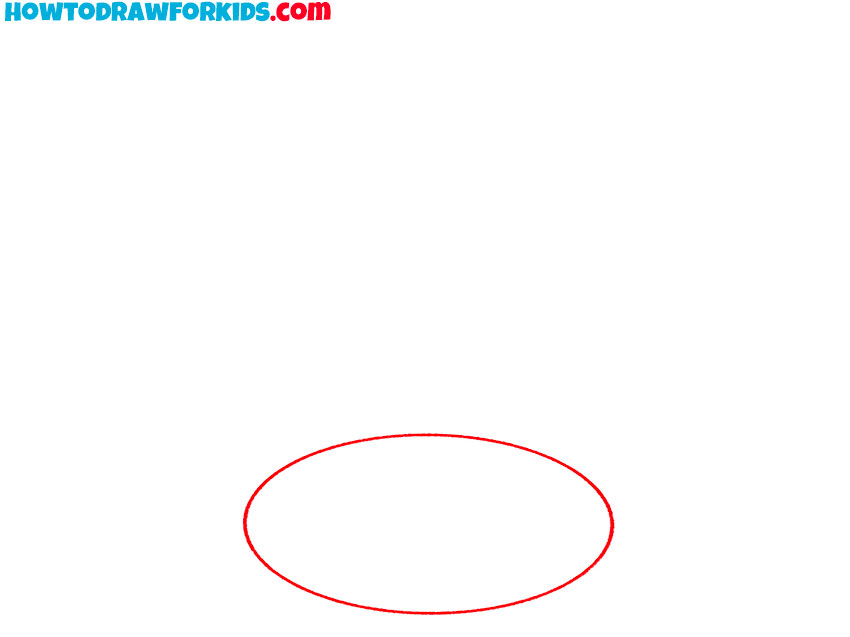
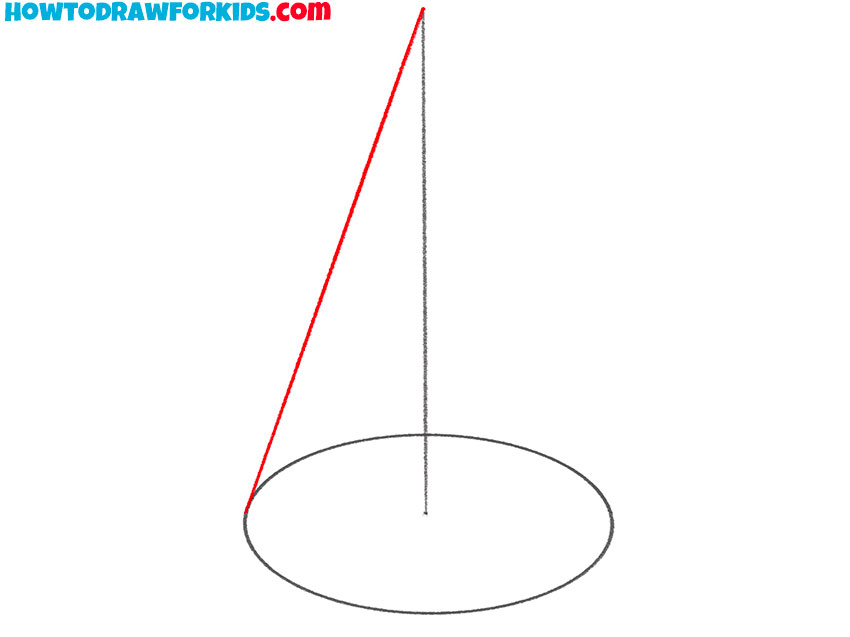
- Sketch the base ellipse of the figure.
First, mark a horizontal ellipse near the lower part of your paper. This will represent the base of the cone. Make the ellipse flattened to show perspective. The width of the ellipse defines the overall size of the cone, so adjust it depending on the shape you prefer.
- Mark the central vertical axis line.
To ensure symmetry, draw a vertical straight line that passes through the center of the ellipse and serves as the central axis of the cone. The top end of this line will become the cone’s tip, so its length defines the height of the geometrical figure. Use a ruler or freehand steady stroke.

- Sketch the first slanted side of the figure.
From the top end of the vertical line, extend a straight line downward toward one edge of the ellipse. This creates the first slanted edge of the cone. The length and angle of this line determine the cone’s slope, so adjust it carefully. This edge starts giving the cone its recognizable pointed shape
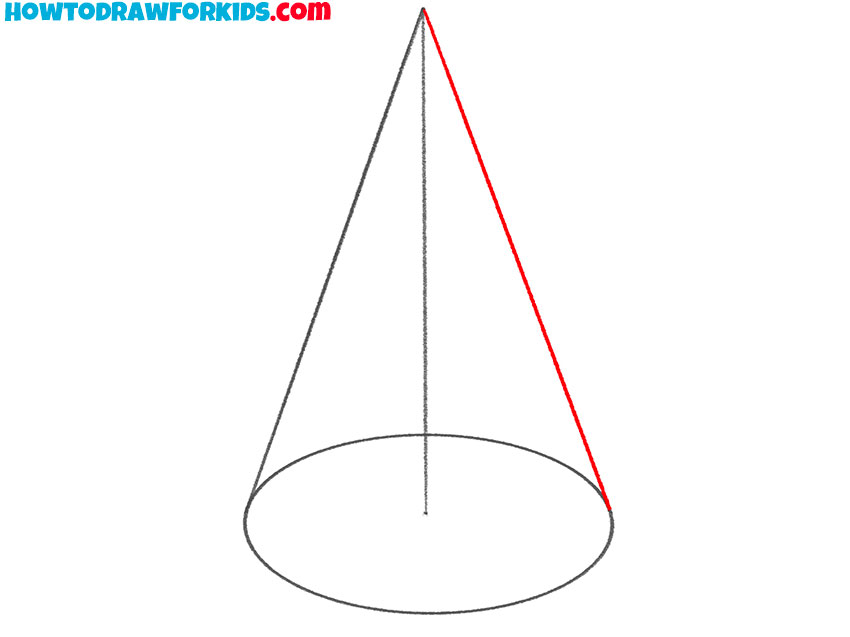
- Draw the second slanted side of the cone.
Repeat the same process on the opposite side by connecting the top point of the axis to the far edge of the ellipse. This second slanted line should mirror the first, creating a symmetrical triangular outline. Check that both sides are even in length and angle; the top point should appear centered above the ellipse.
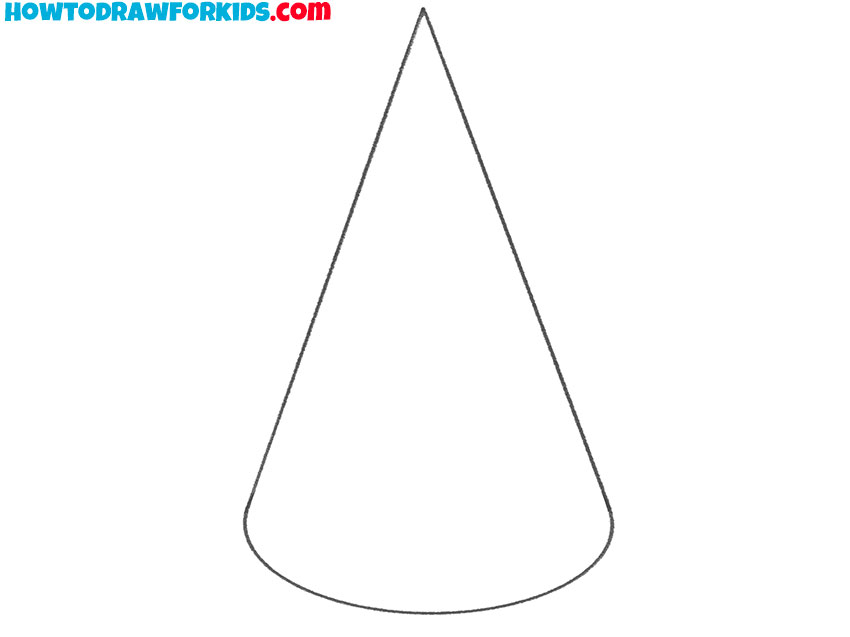
- Erase extra construction lines from the figure.
Clean the cone drawing by erasing unnecessary lines. Remove the part of the vertical axis that runs inside the cone and any extra guidelines overlapping the sides. Keep only the outer edges and the ellipse’s front curve visible. Be careful not to erase the bottom ellipse completely.
- Fill the cone with soft tones.
Finish the drawing by filling the cone with a light color. A pale gray or light blue tone works well for a simplified look. If desired, you can darken one side slightly to convey light and shadow, giving the cone more volume. Also, you can add a thin strip of highlight to make the cone look more dimensional.

At the end of the tutorial, I’ve prepared a PDF for you that contains a short version of this guide and additional useful tools. You can download this file for free in order to repeat this lesson at any convenient time, even if you do not have Internet access.