How to Draw a Dahlia
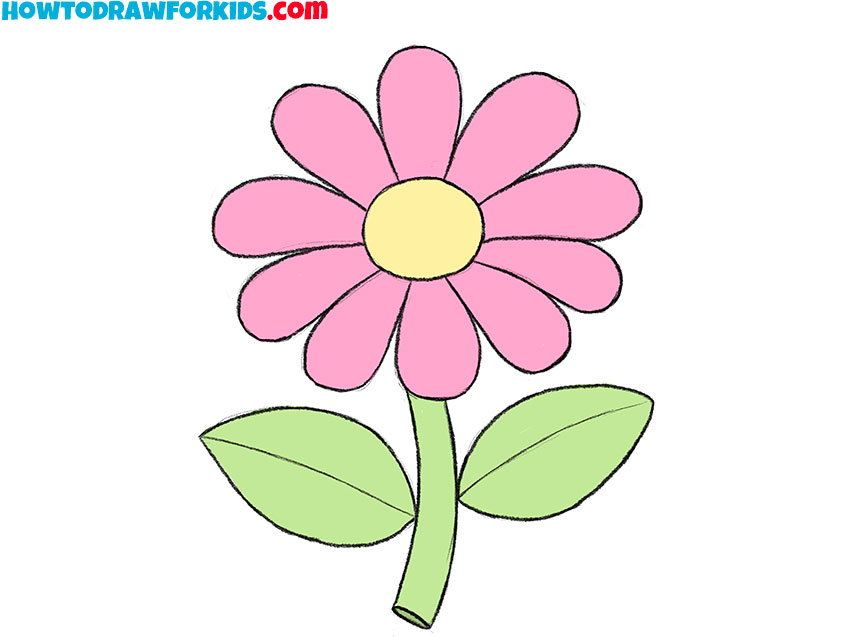
We have already practiced drawing simple flowers, and now we move on to a more detailed subject as we learn how to draw a dahlia.

Now I will show you how to draw a dahlia. These are very beautiful flowers. I think you will enjoy drawing this wonderful flower.
The inflorescence consists of many petals. All dahlias are brightly colored. The color of the petals can be different – white, pink, lilac, red, burgundy, yellow, orange. The bud can be one-color, or it can have petals of different shades, where there is a smooth transition from one color to another.
The main thing is to correctly draw the shape of the petal, and then gradually increase the number of petals and make the bud more lush and voluminous. It will take some time, but the flower will look more realistic and you will be happy with the result.
Materials
- Pencil
- Paper
- Eraser
- Coloring supplies
Time needed: 20 minutes
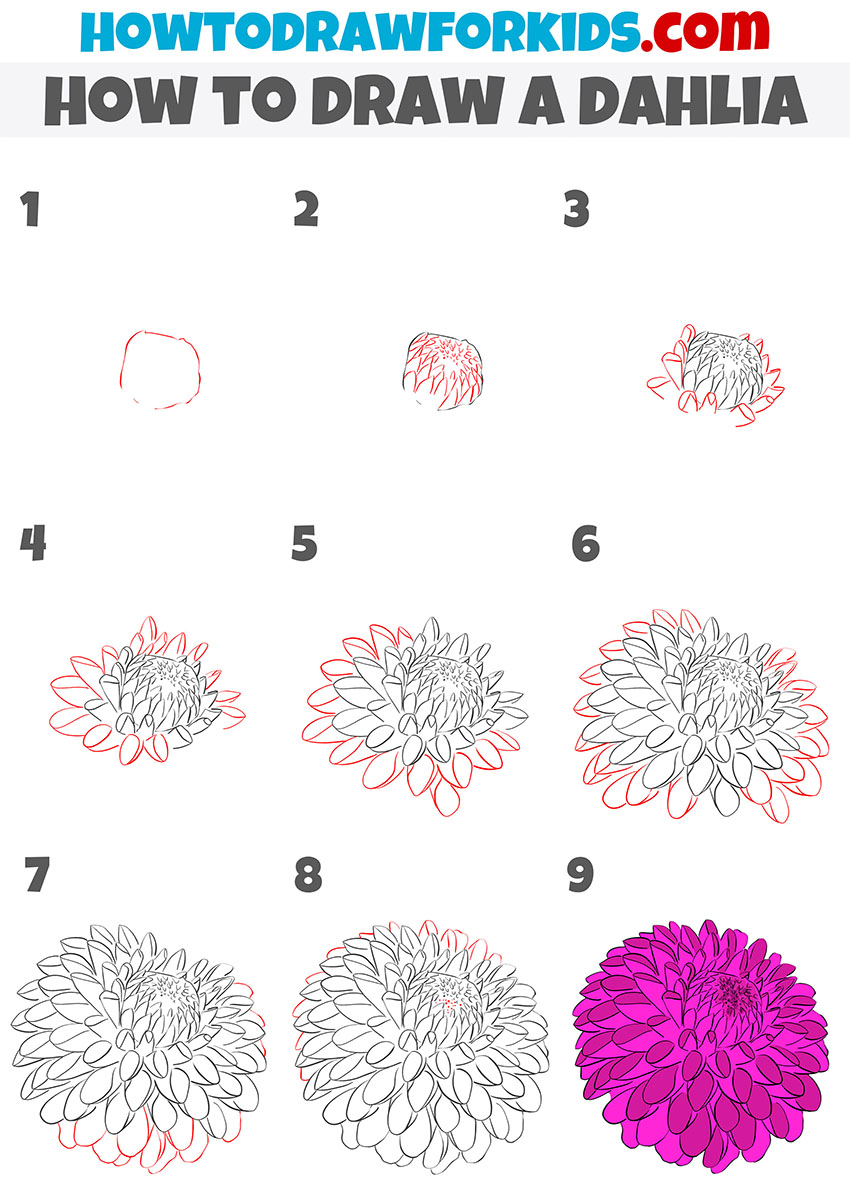
How to Draw a Dahlia
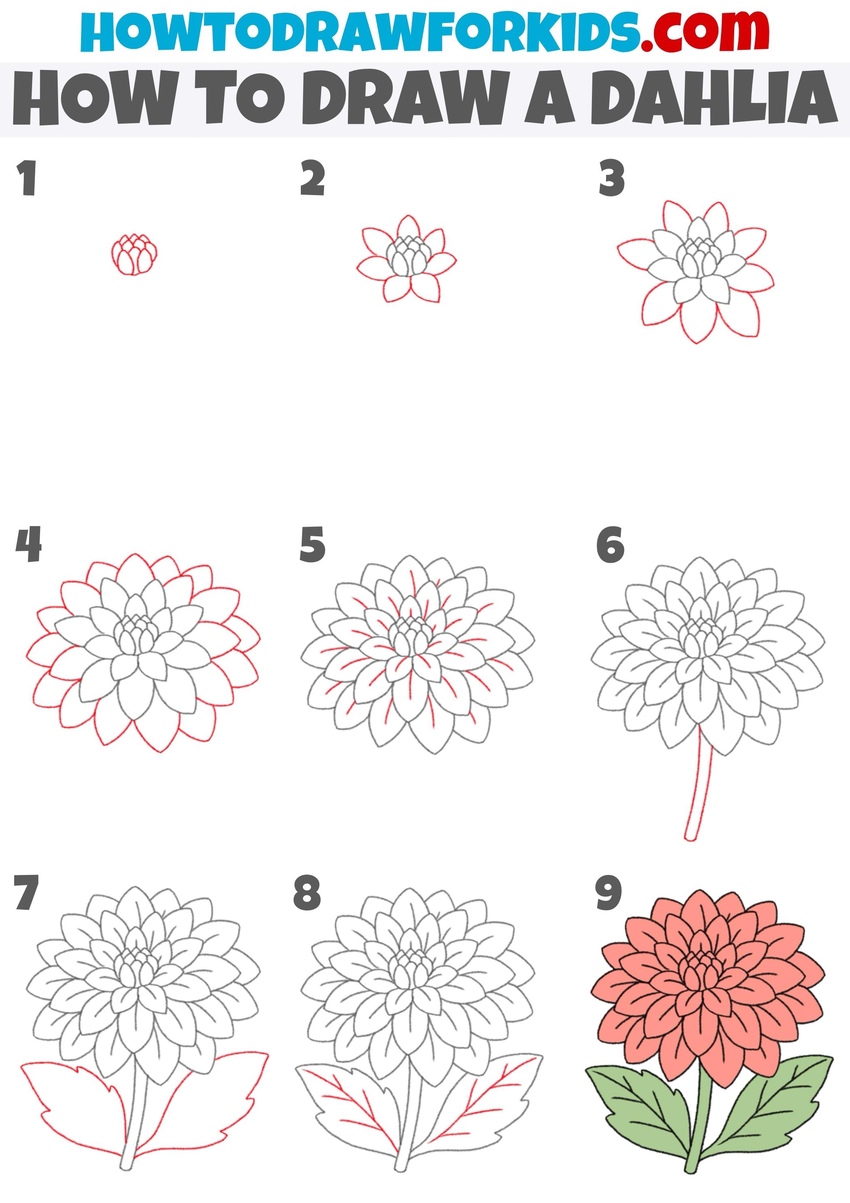
- Sketch the flower core.
A dahlia’s bloom starts from the center, so begin by sketching several small oval petals grouped tightly together. These should overlap, creating the appearance of an authentic flower core.

- Sketch the second row of petals.
Now continue the shape of the bloom by drawing a row of larger petals around the central group. Each petal should be shaped like a rounded triangle, pointing to the side. Try not to make the petals too long here, as they are still fairly close to the core.
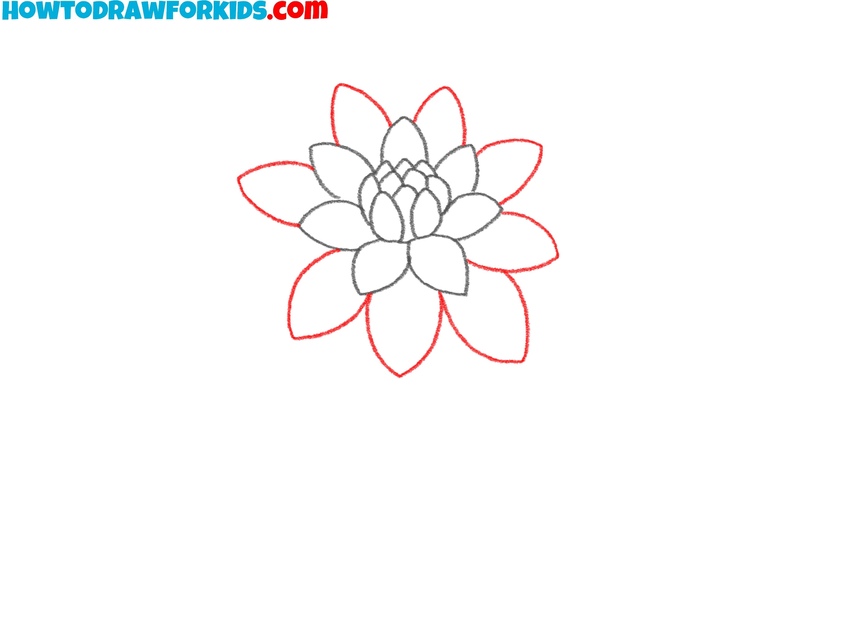
- Draw the third dahlia petal row.
With the inner rings complete, move outward by sketching another set of petals, each one larger and more pronounced. These should curve from the core to the sides, creating a second frame around the smaller petals. Don’t draw them too close together.
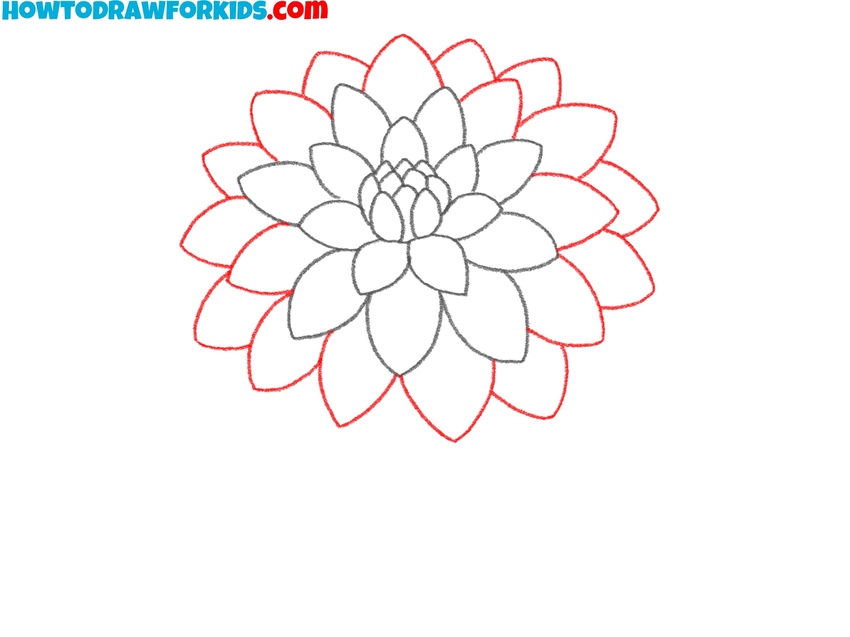
- Complete the bloom of the flower.
Continue adding another row that radiates outward. As in the previous steps, the petal should overlap the one before it, becoming slightly larger than the previous row. Try to make the petals similar in size and shape, but don’t try to make them identical, because in nature, no two petals are exactly alike. This step finalizes the bloom and creates a fill round shape.
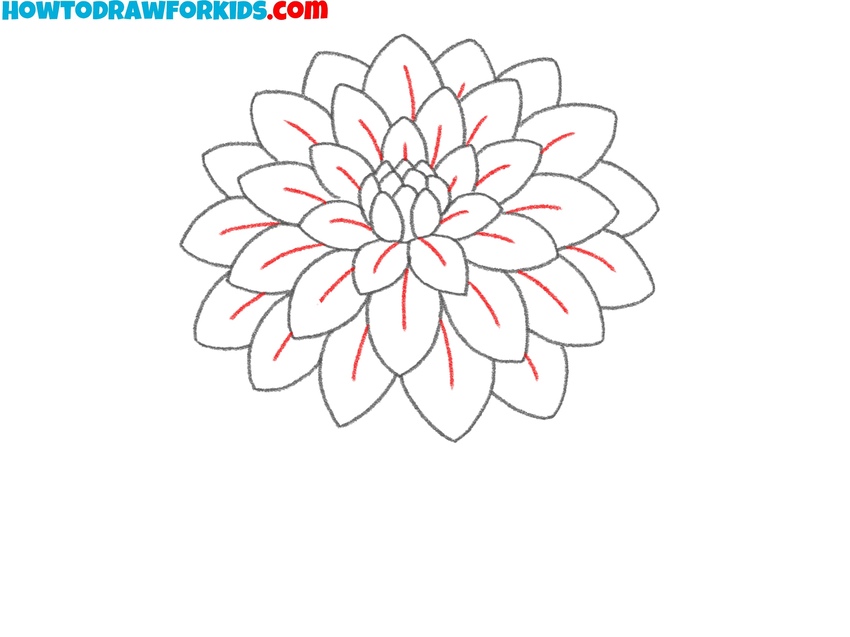
- Sketch the fold lines inside petals.
Now that the main petals are in complete, add small lines inside each petal to convey folds. Start at the base of each petal and lightly sketch a short line that moves toward the tip, stopping about halfway. These inner lines make the petals look more realistic.
- Draw the dahlia stem.
Now that the bloom is detailed, give it support by sketching a long stem. Use two parallel lines for the side edges of the stem. In floral art, stems are often left simple so that attention remains on the flower head.

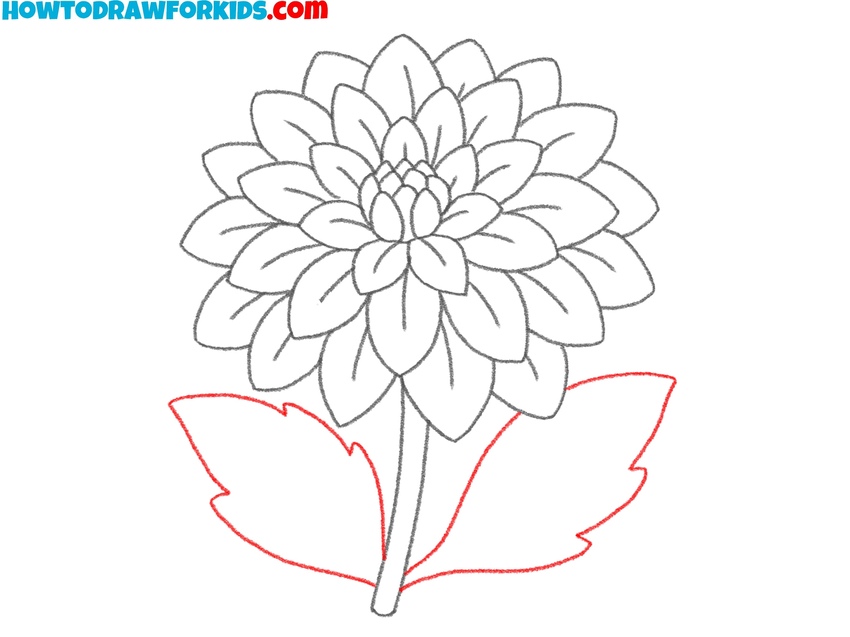
- Sketch the leaves below bloom.
To finalize the main flower shape, sketch two large leaves extending from both sides of the stem. Each leaf should be broad and pointed at the ends, with smoothly jagged outlines. You can add more leaves for a more detailed composition, or keep just one on each side for a simple look.
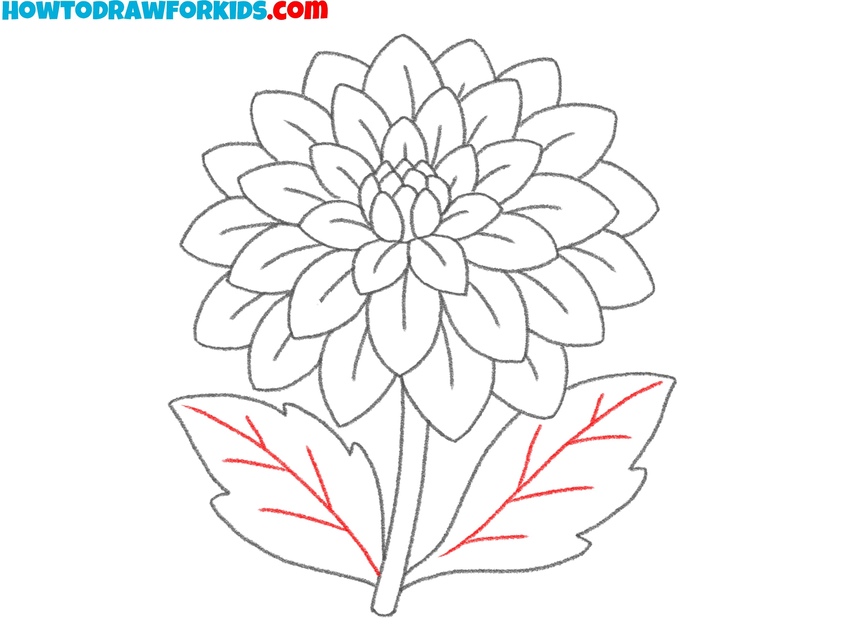
- Illustrate the central leaf veins.
To make the leaves more realistic, draw lines running from the base to the tips to represent veins. Add smaller side veins branching to the edges to convey texture. Keep these lines light and very simple. In floral art, leaf veins are often simplified, as in my illustration.
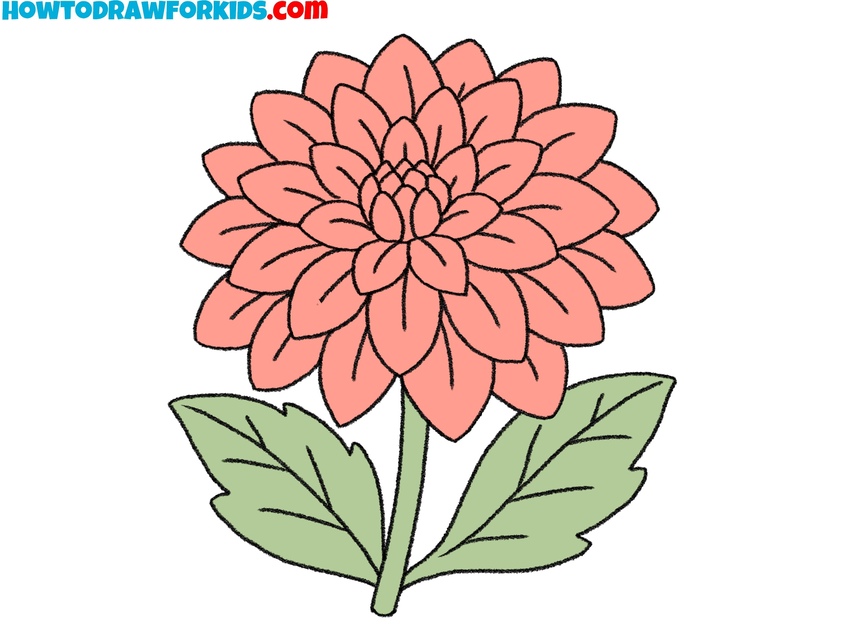
- Paint the flower, stem, and leaves.
Dahlias are famous for their rich variety, so you can choose bright reds, soft pinks, deep purples, or even multicolored gradients. Fill the petals with an even shade, or experiment by adding more complex colors. The leaves should be shaded in green. You can also try unconventional colors, for example blue or orange petals.
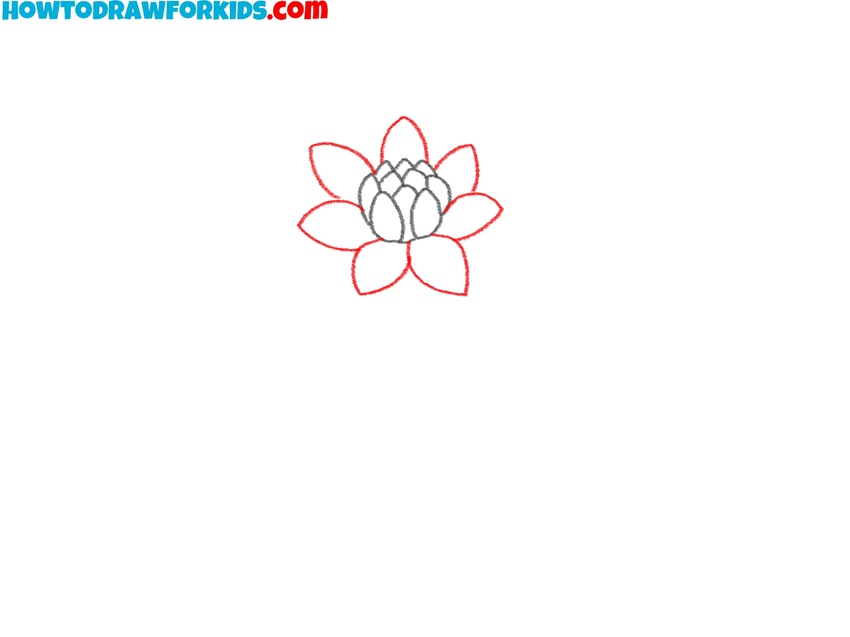
Additional Dahlia Drawing Tutorial
To draw this version of a dahlia, outline a small oval shape in the center to act as the flower’s core. Add short, narrow petals around this area, drawing them closely packed together.
Gradually sketch additional layers of petals, each one slightly larger than the previous, radiating outward in neat rows. Continue expanding the bloom by placing longer petals near the edges, always keeping them slightly overlapping to capture the dahlia’s natural density.
Once the outer layer is complete, check the overall symmetry and refine any uneven areas. Finish the drawing with color, using rich tones of pink or purple.