How to Draw a Dog Bone
On this page I will show you how to draw a dog bone or a toy in two different ways, as well as a dog with this bone in its teeth.
First, I will describe in detail the process of drawing a dog bone, then I will show a slightly different way of depicting the same object, and at the end you will see how to make this artwork even more interesting.
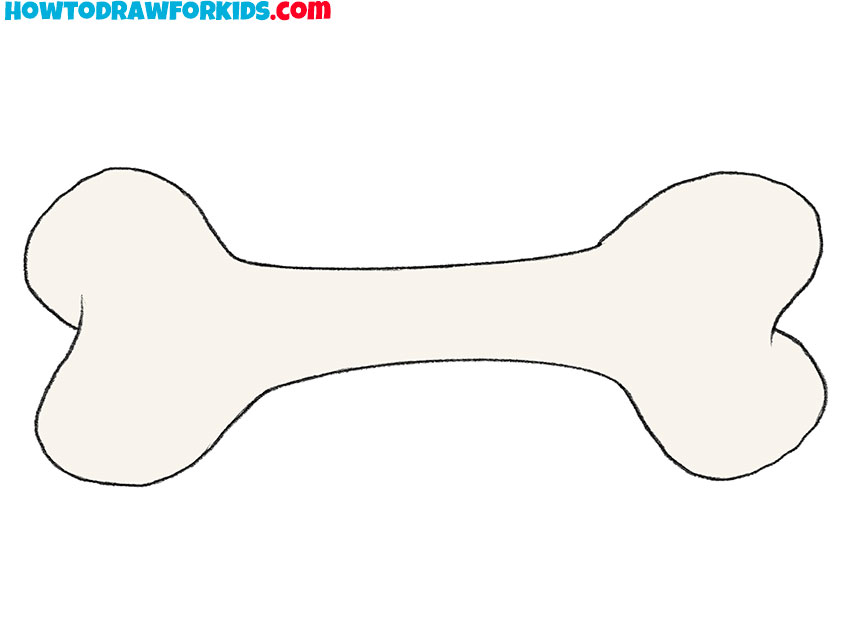
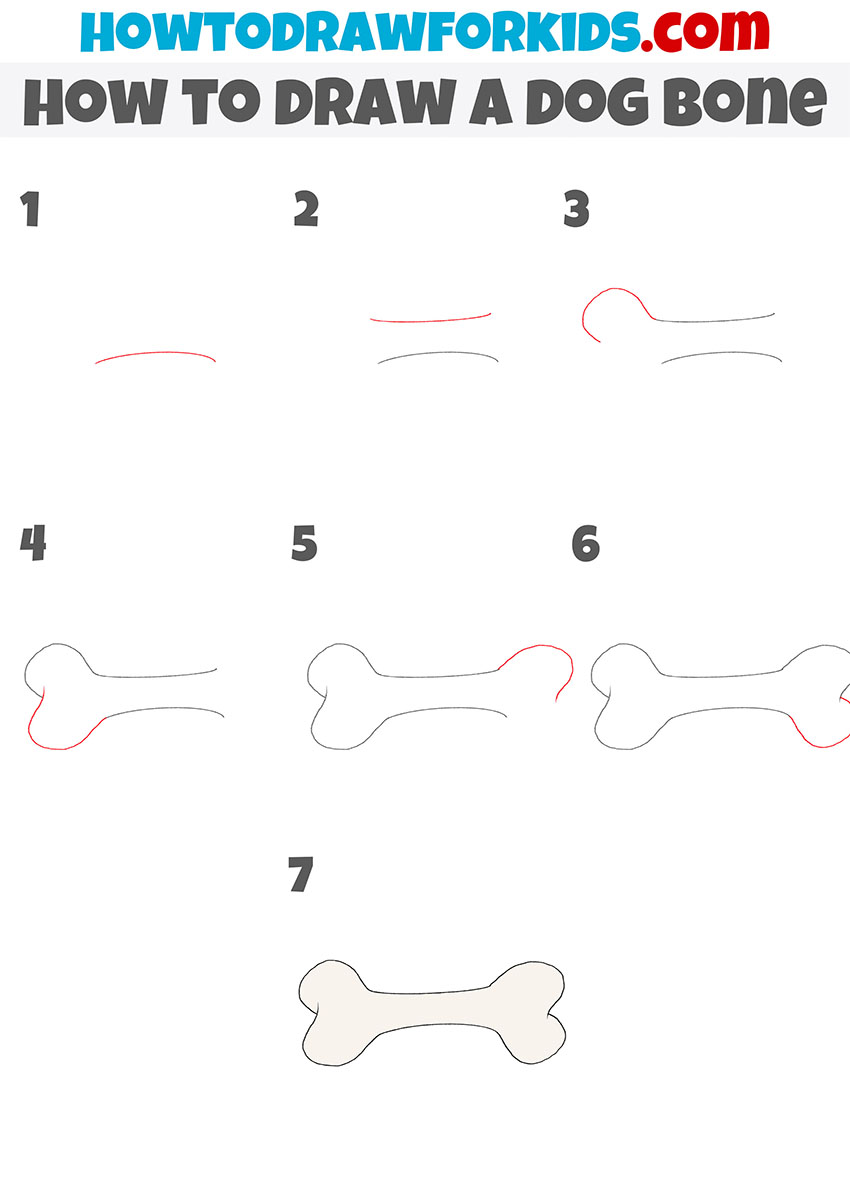
Table of Contents
- Basic Information
- Steps of the tutorial
- Additional materials
- Dog toy drawing tutorial
- Dog with a bone drawing tutorial
- Conclusion
Basic Information on How to Draw a Dog Bone
I suggest you complete another interesting and useful lesson in which I will show you how to draw a dog bone. This is a very simple instruction that includes seven simple steps.
In addition, I will show you a more simplified version of drawing a dog toy, and at the very end I will show you how to draw a cute cartoon dog with a toy bone in its teeth.
Dog toys come in many different shapes and types, but I decided to go with the most popular one, which looks like a regular bone.
In the picture, you see a large bone that has a thin middle part and large rounded joints at the ends. Therefore, in this lesson, you will draw both straight and rounded lines. Try to depict each element correctly so that in the end you get a great drawing.
The drawing is made in a very simple manner and does not have any shadows or highlights. But if you add them, you will make your dog bone drawing more dimensional.
Materials
- Pencil
- Paper
- Eraser
- Coloring supplies
Steps on How to Draw a Dog Bone
Time needed: 15 minutes
How to Draw a Dog Bone
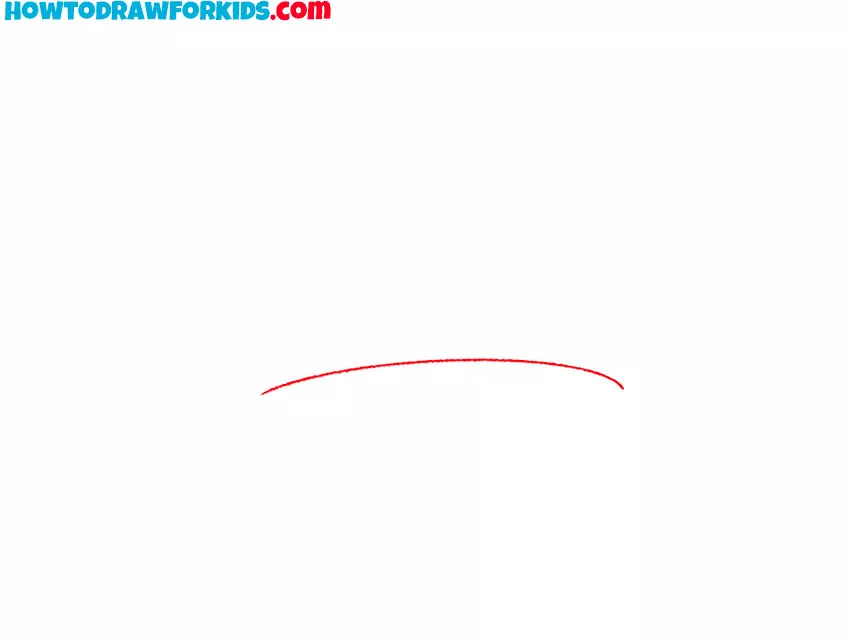
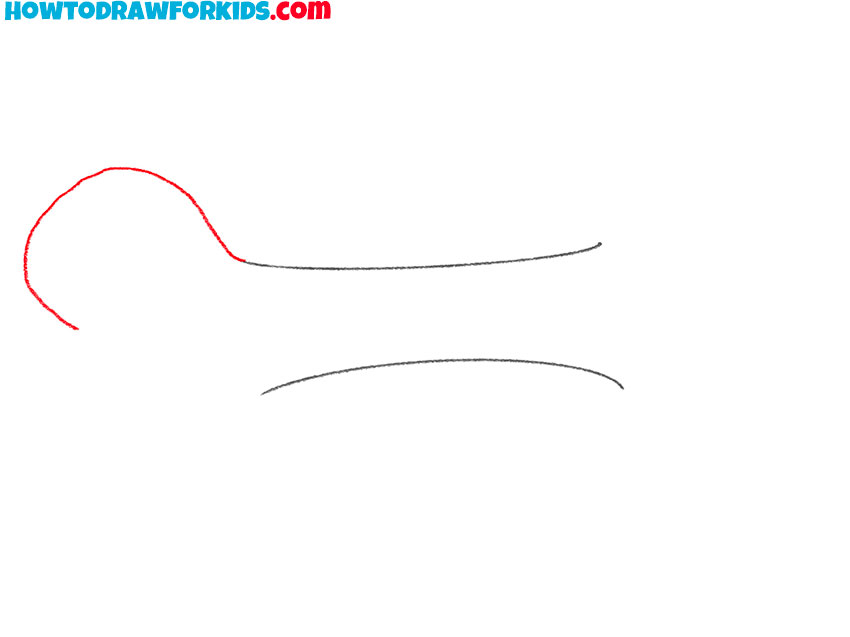
- Start drawing the middle of the dog bone.
Depict a smooth line as shown in the example. In this same step, you need to determine where your dog bone design will be located.
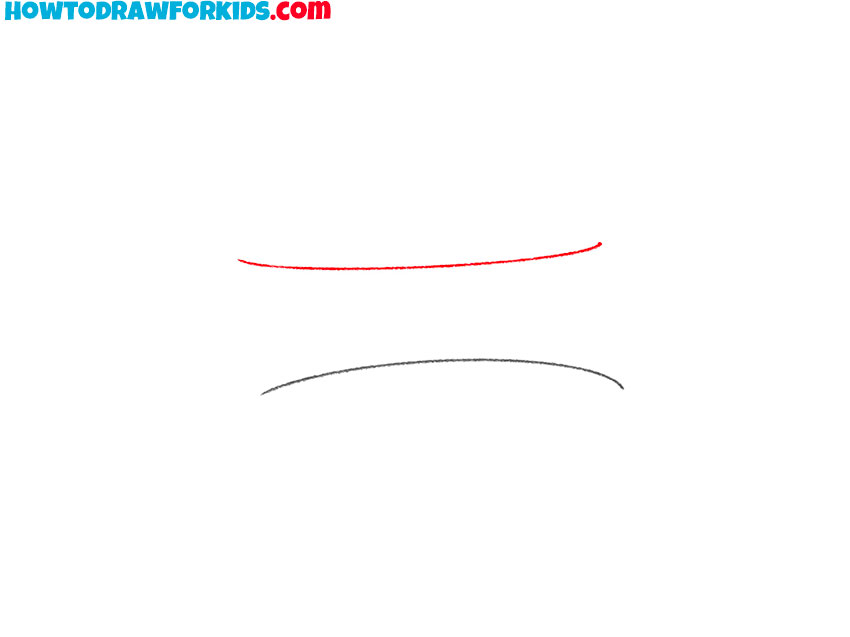
- Add the second part of the middle of the bone.
At this stage, sketch out another smooth line above. This line is essentially a mirror version of the one you drew in step one.
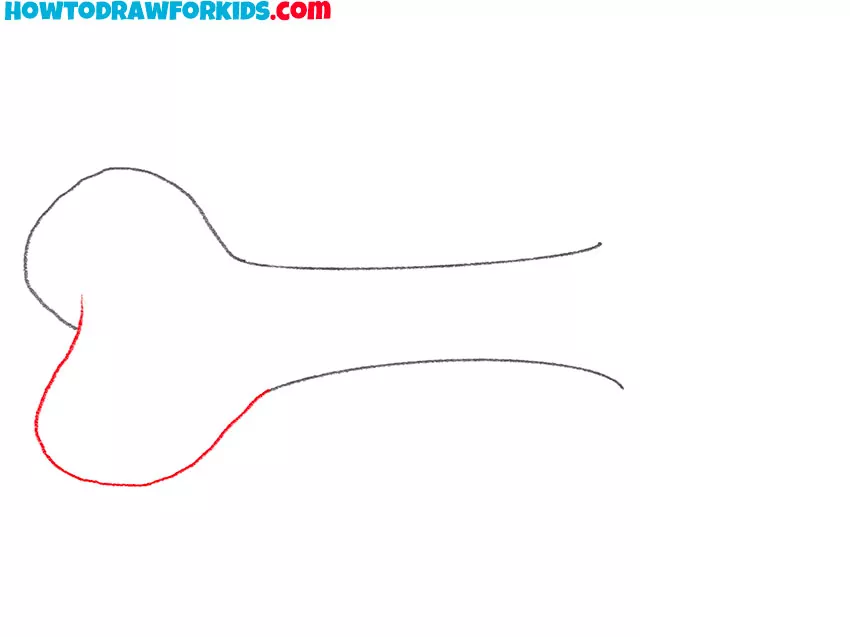
- Depict the first part of the joint on the left.
Continue the line and depict one part of the joint. Try to follow me in the shape and volume of this part.
- Draw the second part of the joint on the left.
To do this, you need to depict another rounded line at the bottom. Keep an eye on the thickness of the lines and their shape to make your dog toy drawing more beautiful.
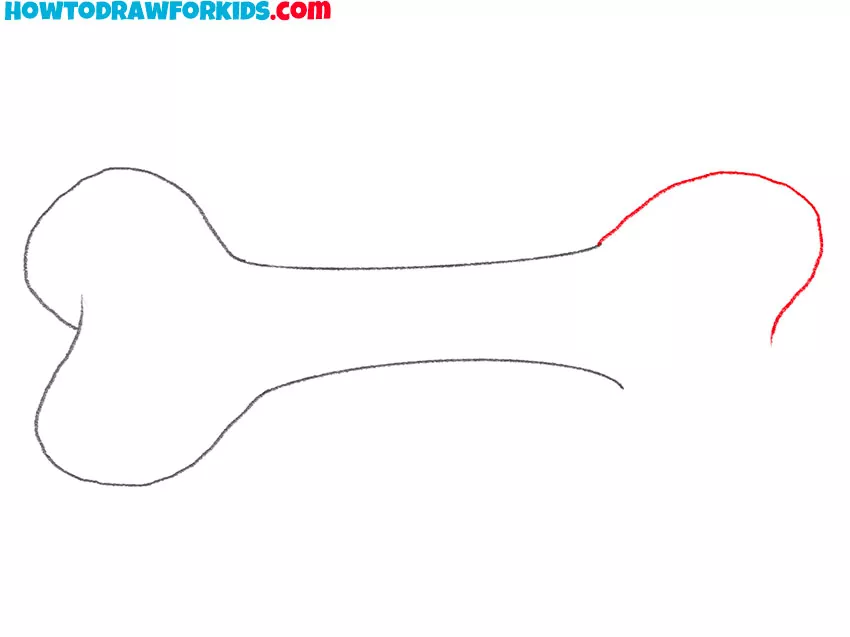
- Add one part of the joint on the right.
To do this, sketch out a rounded line at the top. This part of the drawing should practically repeat the one you drew in the third step.
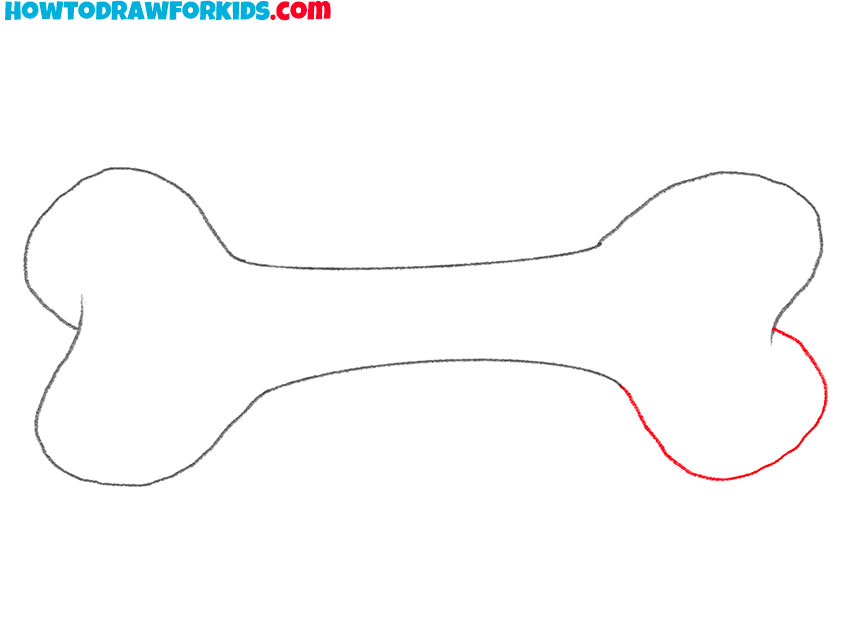
- Draw the second part of the joint on the right.
Depict another rounded line to make a closed path. Please note that the dog bone drawing should be fairly symmetrical.
- Correct inaccuracies and add some colors.
Check your drawing and correct inaccuracies if necessary. Remove unnecessary lines if there are any, and color the dog bone drawing beige or ivory.
Additional Materials
Finally, I suggest you download the PDF file that I have previously created for your convenience. Save this file and use it whenever you want to be creative.
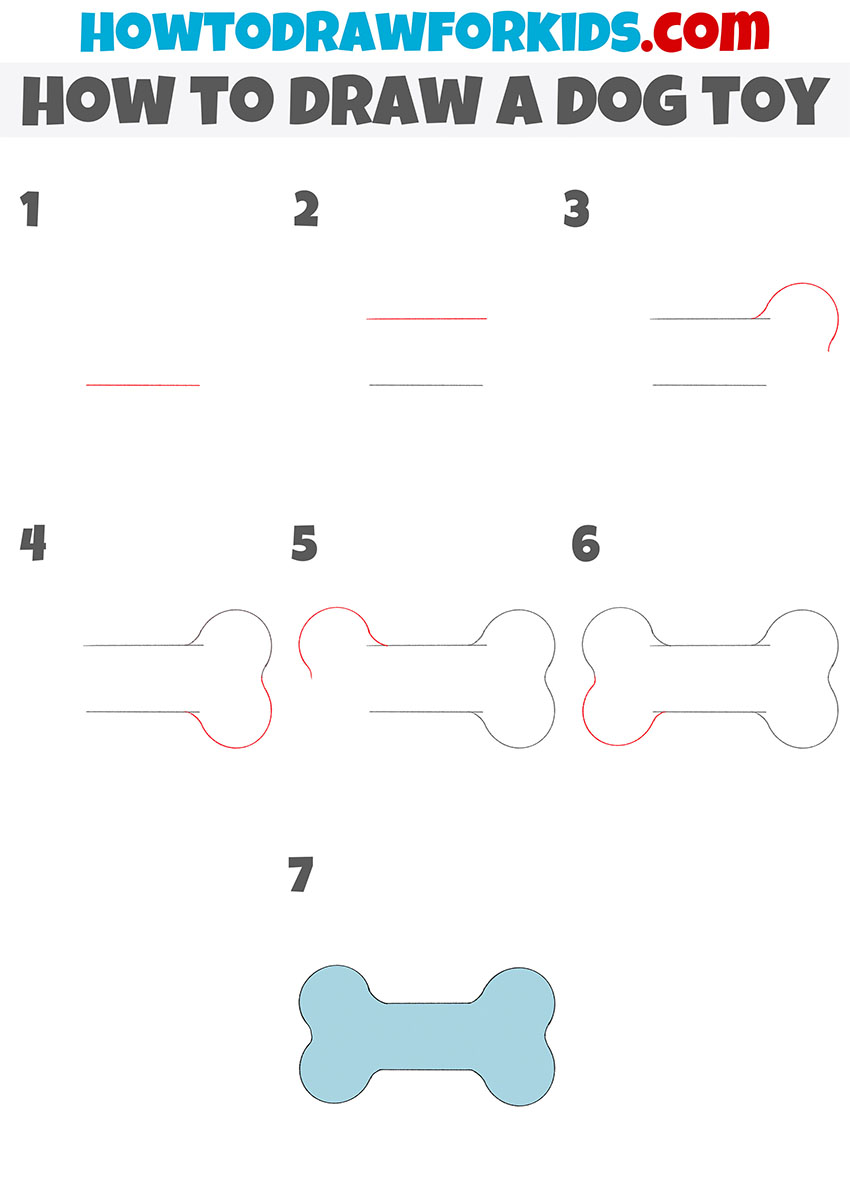
Alternative Way to Draw a Dog Toy
So, the previous drawing of a dog toy looked like a real bone, but there are toys that are more sketchy, and even in color they bear little resemblance to a real bone.
The lines and steps here are roughly similar to what you could see above, but the drawing itself, as I said, will be more cartoonish. At the end, you can color your drawing of a dog toy either blue like in my primer, or any other color.
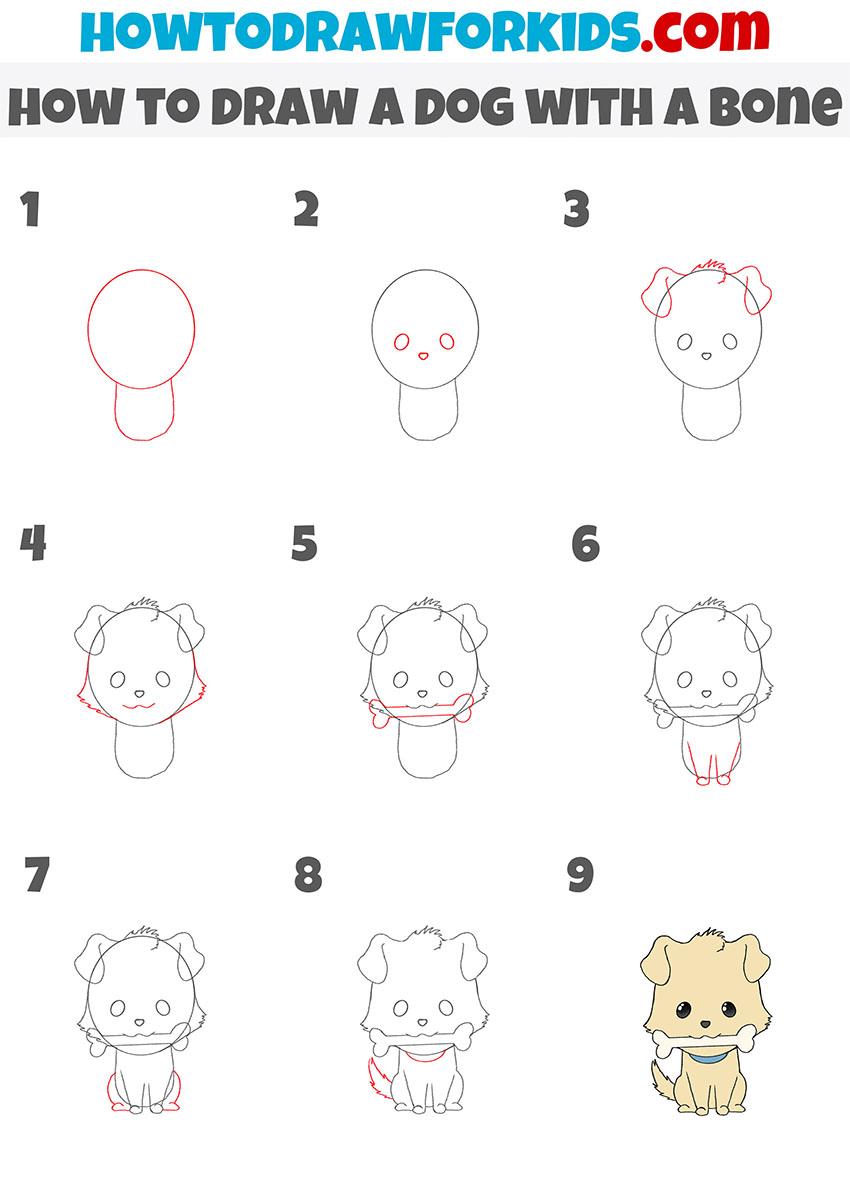
Dog With a Bone
Before you are an accessible instruction, which shows in detail how to draw a dog with a bone. Here you will once again train your ability to draw animals. The illustration shows a small dog sitting and holding a bone in its mouth.
The dog is presented in a cartoon style and looks very cute. Pay attention to body proportions. The head is much larger than the body, the legs are very short. Try to correctly draw all the elements in each step so that you get a good drawing.
Conclusion
It was quite a long journey to get here, wasn’t it? Have you tried all three instructions presented on this page? If not, then I advise you to try them all.
In addition, I strongly advise you to subscribe to my updates on social networks, such as YouTube and Pinterest, where I publish a lot of interesting and useful things.
love dog