How to Draw a Dumpling
Dumplings, khinkali, pelmeni, gyoza… This lesson on how to draw a dumpling will help you learn how to depict any of these dishes.
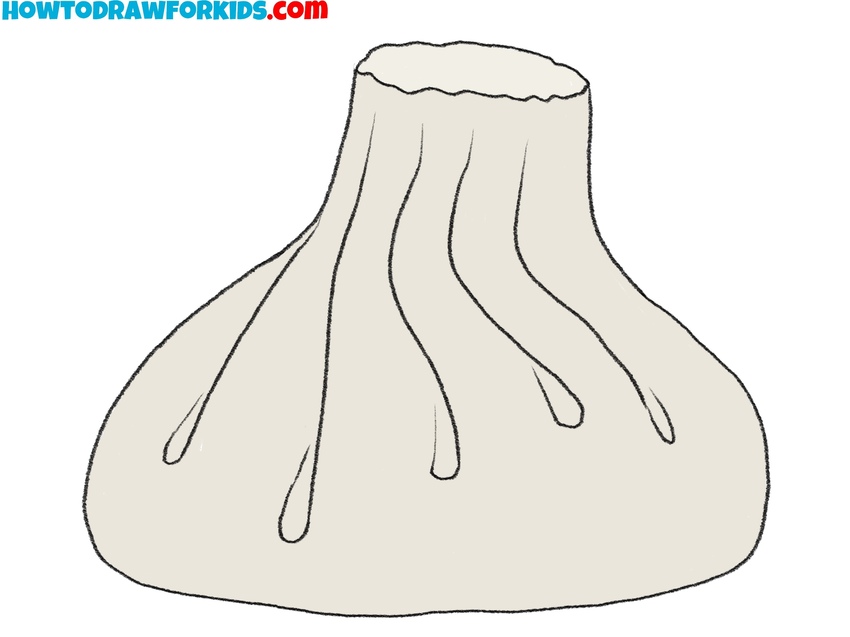
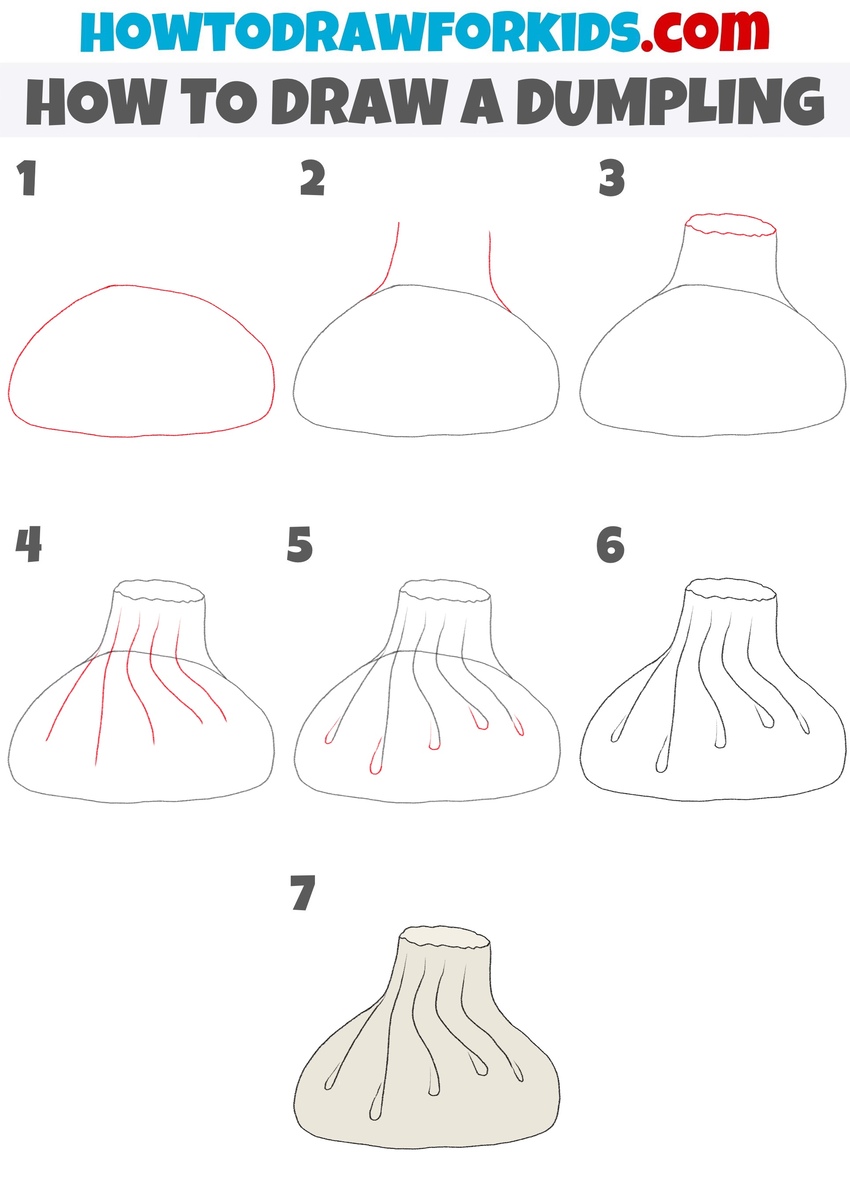
How to Draw a Dumpling: Introduction
This tutorial provides a step-by-step guide on how to draw a dumpling. It will demonstrate how to create a simple dumpling drawing and may also help you draw similar objects with similar shapes.
Dumplings are typically made up of very simple shapes, resembling a bag. As a result, this drawing will be really simple, making it suitable for both children and even preschoolers, even if they have no prior drawing experience.
Since dumplings are hand-made objects, they tend to lack symmetry and straight lines, which gives them a realistic appearance. To make your dumpling drawing look natural, avoid using overly straight or symmetrical lines.
In keeping with the usual approach on this website, an additional dumpling drawing tutorial has been included to help improve your drawing skills. This is a simplified version that provides another method for drawing a dumpling.
Dumpling Drawing Tutorial
Materials
- Pencil
- Paper
- Eraser
- Coloring supplies
Time needed: 25 minutes
How to Draw a Dumpling
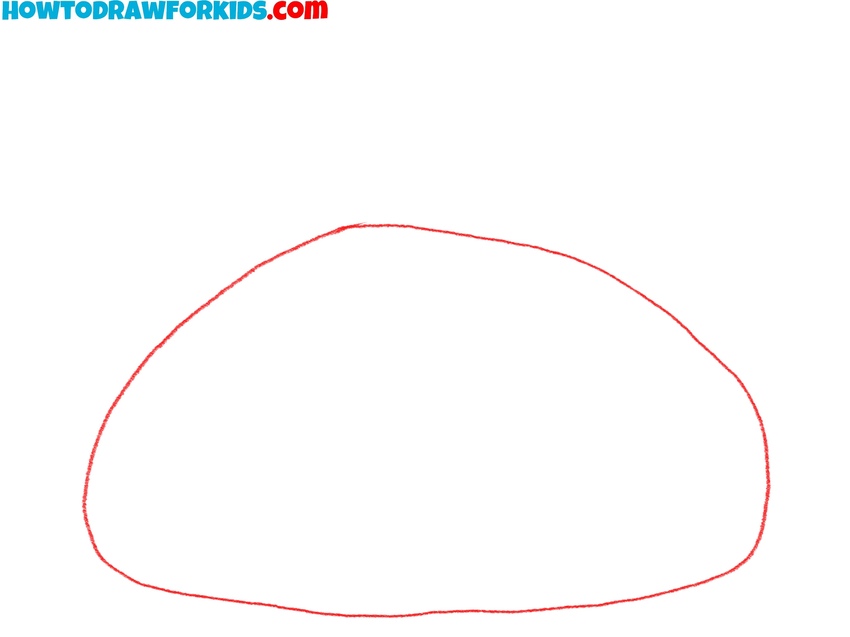
- Draw the bottom of the dumpling.
Begin by sketching a rounded, irregular shape to represent the bottom part of the dumpling. Use soft, slightly uneven lines to make the outline appear organic, as dumplings are hand-formed and rarely perfectly symmetrical. Create a flattened base at the bottom of the shape.
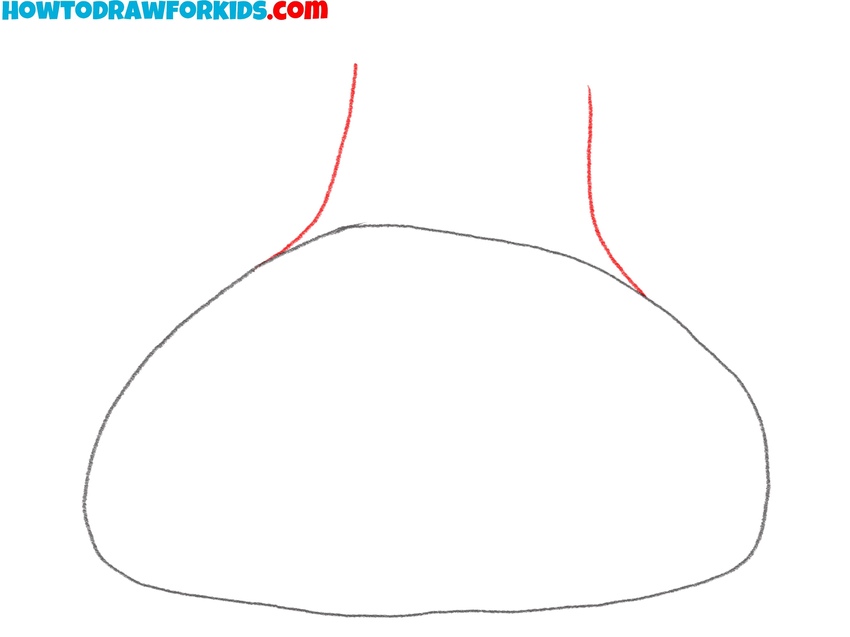
- Add the neck of the dish.
From the top center of the rounded base, draw two slightly curved vertical lines extending upward to form the neck of the dumpling. These lines should taper inward as they approach the top, narrowing slightly to suggest where the dough is pinched together.
- Outline the pinched top.
At the top of the neck, add a wavy line to indicate the pinched, folded edge of the dumpling. This line should not be perfectly straight – alternate the curves to make it resemble the uneven texture of hand-pinched dough of the dumpling.

- Add vertical lines for the folds.
Begin adding texture to the dumpling by sketching vertical lines that start at the wavy pinched top and extend downward across the body. Space these lines unevenly around the dumpling, and vary their curvature slightly to follow the rounded contour of the body.

- Detail the dough folds.
Then, continue the folds by adding small teardrop or droplet shapes at the bottom ends of each vertical line. These lines, like all the previous details, should have an uneven shape so that your dumpling drawing looks truly realistic.
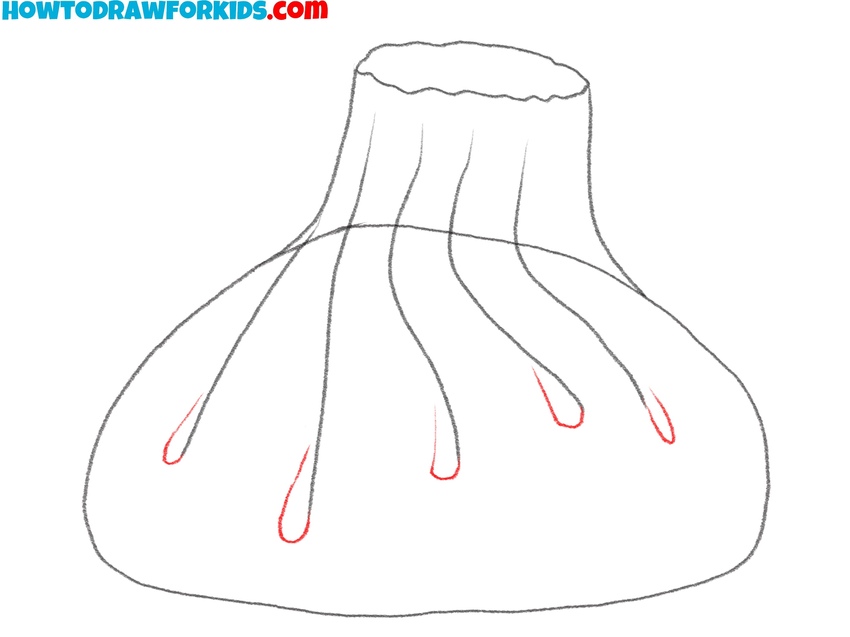
- Finalize the dumpling sketch.
Carefully go over the entire outline of your dumpling to refine the shape and smooth any uneven areas. Erase unnecessary guidelines or overlapping lines that detract from the final appearance. Highlight the slight irregularities in the dumpling’s shape to maintain its handmade look.

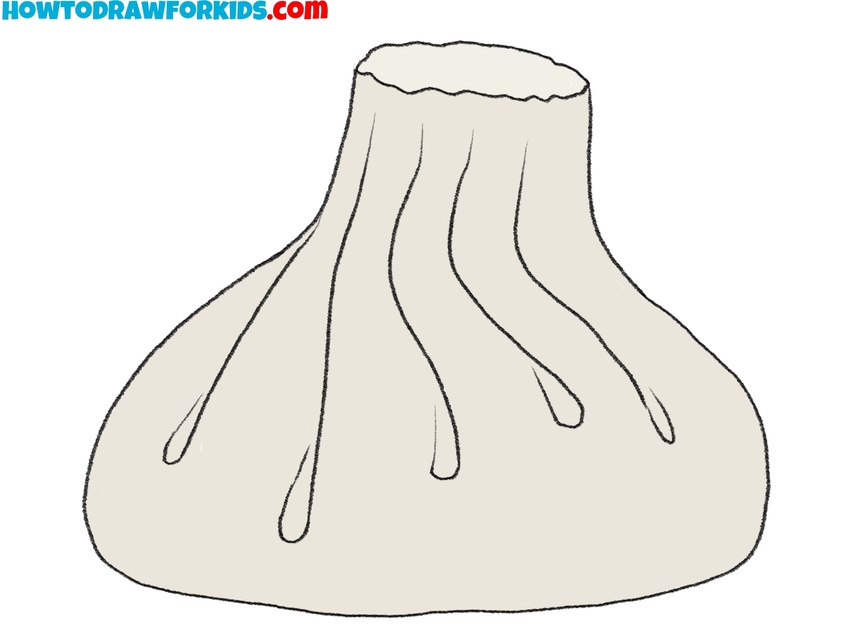
- Add color the the dumpling.
Use soft beige, ivory, or cream tones to fill the body of the dumpling, giving it the characteristic color of boiled or lightly steamed dough. After that, you can add shading along the folds and under the dumpling to make the dish look more realistic.
How to Draw a Dumpling for Preschoolers
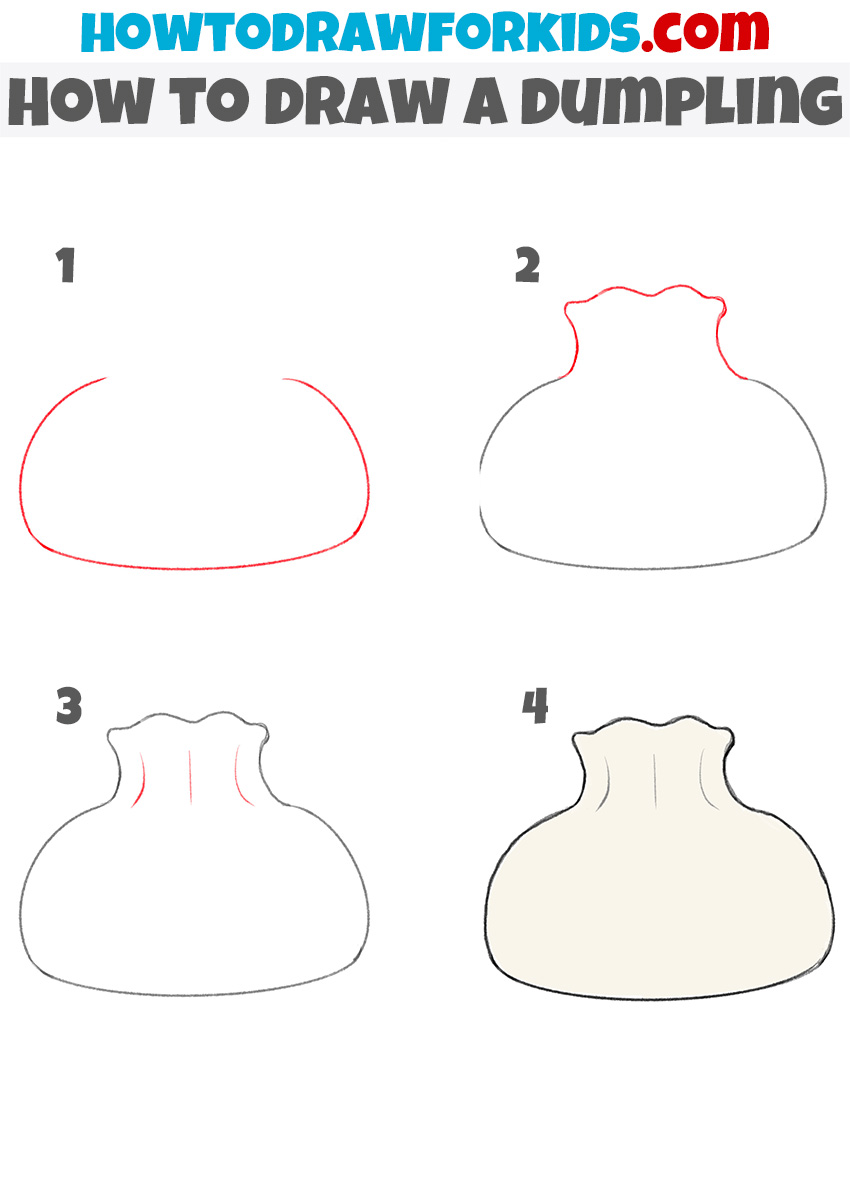
So, dear young artists, let’s try another tutorial on how to draw a dumpling. The main difference between the first tutorial and this one is the level of detail and complexity in the folds and lines. The first tutorial includes more small vertical fold lines and teardrop details that add realism, while this tutorial focuses on a simpler design with fewer folds and smoother lines.
To draw a dumpling in this style, start by sketching a rounded base shape with a flattened bottom. This forms the body of the dumpling and should be slightly uneven to resemble a handmade object. Add a wavy upper outline at the top to create the appearance of the dumpling being pinched, and create two slightly curved lines upward from the body’s top to form a short neck.
Add a few vertical lines starting at the top of the dumpling’s neck, extending downward to show light folds in the dough. Finish by erasing any extra guidelines and smoothing out the entire dumpling drawing. Apply light beige or cream tones for the dumpling.
I have prepared a short version of this tutorial for your convenience, which you can download as a PDF file. After downloading this file, you can return to this lesson absolutely any time you want to start drawing. You do not need to be connected to the Internet to use the file.
Conclusion
I hope you are satisfied with the result. If you found this dumpling drawing tutorial helpful, feel free to share it with others and try drawing together. You are welcome to leave your feedback, questions, or suggestions for future lessons in the comments. Additionally, follow us on social media to stay updated.
Do not forget to check out other tutorials in the Foods category. These include guides on drawing a cupcake and improving your skills by learning to draw a burger. These tutorials provide clear, step-by-step instructions to help you improve your drawing abilities.


