How to Draw a Guitar
For those who love drawing as much as music, I have created three different but really simple tutorials to demonstrate how to draw a guitar.

How to Draw a Guitar: Basic Information
The guitar is a simple subject to draw, but to learn how to draw a guitar, it is important to understand several key points. In this lesson, I will explain them in detail.
When drawing a guitar, it is important to remember that it consists of several parts that form its recognizable shape. These parts need to be drawn in the correct sequence, maintaining proportionality, symmetry, and accurate proportions.
This lesson will not only show how to draw a guitar but also help you practice drawing objects with symmetrical and smooth elements, improving your skills for other similar subjects.
Additionally, this lesson includes two more instructions for drawing a guitar, which can be found at the end of the page. These additional guides offer alternative approaches to drawing a guitar, allowing you to learn different techniques and perspectives.
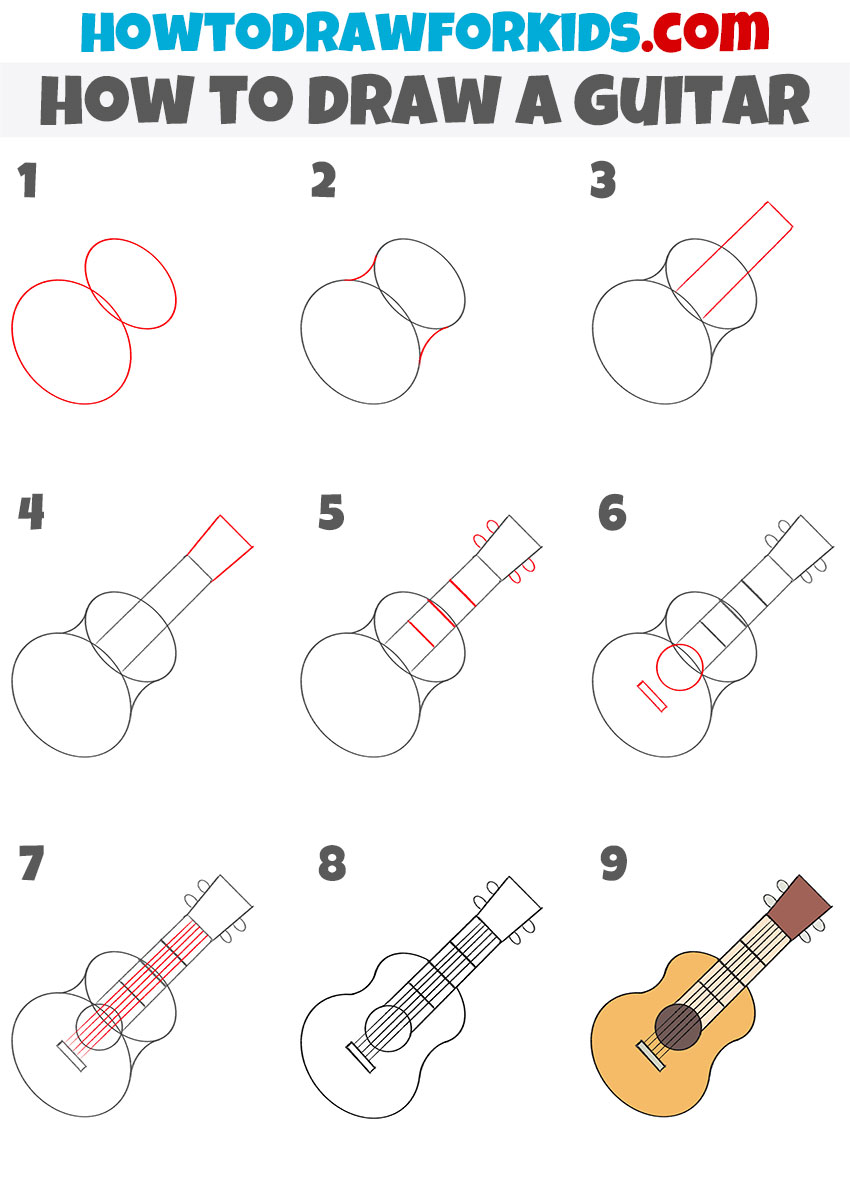
Guitar Drawing Tutorial
Materials
- Pencil
- Paper
- Eraser
- Coloring supplies
Time needed: 30 minutes
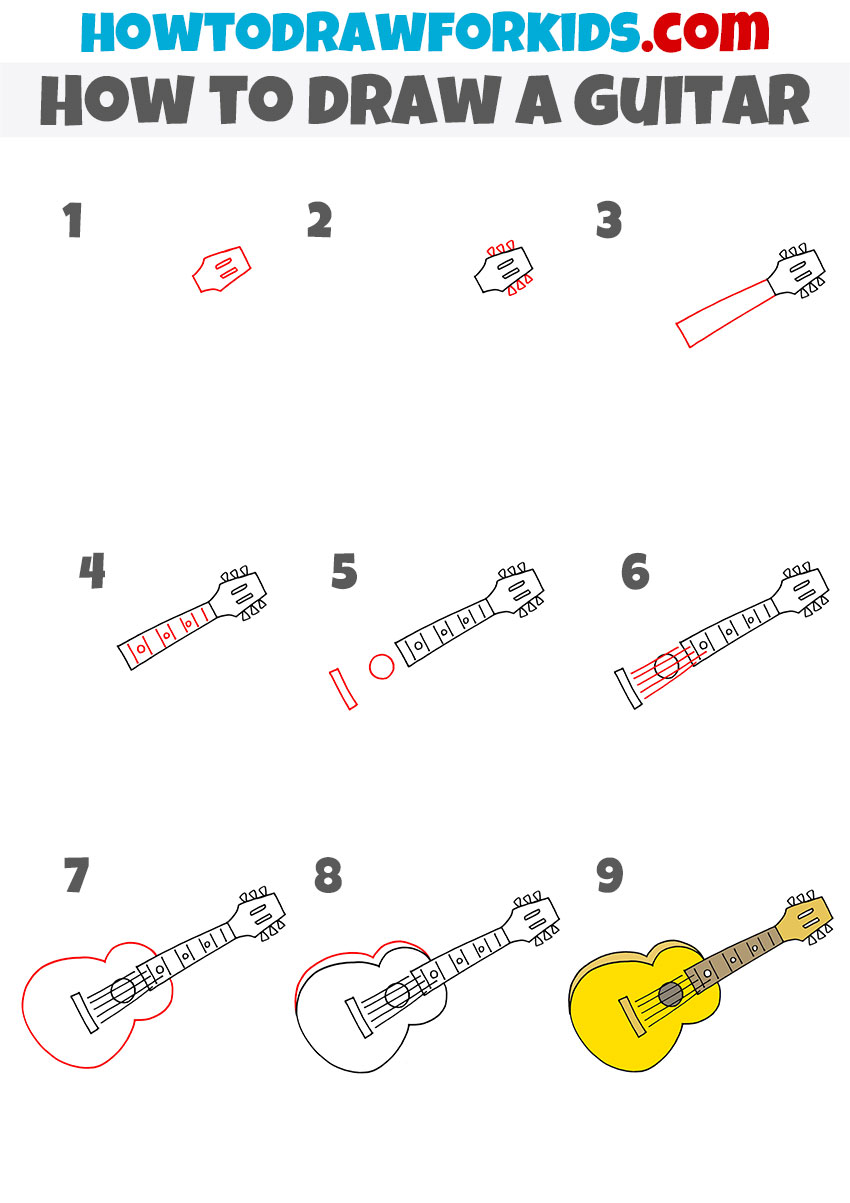
How to Draw a Guitar
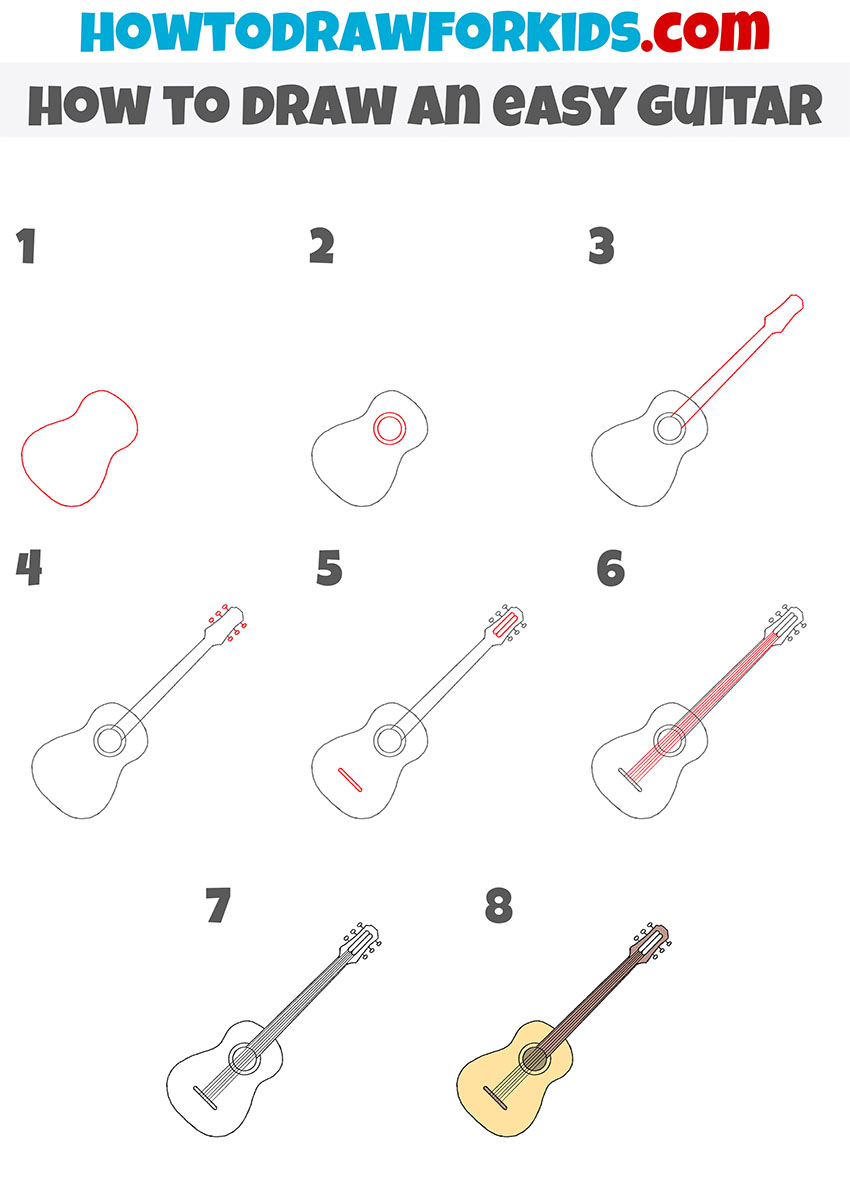
- Draw the body of the guitar.
To begin this tutorial on how to draw a guitar, start by outlining the main shape of the guitar’s body. It resembles a figure-eight or an hourglass with curved edges. Make sure one side is slightly larger than the other to reflect the realistic shape of an acoustic guitar.
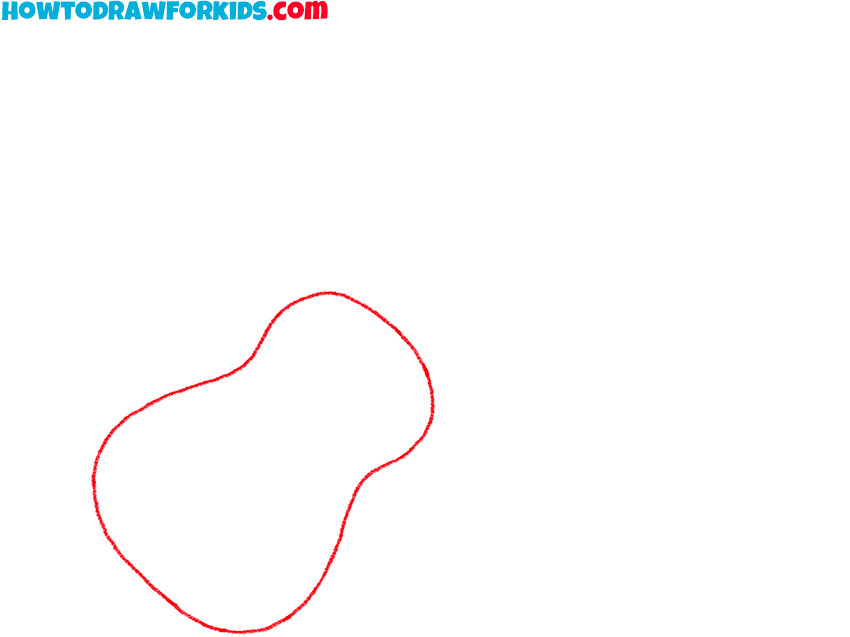
- Add the resonator hole.
Next, draw the sound hole near the center of the guitar’s body. It’s a small circular shape that sits symmetrically in the upper section. This step is very important for making the drawing recognizable as a guitar. Add an additional larger circle around the sound hole to make it look more detail.
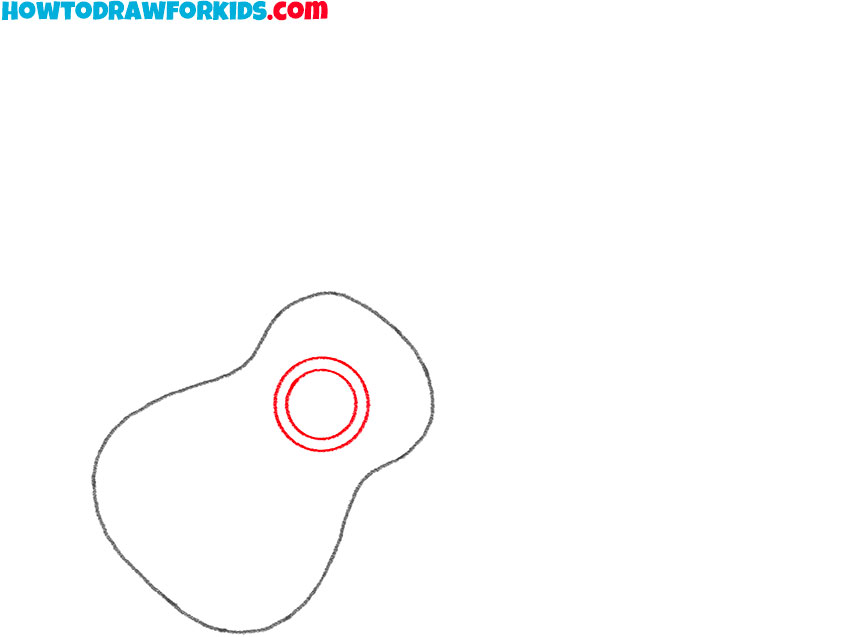
- Add the neck and head.
Begin by drawing two long, straight lines extending upward from the body. This will form the neck. The shape of the neck should taper slightly as it moves away from the base. Then, at the top of the neck, sketch the headstock, which has a slightly tapered rectangular shape.
- Sketch the tuning pegs.
Now, focus on the details of the headstock by adding six small tuning pegs, three on each side. These pegs are evenly spaced along the headstock and are used to adjust the strings’ tension. Each tuning peg should consist of a small rectangle and a short line connecting it to the head.
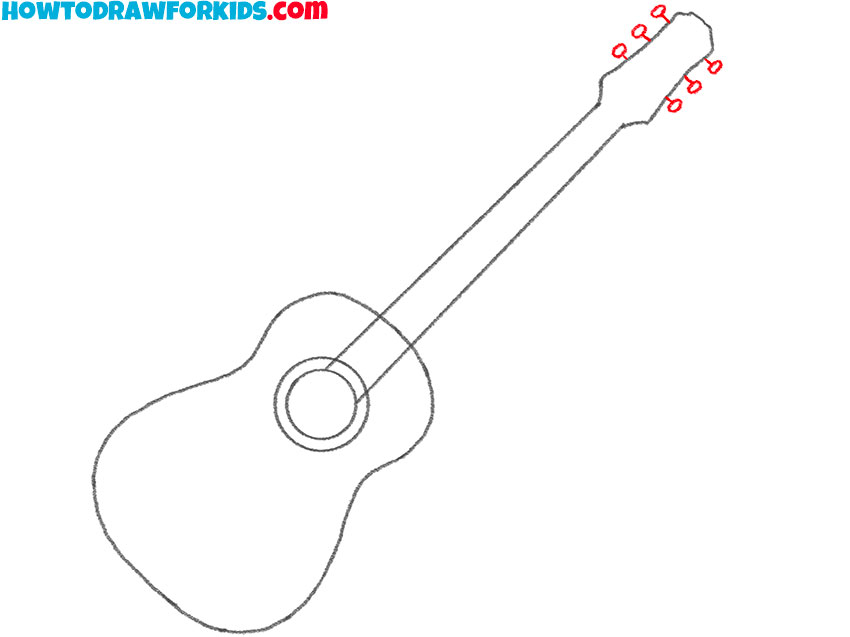
- Illustrate the bridge of the instrument.
Move back to the guitar’s body to draw the bridge. It is a small, rectangular section located below the sound hole. The bridge serves as the anchor point for the strings, so it’s an important feature in this tutorial on how to draw a guitar. Next, detail the headstock with a few simple lines.
- Draw the guitar strings.
Next, draw six thin, straight lines running from the headstock down to the bridge. These represent the guitar strings and should be spaced evenly across the neck and body. The strings should align with the tuning pegs at the top and the bridge at the bottom, demonstrating the realistic layout of a guitar.

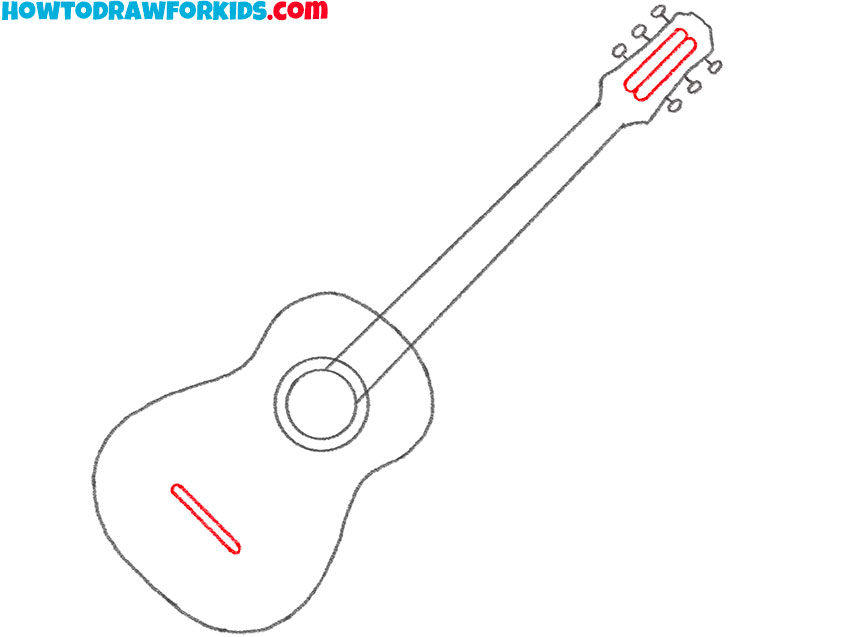
- Correct inaccuracies.
In this step, refine the overall guitar drawing by reviewing all the components. Smooth out any uneven lines and make adjustments where necessary to ensure the proportions of the body, neck, headstock, and strings are accurate.

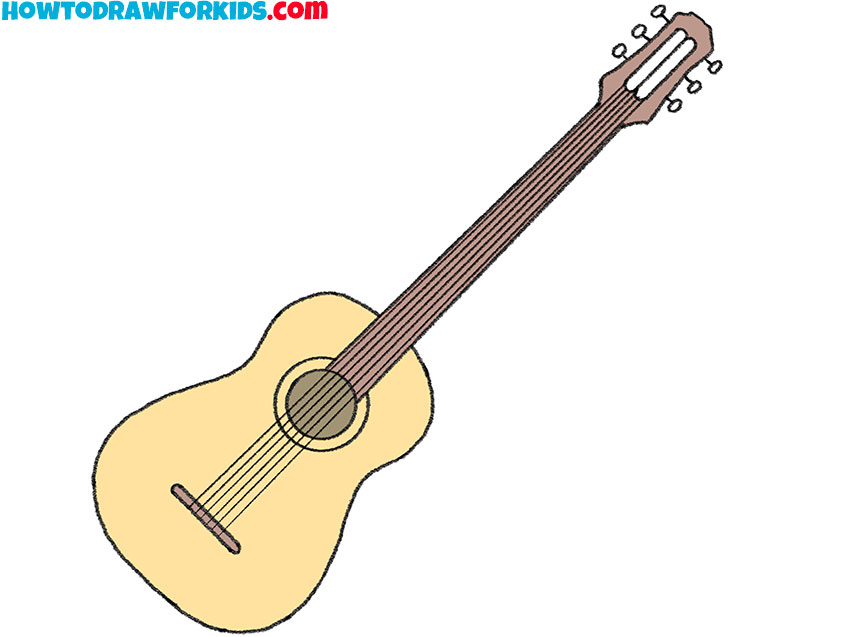
- Color the guitar drawing.
Choose shades like brown or yellow for the body of the guitar, darker tones for the neck and headstock, and gray colors for the tuning pegs. Next, detail the head with a few simple lines. This will complete the steps of the tutorial on how to draw a guitar, leaving you with a polished and realistic result.
Additional Content
For young artists who want to learn and draw a guitar anytime, anywhere, I have created a free downloadable PDF file for this guitar drawing lesson, now available on my website.
It provides a concise version of the full tutorial, making it ideal for quick learning and practice. In addition to the steps, this file contains a coloring page, a tracing worksheet, and a grid drawing worksheet.
Alternative Drawing Techniques
Guitars are an instrument that have been around for centuries, and during this time, many different types of this instrument have been created. And of course, it will be extremely useful to be able to draw guitars of different types. Below, I present to your attention two additional instructions that will help expand your knowledge and give you new skills so that you can draw a guitar of any shape.
How to Draw a Simple Guitar
The key difference between this tutorial and the first one lies in the starting point and level of detail. While the first guitar drawing tutorial begins with the body of the instrument, this one starts with the headstock, followed by the neck and fretboard details before moving on to the body. Additionally, this tutorial includes more attention to the fret markers on the neck.
To draw a guitar using this method, start with the headstock by sketching its outline, including the small openings for the tuning pegs. Add the tuning pegs using simple shapes. Draw the neck as a long, straight rectangle extending downward, and then add the fret markers along the neck for accuracy. Next, sketch the sound hole and bridge by drawing a circle and a small rectangle. Draw six strings running from the tuning pegs through the neck to the bridge. Once the neck and headstock are complete, outline the guitar’s body. Refine the details, smooth the lines, and review your drawing for accuracy. Finally, add colors to complete your guitar drawing.
How to Draw a Cartoon Guitar
This is a cartoon guitar tutorial that features cartoon proportions and style, focusing on a simplified and exaggerated appearance. Unlike the first tutorial, which follows realistic proportions, this one demonstrates a stylized approach suitable for cartoons or illustrations with a less formal design.
To draw a cartoon guitar, start by sketching two overlapping circles for the body, ensuring one is slightly larger to define the upper and lower sections. Connect the circles with curved lines to complete the body shape. Add the neck by drawing a long rectangle extending from the body and connect it to the headstock, represented by a simple rectangular block. Draw small pegs on the headstock. Add horizontal lines across the neck to mark the frets, maintaining the cartoon proportions. Include the sound hole as a small circle on the body and sketch the bridge as a rectangular shape. Draw six lines for the strings, running from the headstock through the neck to the bridge. Refine the lines and add color to complete your cartoon guitar drawing.
Conclusion
You have now completed another really cool and useful drawing lesson, that demonstrated you how to draw a guitar, suitable for young artists and kids. Remember, there are many more tutorials available on my website, including the lesson on drawing a rose or the guide on drawing a hand step by step.
To continue improving your skills, check out other tutorials and keep practicing. To stay updated on new lessons and drawing tips, follow me on social media.