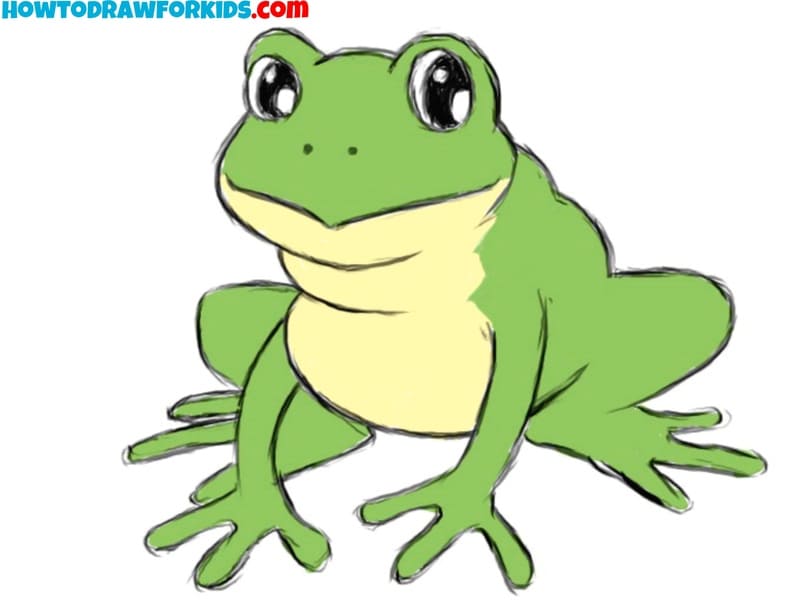
How to Draw a Frog
On this page, I’ll demonstrate how to draw a frog using four unique techniques, guiding you step-by-step to create your own charming amphibian artwork.
How to Draw a Frog: Introduction
This tutorial on how to draw a frog introduces basic geometric shapes like ovals, circles, and curves, helping young artists recognize and utilize these forms in their drawings.
This tutorial will be useful in teaching how to observe and illustrate the unique, fluid body shapes of frogs. Practicing the depiction of these smooth lines in the frog’s body, limbs, and eyes helps develop a more intuitive understanding of organic forms, beneficial for drawing other animals and even human figures.
This tutorial will help in illustrating key features such as the prominent eyes and unique toe pads of frogs, making the drawing more recognizable and interesting. Practicing this emphasis helps in identifying and highlighting defining characteristics in other subjects.
Frog Drawing Tutorial
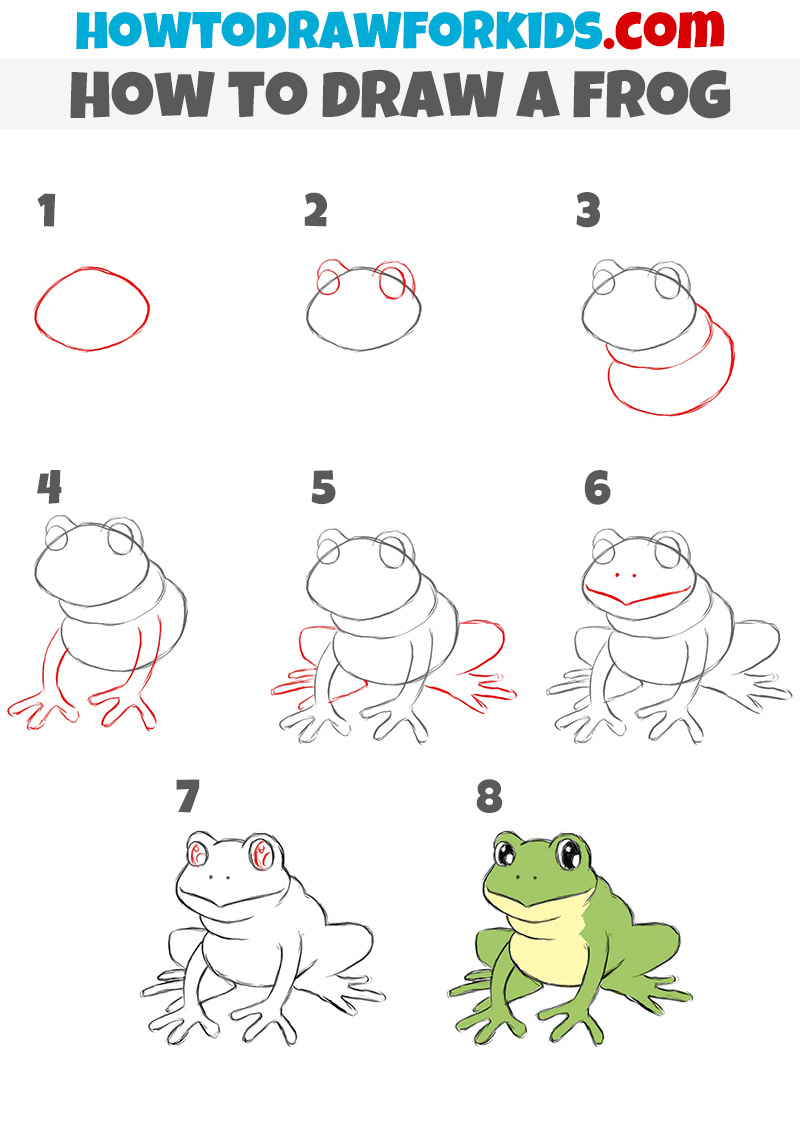
Time needed: 40 minutes
How to Draw a Frog
- Form the head of the frog.
Start by sketching a basic oval shape to represent the frog’s head. This provides a foundation for the subsequent steps, forming the primary structure of the frog’s face. Make sure to position the oval centrally on your drawing surface, leaving enough space for the body and limbs below.

- Illustrate the eyes.
Add two large circles on top of the head, slightly overlapping its top edge. These represent the frog’s prominent eyes. Space them evenly, ensuring they align symmetrically on either side of the head. You can add a slight curve beneath each circle to illustrate their protruding shape.

- Form the torso of the frog.
Extend two curving lines downward from the base of the head, connecting at the bottom to form the frog’s torso. Ensure these lines are smooth and rounded, illustrating the frog’s robust body shape. Make the torso appear full and plump, echoing a frog’s natural form.

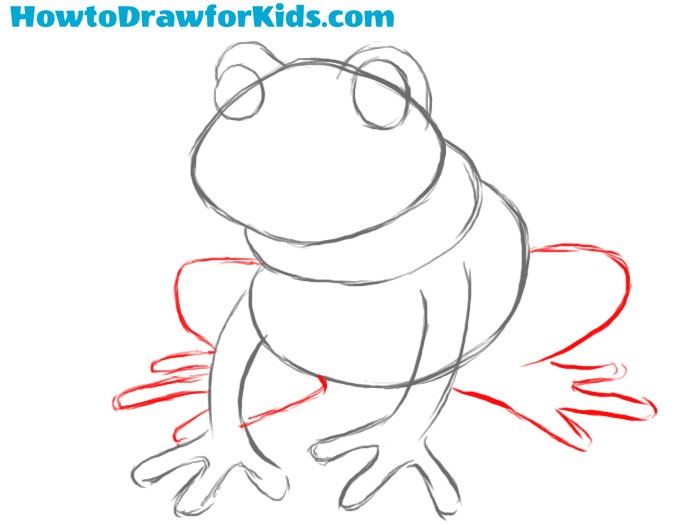
- Create the arms.
Sketch two arms extending from each side of the torso. Start the arms from the midpoint of the torso, drawing a curved line downwards to the ground. The forearms should bend outwards at the elbows, ending with elongated, webbed fingers. Make sure to give each arm three distinct fingers.
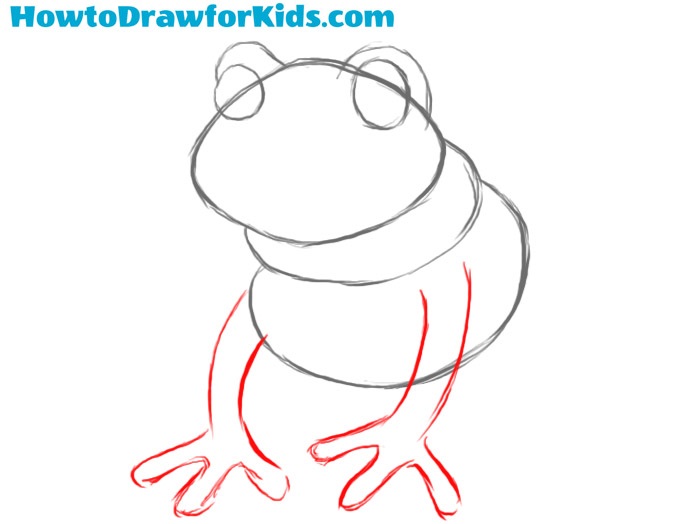
- Add the legs.
Draw two long, curved legs extending from the back of the frog’s torso. The legs should bend at the knee, angling backwards and then downwards. At the end of each leg, add three elongated toes, fanning them out to create webbed feet.
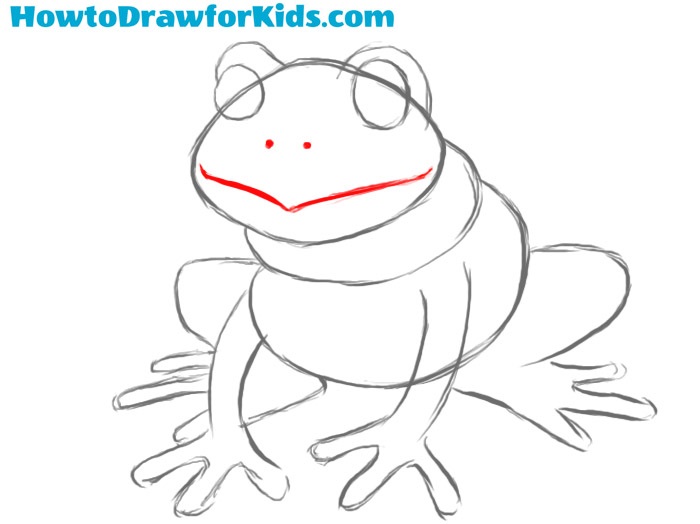
- Draw the mouth of the frog.
Now, add a subtle smile to the frog’s face by drawing a simple curved line below the eyes. Place the mouth evenly between the eyes and torso, spanning the width of the head. The line should be slightly curved upwards at each end, giving the frog a friendly expression.
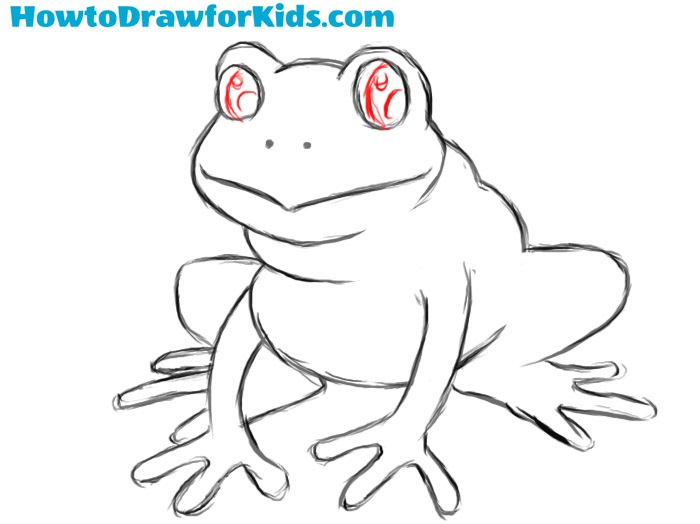
- Detail the pupils.
Inside each eye, draw a smaller circle to represent the pupil, centered within the larger eye outline. Fill in the pupils, ensuring they are uniform and aligned. This step gives the frog a lively, attentive appearance. Optionally, add a tiny white highlight to each pupil, giving the eyes a reflective look.
- Color the your artwork.
Finish the drawing by coloring it in. Use green for the frog’s body, leaving its belly a lighter shade, such as yellow or beige. Ensure to color the arms, legs, and head evenly, maintaining consistent tones. The eyes can be white with black pupils.
How to Draw a Frog: Alternative Methods
How to Draw an Easy Frog
This tutorial is great for beginners or kids as it doesn’t contain any tricky elements to complete. I am sure that by learning how to draw another animal, you can greatly improve your artistic skills.
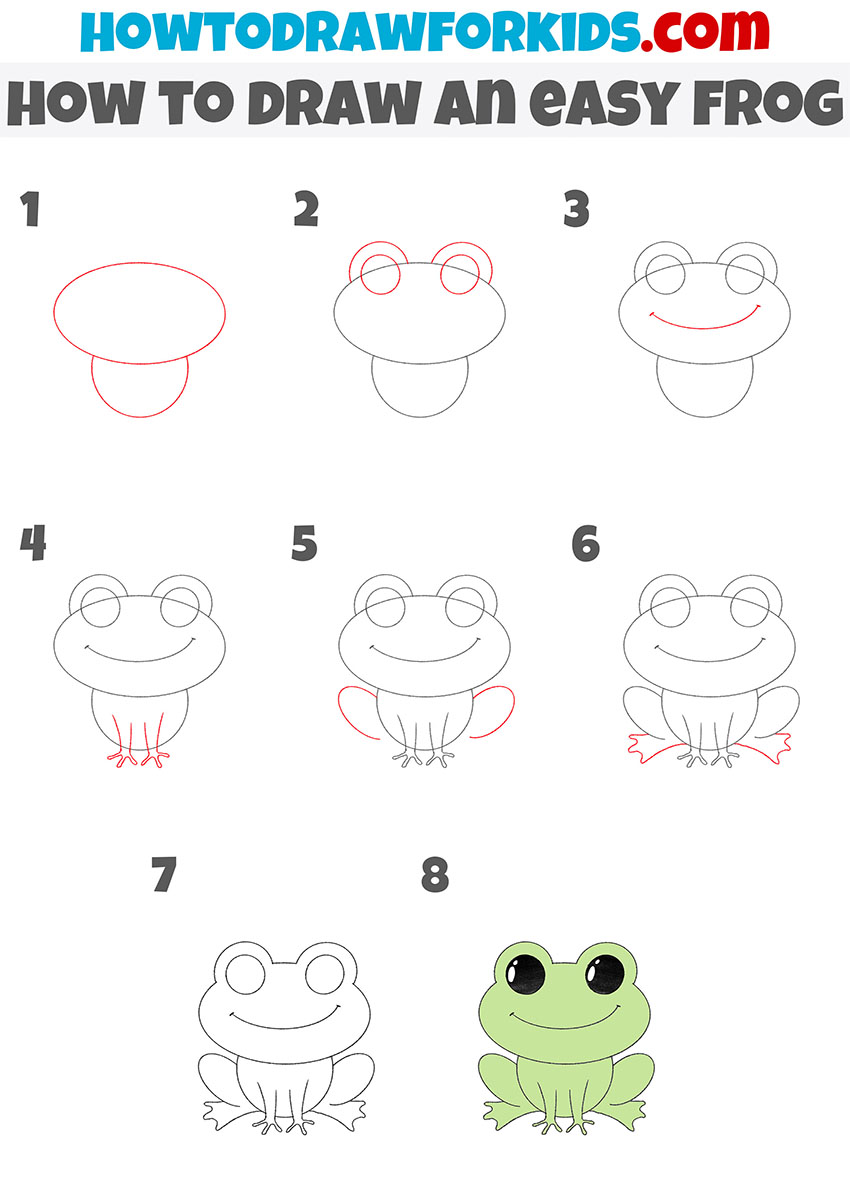
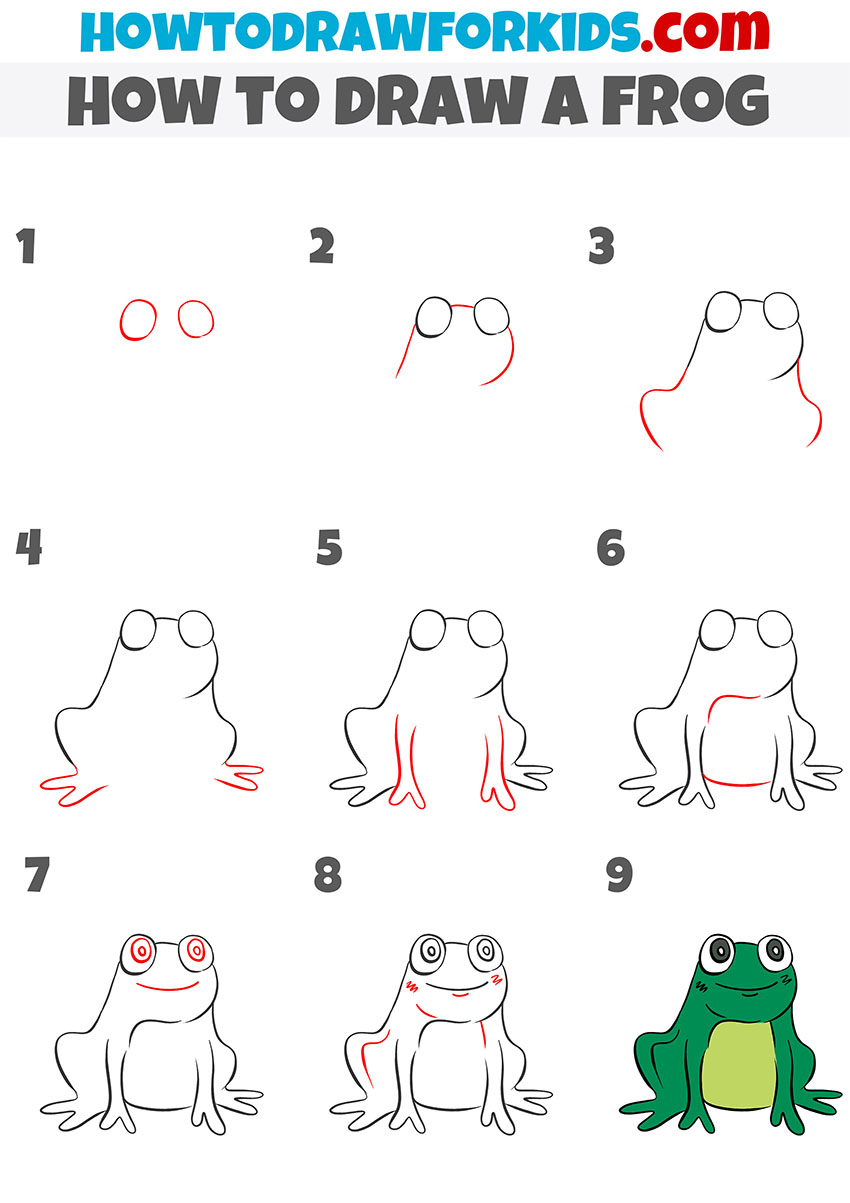
How to Draw a Frog Step by Step
This tutorial has nine easy steps. If you are careful during the lesson, you will get good results. Now take all your drawing supplies and get to work.
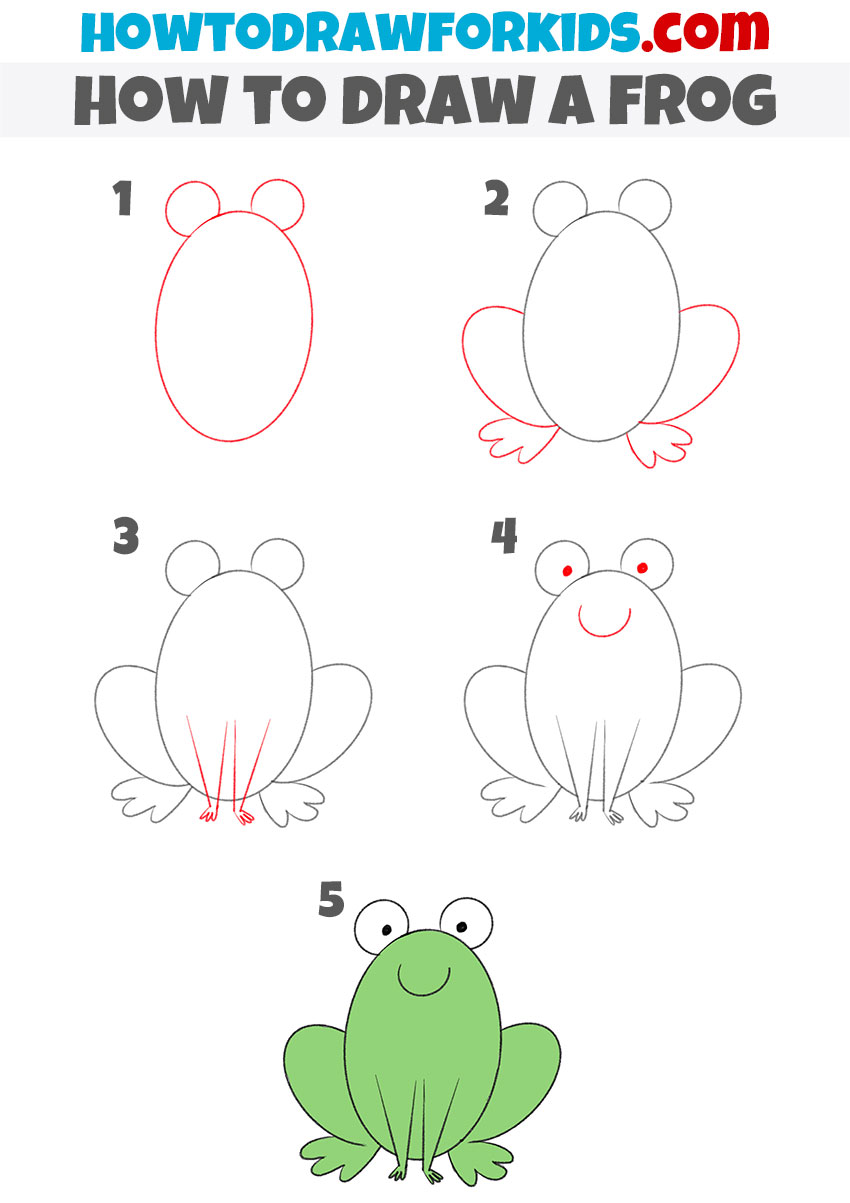
How to Draw a Frog for Kindergarten
I am sure that if you try to follow the order of the steps and check the correct proportions, you will get a really great result. So grab your favorite painting supplies and get ready to go with this simple 4-step tutorial. I think you will get great results!
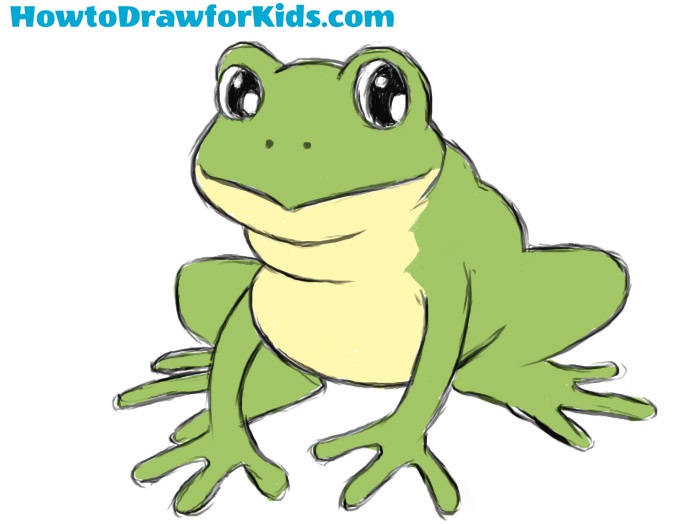
Conclusion
In real life, frogs are not the most beautiful and cute creatures, but in our lesson on how to draw a frog for kids, we were able to portray a very nice and cartoon version of this green creature. If you liked this lesson, then be sure to visit our other animal drawing lessons, you will definitely like them too.