How to Draw a Gas Mask
In this lesson, you’ll practice how to draw a gas mask with two approaches that show the protective device in really simple forms.
How to Draw a Gas Mask: Introduction
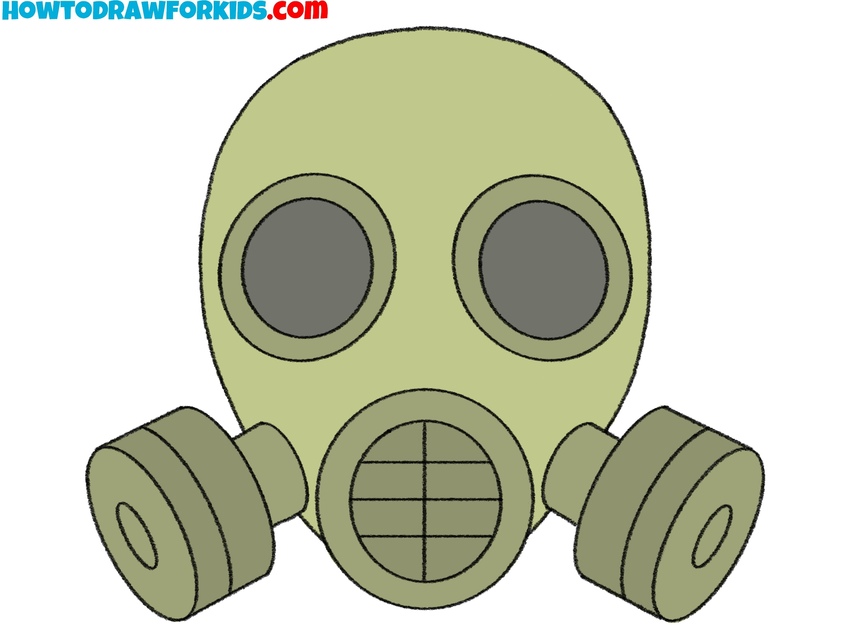
In this tutorial, you will learn how to draw a gas mask. This is personal protective equipment that must be worn over the head. The gas mask protects against poisonous gases and smoke. The design of the gas mask is simple. The main material is elastic rubber. Thanks to this material, the gas mask is comfortable to put on and it adheres well to the surface of the head. The rubber mask has glass eye holes and filter boxes.
There are different types of gas masks that contain one or more filters. In this picture, you see a gas mask that has two filter boxes on the sides and an intercom in the middle. You will now depict all these elements in your drawing. It will not be difficult to do this, since this lesson is very simple and is intended especially for novice artists.
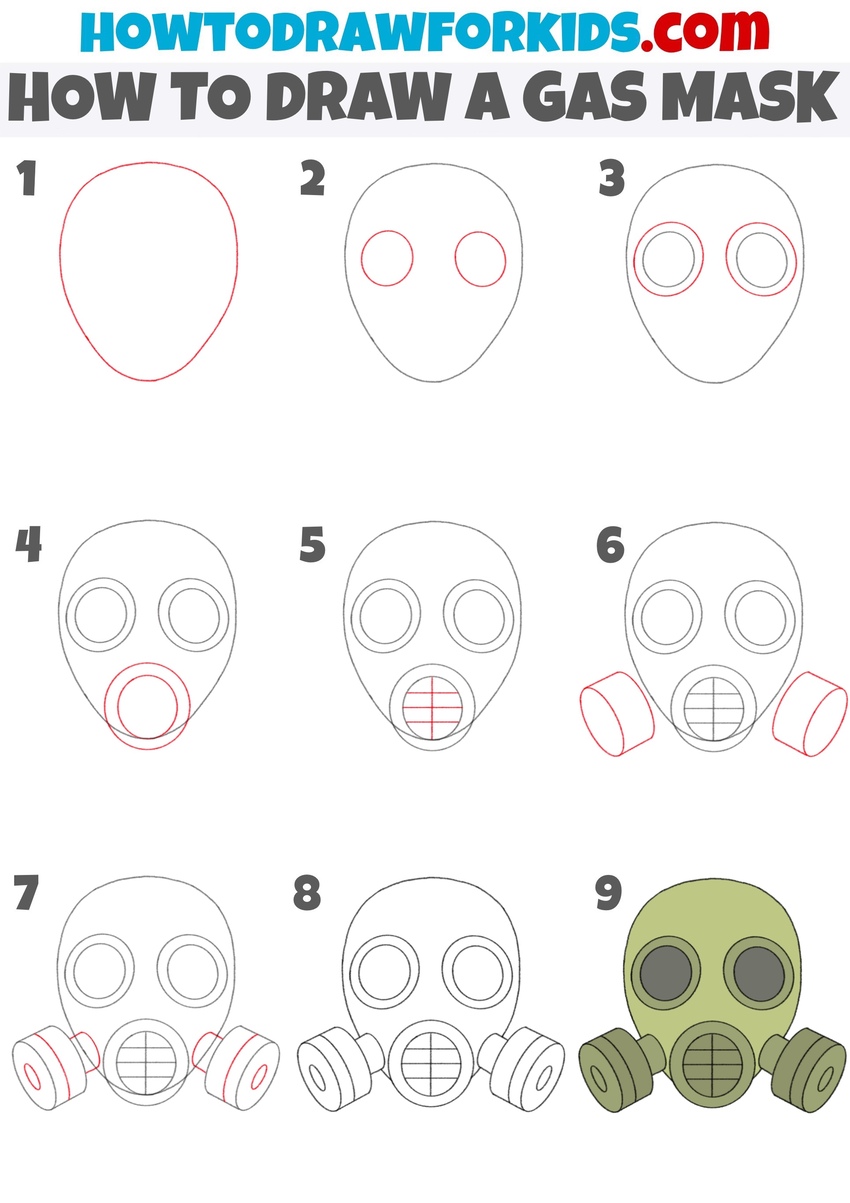
Drawing a gas mask includes nine easy steps. You will need attention, accuracy, and the ability to draw straight lines. It is also necessary to ensure that both sides of the gas mask are symmetrical.
Gas Mask Drawing Tutorial
Materials
- Pencil
- Paper
- Eraser
- Coloring supplies
- Compass (optional)
Time needed: 25 minutes
How to Draw a Gas Mask
- Sketch the main mask outline.
Begin by sketching the main outline of the mask, that should look like an oval or egg shape. Think of it as the form that will cover the entire face. Keep your strokes light and smooth, since many parts of this shape will be erased in the next steps.

- Sketch the eye lenses.
Inside the outline from the previous step, sketch two large circles for the eye lenses. Place them near the upper half of the mask. Both circles should be about the same size and aligned at the same level. If freehand circles are difficult, lightly sketch several overlapping ovals until they form a neat round shape.

- Draw the outer circles around the eyes
Around each circle, draw a second larger circle to form the lens frames. This creates the impression of thick, protective glass. Keep the spacing between the inner and outer circles even. A useful tip is to rotate the paper as you draw the curves, which helps keep your wrist in a natural position and results in cleaner lines.

- Draw the central filter of the gas mask.
At the lower part of the mask, sketch a large circle that will represent the filter area. Place it centrally below the lenses so the mask remains symmetrical. A realistic gas mask drawing should have a large, noticeable filter.

- Sketch the filter grille.
Inside the filter circle, draw straight horizontal and vertical lines crossing each other to form a simple grid. The grid doesn’t need too many lines; a few well-placed ones are enough to make the mask look realistic and the filter feel authentic.

- Draw the gas mask side filters.
On each side of the mask, draw a cylindrical shape attached to the lower portion. These are the side filters that complete the gas mask design. Try to draw them symmetrical in size and placement. To draw these parts of the gas mask correctly, first draw the ovals, then the side edges.

- Sketch the cartridge details.
Continue drawing the gas mask cartridges by adding cylindrical bases, that connect them to the mask itself. Draw additional concentric circles on the outer face of each cartridge. You can also add smooth lines on the side edges to give the drawing a detailed look.

- Refine the main contours.
The main parts are created, and not it’s time to erase overlapping construction marks. Try to keep the structural details that define the design. Pay attention to proportions and correct them if it’s needed. A teacher’s tip is to hold the paper at arm’s length to see if anything looks crooked.

- Add green and gray tones.
Color the main parts of the mask in a green color as shown and use dark gray for the lenses and cartridges. While green is common, you could experiment with other colors like yellow, black, or gray, depending on the style you want.

Easy Gas Mask Drawing Tutorial
In this additional tutorial, you are shown another simple approach to drawing a gas mask, and the style here is based on really simple shapes without too many technical details. Each stage carefully adds one part of the gas mask, such as the lenses, the cartridges, and the central filter, until the drawing is complete.
To create this gas mask drawing, illustrate the upper contour of the mask with a smooth curve, then add the large rounded lenses for the eyes. Draw the lower curve of the mask and attach the cylindrical cartridges on each side. Add the central oval filter in the lower part of the mask, then sketch an inner circle to define the filter opening.
Continue by adding outlines inside the eye lenses to convey glass. Check the overall proportions so the gas mask looks symmetrical. Clean up extra lines and refine the outlines. After that, color the gas mask with green for the main section, blue-gray for the side filters, and a darker shade for the central filter.


