How to Draw a Teacher
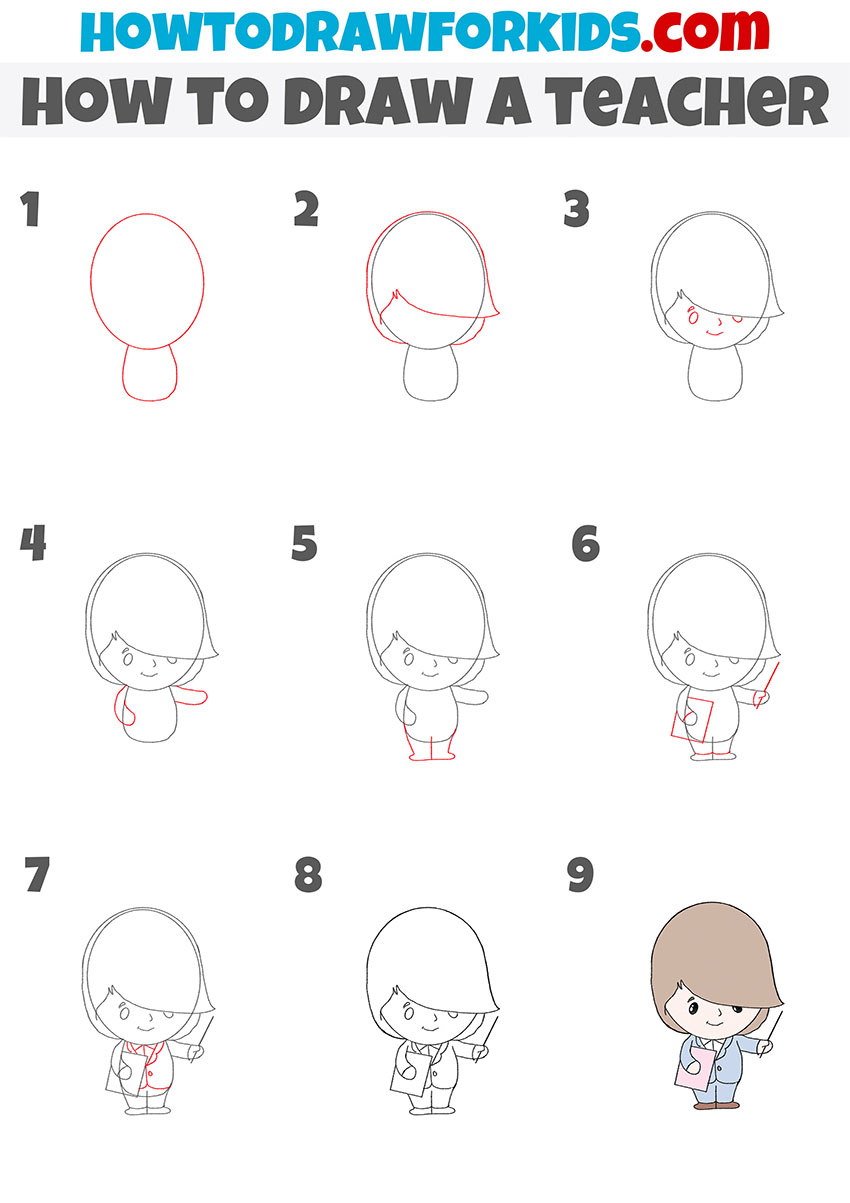
A new lesson is ready for you, in which I will tell you how to draw a teacher step by step. This simple lesson consists of nine steps.

So now you can learn how to draw a teacher. You all know that a teacher is a person who teaches a subject in an educational institution.
The profession of a teacher is considered to be very popular and prestigious. Speaking of a teacher, we always imagine a person who holds a pointer in his hands in order to show something on the board, and who is also constantly working with any papers.
It is such a teacher that you will learn to draw with the help of this step-by-step instruction. Please note that this drawing will be done in a cartoon style, so the size of the head will be larger than the size of the torso. I am sure that this lesson will be useful for you and will not cause difficulties.
Teacher Drawing Tutorial
Materials
- Pencil
- Paper
- Eraser
- Coloring supplies
Time needed: 30 minutes
How to Draw a Teacher
- Draw the head and torso.
To outline the teacher’s head, draw a large oval, and depict his torso below using a curved line.

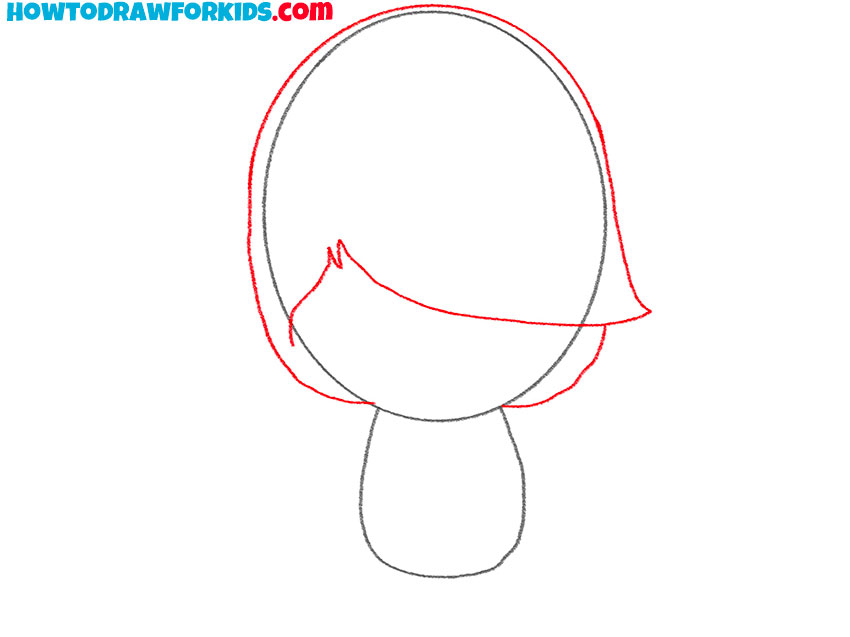
- Depict the teacher’s hair.
To draw the hair, add curved lines in the middle and along the edges of the outline of the head.
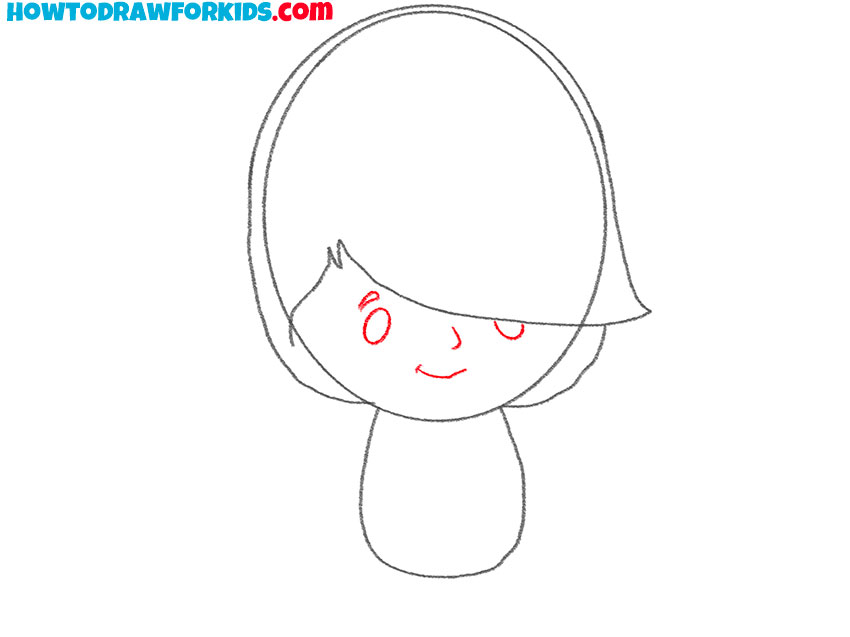
- Add facial features.
Sketch out the eyes, nose, mouth and eyebrow.
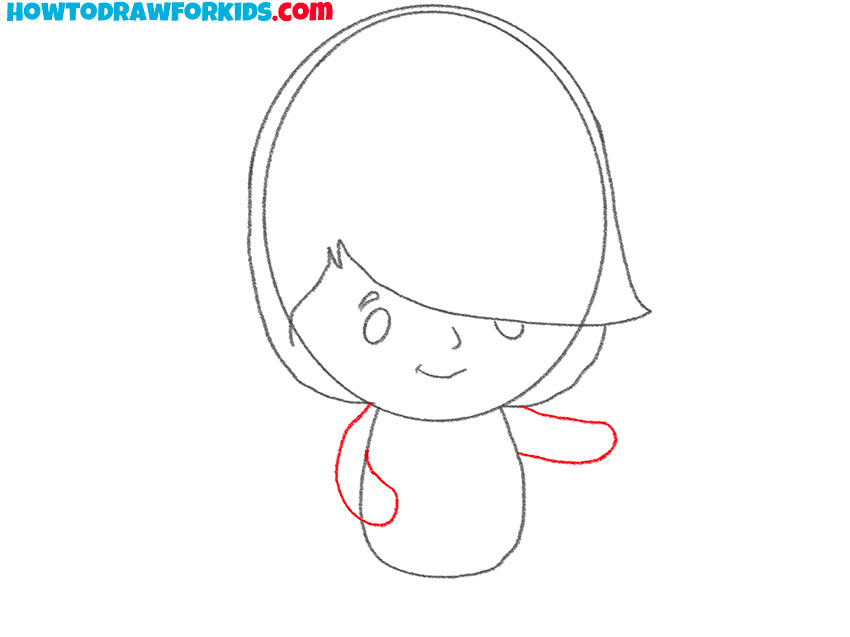
- Depict the teacher’s arms.
One arm of the teacher is lowered down, and the other is set aside.
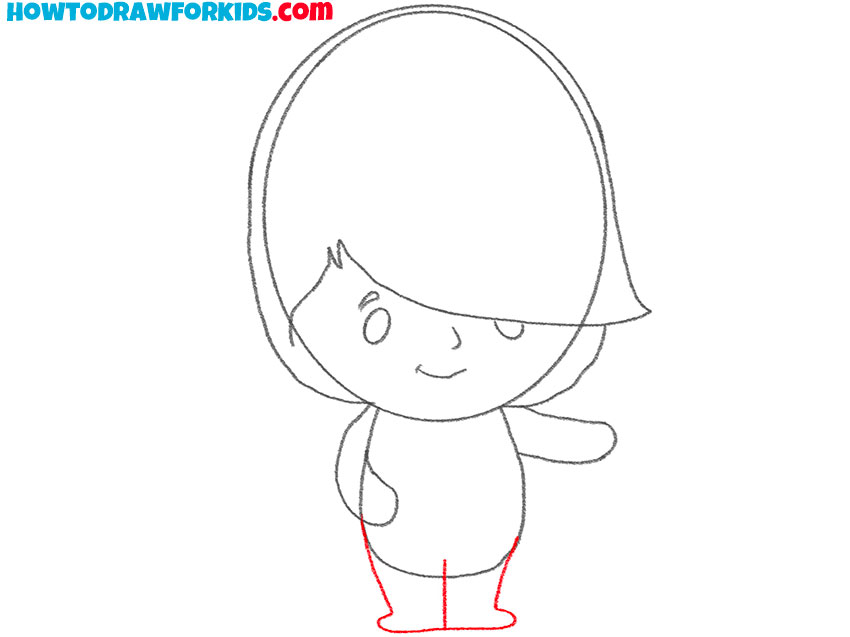
- Sketch out the teacher’s legs.
Draw a straight line at the bottom of the torso, as well as two curved lines on the sides.
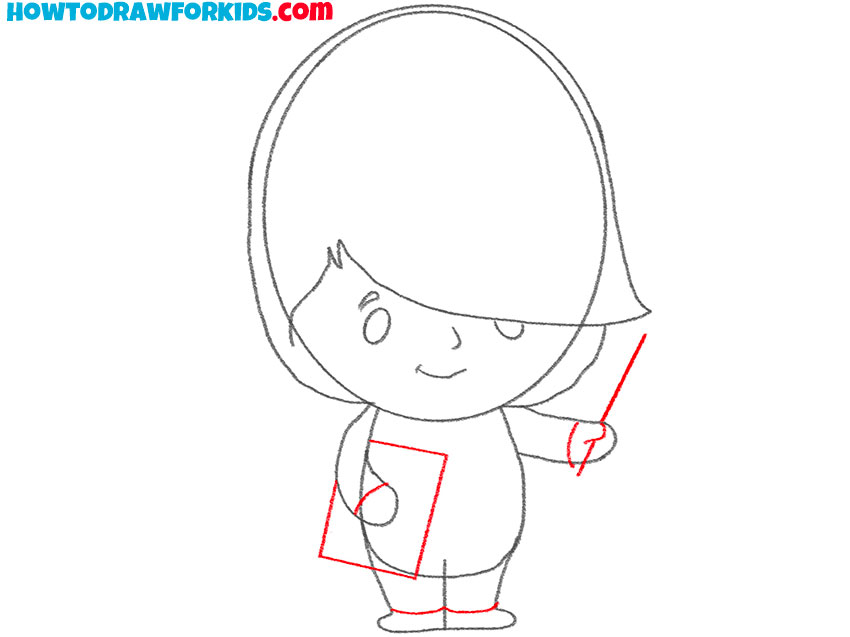
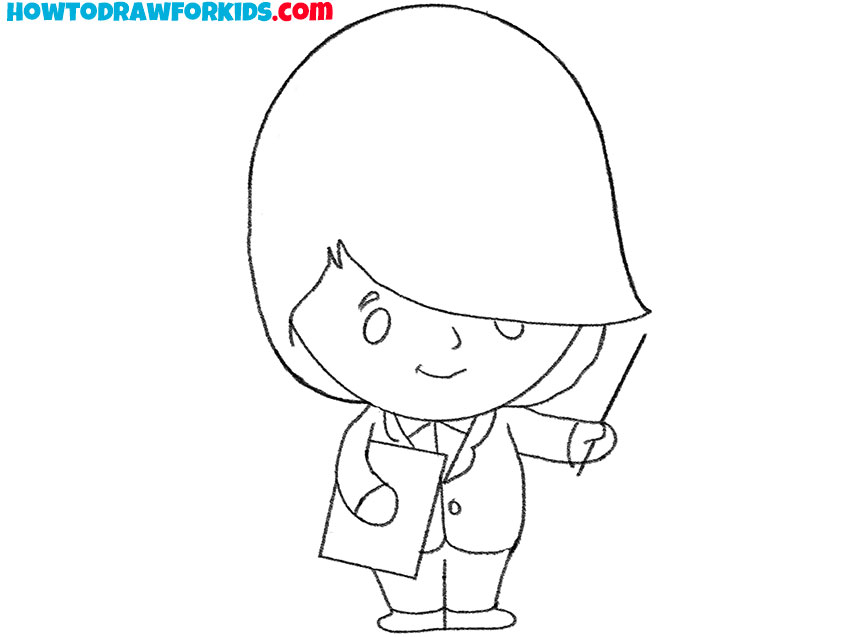
- Draw the pointer, document and other elements.
Use a straight line, the unfinished rectangle, and some arcs.
- Add the elements of the costume.
Draw the outline of the jacket, collar and button using straight and rounded lines.
- Correct inaccuracies.
Use the eraser to remove any unnecessary guidelines.
- Color the drawing.
To color the teacher, choose any colors.
You can also download a PDF file with a short version of this lesson and additional useful materials. This will help you return to this lesson at any time convenient for you.