How to Draw a Sweater
Grab your pencils and prepare for a cozy drawing session, as I walk you through how to draw a sweater that’s as comfy on your page as it is in chilly weather. With my straightforward guide, you’ll craft a garment that looks soft to the touch, complete with cuffs and a collar that beg to be worn.

How to Draw a Sweater: Basic Information
Cozy up, dear readers, because I’m going to show you how to draw a sweater that’s as snug and comfortable on paper as it is in real life. This lesson breaks down the cozy complexities of a sweater into simple, doable parts. You’ll learn to translate the warmth of a sweater onto your sketchpad with easy, flowing lines.
This isn’t just a tutorial; it’s a way to weave your artistic yarns into a tapestry of comfort. The sweater we’ll draw together has a gentle round neck, relaxed sleeves, and a snug waistband – features that make a sweater a cherished wardrobe staple. My technique is about capturing that comfort and turning it into a drawing that almost wraps around you.
By the time you put the finishing touches on your sweater drawing, you might just want to sketch an entire wardrobe. Whether it’s for a holiday card or a fashion design dream, learning to draw a sweater is just the start. Let’s wrap up in the warmth of creativity and see where our pencils take us next.
Sweater Drawing Tutorial
Materials
- Pencil
- Paper
- Eraser
- Coloring supplies
Time needed: 25 minutes
How to Draw a Sweater
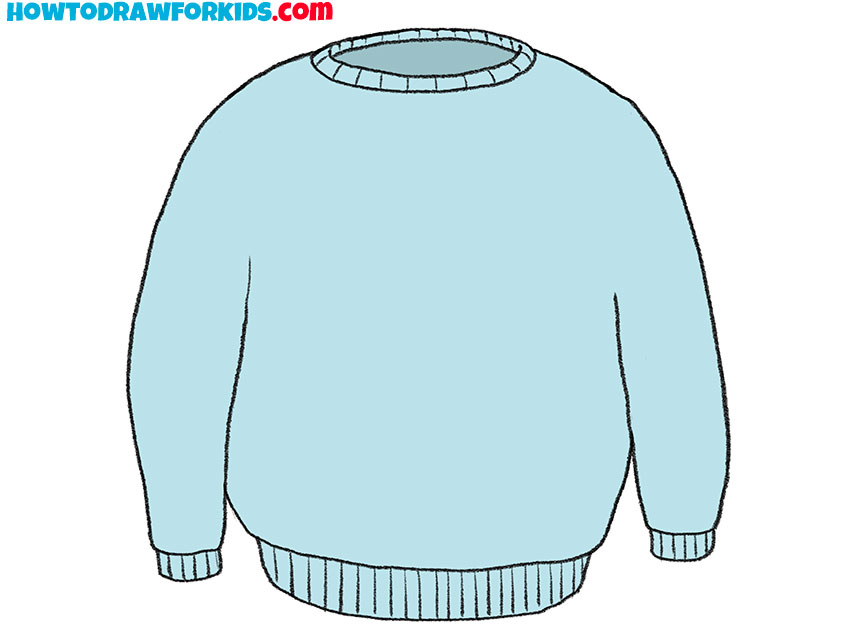
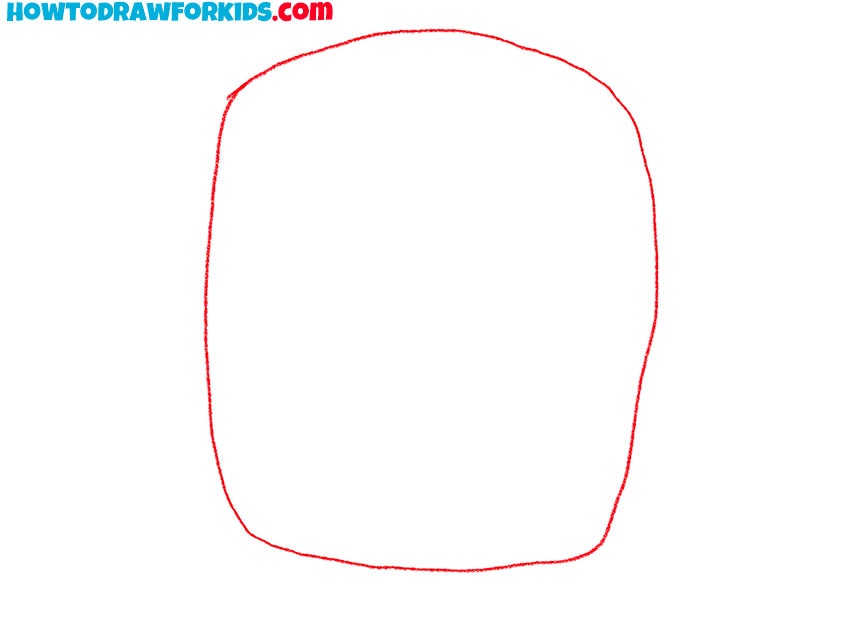
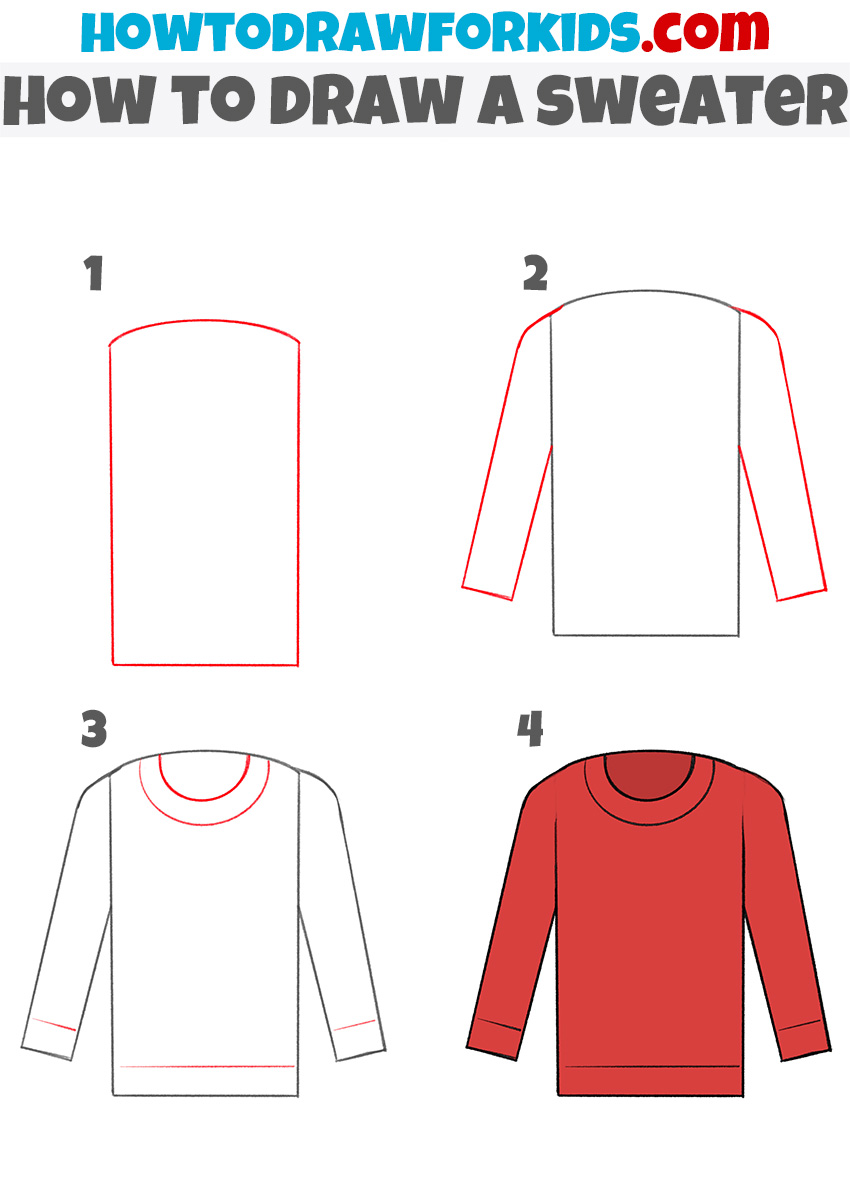
- Draw the outline of the main part of the sweater.
Sketch out this element as an arbitrary shape using a long, curved line.
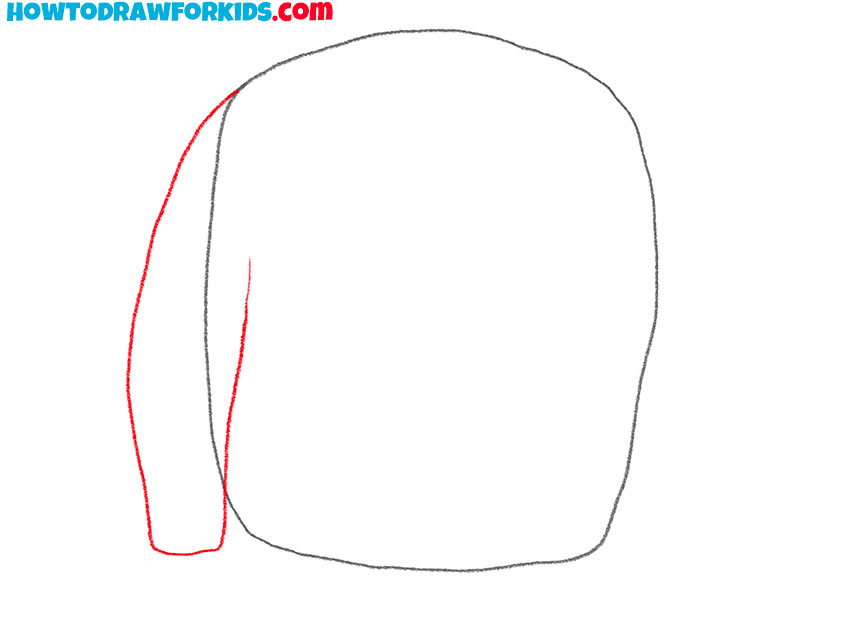
- Add one sleeve.
On the left side of the previously drawn shape, draw a long sleeve using a curved line.
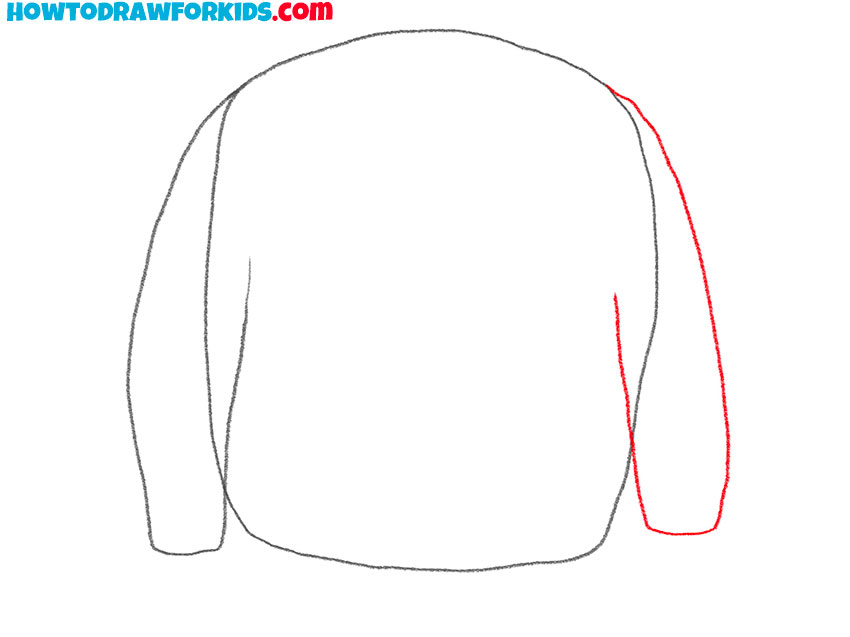
- Depict another sleeve.
On the right side of the body of the sweater, add another sleeve.
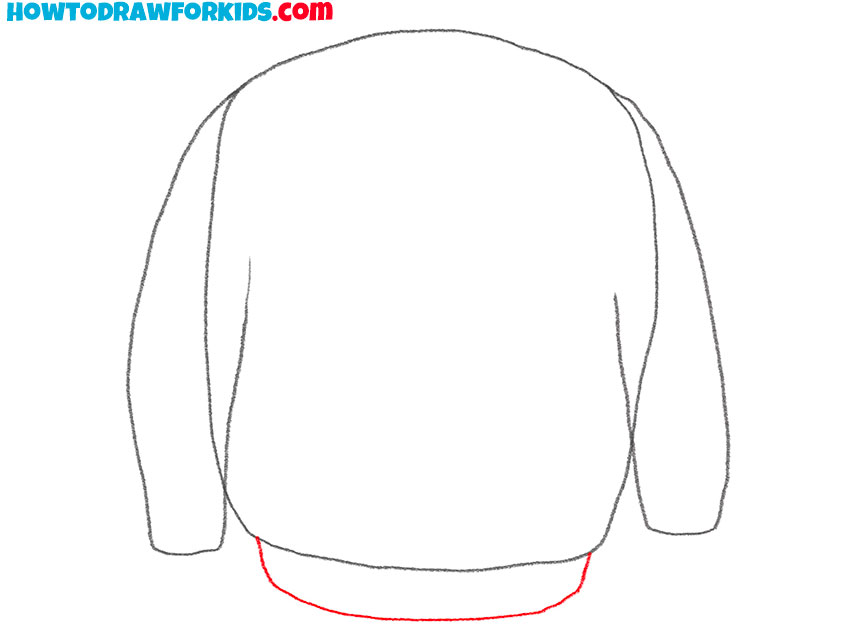
- Draw the bottom of the sweater.
Under the previously drawn main part of the sweater, add a curved line.
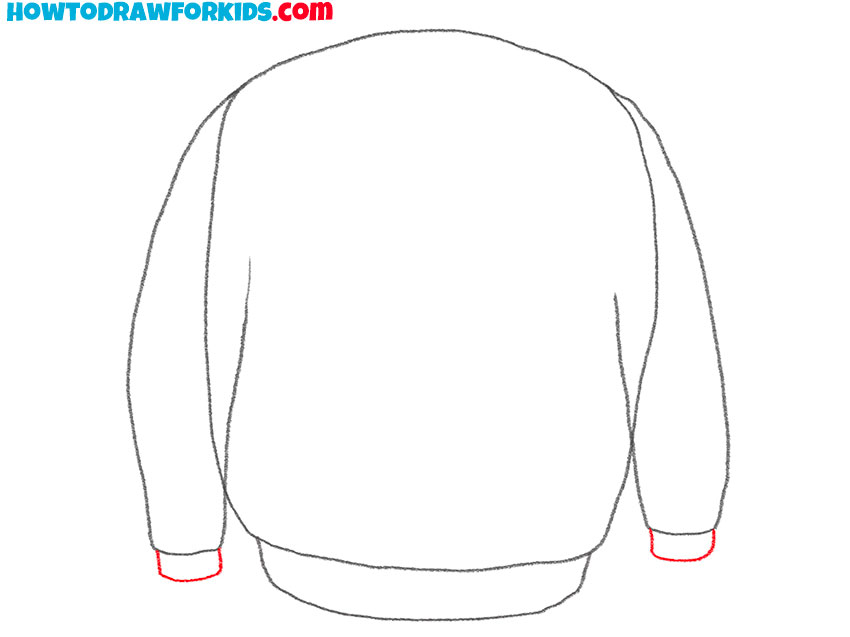
- Sketch out the cuffs on the sleeves.
Depict symmetrical curved lines below each drawn sleeve.
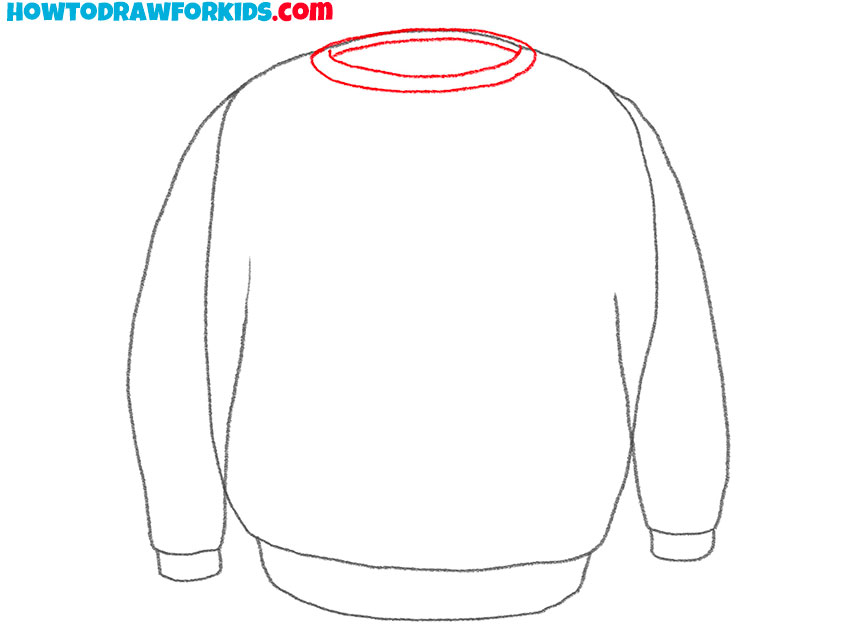
- Add the neck of the sweater.
At the top of the body of the sweater, add the outer and inner neckline using rounded lines.
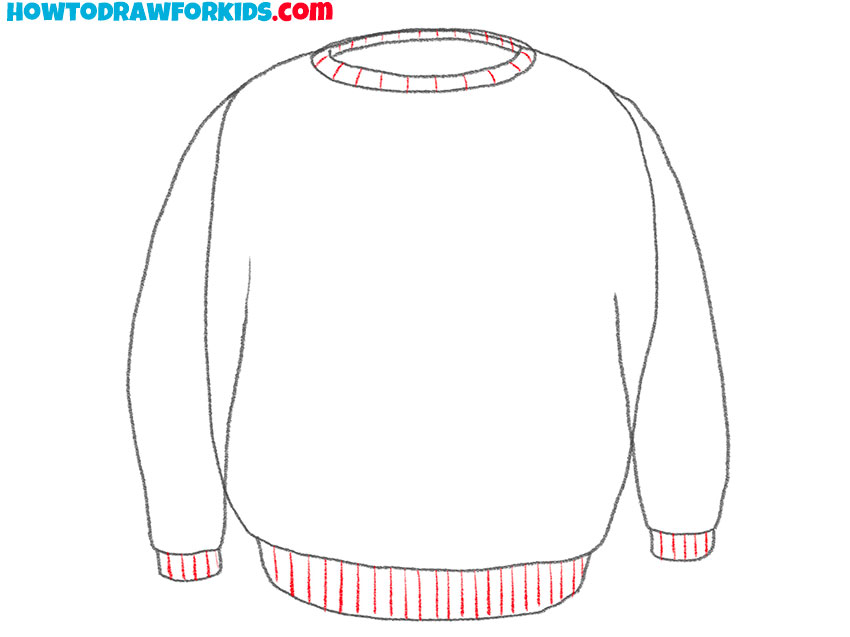
- Add details.
On the neck, cuffs and bottom of the sweater, add many straight lines.
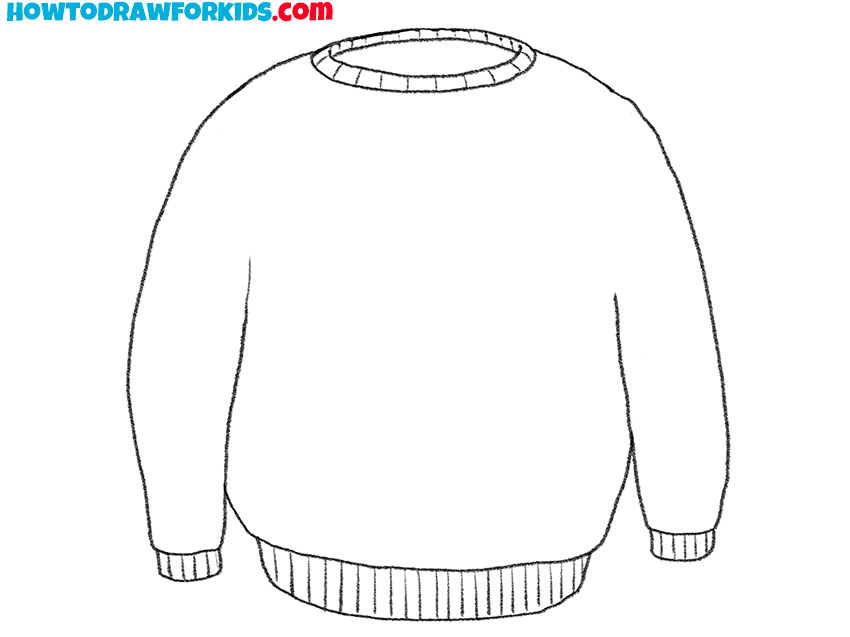
- Correct inaccuracies.
Use the eraser to remove unnecessary guidelines.
- Color the drawing.
To color this sweater, you need to use two shades of blue.
Additional Content
To complement the cozy sketching experience, I’ve put together a free PDF file for this sweater drawing lesson. It’s compact, allowing you to take your drawing exploration on the go, so you can practice in the park, on a bus, or snuggled up at home. This file is handy for those moments when the internet is just a distant dream.
Inside the PDF, you won’t find step-by-step instructions; instead, it’s packed with additional material aimed at deepening your drawing abilities. After you’ve wrapped up the basics from the main lesson, this PDF serves as your next stepping stone, offering exercises to refine those comforting sweater lines and shapes.
Think of this PDF as an extra layer of learning, much like a sweater itself, offering warmth and support to your artistic journey. Download it, and let it be a silent mentor, guiding your hand towards more nuanced sketches and richer details, long after the main lesson has ended.
Alternative Drawing Technique
In addition to our snug sweater sketching session, I’ve designed an even more simplified drawing technique for a sweater. This alternative approach peels back the layers to the absolute basics, making it wonderfully suitable for beginners or anyone looking to brush up on their fundamental skills. It’s drawing made effortless, focusing on the pure joy of creation.
This new method is all about streamlined shapes, eliminating any complex shadows or textures, so that your hands and mind can enjoy the comfort of drawing without the bulk of detail. The lines are clean and clear, guiding you to create a sweater that’s simple yet recognizable. It’s perfect for quick sketches that still capture the essence of coziness.
Embrace this minimalist style as an exercise in artistic clarity, perfect for honing your ability to capture the essence of an object with just a few strokes. This technique isn’t just about making it easier to draw a sweater; it’s about sharpening your observation skills, teaching you to see and replicate the most fundamental forms of any subject.
How to Draw a Sweater for Kindergarten
Okay, little artists, let’s draw a super simple sweater that’s cozy and cute, in just four easy steps! First, we start with a big, tall rectangle – like a building block standing up. This is the body of our sweater, where all the warmth is kept in.
Next, we add two smaller rectangles on each side for the sleeves – like the wings of our sweater building block. These are the sleeves, and we want to make sure they’re long enough to keep our hands warm. Just like sleeves on a real sweater, they should be symmetrical, reaching out equally from the sweater’s body.
For the third step, we sketch two lines, one at the bottom of our sweater and one at the end of each sleeve for the cuffs where our hands pop out. Then, we make a circle at the top for the neck – imagine it’s a cozy loop to keep your neck warm. And that’s it! In four steps, we’ve made a sweater! Now, grab your favorite crayons and color it in any shade you love!
The Secrets to Sweater Drawing Success
As we put our pencils down and admire our newly drawn sweaters, it’s the perfect moment to share some pointers that can take your artistic skills from good to great. Remember, every artist starts with simple shapes, and it’s the fine-tuning that brings the magic.
- Practice Proportion: Pay attention to the size of each part of your sweater. The sleeves should match the length of the sweater’s body for a balanced look.
- Smooth Lines: Keep your hand steady for those straight edges. Try drawing with your arm instead of just your wrist for smoother lines.
- Consistent Cuffs: When drawing the cuffs, ensure they’re the same thickness. You might use a ruler to help with straight lines and a coin for perfect curves.
- Calm Coloring: Take your time filling in colors. Going slowly helps to stay within the lines and creates an even, vibrant finish.
- Texturing Techniques: Experiment with different pencil strokes to add texture to your sweater. Horizontal lines can create a knitted effect.
- Shading for Depth: Practice light shading around the edges and under the sleeves to give your sweater depth and volume.
- Layering Details: Once comfortable with the basic shape, try adding a pattern or a design on the sweater for a personal touch.
- Observational Skills: Look at real sweaters and notice where folds and shadows are. Try adding these to your drawings for realism.
In closing, these tips are your toolkit for progress, your companions along the path to becoming a more skilled artist. Use them wisely and watch as your drawings become more detailed, more realistic, and more expressive. The road to mastery is long, but every tip and trick you employ opens a new door to possibilities.
Conclusion
Wrapping up our cozy sweater sketch, why stop there when there’s a whole world to draw? On my site, you’ll find an ocean of lessons, like how to draw a mermaid’s tail that swishes and sways, or the relaxed posture of a seated person. Each tutorial is your gateway to a new skill, a fresh way to see the world through art.
Keep your pencils sharp and your notifications on by following me on social media. You won’t miss a single splash of creativity with our upcoming lessons. And your thoughts? They matter. Slide your suggestions and wishes into the comments section under this lesson – it’s the canvas where ideas for our next artistic adventure await.