How to Draw a Hammer
In the theater of art, even a hammer becomes a protagonist, and I’m here to direct you on how to draw a hammer, spotlighting its form and function. Our script is simple, yet the performance – capturing the hammer’s essence – will be nothing short of captivating.

How to Draw a Hammer: Basic Information
In this artist’s studio, we transform the ordinary into the extraordinary, and today, I’ll reveal how to draw a hammer with strokes that sing of simplicity and strength. This lesson peels back the tool’s rugged exterior, presenting its true form through easy, approachable steps that even a novice can grasp.
With each stroke, we’ll explore the hammer’s unique form, blending functionality with aesthetic. Pay close attention to the head’s shape, capturing the weight and curves that give the hammer its powerful silhouette. This method simplifies the process, yet the result will carry the true spirit of this indispensable tool.
By the time we put down our pencils, you’ll not just draw a hammer – you’ll craft it with your own hands on paper. This skill will serve you well, as you’ll learn how each shadow and line contributes to the overall depth, making your drawing stand out with a life-like quality.
Hammer Drawing Tutorial
Materials
- Pencil
- Paper
- Eraser
- Coloring supplies
Time needed: 30 minutes
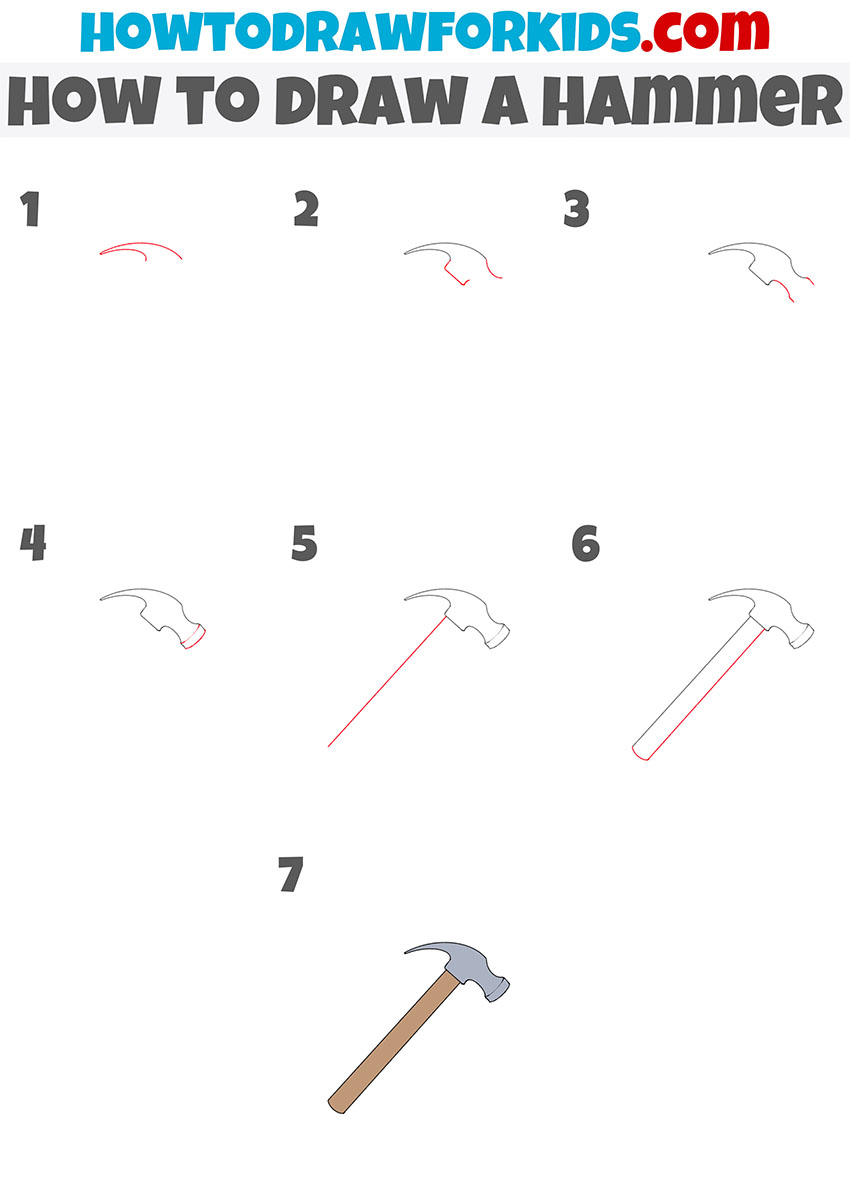
How to Draw a Hammer
- Draw the pointed edge.
Depict the sharp part of the hammer, which is used to break objects.

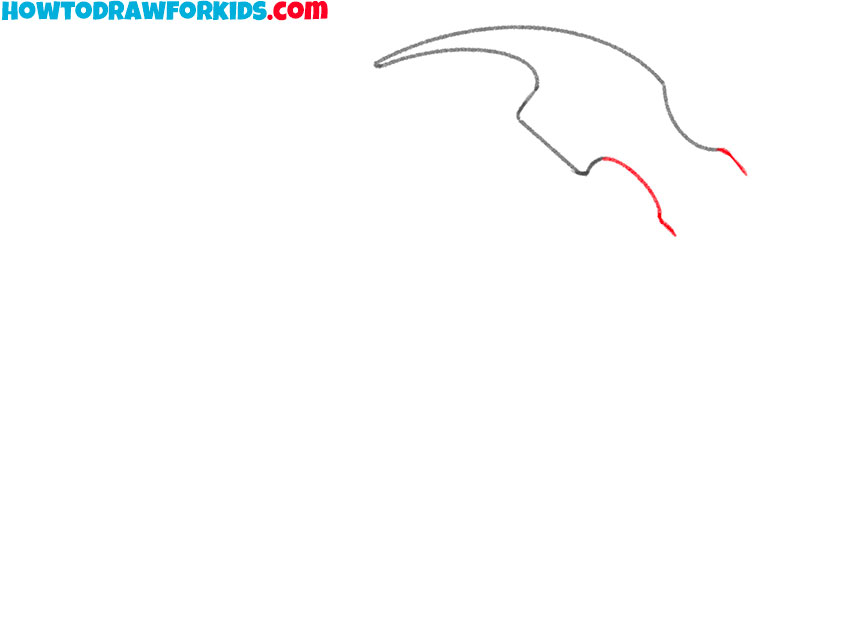
- Add the middle part of the hammer.
Sketch out the main part of the hammer with curved lines.

- Add the other end of the hammer.
Continue the lines and draw the part of the hammer that is used to drive nails.
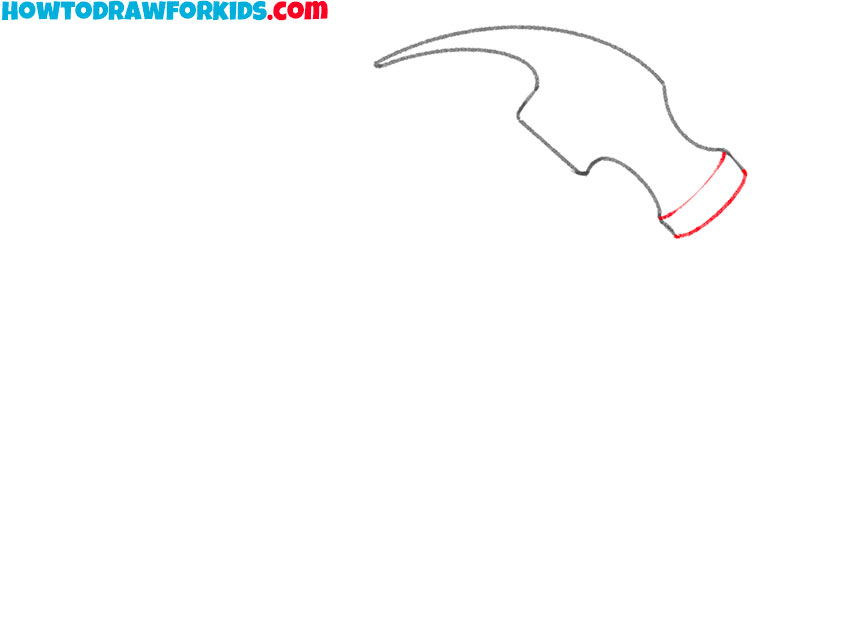
- Draw the impact part of the hammer.
Depict two parallel lines to draw the impact part of the hammer.
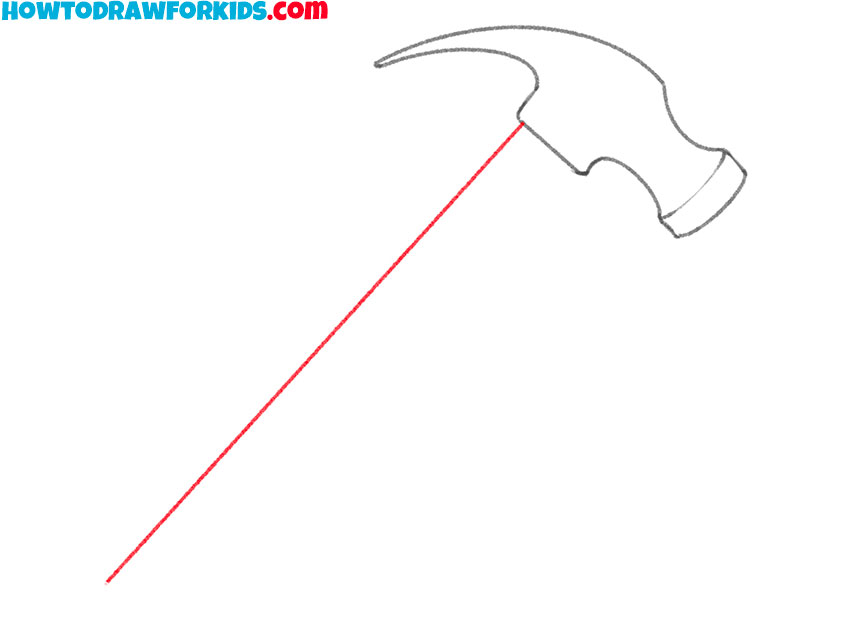
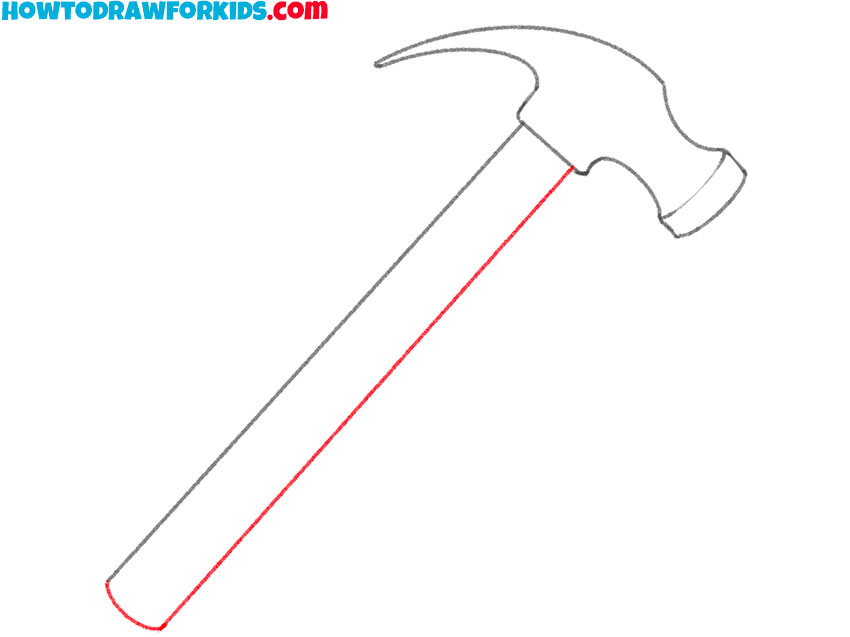
- Start drawing the handle.
At this stage, sketch out a straight line.
- Add the rest of the handle.
Draw one long line and depict the end of the handle with a short line.
- Color the hammer.
You will need gray and brown.
Additional Content
In the quiet moments after our lesson, when the echo of graphite against paper still lingers, I offer you a companion for your journey: a free, downloadable PDF. This is not merely a recapitulation of our session but a treasure trove of exercises, ready to be your silent tutor, guiding your practice into the future.
This PDF is a lantern in the artist’s night, filled with challenges and practices that beckon your skills to rise like stars after dusk. Once the fundamental teachings of drawing a hammer are etched into your mind, these exercises will be there to ensure your progress never dims.
Let this collection of exercises be the wind that propels your artistic sails once the initial waves of learning settle. It’s designed to be a steadfast ally, one that stands by you as you navigate the vast seas of creative potential, ensuring that your journey is ever-moving, ever-improving.
Alternative Drawing Technique
To expand the horizons of our artistic endeavors, I’ve also developed a new, simplified method for drawing a hammer. This alternative approach strips down the complexity, focusing on the core elements that make a hammer recognizable yet easy to sketch. It’s designed for those who seek to refine their skills with a more forgiving technique.
This streamlined method emphasizes bold, basic shapes and minimizes intricate details, which is perfect for beginners or for those looking to practice without the pressure of perfection. The goal is to build confidence through repetition, allowing your hand and eye to become more attuned to the basic form of the hammer.
As you practice this new technique, you’ll find your strokes becoming more assured and your understanding of proportions more intuitive. This method isn’t just about drawing; it’s about building a solid foundation in your artistic skills that will serve as a springboard for more complex projects in the future.
Really Simple Hammer Drawing for Kindergarten
In this simplified three-step approach to drawing a hammer, crafted especially for the imaginative minds in kindergarten, we start with the basics: a vertical rectangle. This forms the sturdy head of the hammer, a shape familiar and simple for tiny hands to replicate.
Next, we draw a long horizontal rectangle protruding from the center of the hammer’s head to represent the handle. This step is crucial as it introduces children to the concept of combining shapes to create a complete image, all while maintaining the simplicity needed for their skill level.
Lastly, we color our shapes, bringing the hammer to life with earthy browns for the handle and a steely blue for the head. This not only adds a splash of fun but also aids in their understanding of how colors can illustrate different materials. This method makes drawing accessible and enjoyable.

Unveiling the Learning Layers in Hammer Drawing
Here is a closer look at the elements that have subtly shaped their understanding and skills. Let’s peel back the layers of this simple hammer drawing to appreciate the foundational elements it has helped to strengthen.
- Introduction to Geometry: Using rectangles to form the hammer’s head and handle, children learn to identify and draw basic geometric shapes, an essential skill in art and mathematics.
- Concept of Proportion: By aligning the handle with the hammer’s head, young artists begin to grasp the concept of proportion, laying the groundwork for more advanced drawings.
- Color Theory Basics: Choosing colors to reflect the hammer’s materials introduces the basics of color theory and its application in art.
- Focus on Composition: Understanding how the parts of the hammer work together teaches composition, an important aspect of visual storytelling.
- Creative Decision-Making: Allowing children to choose whether to add additional details like wood grain or metal sheen encourages independent creative decision-making.
- Artistic Vocabulary: Discussing elements like ‘head’, ‘handle’, and ‘texture’ expands the children’s artistic vocabulary.
As we step back and survey the colorful array of hammers on display, we realize that our young artists have not only learned to draw a simple tool but have also practiced a suite of skills that are integral to art. From geometry and proportion to color and composition, they have laid the groundwork for a lifetime of artistic adventure.
Addressing Your Hammer Drawing FAQs
At the close of our drawing session, curiosity often blooms as brightly as pride in our young artists’ achievements. Questions bubble up, eager for answers, enriching the minds that yearn to learn more. Here we gather and address those queries that might arise from the hammer drawing lesson.
In the spirit of fostering an environment where inquiry is as celebrated as the art of drawing itself, we present a compilation of questions frequently asked by our enthusiastic learners. Each one reflects a step in the educational journey, seeking to clarify, enlighten, and encourage exploration.
- Why do we start with a rectangle for the hammer’s head? Beginning with a rectangle helps us understand the hammer’s basic shape and sets a strong foundation for adding details later on.
- How can we make the handle look like wood? To create a wood-like texture, try adding parallel lines along the length of the handle with light and dark shades of brown.
- What colors should we use for the hammer, and why? The head is often metal, so shades of gray or blue can represent steel; brown tones work well for a wooden handle.
- Is it important to draw the hammer to scale? While proportion is important, the focus for beginners is on capturing the basic shape and feeling of the hammer rather than precise scaling.
- How can we show that the hammer is three-dimensional? Slight shading on one side of the hammer’s head and handle can give the illusion of depth and dimension.
- Can we add a background? Yes, a background can add context to your hammer, like placing it on a workbench or against a wall.
- What if my hammer doesn’t look like the one in the tutorial? Everyone’s drawing will look a bit different, and that’s perfectly okay—it’s a reflection of your unique style.
These questions are the seeds from which deeper understanding grows. They extend the lesson beyond the act of drawing, into the realms of critical thinking and personal expression. Each answer not only enlightens but also empowers our young learners to take their newfound skills and curiosity into every corner of their creative lives.
Conclusion
With the final stroke of our tutorial, the humble hammer now rests vividly on your canvas, but let’s not let our creative tools cool just yet. Venture over to my website, where you can dive deep into drawing a fearsome shark or trace the delicate curves of a celestial star. Each tutorial opens a new door to artistic exploration.
Keep the sparks of creativity flying by joining us on social media, where the latest updates and upcoming projects always shine bright. If you have ideas or requests for future lessons, your comments below are the guiding stars that shape our next creative adventure. Together, let’s chart the course to new artistic territories.