How to Draw a Handshake
Continuing the topic of drawing human hands, I’d like to show you how to draw a handshake using a few simple curved and straight lines.

So, with the help of this guide, you will learn how to illustrate a handshake with a very basic step by step method.
A handshake means greeting and gratitude, sometimes it means making a deal or other agreement among people.
Very often the handshake is depicted on various emblems and logos. In such cases, a handshake symbolizes peace and solidarity. Surely you have seen this symbol many times.
You can easily draw a handshake if you follow all drawing steps carefully. To depict a handshake, you need to draw the hands partially overlapping each other, and in the steps below you will see this in detail.
So, prepare all the necessary materials and start drawing the handshake step by step. Enjoy the sketching process!
Materials
- Pencil
- Paper
- Eraser
- Coloring supplies
Time needed: 20 minutes
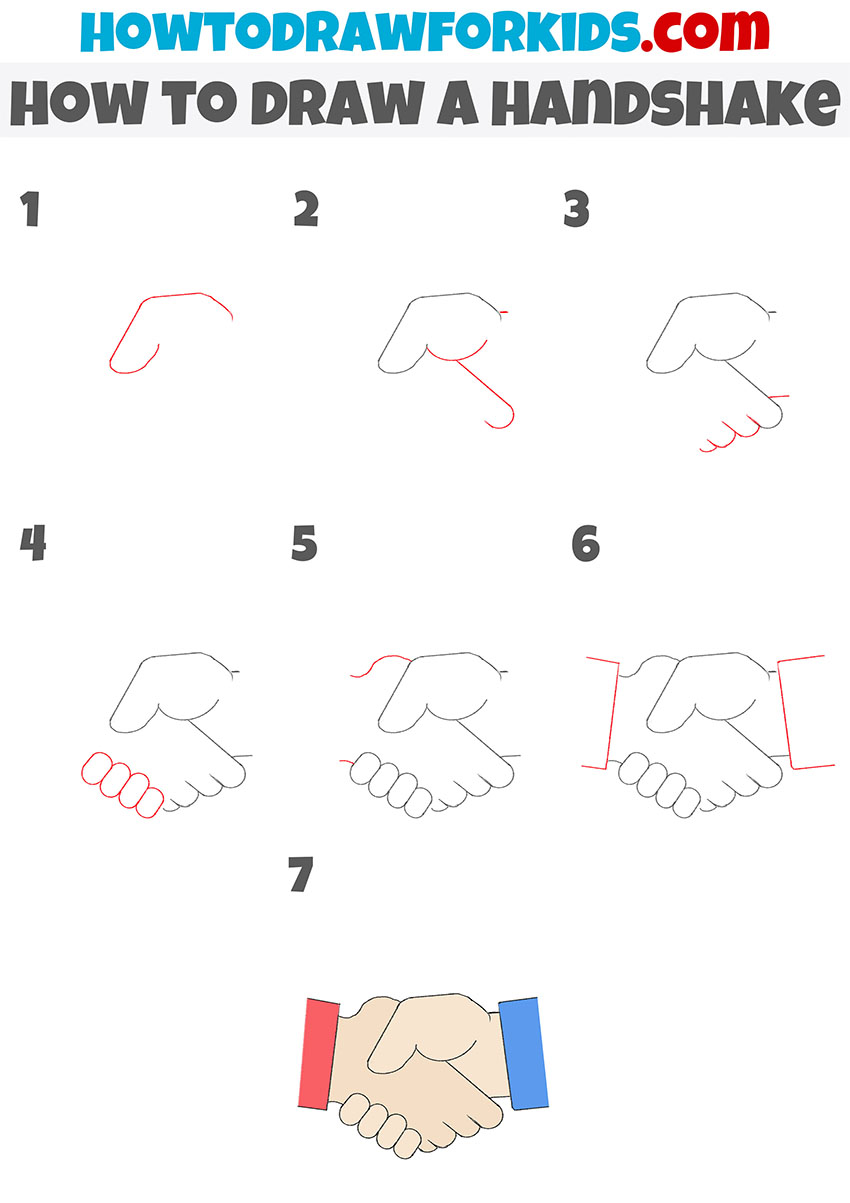
How to draw a handshake step by step
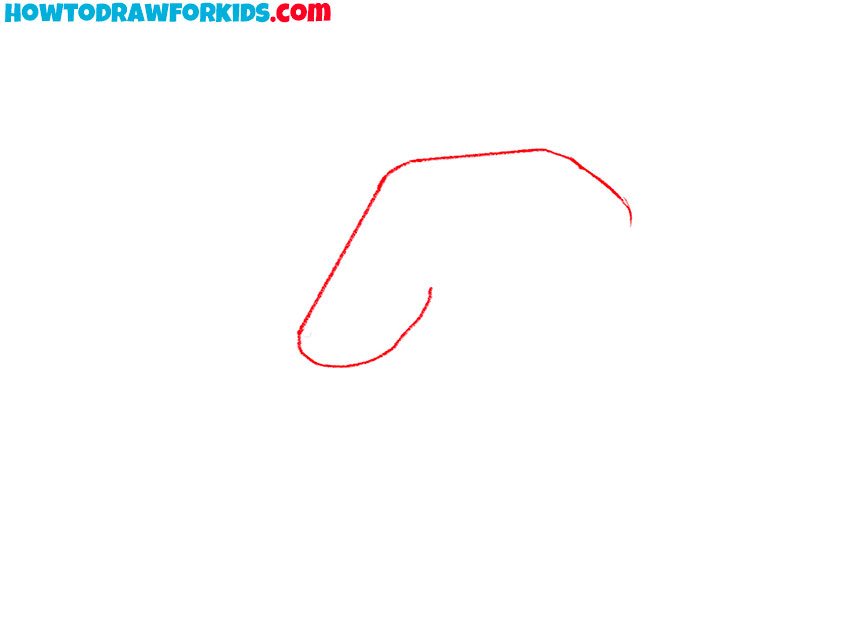
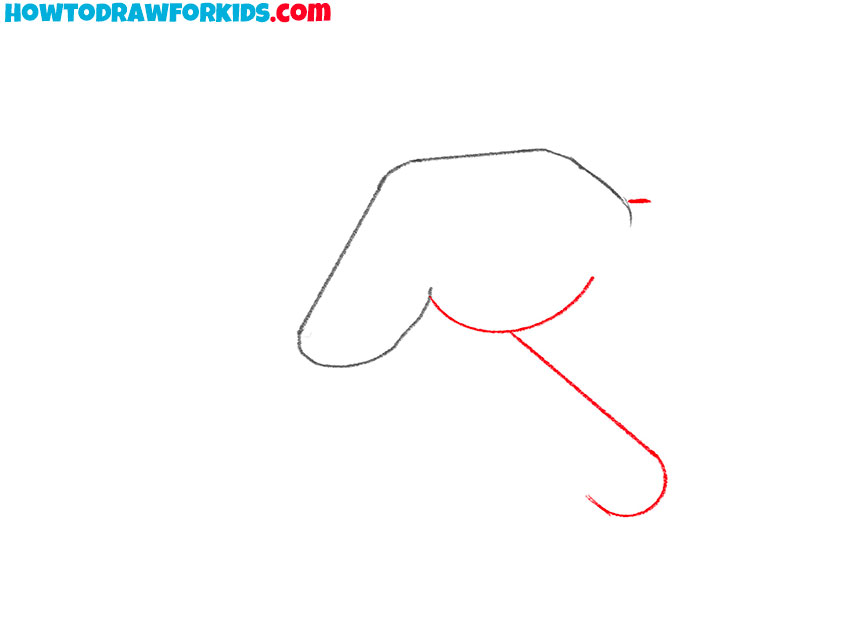
- Sketch the thumb of the right hand.
The hands are drawn as a series of simple lines, neatly overlapping each other, so let’s start with the one on the right. First, sketch out the thumb, starting with the thick base closest to the palm, then drawing the outermost phalanx.
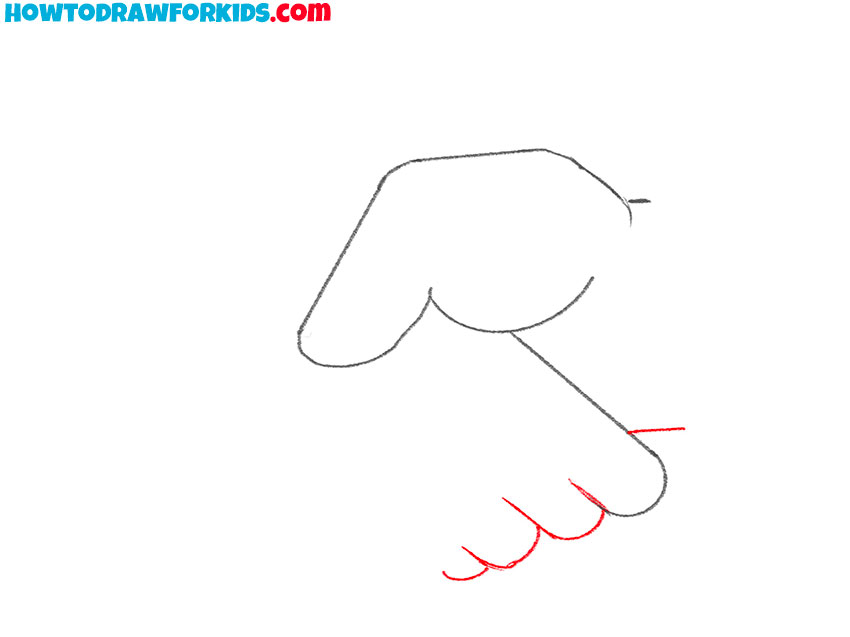
- Draw the index finger of the left hand.
First, outline the bottom of the right thumb with a long, curved line. Then, use a small dash to mark the top of the wrist. Next, use several short and smooth lines to outline the index finger of the right hand.
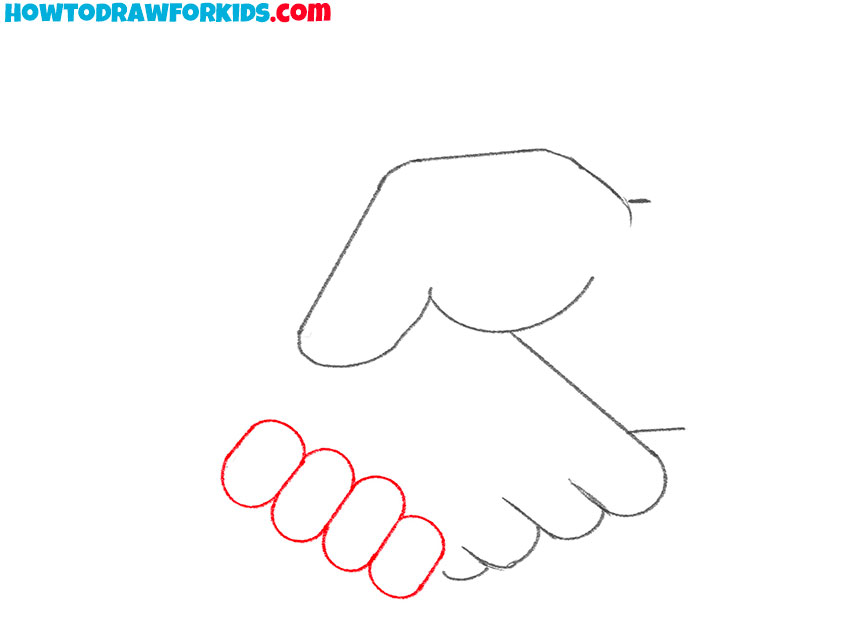
- Complete the fingers of the left hand.
The handshake needs stacked finger shapes to show grasp. Beneath the index finger, draw the overlapping and rounded finger segments of the left hand. Then, extend a short straight line to the right to hint at the bottom edge of the opposite wrist.
- Draw the fingers of the right hand.
Now repeat the same actions to outline the fingers of the right hand that grasp the left hand on the other side. To do this, create four ovals, tightly pressed together and varying in size depending on the finger. To make the handshake drawing more three-dimensional, you can draw nails to the fingers.
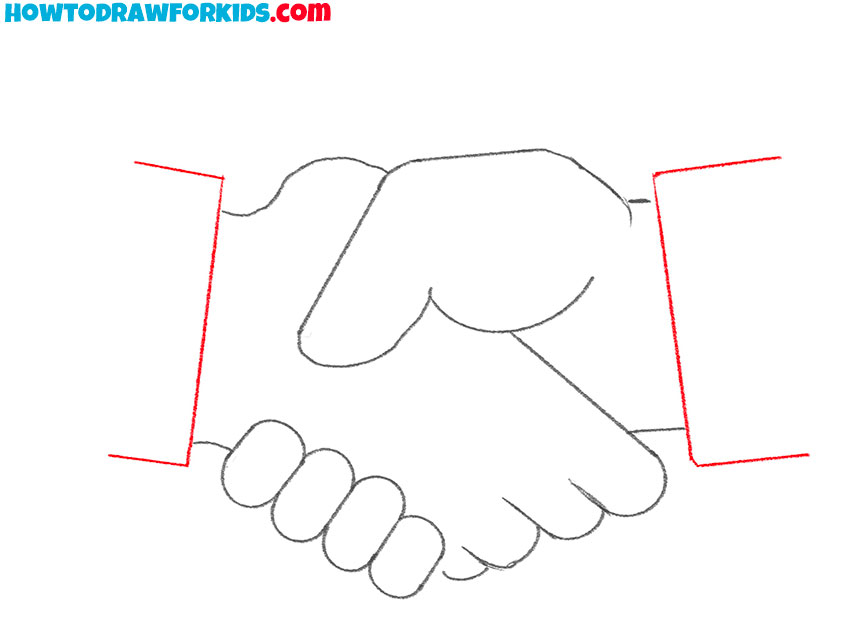
- Complete the left hand.
Now it’s time to finish the outline of the hands themselves before moving on to the remaining details. Use a smooth line to outline the top edge of the left wrist. Then, just below this line, carefully draw the bottom edge of this wrist with another smooth line.

- Draw the sleeves and complete the handshake.
Draw the straight sleeve ends as two vertical semi-rectangles – one at the left and one at the right. Now erase construction extras from the sketch. Keep only the final outer contours. The width of the sleeves should be slightly wider than the width of the wrists.
- Add color to the hands and sleeves.
People vary greatly, and so do skin tones, so paint the hands any color, using one color for both palms or painting them in different colors. Paint the left sleeve a warm color and the right sleeve a cool color so the forms don’t merge.

The lesson has come to an end, and now you can look at the result of your work. If you liked this lesson, you can leave your feedback in the comments.
You now have the opportunity to download a PDF file that contains a short version of this guide and some useful tools. Hurry up to download the file and use it whenever you want, even if you don’t have an Internet connection.