How to Draw a Hydrangea
After showing the best-known flowers, I want to show you something new and unique, and explain how to draw a hydrangea.
How to Draw a Hydrangea: Introduction
In this tutorial, I want to show you how to draw a hydrangea. This is a very beautiful flower that has a lush inflorescence. Hydrangea will become a real decoration of any personal plot, garden, park, or alley. Also, hydrangea can be grown in your home. Such a plant can decorate any interior. This plant is unpretentious and does not need special care.
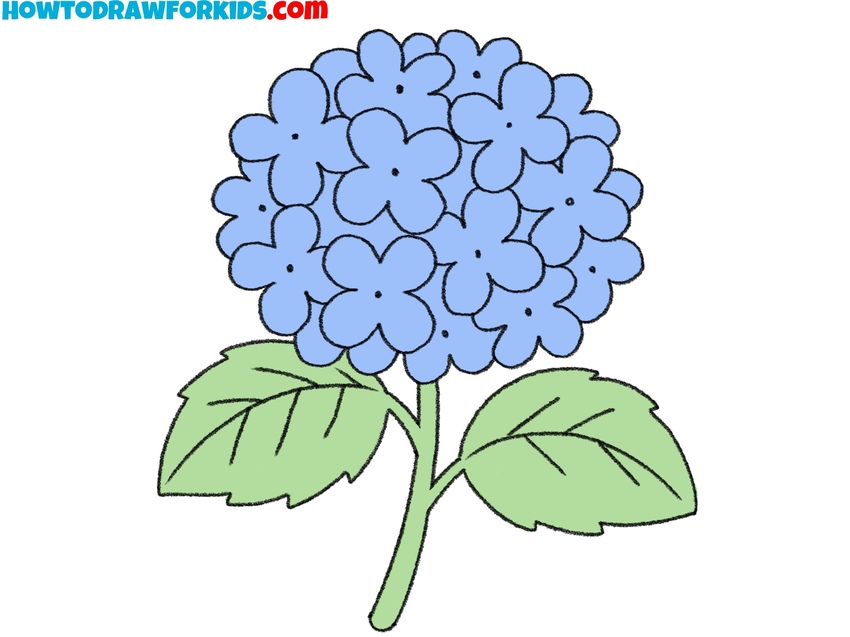
Hydrangeas are of different types, which differ in size, color, and shape of the inflorescence. Hydrangea can be white, pink, blue, lilac, purple, yellow-green. In the picture, you can see a beautiful purple hydrangea. You can color your flower in the same color, or you can use any other shade.
The hydrangea inflorescence consists of a large number of small flowers. The leaves have a beautiful oval shape. You will depict all this in your drawing.
Hydrangea Drawing Tutorial
Materials
- Pencil
- Paper
- Eraser
- Coloring supplies
Time needed: 20 minutes
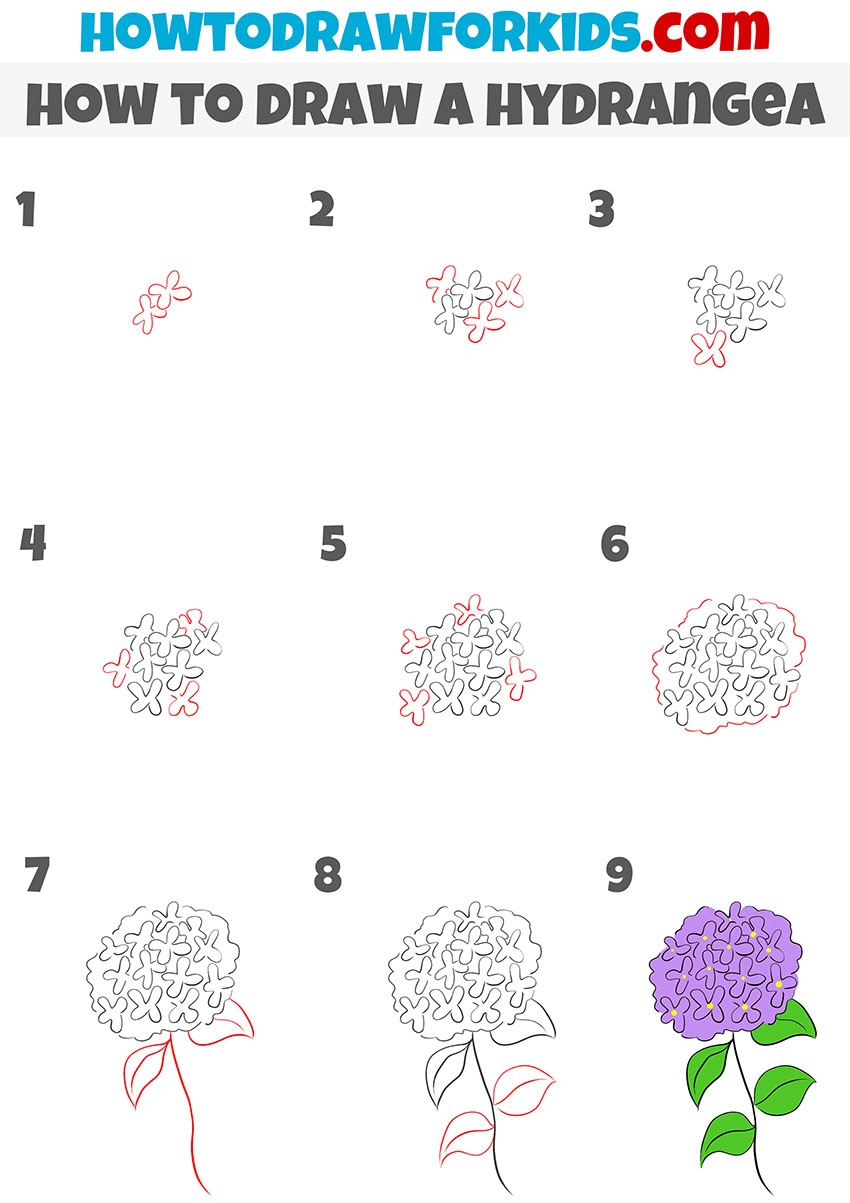
How to Draw a Hydrangea
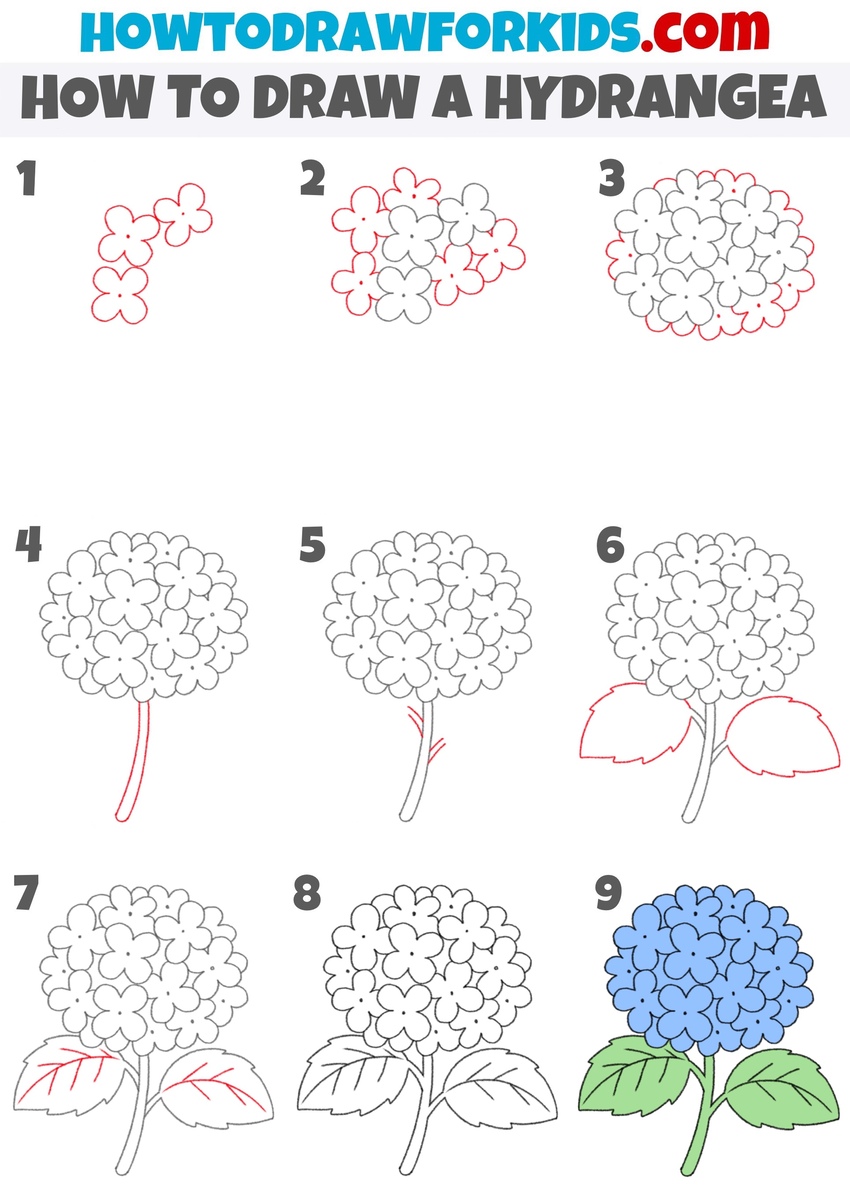
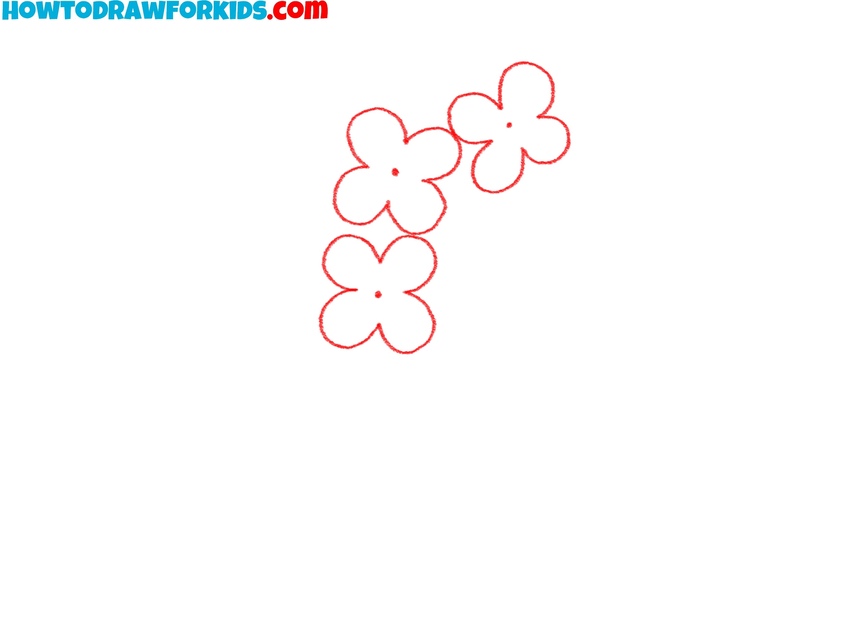
- Sketch the first blossom shapes.
Every hydrangea bloom is made up of many tiny flower shapes, so it makes sense to begin by sketching a few of them. Draw three or four small blossoms, each shaped with four rounded petals. Overlap them so they already look like they belong together in a cluster.
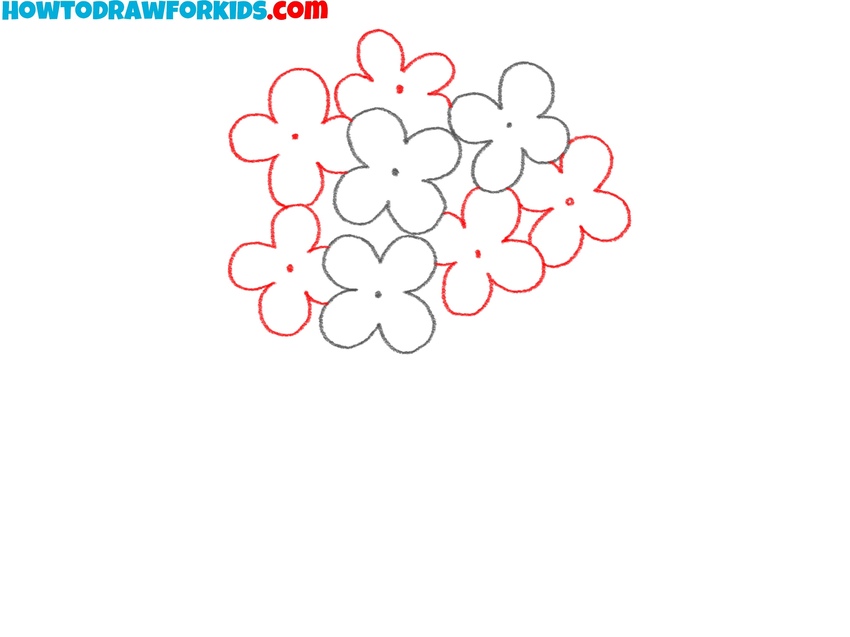
- Sketch additional petals.
Once the first blossoms are placed, it’s time to add more four-petal shapes around the existing group. Try to overlap these shapes and connect as naturally as possible. It helps to picture the cluster as a ball forming, with each flower adding to the round shape.
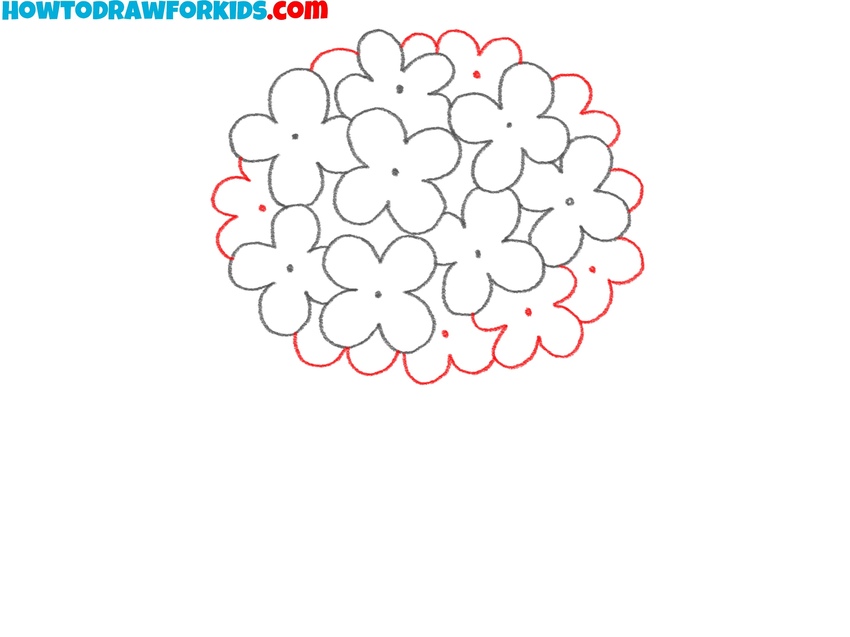
- Complete the round bloom.
Now it’s time to turn the scattered blossoms into a complete hydrangea head. Keep adding flowers around the edges until you have a large, rounded cluster. Don’t try to force a perfect circle, hydrangeas often have slightly irregular shapes. Where you notice gaps, sketch partial blossoms.
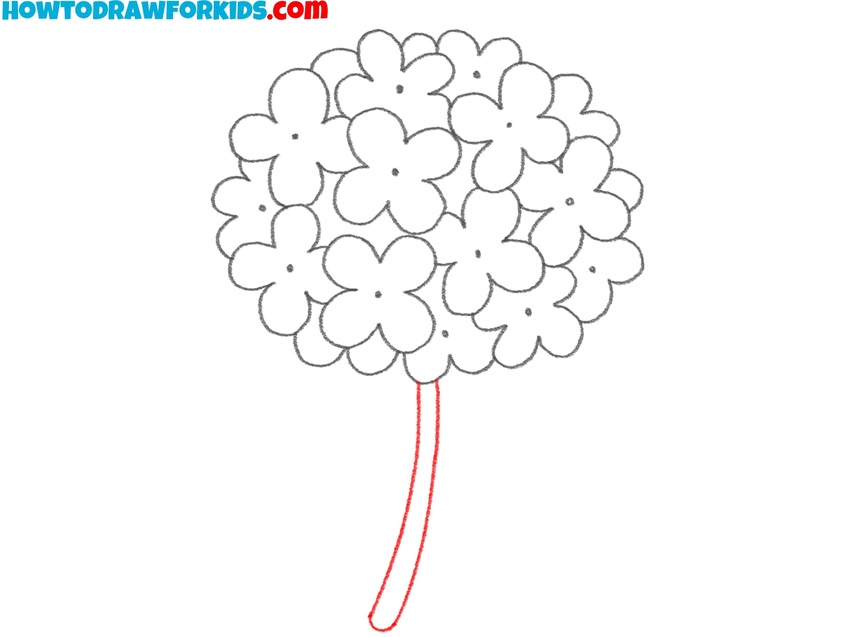
- Draw the stem of the hydrangea.
With the cluster completed, it needs to connect to a stem. Draw two smooth vertical lines from the center of the flower head and connect them at the very bottom. The curve is important, because stems almost never grow perfectly straight, and a barely noticeable bend makes the drawing feel more realistic.
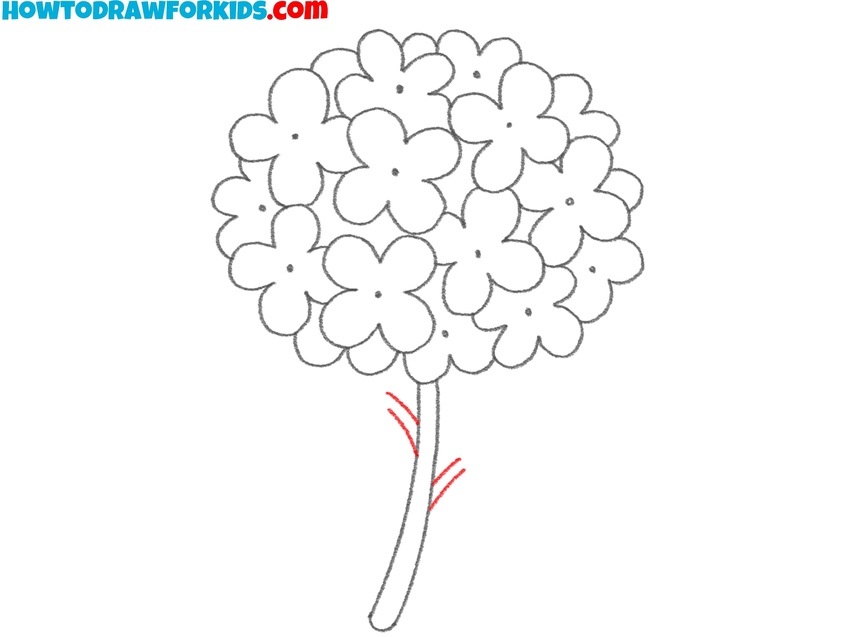
- Sketch small side stems.
Hydrangea leaves don’t grow directly out of the stem without support, so add small branching stems to hold them. Draw two short angled lines on each side of the main stem. Make these branch stems thinner than the main stem.
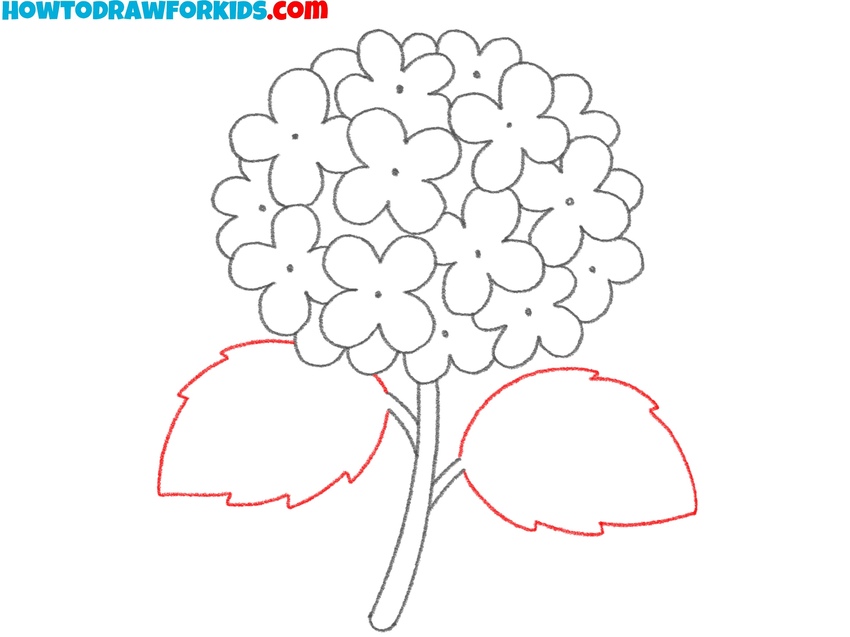
- Add big leaves to the sides.
Leaves will make your hydrangea drawing look more recognizable, so now you can sketch them attached to the small stems. Hydrangea leaves have noticeable jagged edges, so add small serrations along the outline. Don’t try to make them perfectly identical.
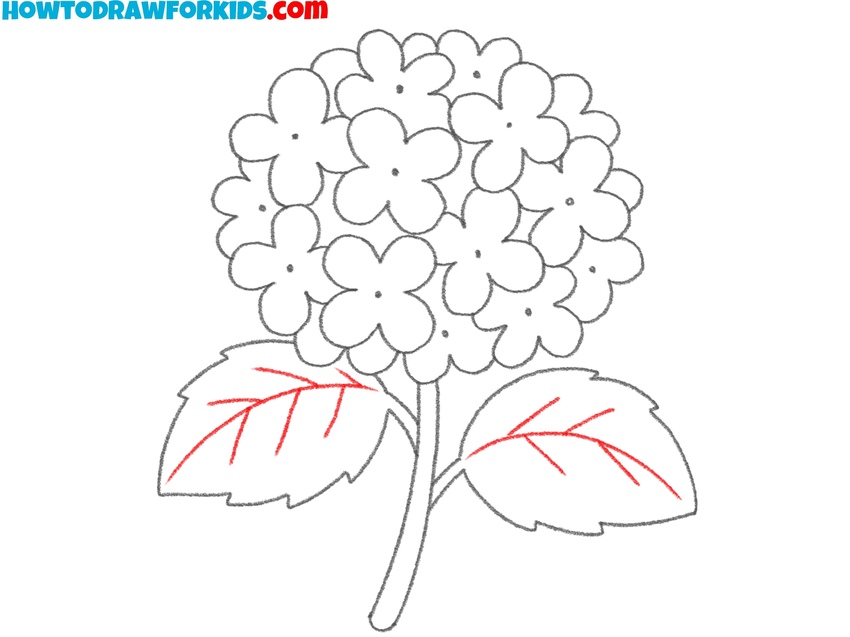
- Outline the leaf veins.
To make the leaves look realistic, add internal vein lines. Start with a single vein running through the center of each leaf, then branch smaller veins toward the edges. Make the vein lines lighter than the main outlines. Don’t make the side veins perfectly even or symmetrical.
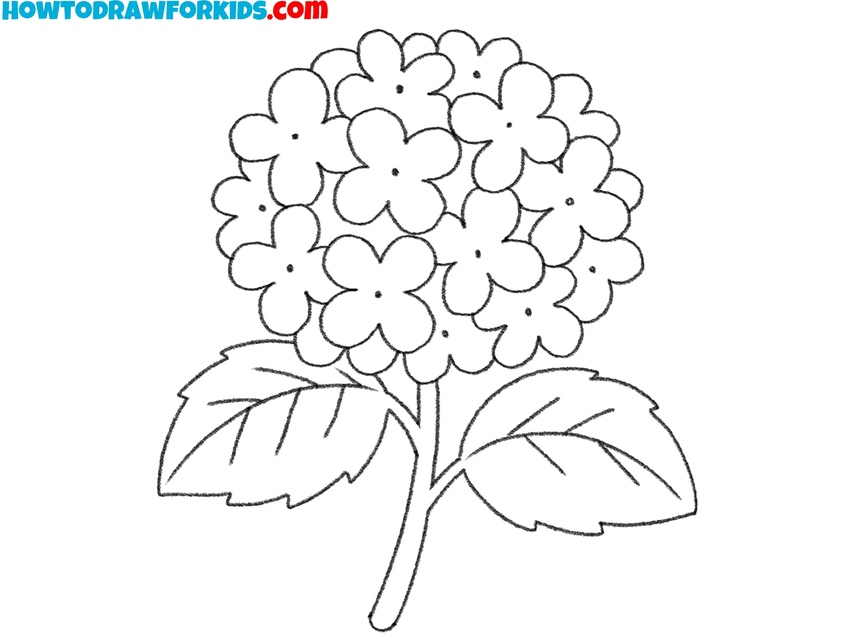
- Correct small drawing mistakes.
Before moving on to color, clean up and refine your hydrangea drawing. Go back over the main shapes of the hydrangea darkening the lines and erasing any unnecessary sketch marks. This step is also about checking the proportions. Small adjustments now will make the final result more professional.
- Shade the flower and leaves.
Hydrangeas are most often blue, pink, purple, or even white, depending on soil acidity, but here you can use a rich blue for the cluster. Fill in the petals, and if possible, add a slightly darker tone in the center of each blossom to give them dimension. For the leaves and stem use green.

Easy Hydrangea Drawing Tutorial
To draw a hydrangea, it is necessary to construct the cluster by repeating small four-petal shapes. Draw a few of these florets in the center, then add more overlapping rounded shapes. Continue filling the space until the cluster looks full.
Encircle the group with a loose outline to unify the shape into a single blossom. From the bottom of the cluster, extend a curved line to represent the stem. Add leaves to the stem with pointed oval shapes, attaching them at different heights.
Place a central vein in each leaf with smaller side veins branching off. Once the outlines are complete, refine them and erase any overlaps. For coloring, use shades of purple, pink, or blue for the petals, and green tones for the leaves.
Conclusion
The hydrangea is ready! You can draw such a beautiful flower on a postcard for your friends or make a beautiful still life. If you liked the lesson, then you can leave your feedback in the comments.
If you want to continue with similar topics, take a look at the flower drawing tutorial to learn the basics of sketching different blossoms, or the rose drawing tutorial to study another flower with more complex shapes and layers. Don’t forget to share your results, leave a comment, and check back for more drawing lessons.

Izzy
Thanks. I’m glad you find this hydrangea tutorial easy.