How to Draw a Nine-Tailed Fox
In this really simple tutorial I will show you how to draw a nine-tailed fox – a mythical creature from East Asian mythology.
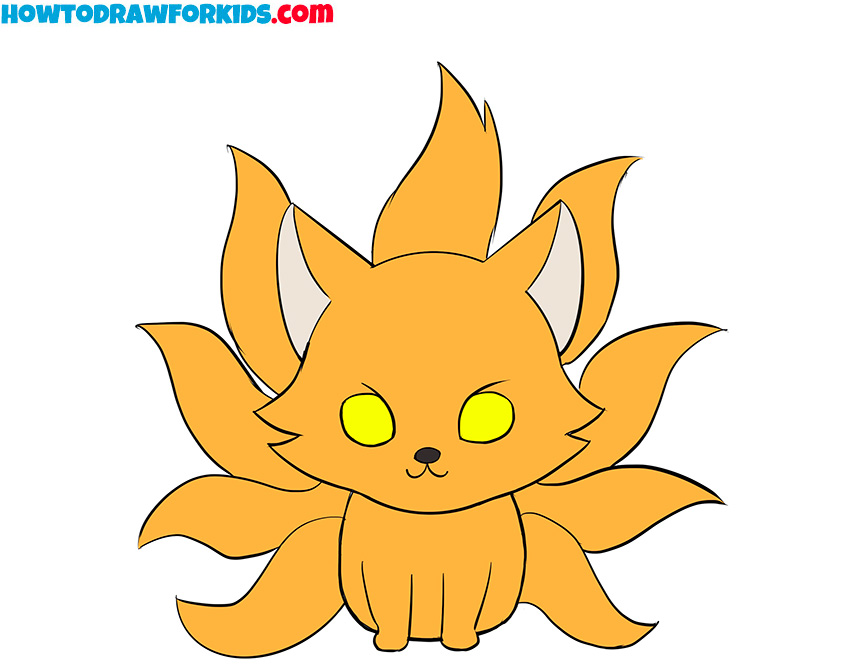
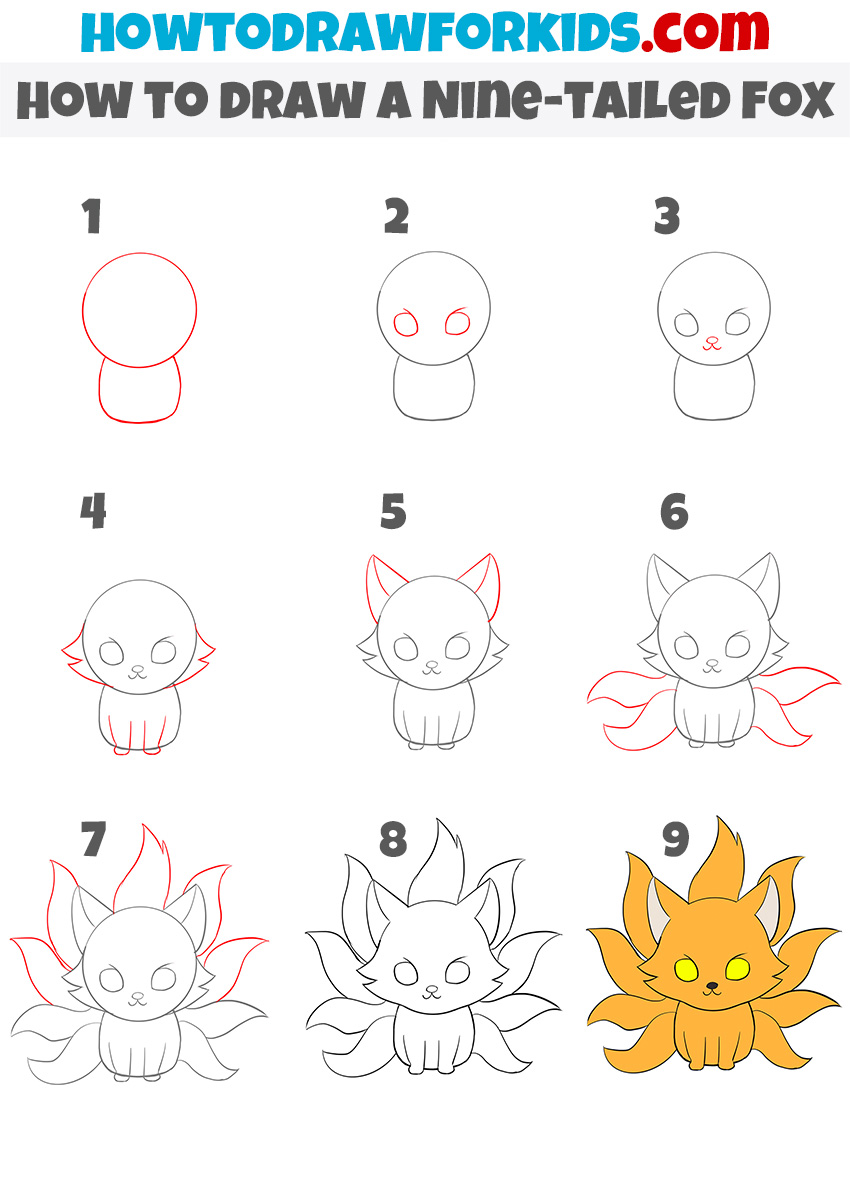
How to Draw a Nine Tailed Fox: Introduction
When drawing a nine-tailed fox, it’s important to focus on a few very important aspects to ensure your illustration conveys the character’s distinctive features.
First, pay attention to the overall proportions of the fox. In this image, the nine-tailed fox has a simple, cartoonish appearance with minimal details. To maintain this style while drawing, focus on keeping the shapes smooth, simple and symmetrical. The fox’s body is small compared to its large head and tails.
Another area to watch is the positioning of the tails. Distributing the tails evenly around the fox’s body will create a symmetrical look. You may want to sketch a light outline first to plan the placement of the tails before adding details. Notice how the tails vary slightly in direction, giving the image more natural look.
Additionally, when drawing a fox, using light strokes for the initial sketch allows for easier adjustments. Once the structure of the body and tails is complete, you can add details.
Nine Tailed Fox Drawing Tutorial
Materials
- Pencil
- Paper
- Eraser
- Coloring supplies
Time needed: 35 minutes
How to Draw a Nine Tailed Fox
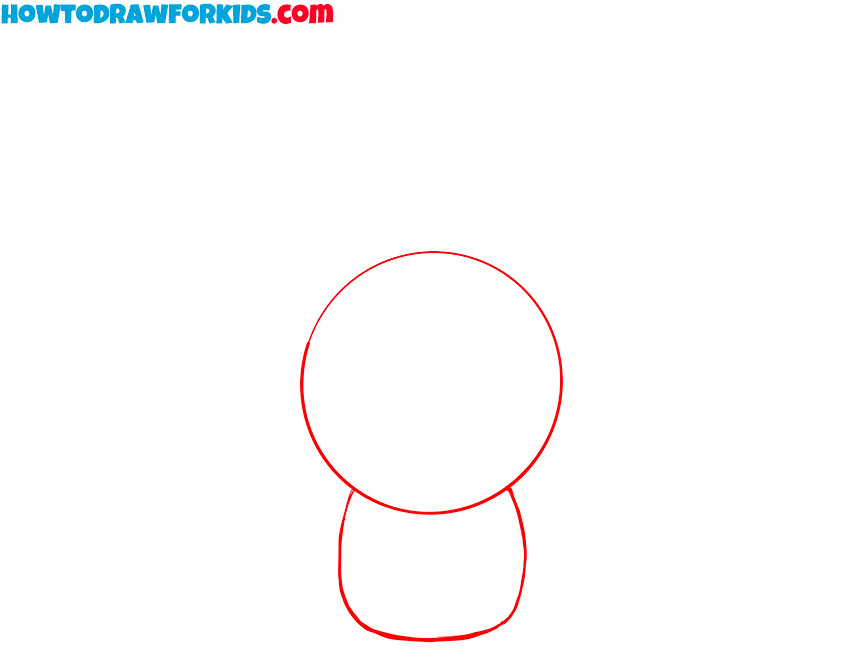
- Draw the head and body.
Start by drawing the basic outline of the nine-tailed fox. Begin with a large circle for the head. Directly below it, sketch a smaller, oval shape for the body. The body should be slightly narrower than the head to give your nine tailed fox a cute, cartoon-like appearance.
- Sketch the eyes.
Next, add two large, almond-shaped eyes in the center of the nine tailed fox’s head. Position them symmetrically on either side of the face, leaving enough space in below for the nose and mouth. These eyes should be large and cartoonish, which will later give the fox its cute look.

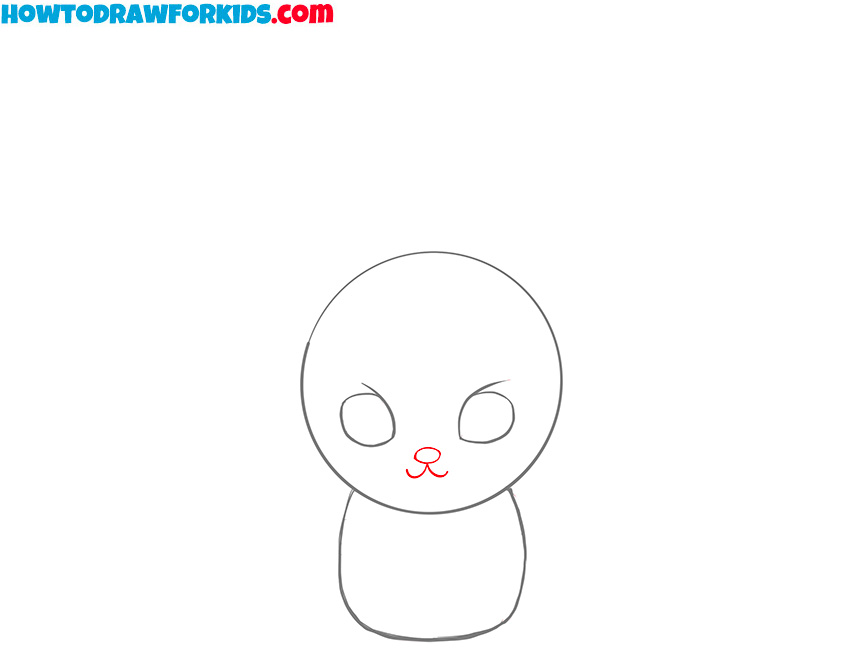
- Add the nose and mouth.
Draw a tiny upside-down triangle for the nose, centered between the eyes. Below the nose, draw a short, curved line to form the mouth. Make sure the nose is small and simple, as this complements the overall cartoonish style of the fox. The mouth should also be subtle.
- Add the front paws.
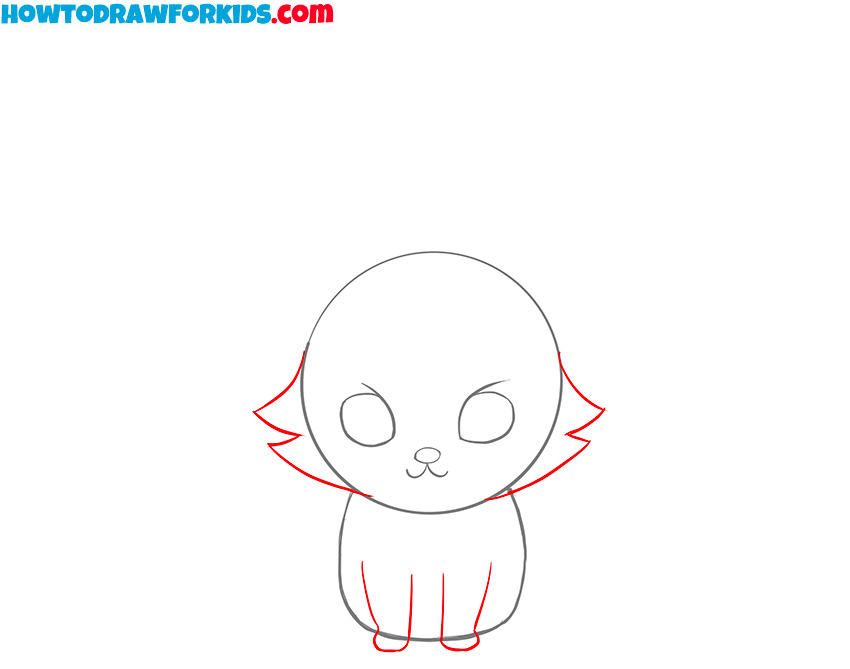
Draw two straight, vertical geometric figures from the bottom of the body. At the ends of these forms, curve them slightly to form small, rounded paws. These will give the fox a sitting position. The paws should look small and round, matching the overall simplified style of the nine tailed fox drawing.
- Sketch the ears.
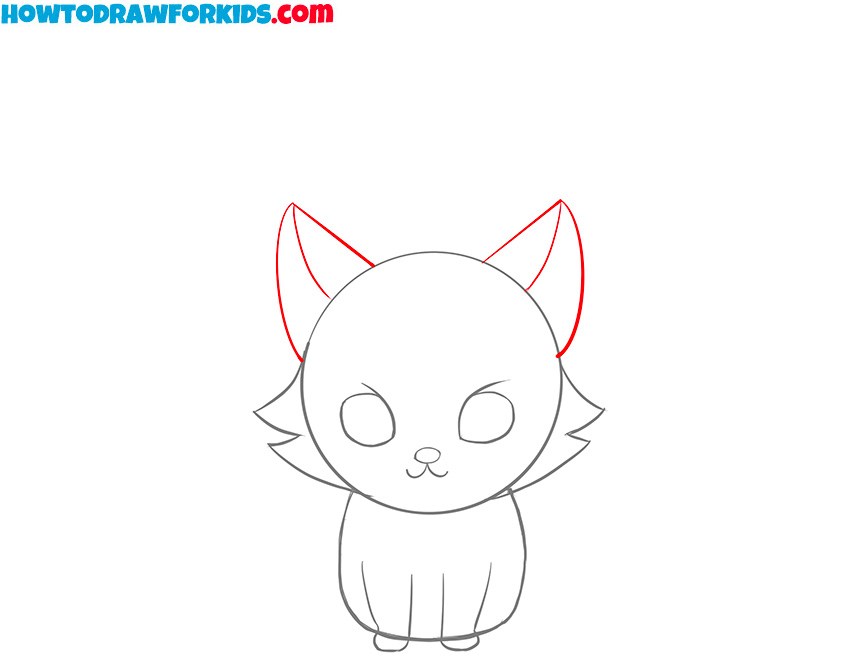
On each side of the head, draw two triangular shapes to represent the ears. These ears should be slightly tilted outward to give the fox a cute appearance. Inside each ear, sketch a smaller triangle to represent the inner part of the ear.
- Start drawing the tails.
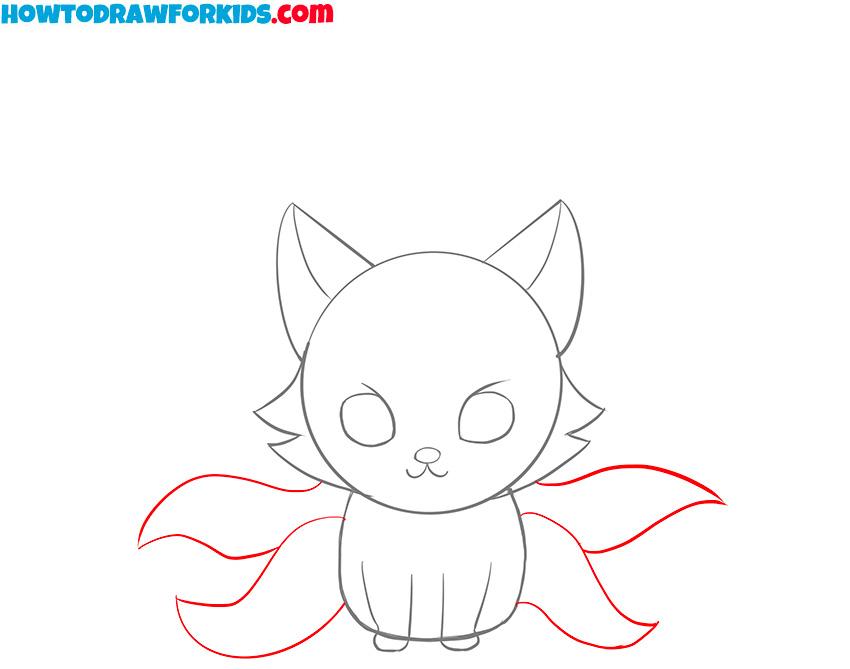
Now it’s time to add one of the most distinctive features of your nine-tailed fox drawing – the tails. Start by drawing two large, curved shapes on the sides of the body to represent the first two tails. These tails should flow outward from behind the body, and the curves should be smooth.
- Add more tails.
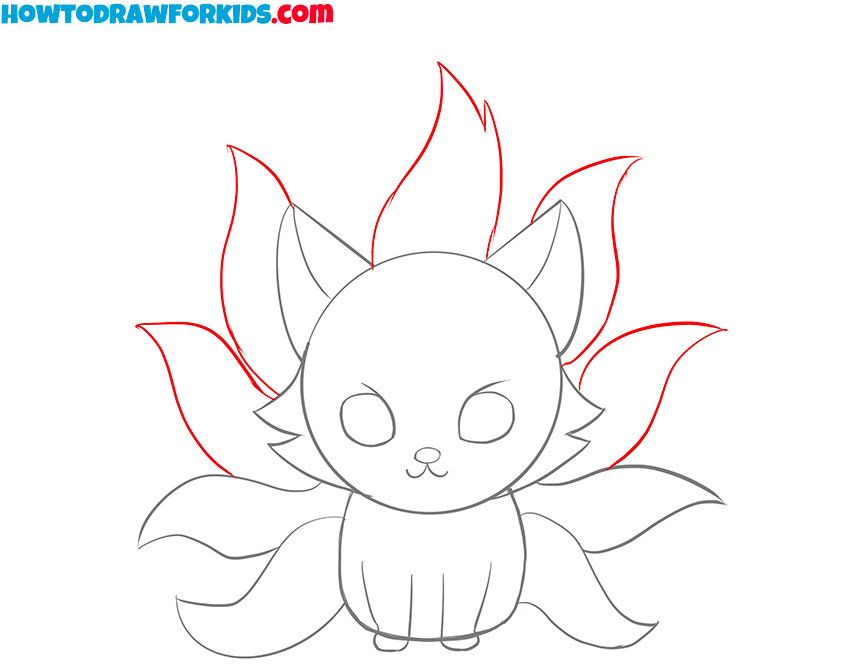
Add more tails behind the fox, making sure they fan out evenly from the base of the body. Each new tail should curve outward in a graceful manner, matching the size and shape of the previous ones. By now, the fox should have nine tails sketched, evenly spread around its body.
- Refine the sketch.
At this point in your nine-tailed fox drawing, it’s time to refine the entire sketch and prepare it for the final touches. Go over the outline of the fox, making the lines more smooth and cleaner. Erase any unnecessary guidelines or overlapping lines.
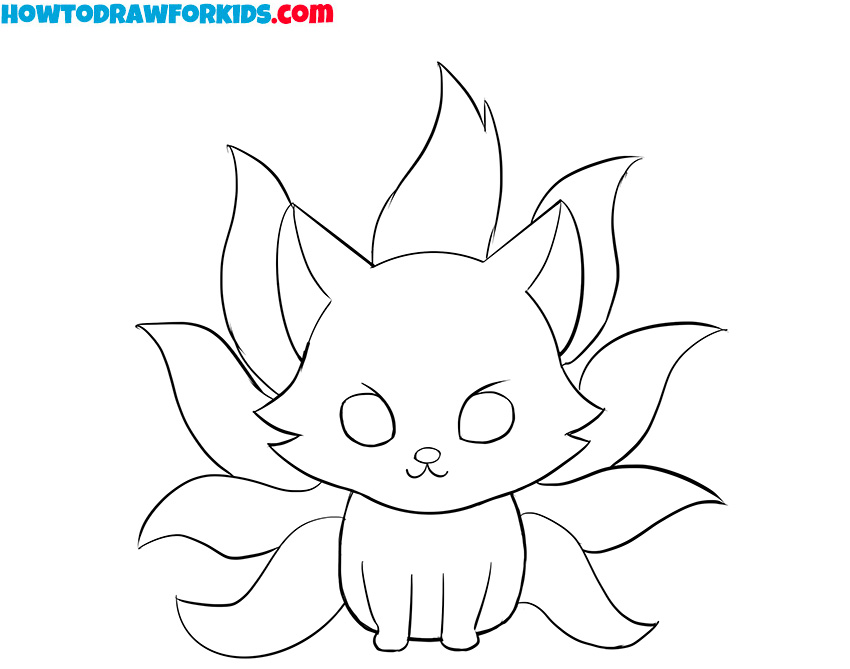
- Color your nine-tailed fox.
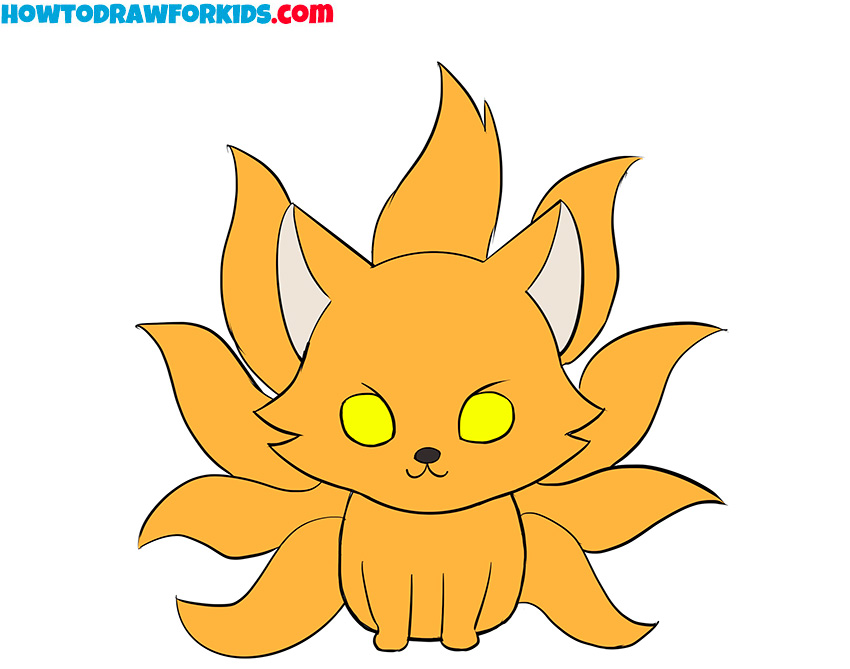
Use a bright orange color for the body and tails, keeping the application even and smooth. For the eyes, select a bright yellow shade. You can add subtle shading to the body and tails to give the fox a sense of realism, but keep the overall coloring simple to maintain the cartoon style of your nine-tailed fox drawing.
Additional Content
This was a complete nine-tailed fox drawing tutorial, and I hope you found it not only informative but also interesting. As part of this tutorial, I’m pleased to offer you the opportunity to download a special PDF that complements this guide.
The PDF includes all of the steps outlined in the tutorial, along with additional resources to improve your drawing experience. Inside, you’ll find a coloring page of the nine-tailed fox, a tracing worksheet, and a grid drawing worksheet. Don’t miss the chance to print this valuable resource, which is a great way to practice and improve your drawing skills at your own pace.



Thanks for teaching how to draw this because this is my bestest friend’s favorite animal & her birthday is on Sunday!!!!!!!!!!!!!!!