How to Draw a Phoenix
In this lesson, you can learn how to draw a phoenix step by step. This fascinating drawing lesson will definitely not leave you indifferent.
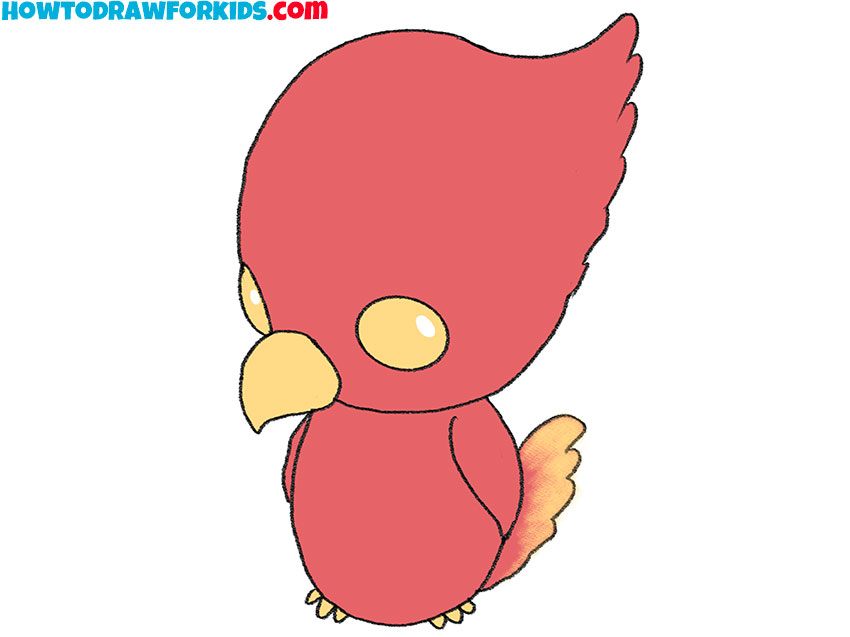
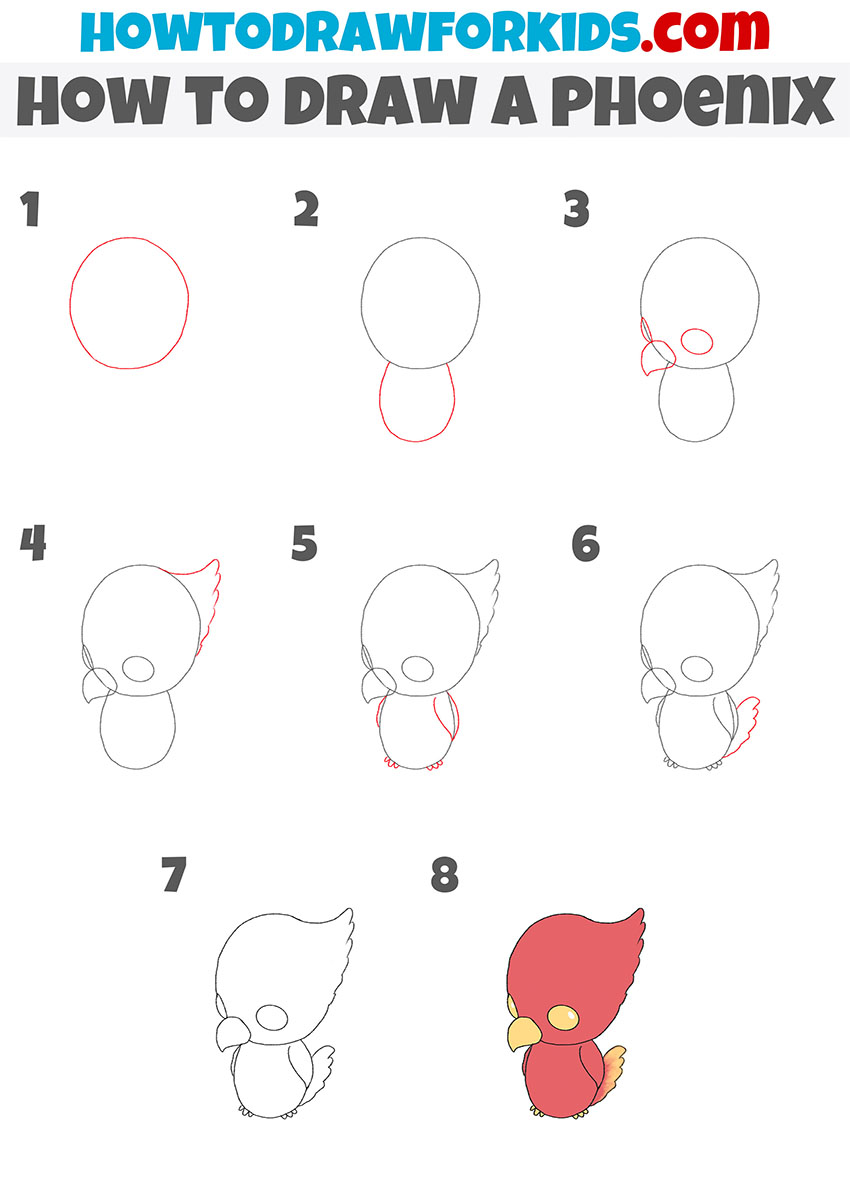
I am glad to offer you a great drawing lesson in which I will tell and show you how to draw a phoenix step by step. This simple lesson consists of only eight steps, which are easy for any aspiring artist or child to follow. To get an excellent result, you need to carefully follow my instructions and have a good mood.
Surely you have ever heard of such a bird as a phoenix. Phoenix is a mythological creature. This is a long-lived bird that is able to revive after death. There are legends about the phoenix bird in the myths of different countries and peoples.
It is believed that the phoenix is the embodiment of the element of fire, as well as a symbol of eternal life and resurrection. Often, the phoenix is identified with the sun and its energy. Usually, the phoenix is depicted as red or orange to show that this bird is a symbol of fire and heat.
According to legends, phoenixes are able to heal any wounds. Also, for sure, each of you who knows the story of Harry Potter remembers the episode where the phoenix came to the aid of the main character.
Now you will learn how to draw this beautiful bird in just a few easy steps. If you already want to get started with this work, then I recommend that you prepare your art supplies and then enjoy the creative process.
Materials
- Pencil
- Paper
- Eraser
- Coloring supplies
Time needed: 30 minutes
How to Draw a Phoenix
- Draw the outline of the phoenix’s head.
Sketch out the outline of the phoenix’s head.

- Add the outlines of the body of the phoenix.
Below the previously drawn head, draw an incomplete oval using a curved line.

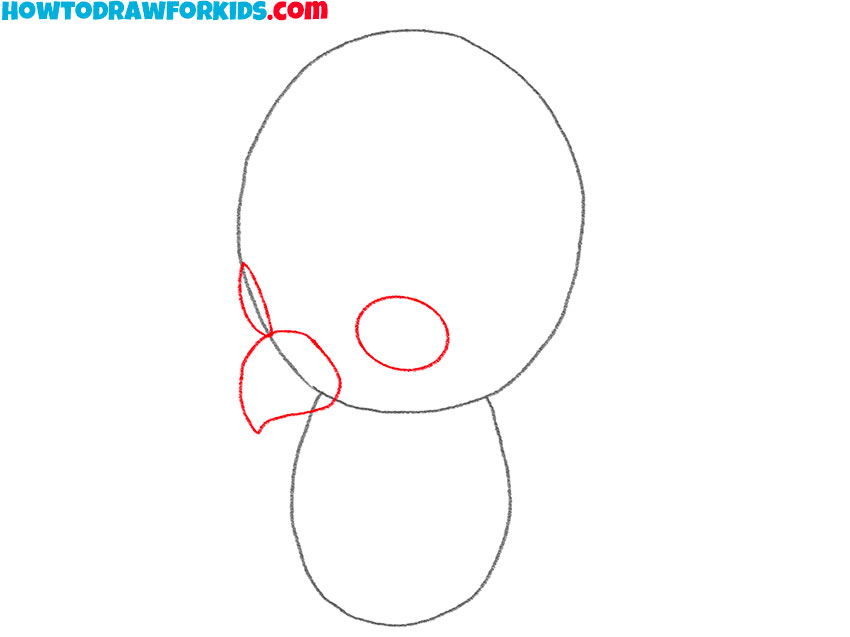
- Depict the facial features of the bird.
Now you need to draw the beak and two eyes using an oval, arcs as well as curved lines.
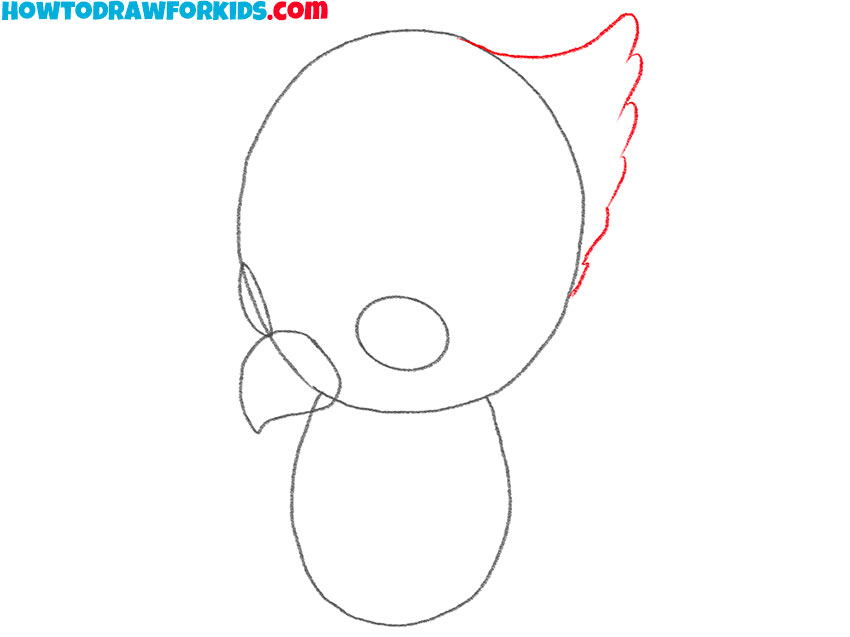
- Sketch out the crest on the bird’s head.
On the right side of the phoenix’s head, depict the crest raised up using rounded lines.
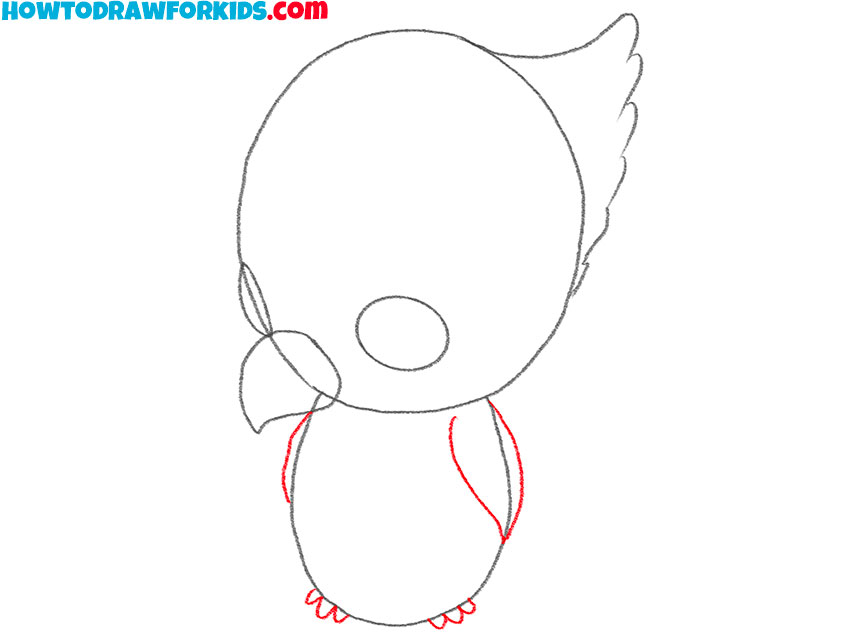
- Add the wings and legs of the phoenix.
From the right and left sides of the body, draw curved lines, add arcs at the bottom of the body.
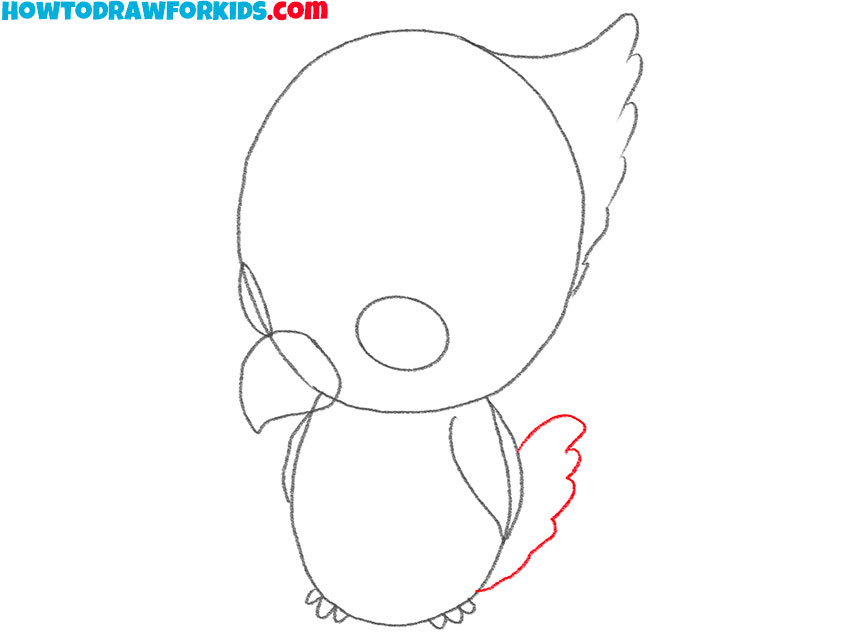
- Draw the bird’s tail.
On the right side, in the lower part of the body, add several curved and rounded lines.
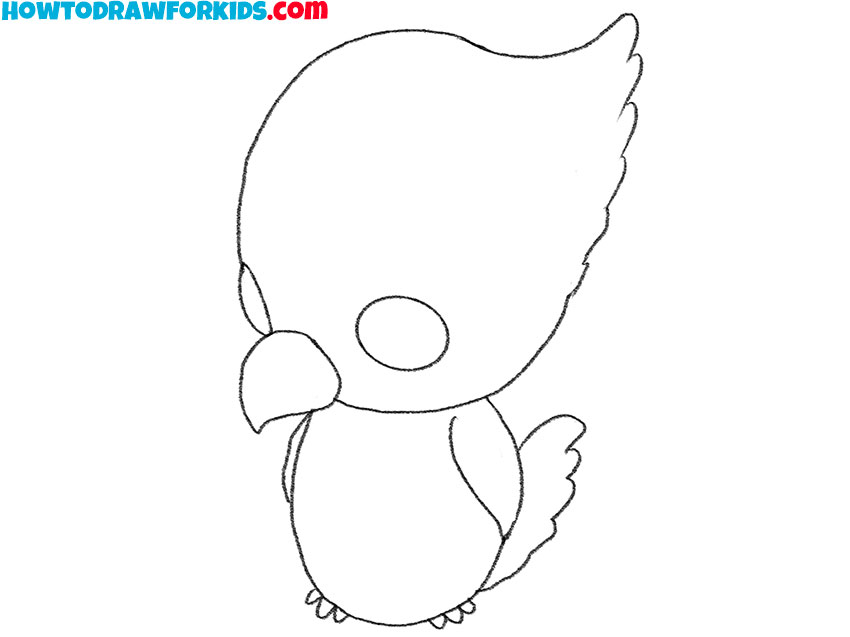
- Prepare the drawing for coloring.
Before coloring the phoenix, you need to remove unnecessary auxiliary elements.
- Color the drawing.
To color the phoenix, use yellow, red and orange. Depict the gradient on the tail.

Traditionally, for your convenience, I have prepared a PDF file that contains a short version of this lesson, as well as training materials that will help you complete this lesson. Download this file right now so as not to lose this lesson and return to it at any time convenient for you, even if you are not connected to the Internet.

