How to draw a Polo Shirt
In this tutorial, we will continue with the topic of drawing clothes and learn how to draw a polo shirt using two really simple methods.

How to Draw a Polo Shirt: Introduction
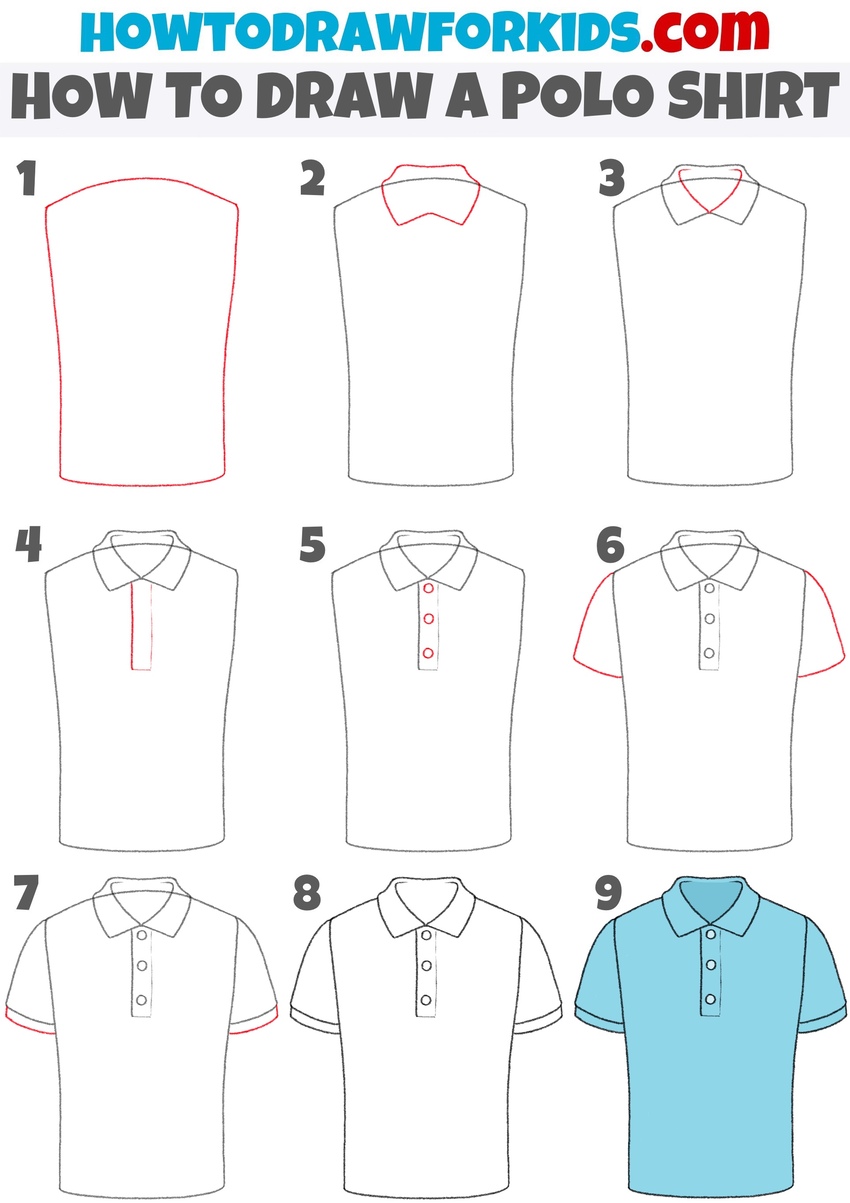
Continuing the theme of clothing, in this lesson, you will learn how to draw a polo shirt. Polo is a garment made of knitted fabric. The polo has a short fastening, a turn-down collar, and a short sleeve. In this tutorial, I’ll demonstrate how to replicate all these details correctly.
Additionally, drawing a polo shirt is a great exercise for developing essential skills in drawing clothing. It allows young artists to practice observing and replicating the structural details that make clothing recognizable, such as collars, seams, and buttons.
A polo shirt is a straightforward design, but it includes key features like the collar, buttons, and sleeves that make it recognizable. This tutorial teaches artists how to illustrate the important parts of clothing with minimal details. This skill is very important when creating quick sketches or designing costumes for characters where simplification is necessary without sacrificing accuracy.
And in order to train this skill, I have included a second, even more simplified lesson on how to draw a polo. This lesson will be much simpler, and demonstrates the next level of simplification of details in drawing clothes. Try both lessons and learn how to create clothes of varying degrees of simplification using the example of a polo shirt.
Polo Shirt Drawing Tutorial
Materials
- Pencil
- Paper
- Eraser
- Coloring supplies
How to Draw a Polo Shirt for Preschoolers
Time needed: 30 minutes
How to Draw a Polo Shirt
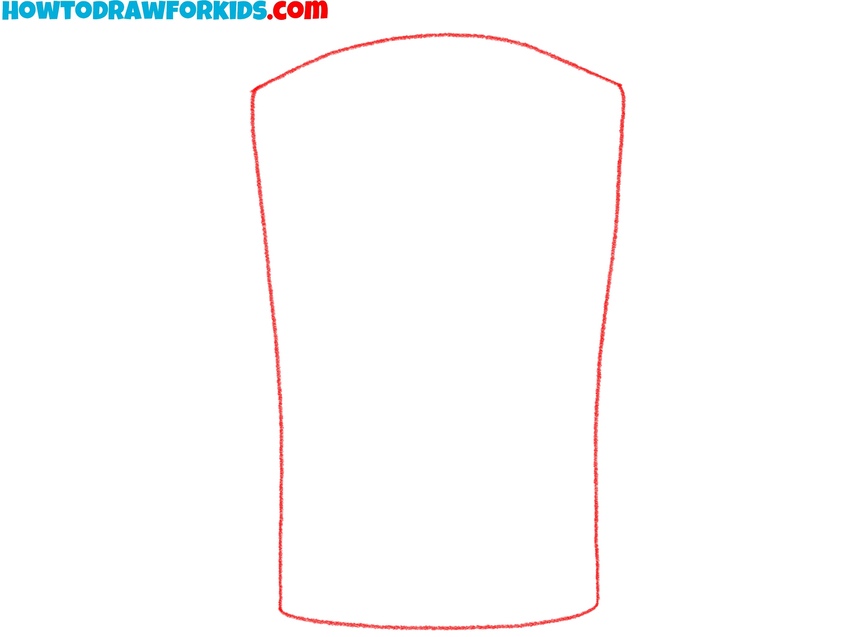
- Sketch the torso of the polo shirt.
To start drawing a polo shirt, begin with a basic outline of its torso part. Create a tall, slightly curved rectangular shape. The top edge should have a slight curve, resembling the outline of the shoulders. Keep the bottom edge straight to mimic the hem of the shirt.
- Start drawing the collar.
Sketch a an angular shape at the top of the shirt body outline for the collar. The collar consists of two overlapping segments that meet at the center, forming the classic polo style. Pay attention to the sharpness of the collar edges, as this is an important detail that defines the look of the shirt.

- Finalize the collar.
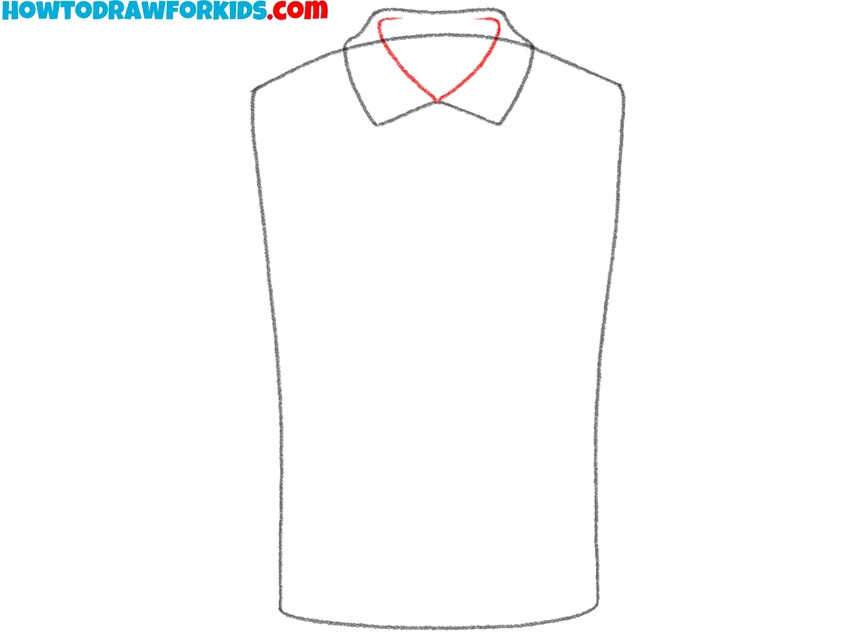
To complete the drawing of the polo collar, sketch two smooth lines inside the shape from the previous step, ensuring they meet at the center. It is essential to maintain symmetry while drawing this part of the garment, so regularly check the outlines to ensure accuracy.
- Illustrate the placket.
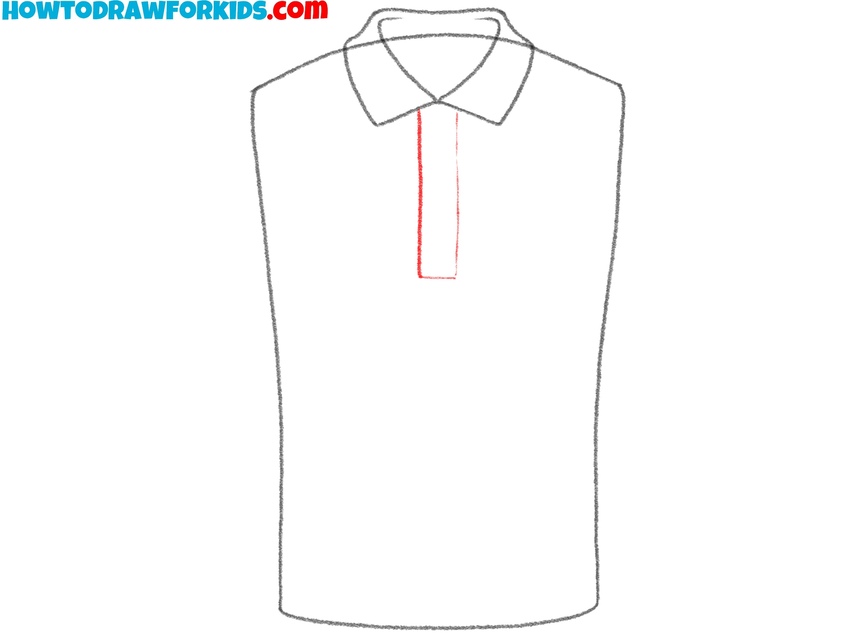
Move on to the placket, the vertical strip at the center of the shirt where the buttons are attached. Sketch a narrow rectangle starting below the collar, extending downwards. This feature is a defining element of a polo shirt, so ensure it is placed neatly at the center.
- Sketch the buttons.
Within the placket of the polo shirt, draw the buttons. To do this, draw three evenly spaced circles along the vertical strip you created in the previous step. Make sure the size of the buttons is consistent. For more detail, you can draw small folds around the buttons.

- Draw the sleeves of the polo shirt.
From each side of the upper shirt outline, draw smooth and curved lines extending outward to form short sleeves. These sleeves should angle slightly downward, reflecting how polo shirts naturally fall on the arms. Ensure both sleeves are symmetrical.

- Add the sleeve cuffs.
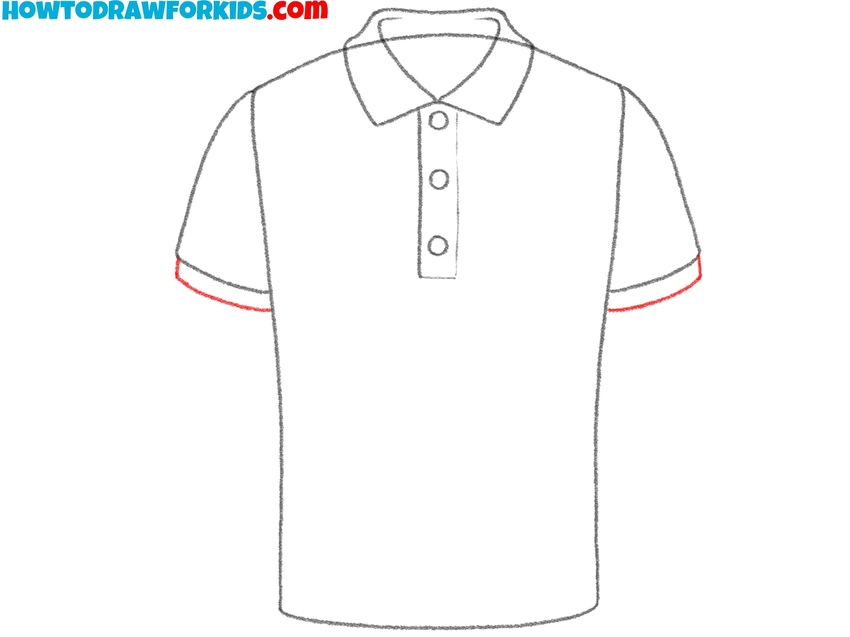
Draw a narrow band near the edge of each sleeve to represent the cuff detail commonly found on polo shirts. The cuffs should follow the curvature of the sleeve edges and appear uniform on both sides. For more realism, make the cuffs slightly narrower than the sleeves.
- Finalize the outlines of the sketch.
Give your polo shirt drawing a finished look by erasing any unnecessary guidelines and smoothing out edges. Ensure, that all elements, such as the collar, placket, and sleeves, are cleanly defined. Review your drawing for symmetry. If everything is ok, then start coloring the polo shirt.

- Add color to the polo shirt.
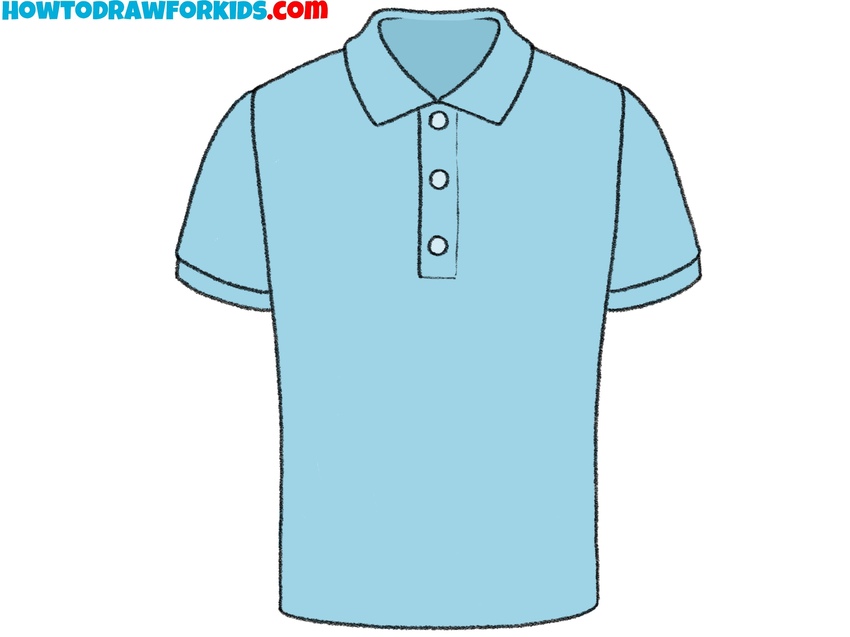
Use a solid color, like blue, for the shirt body, while leaving the buttons and collar details white or another contrasting shade. Feel free to choose any color that matches your intended design. To give your polo shirt drawing a more dimensional look, color the inside a slightly darker color.
Polo Shirt Drawing Tutorial for Preschoolers
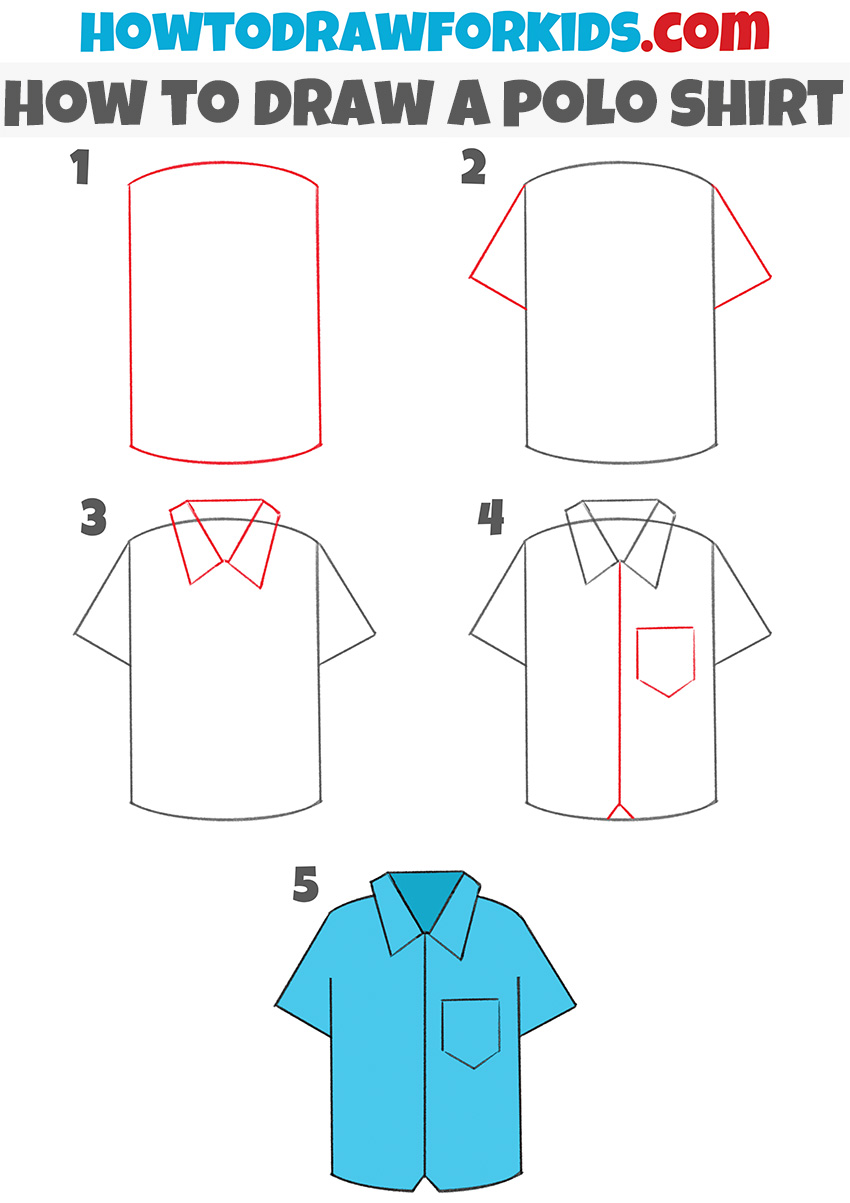
This method is created for those who found the first tutorial too complex or for anyone looking to try a different approach to drawing a polo shirt. Unlike the first method, this one simplifies the structure by using basic shapes. The steps are more simplified, focusing on creating a neat and recognizable polo shirt design without requiring advanced techniques. In addition, a slightly different style of shirt is presented here compared to the first version.
To draw a polo shirt in this simple technique, sketch a vertical rectangle with curved top edges and a flat bottom to outline the torso part. Add the short sleeves by sketching two triangles extending outward from the sides of the shirt body. Next, draw the collar by sketching two angular shapes at the top of the shirt body. These shapes should meet symmetrically at the center, creating the traditional polo collar.
Add a vertical line running down the middle of the shirt body to represent the placket. For additional detail, draw a small pocket on one side of the shirt body by sketching a pentagon shape. Clean up the polo shirt drawing by refining the outlines and erasing any unnecessary lines. Lastly, color the polo shirt using a single, solid shade to finish the drawing.
Conclusion
So, this was a tutorial on how to draw a polo shirt, in which we learned how to draw clothing items in a very simplified style.
Go to the clothing category on my site to learn how to draw other clothing items in the same simple style. For example, you can learn how to draw a shirt of classic cut or learn how to draw pants.
By the way, do not forget to write in the comments about how successfully you were able to draw this. Your messages help me a lot in work.

