How to Draw Abra
Do you like drawing Pokémon characters? This tutorial on how to draw Abra will help you sketch it with smooth and simple lines.

How to Draw Abra: Introduction
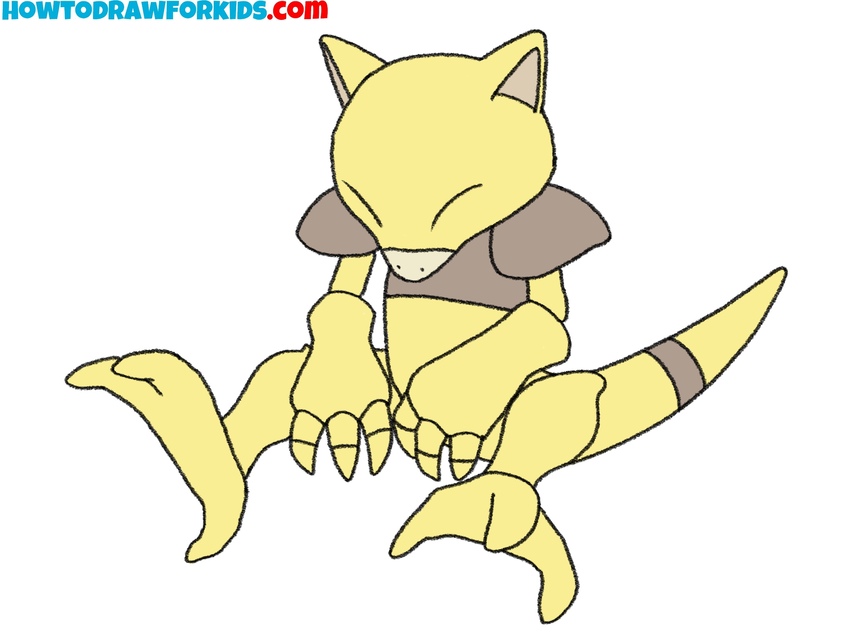
In this tutorial I’ll show you how to draw Abra in sleeping pose. This sleeping pose is one of its most iconic appearances. Its large head, closed eyes, and curled sitting pose make it easy to recognize even with simple lines.
Most of the features on Abra’s face are small and positioned low. The closed eyes are drawn as thin curved lines and must be symmetrical. The ears are slightly tilted and should be sketched as two simple triangular shapes. These small details are easy to misplace, so it’s best to draw lightly at first to check proportions.
The limbs are blocky and segmented. Keep the proportions consistent and avoid making the limbs asymmetrical. Each finger and toe should be similar in length and shape. The position of the feet and hands also follows the sitting pose, so match the direction carefully.
You can try coloring Abra in different tones or add effects like floating pebbles to show its psychic abilities. For advanced versions, you can draw it mid-teleport or levitating, while still keeping the basic features intact
Abra Drawing Tutorial
Materials
- Pencil
- Paper
- Eraser
- Coloring supplies
Time needed: 40 minutes
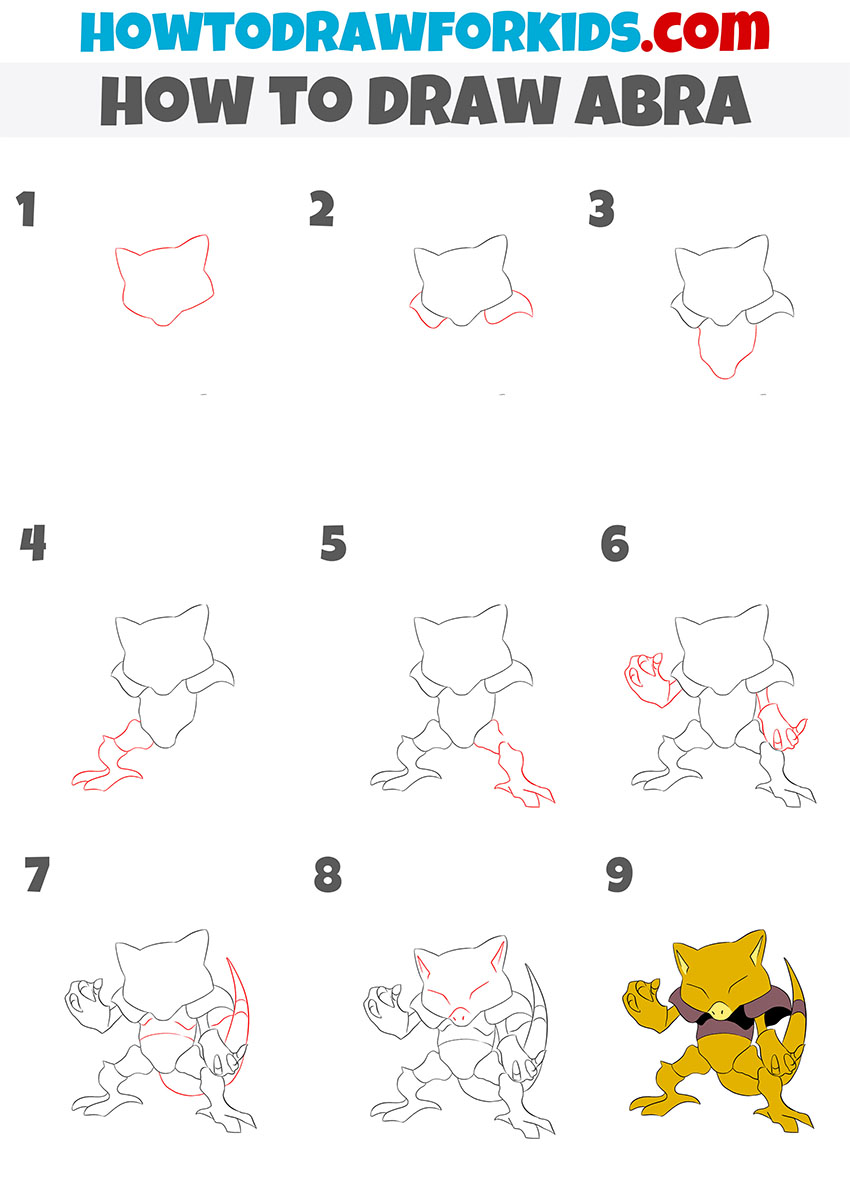
How to Draw Abra
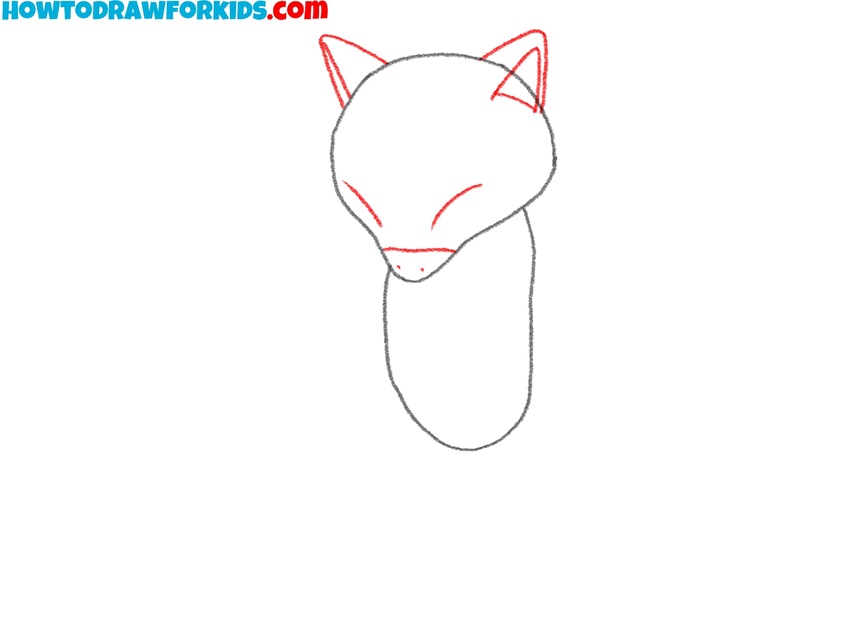
- Sketch the main shape of the Pokémon.
Start drawing Abra by outlining the basic head and upper body. Use a rounded shape for the head, which is slightly wider at the top and narrows down. Connect it with an oval body shape. Don’t worry about symmetry at this point, just try to make the general silhouette close to what you see.

- Draw Abra’s facial features.
Now draw Abra’s ears – two tall, pointed shapes on top of the head. Sketch short lines inside the ears to mark the inner structure. Then draw the closed eyes in the form of two curves angled towards the center. In the middle below the eyes, add a small triangle for the nose.
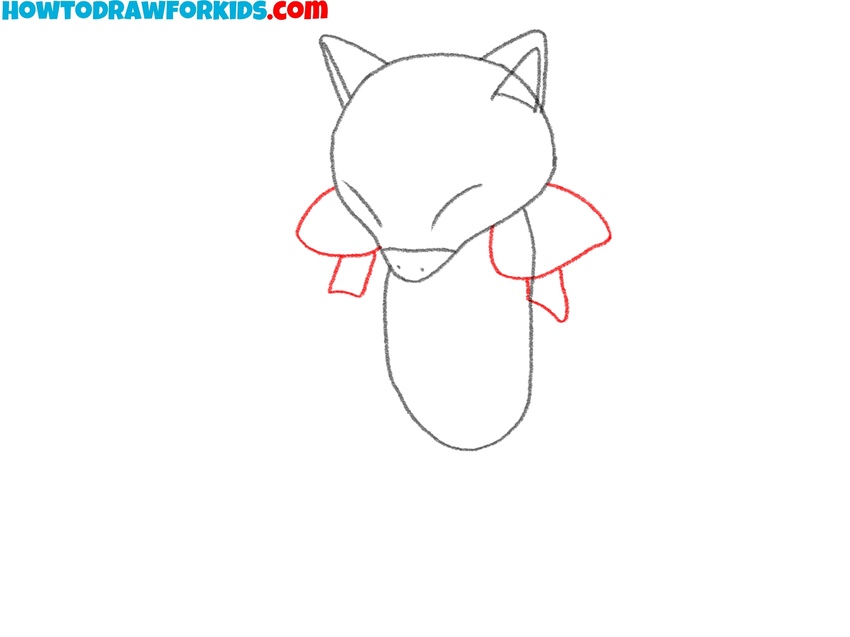
- Add the shoulder parts and upper arms.
Draw the armor-like shoulder parts, which rest on top of the arms. Then add the short upper arms below them. Make sure both sides are symmetrical. Use slightly curved lines to shape the arm segments. These shapes are a bit blocky, and you can think of them as separate armor plates stacked onto the body.
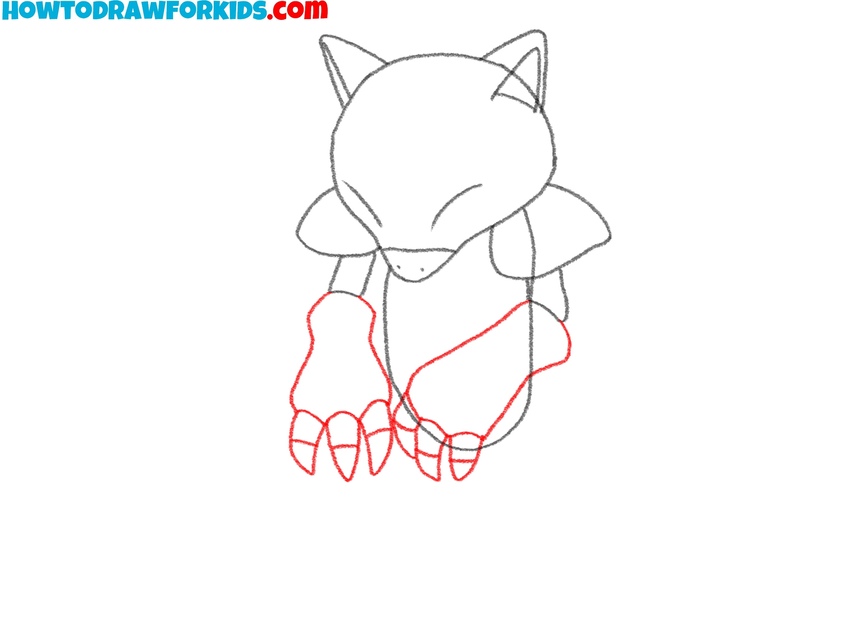
- Draw Abra’s hands and fingers.
Now draw the lower part of each arm, which connects directly to the large clawed hands. The arms widen slightly as they reach the fingers. Abra’s hands are made of three thick fingers each with visible pointed claws at the tips. Curve each finger slightly. Repeat the same shape on both sides.
- Sketch the Pokémon’s lower body.
Draw Abra’s legs extending out to each side of the body. The foot should taper slightly at the ankle. Then add the large feet, with toes and claws visible at the tips. You can vary the leg angle slightly to make one foot come forward more than the other if you want.

- Draw Abra’s long curved tail.
Now draw Abra’s long, thick tail extending out to the side and curving upward. The tail should start from behind the legs and follow a smooth, wide curve. Make it taper gradually at the end and not too sharp. Abra’s tail is very large in proportion to its body. Adjust its length and curve.

- Draw stripes on the body and tail.
Draw the bands on the torso and the tail. On the chest, sketch a slightly curved line to show the separation of the chest armor. On the tail, add a couple of curved bands to divide the segments. Make sure the bands on the tail follow its curve and don’t look flat. You can change how many segments you show.

- Erase guidelines and trace the final lines.
Use a darker pencil or pen to trace the final outlines of the Abra drawing. Remove any construction lines and clean up the sketch. Double-check symmetry and angles. At this point, the full outline of Abra should be complete. If you want to make any adjustments, do it now before coloring begins.

- Color the finished drawing of Abra.
Color Abra with its signature yellow for the body and brown for the shoulders, chest, and tail bands. You can also experiment with slight gradients or outlines to make the drawing look more voluminous or flat. Use lighter brown for the inner parts of the ears and lighter yellow for the muzzle.

How to Draw Abra: Alternative Methods
If you’ve already completed the main lesson how to draw Abra, you can continue practicing with two more versions that offer a different take on the same character. One of the additional tutorials shows a simplified version of Abra in a curled sitting position. The other additional Abra drawing tutorial features the Pokémon in a standing pose. You can try all three tutorials to compare styles, improve your skills, and find which approach works best for you.
Simple Abra Drawing Tutorial
The most noticeable feature of this second tutorial on how to draw Abra is the increased simplicity and cartoon-like proportions. The lines are rounder, the body is more simplified, and many of the joints and edges are softened compared to the more detailed first version.
To draw Abra using this method, start by sketching the outline of the head, shaping it with two pointed ears and a slightly curved jaw. Add the shoulders below the head, connecting smoothly into the upper arms. Next, draw the lower arms with three rounded claws on each hand. Add a belly contour that connects both sides of the body.
Continue with the legs, making them thick and stylized, positioned in a sitting pose. Draw the feet with three large toes, keeping the outlines bold and clean. Sketch the long curved tail behind the body and add the ring markings near the tip. Finish the face with two closed eyes and a small triangle nose. Use the final step to clean up the lines and color the finished Abra drawing in its typical yellow and brown color scheme.

How to Draw Abra in a Different Pose
The main feature of this additional tutorial on how to draw Abra is its active standing pose. Compared to the previous sitting and simplified versions, this one introduces a pose that shows the character standing with raised arms. This version is also very simplified.
To draw Abra in this simplified standing pose, begin by outlining the head with its sharp cheek points and ears. Next, draw the wide pieces that cover the shoulders. Sketch the torso with simple and smooth lines. Then work on the legs. Each leg has three clawed toes and a distinct segmented knee.
Move on to the arms. Each arm has large claws shown from the front. The fingers are extended as if the character is ready to act. After that, draw the long curved tail sweeping behind the legs, adding band details near the tip. Finish by drawing the face with closed eyes and nose. Refine the outline and color the full Abra drawing using the usual golden yellow and brown tones.
Conclusion
These three tutorials on how to draw Abra offer a complete look at different ways to sketch this classic Pokémon character, giving options for both simple and more complex drawings. The main version shows a sitting pose with full detail, while the additional tutorials include a simplified version and a standing pose.
Practicing these versions helps build confidence in drawing consistent forms, learning how to keep proportions correct while changing poses, and paying attention to small character-specific details like claws or armor lines. If you’re working on drawing more Pokémon, this is a solid way to get comfortable with style and structure before moving on to more advanced characters.
Try combining elements from each pose or creating your own custom scene using these versions. And don’t forget to visit my Pokémon drawing tutorial and check out my tutorial on how to draw Pikachu. You can also share your drawings in the comments, save this guide to Pinterest, and subscribe on YouTube for more updates and printable drawing worksheets.