How to Draw Simba
Special for fans of The Lion King, I’ve created this tutorial on how to draw Simba to show you how to sketch the iconic lion cub.

How to Draw Simba: Introduction
Drawing Simba is a good way to practice cartoon animal proportions. In this tutorial, you’ll learn how to draw Simba in a sitting position with a big head and cartoon body. This tutorial shows how to create the younger version of Simba, so the proportions should show that clearly. The size of the head compared to the body is one of the first things to get right.
These exaggerations are typical in animated characters, especially young versions like cubs. Getting those proportions right is more important than adding small details.
When working on the face, keep the details simple and cartoonish. Simba’s eyes are very expressive, with thick eyebrows and a rounded eye shape. The eyebrows also need to follow the eye curve for a proper look.
You can change the pose by adjusting the tilt of the head or adding more mane if you want to draw an older version. The same body structure can be reused to draw other lion cubs by slightly changing the facial details. This drawing can also be used to create Nala or other characters by changing the face and color.
Simba Drawing Tutorial
Materials
- Pencil
- Paper
- Eraser
- Coloring supplies
Time needed: 45 minutes
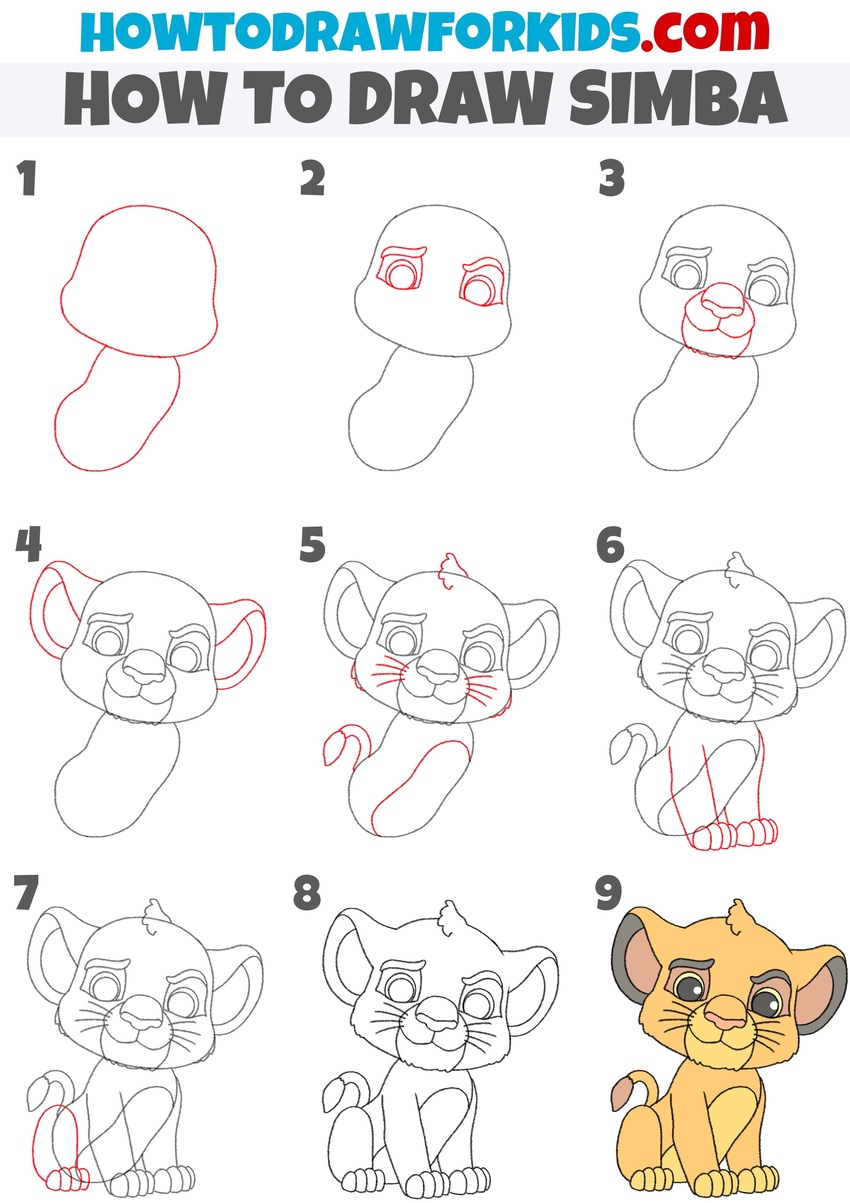
How to Draw Simba
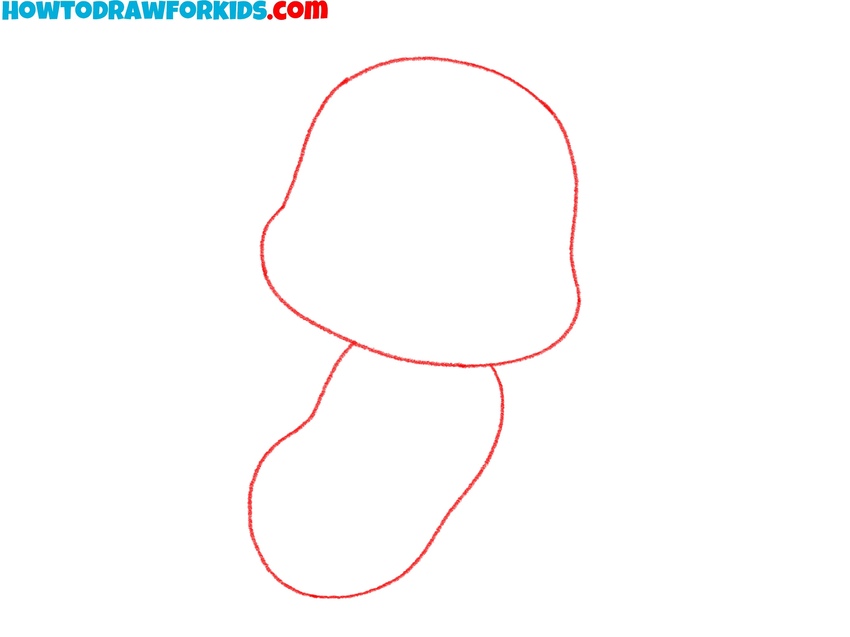
- Sketch the basic outline of Simba.
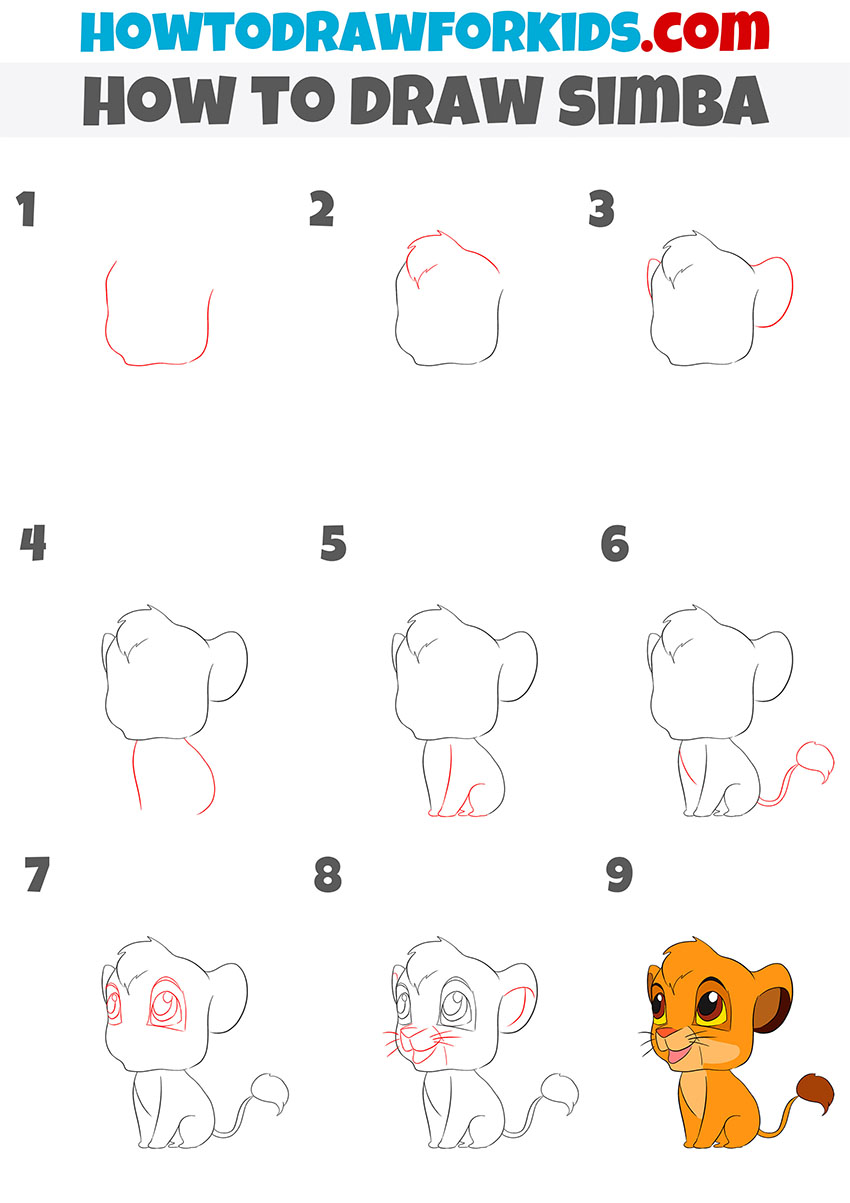
The head should be large and pear-shaped. Below that, draw a bean-shaped oval for the body. Keep the shapes light so you can make adjustments later. Make sure the body is smaller than the head to keep the cub-like appearance. You can experiment by adjusting the tilt of the head.
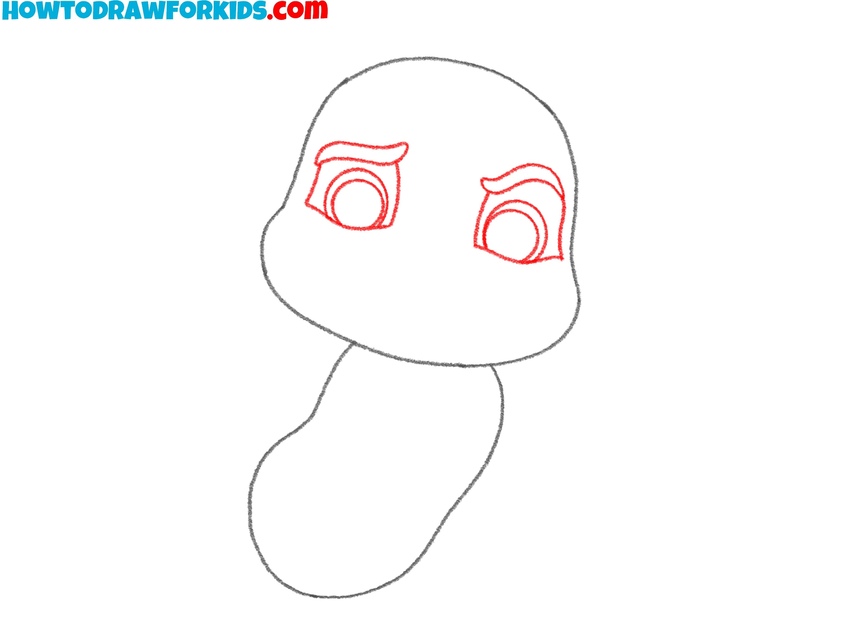
- Add the eyes and brows of the Lion King.
Inside the head, add two large, circular eyes. Add the marks around the eyes and thick eyebrows slightly arched above. You can try changing the angle of the eyebrows to make him look curious or surprised. Make sure both eyes are on the same horizontal line and are the same size to avoid a lopsided expression.
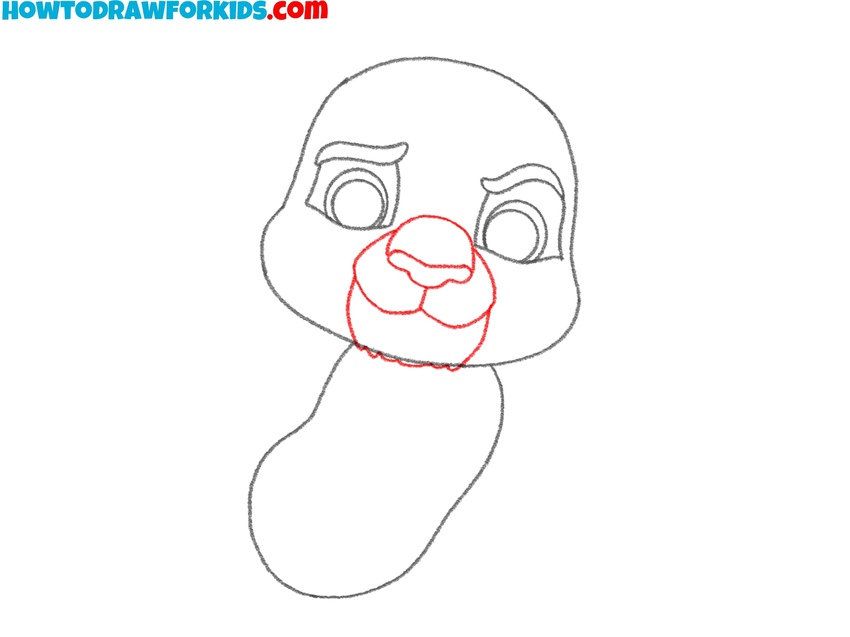
- Draw Simba’s nose and mouth.
Draw the small triangle-shaped nose slightly below the eye line. Add the upper nose area and draw the mouth with a couple of simple lines curving up. If you want to show a different expression, adjust the shape of the mouth to make Simba look sleepy, confused, or excited. Pay attention to symmetry here.
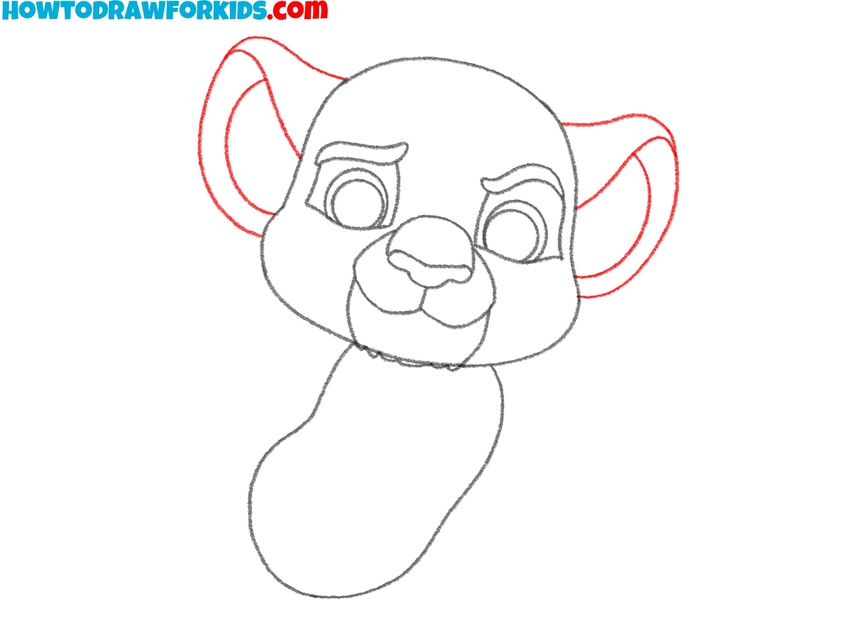
- Sketch the Lion King’s ears.
Attach two rounded triangles to the top sides of the head to create the ears. Inside each ear, draw a smaller curved shape to indicate the inner structure. Make sure the ears are the same size and height. You can also experiment with ear position – tilting one slightly can make Simba look more animated.
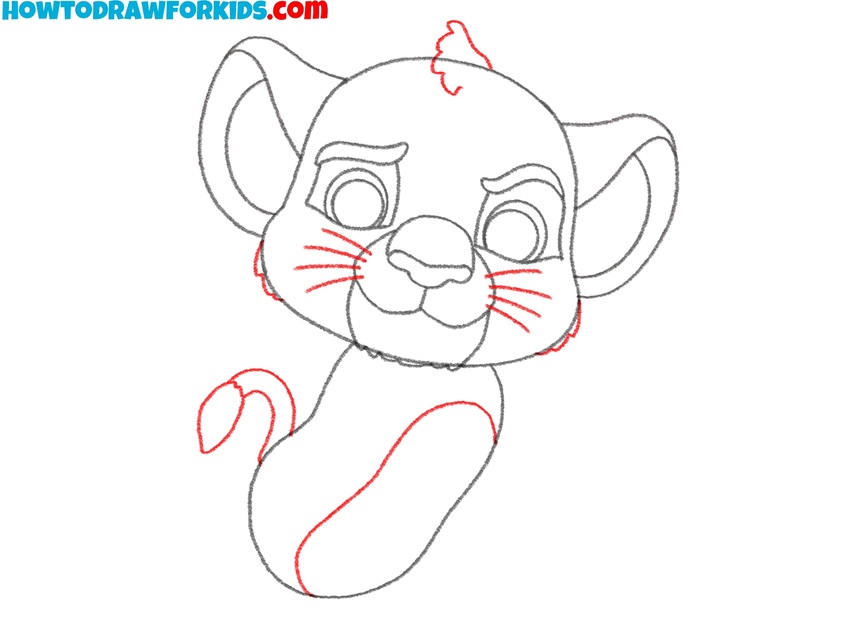
- Add details and sketch the tail.
Lightly add small dots beside the snout for whisker roots. Between the ears, place a small cluster of curved lines to illustrate a tuft of fur. At the back of the body, draw a long, narrow tail that curves behind or beside the body depending on your chosen pose. End the tail with a round tuft.
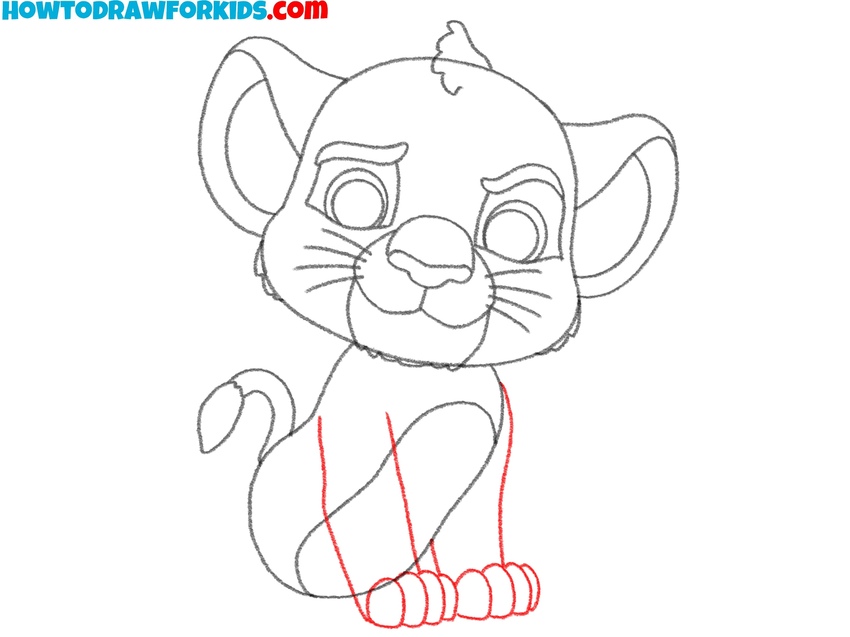
- Sketch Simba’s front limbs.
Starting beneath the head, sketch two vertical front legs of the Lion King. Keep them thick and rounded, tapering gently toward the paws. At the base, form the feet with three short, rounded toes. Short and chubby legs along with big rounded toes will give your Simba drawing a very cartoonish look.
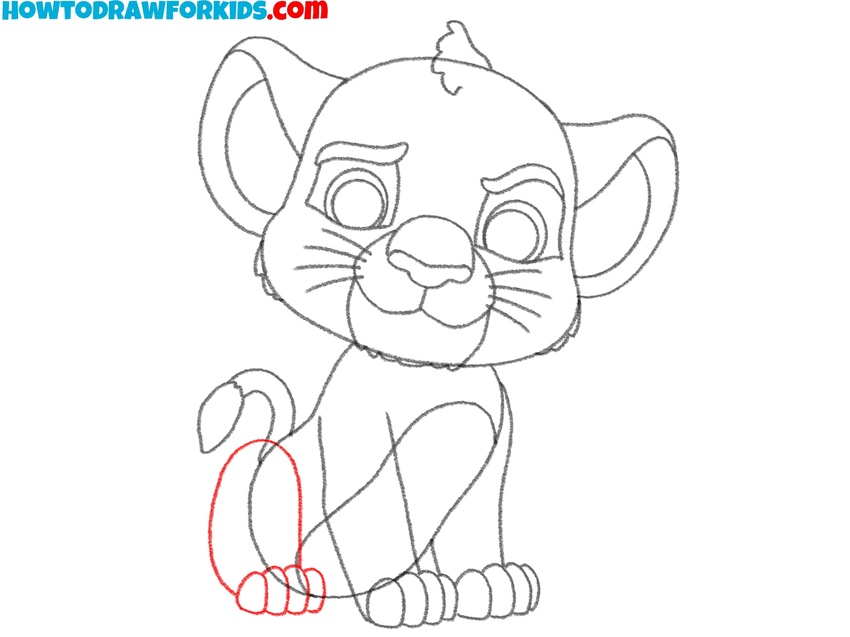
- Draw Simba’s back leg.
On one side of the body, draw a large rounded thigh with a bent knee positioned slightly behind the front legs. Add the rear paw with the same three-toe shape. The back toes should be exactly the same size as the front toes so that your Simba drawing looks complete and proportional.
- Trace the sketch and remove the guides.
Go over the entire figure with a darker pencil or fine liner. Erase the guidelines you no longer need, and double-check the symmetry of the Simba sketch. At this point, review your proportions, this is your last chance to lightly adjust.
- Color your Lion King drawing.
Use golden yellow or light orange for the body of the Lion King. Fill the inner parts of the ears with pink and color the tip of the tail and ear edges with a medium brown. The nose should be a darker brown or black, and the pupils should be dark gray or black with small white highlights.
How to Draw Simba: Alternative Techniques
If you’ve already completed the main Simba drawing tutorial, you might also want to try two simpler alternatives based on the same sitting pose and expression. Both are useful for strengthening your confidence with basic cartoon character drawing while keeping the process less complex.
Alternative Lion King Drawing Method
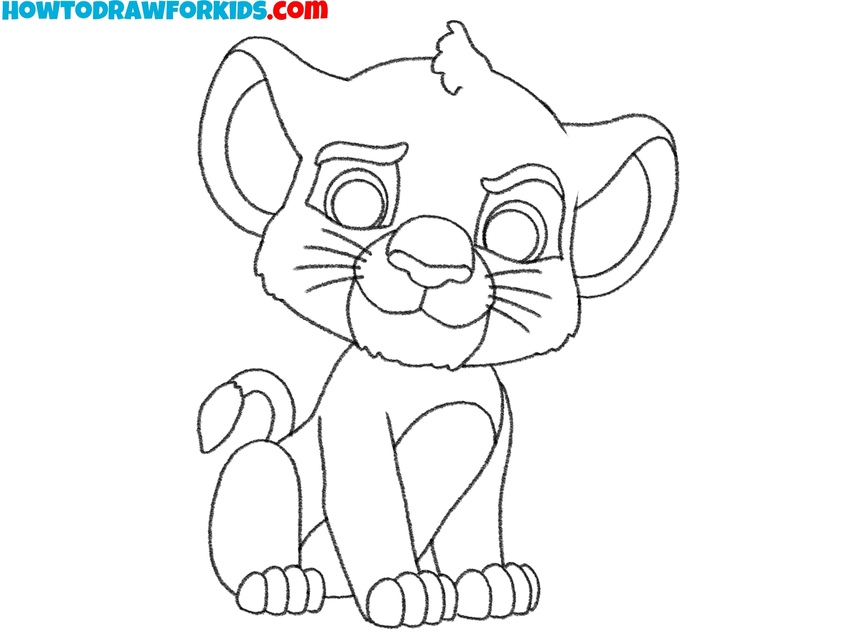
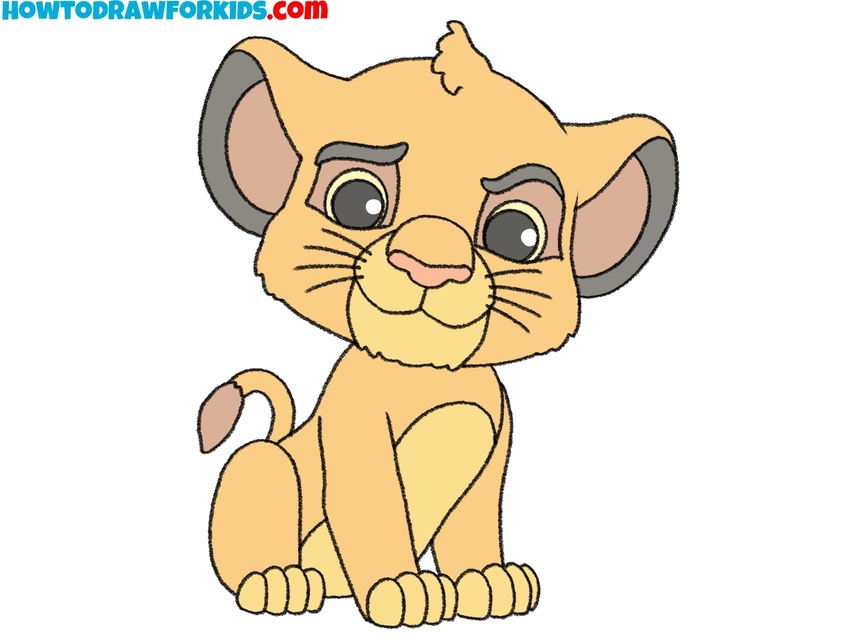
This version of the Lion King drawing tutorial features the same pose and mood as the main Simba tutorial but simplifies the construction. The linework is smoother and fewer small elements are used. The overall silhouette remains recognizable, but the method skips finer details. Color scheme is also adjusted slightly, with stronger contrasts and fewer soft gradients.
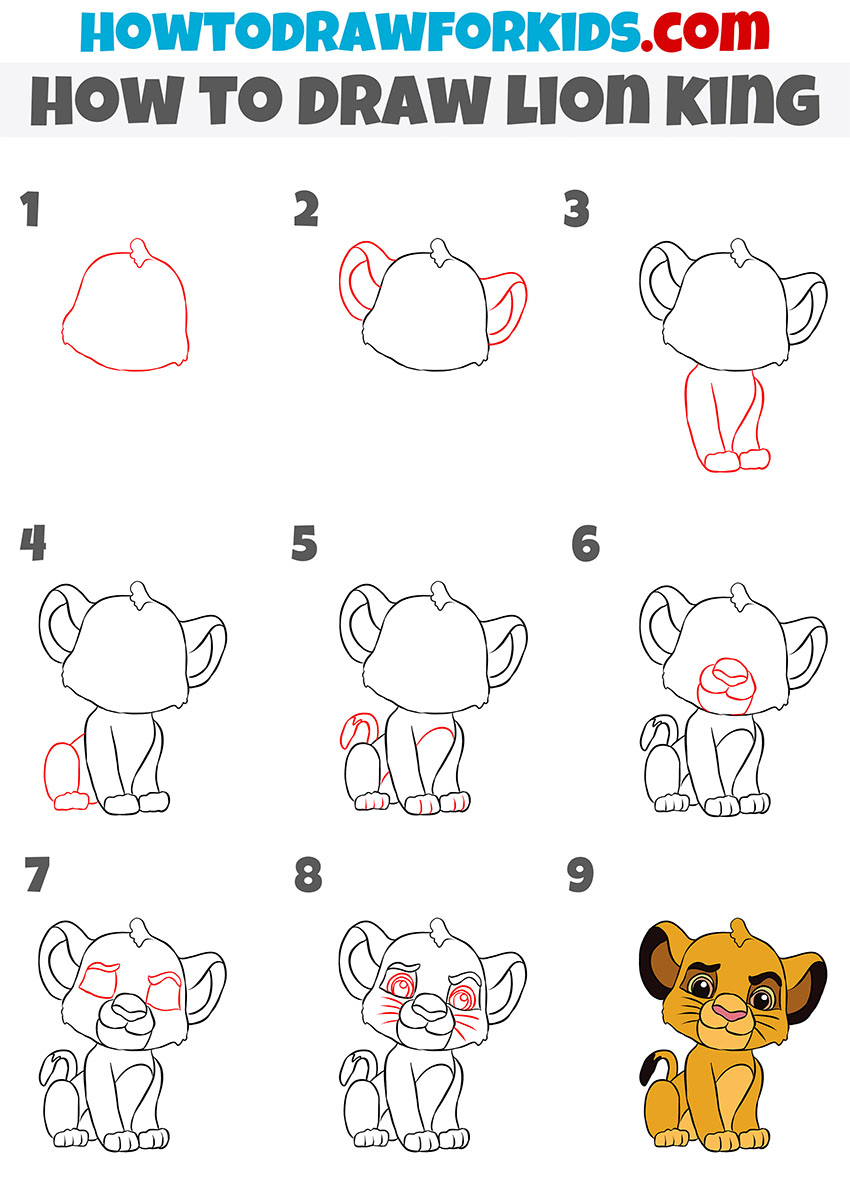
To begin learning how to draw Lion King in this style, outline the large head shape with a smooth contour and a small tuft of hair at the top. Add big rounded ears on each side. Sketch the simple body using curved lines with both legs joined together at the front.
Draw the visible back leg behind the body and add a curved tail on one side with a rounded tip. Insert a wide muzzle and nose in the center of the face. Place the eye shapes with thick upper outlines and draw large pupils. Finish the face with whisker dots and inner ear lines and color your Lion King drawing.
Simple Simba Drawing Tutorial
This is an additional Simba drawing tutorial that offers a simpler approach to sketching the Lion King. The features are more simplified, and the proportions are even more exaggerated.
To begin this simple Simba drawing tutorial, sketch the shape of the head using a smooth, rounded form with a flat bottom edge. Then add a curved line to define the top of the mane with a slightly jagged shape. After that, draw the ears at the top of the head. Sketch two simple smooth lines to create the torso.
Add the front paws by drawing smooth curved lines. Then draw the curved tail extending from the back with a fluffy tip. Move on to the facial features by drawing large eyes with thick upper lines and highlight circles inside the irises. Finish the face with a small triangular nose, a closed mouth, and short whiskers. Add final lines for ear and face details, then color the character in orange and brown tones.
Conclusion
I think you managed to draw a very cute Simba, whether you followed the main version with more details or the simpler additional versions. If you had any questions while working through either version, be sure to ask them in the comments. Your feedback on the tutorial is very important, so don’t forget to share your thoughts.
To train your animal sketching skills, visit my lion drawing tutorial. To learn more about details, visit my lion head drawing tutorial. Also, visit my Stitch drawing tutorial and other lessons from cartoon category, to boost your cartoon characters sketching skills.
Also, subscribe to me on social networks so you don’t miss new tutorials. If you liked the lesson, share it with your friends – these step-by-step guides are easy and helpful for anyone who wants to learn drawing.
It was my destiny to draw I practiced to draw by this app !
It’s nice to hear the tutorials helped you keep practicing. That’s great, Dhiyana.