How to Draw the Wind
In this drawing lesson, I will tell you how to draw the wind step by step. This step-by-step instruction consists of seven simple steps.
I suggest you complete an excellent and very useful drawing lesson for each of you, in which I will tell and show you how to draw the wind step by step. This is another fascinating drawing lesson dedicated to depicting natural phenomena. This phenomenon is considered one of the most frequent and ubiquitous on Earth.
Wind is the movement of air in open space. The wind can be warm and light, or it can be strong and cold. The wind helps to purify the air, helps move clouds and clouds, promotes the spread of plants, due to the fact that it carries their seeds from one area to another. Too much wind can be destructive.
Despite the fact that the air is transparent, with the help of this instruction you can learn how to draw the wind. You will learn how to draw wind with the help of this drawing lesson, you will be able to decorate any of your paintings with the image of this natural phenomenon in the future.
For example, you can draw some kind of natural landscape, mountains, forest, cityscape or some other picture, and then complete your drawing with a picture of a wind flow.
Wind Drawing Tutorial
Materials
- Pencil
- Paper
- Eraser
- Coloring supplies
Time needed: 30 minutes
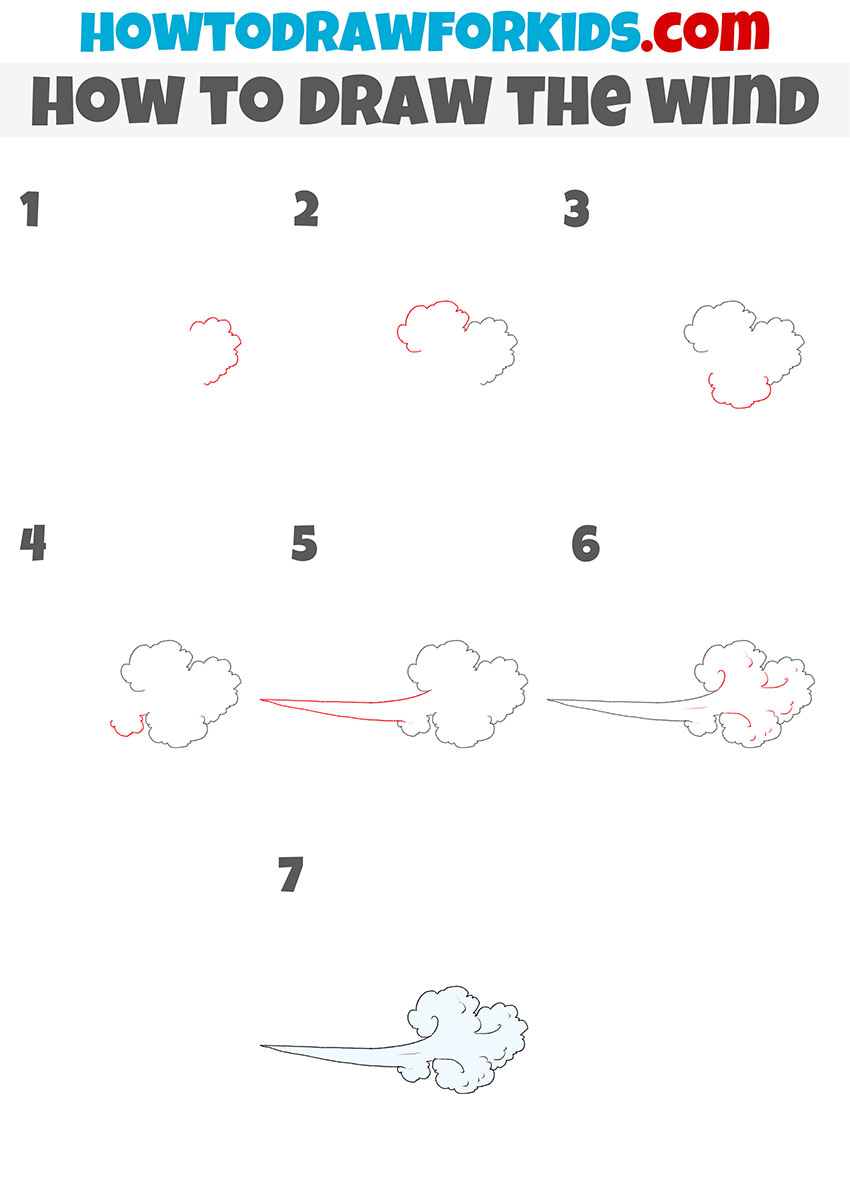
How to Draw the Wind
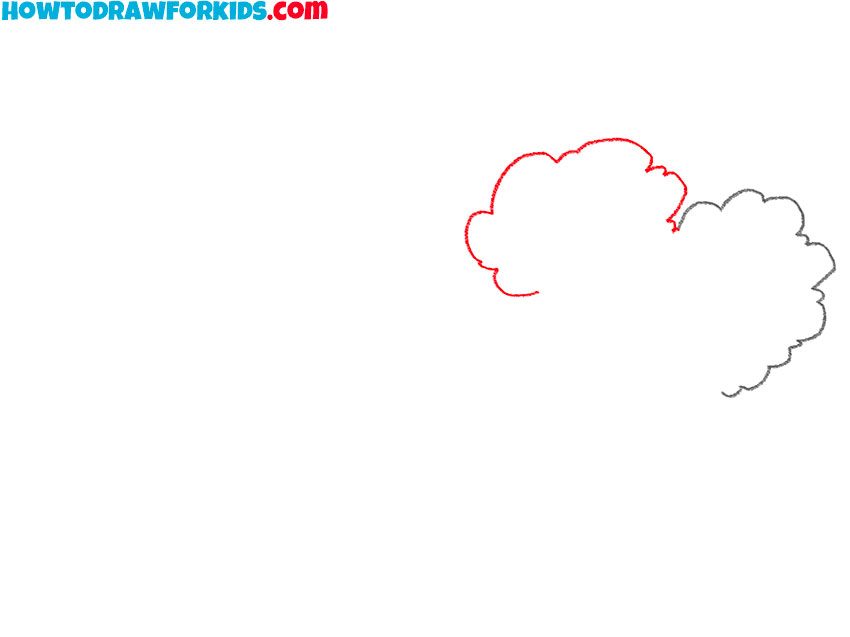
- Draw one edge of the wind flow.
With the help of short rounded lines of different sizes, depict one edge of the wind.

- Add another edge to the wind flow.
On the left side of the drawn lines, add many curved and rounded lines of various lengths.
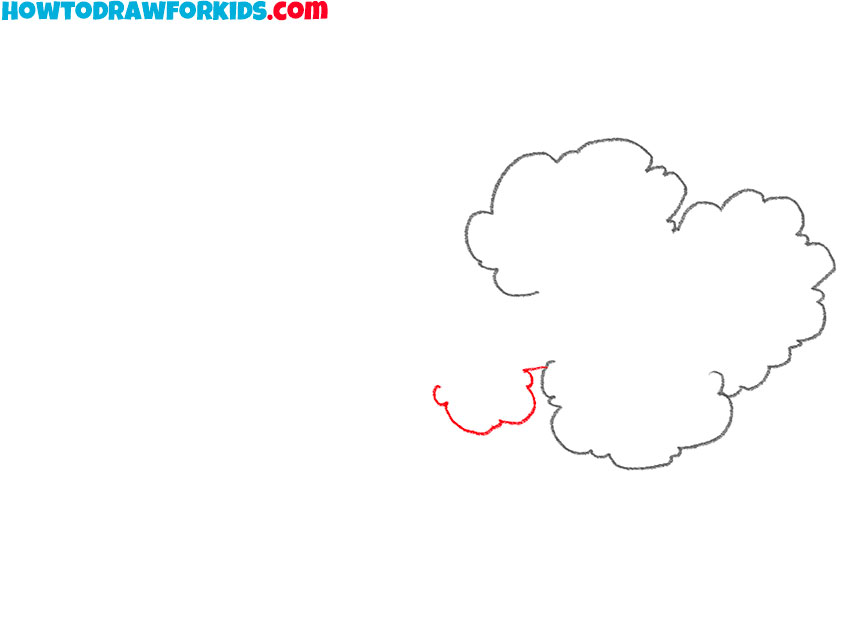
- Continue drawing the wind.
Below the previously drawn elements, add a few more short and long rounded lines.
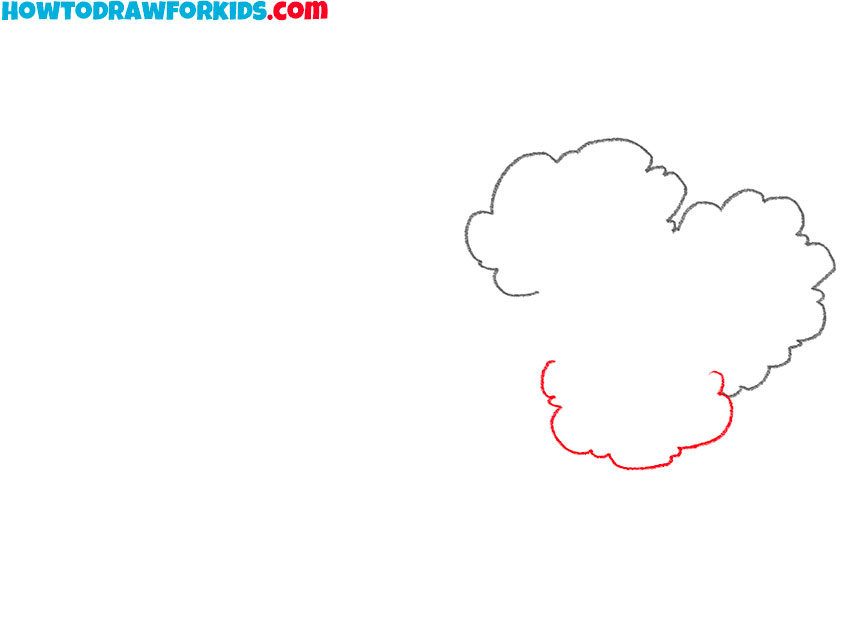
- Add the last edge of the wind flow.
Draw a little more of the wind flow using a short straight line and a few curved lines.
- Depict the beginning of the wind flow.
To the left of the drawn elements, draw two curved lines of different lengths.

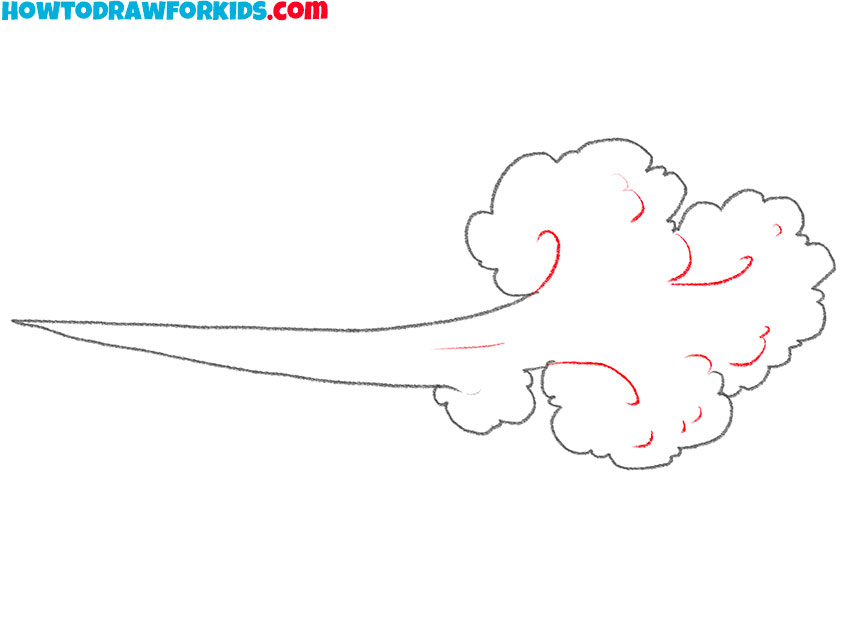
- Make your drawing more voluminous and realistic.
To make the wind look more realistic, add several lines on the surface of the wind flow.
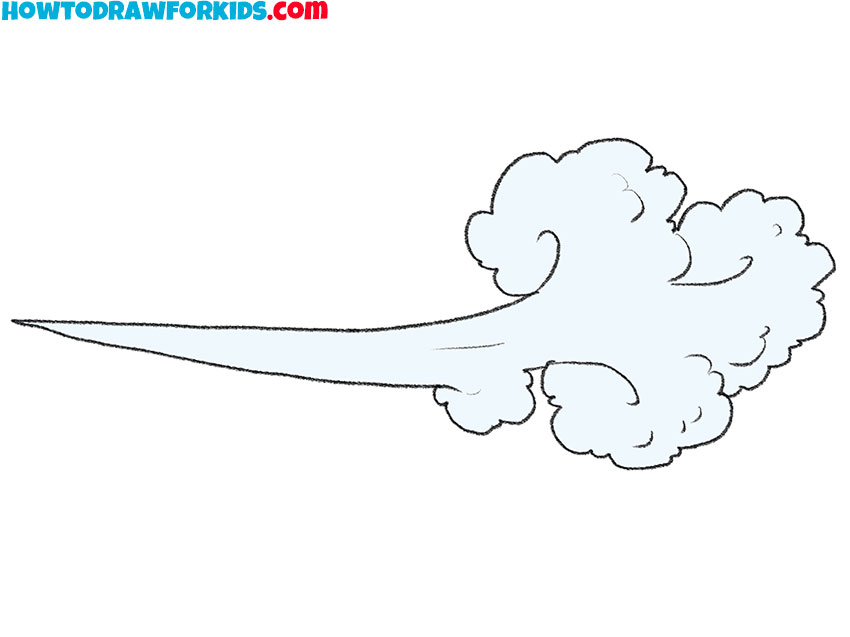
- Color the drawing.
To color the wind, you should use a light blue color.
For your convenience, I have prepared a PDF file that contains all the useful information from this lesson, as well as additional practice materials that will help you develop your artistic abilities. You can download this file right now, so you don’t lose it in the future, and return to this tutorial even without an internet connection.