How to Draw a Pyramid
As we set out on this artistic expedition, my tutorial will illuminate how to draw a pyramid, turning your canvas into a landscape touched by the ancients. Each stroke you make will be a step down the path of history, unraveling the mystery of these monumental wonders through your own hands.
How to Draw a Pyramid: Basic Information
Embark with me as we harness the art of drawing to recreate one of history’s most enigmatic wonders. In this lesson on how to draw a pyramid, we’ll translate ancient glory onto paper, simplifying complex structures into clear, achievable steps. With each line, your skill will echo the precision of the pyramid builders.
As I guide your pencil, it becomes a time machine, drawing you back to the dusty plains of Giza. My methodical approach demystifies the process, turning daunting architectural feats into basic shapes and shadows, empowering even novices to capture the pyramid’s stoic beauty.
By the time your sketch is complete, you’ll hold more than a drawing – you’ll possess a connection to the architects of old. Your newfound ability to draw a pyramid serves not just as a tribute to these architectural marvels but also as a testament to the timeless beauty that you can create with a simple pencil.
Pyramid Drawing Tutorial
Materials
- Pencil
- Paper
- Eraser
- Coloring supplies
Time needed: 30 minutes
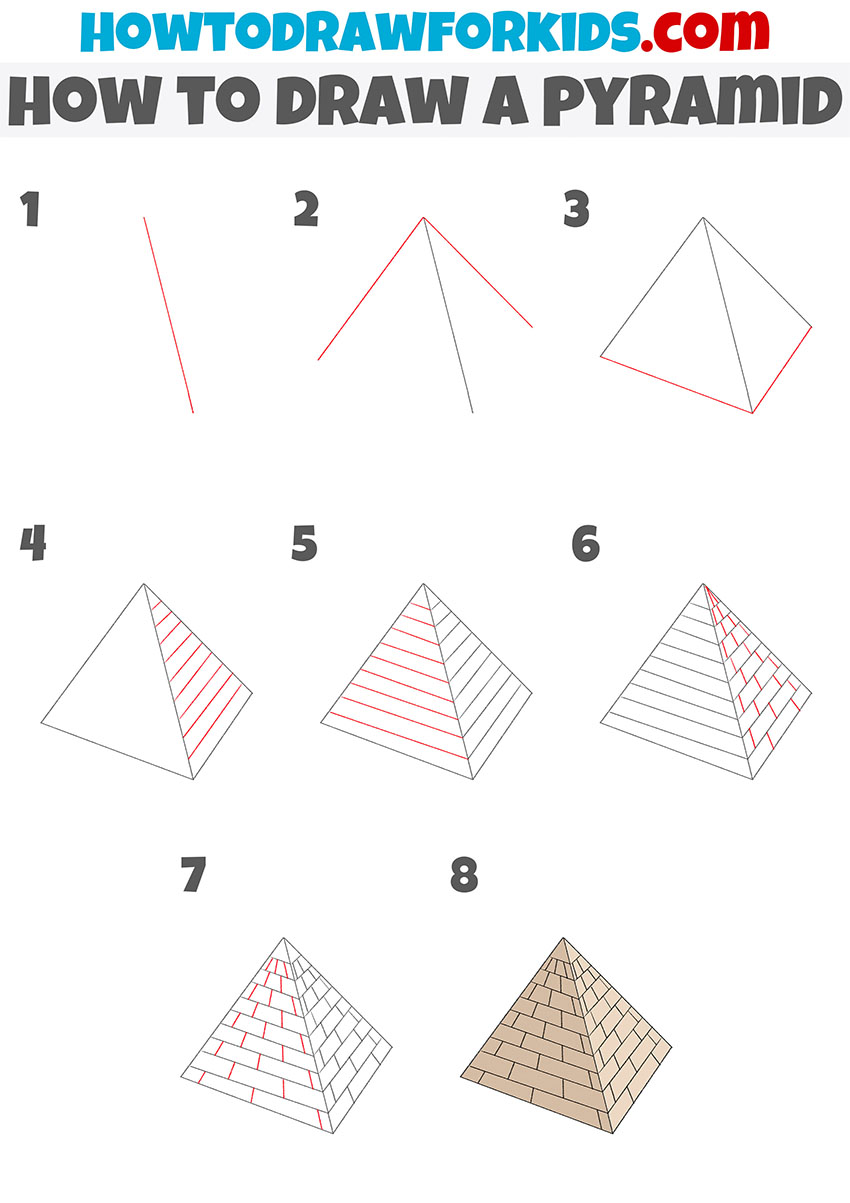
How to Draw a Pyramid
- Draw one face of the pyramid.
To complete this step, you should draw one straight, slanted line.

- Add the top two faces of the pyramid.
From the top end of the previously drawn line, depict two more straight lines.

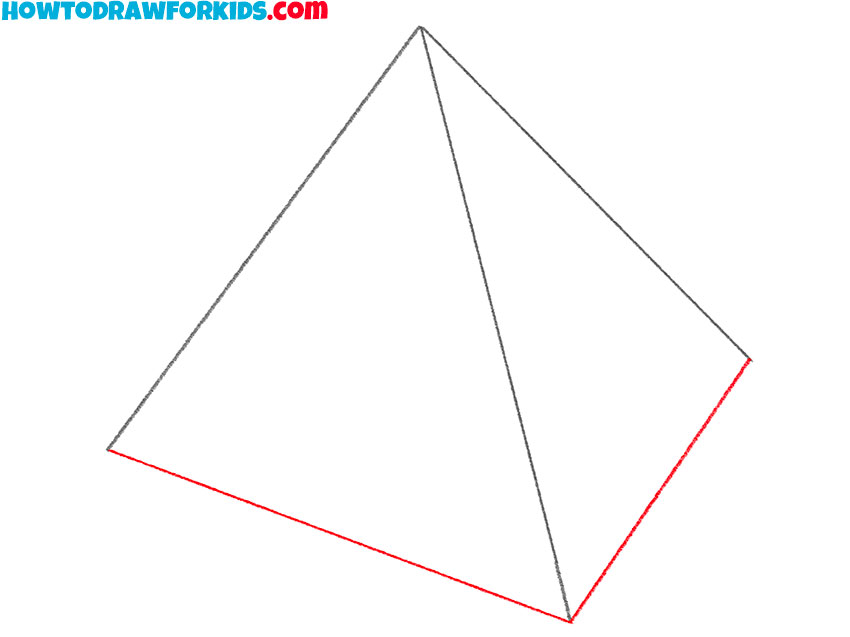
- Finish drawing the outline of the pyramid.
Now you should draw two straight lines to connect the lower ends of the previously drawn lines.
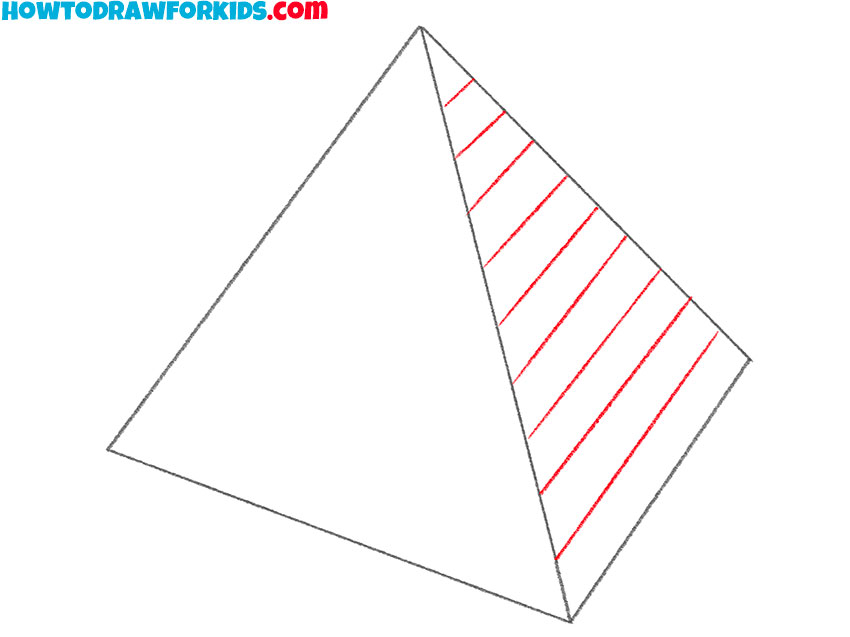
- Start drawing the outlines of the blocks.
Depict many straight, parallel lines on one side of the pyramid.
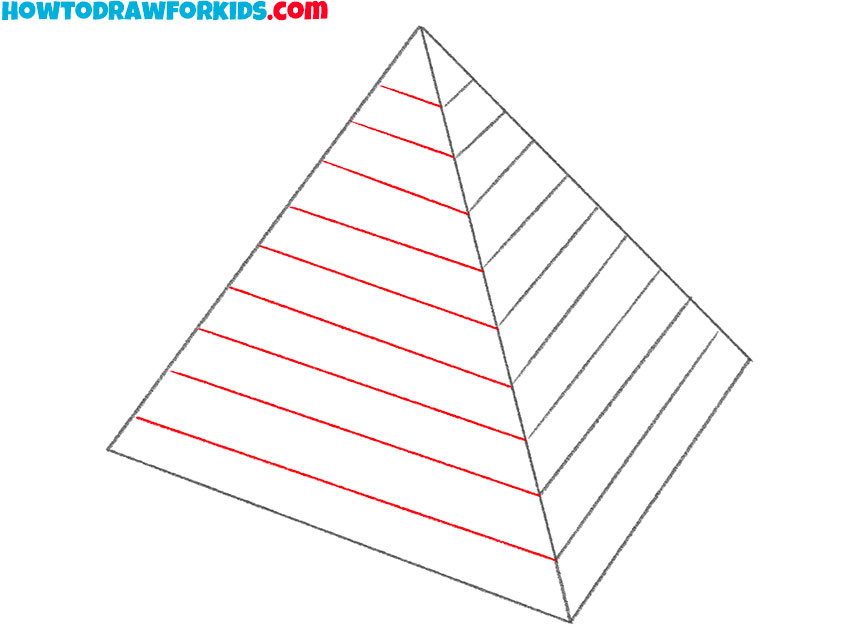
- Continue drawing the outlines of the blocks.
Add several rows of blocks, to do this, draw straight lines from the other side of the pyramid.
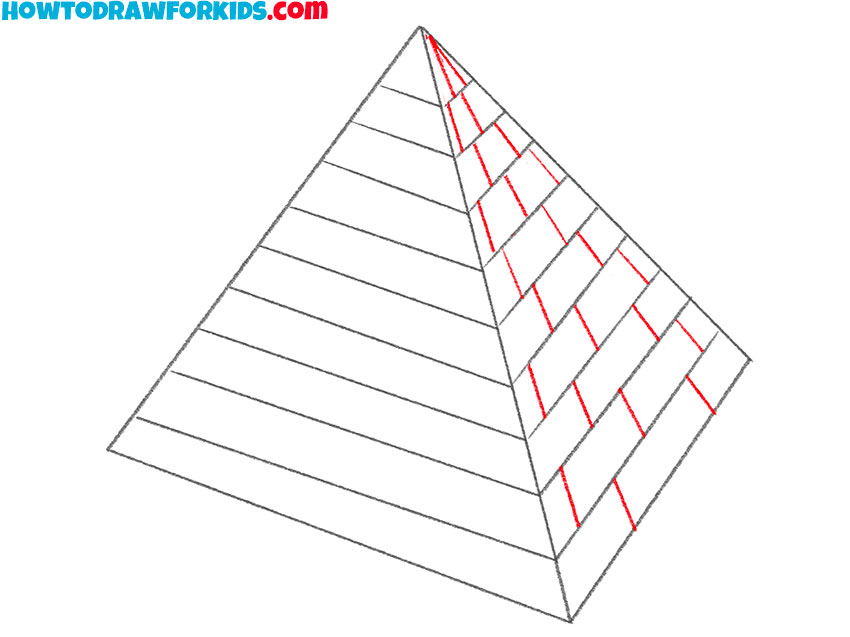
- Add individual blocks.
Now you should add many short straight lines as shown in the example.
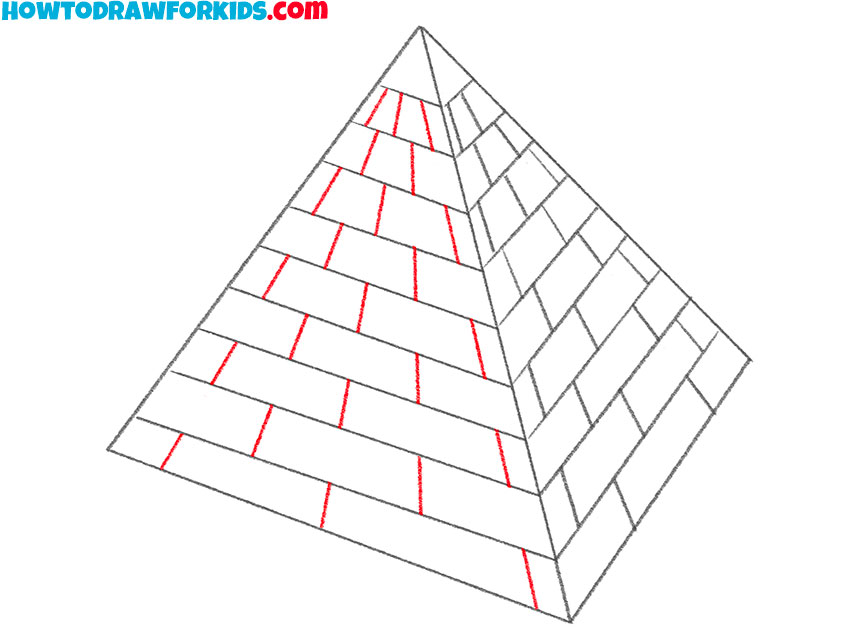
- Finish drawing the pyramid blocks.
In this step, add a few more straight lines on the other side of the pyramid.
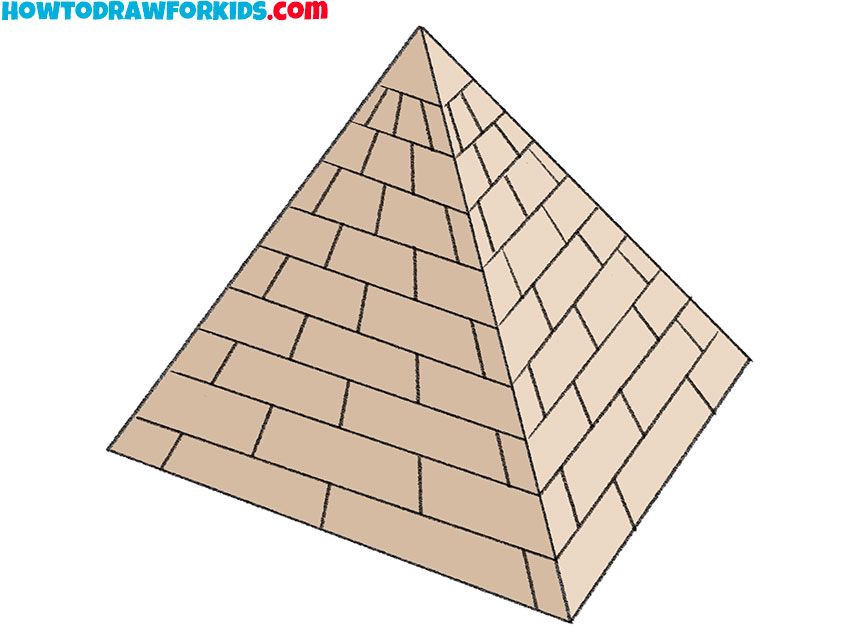
- Color the drawing.
To color the pyramid, use different shades of brown.
Additional Content
For those who wish to delve deeper into the artistry of ancient structures, I’ve crafted a special PDF companion to our pyramid drawing lesson. This downloadable guide is brimming with extra materials designed to enhance your drawing skills, perfect for those moments when you’re away from the internet and the urge to create strikes.
Inside, you won’t find step-by-step instructions; instead, you’ll be met with challenges and exercises intended to refine your technique and encourage personal style development. It’s a resource created to complement your learning journey, providing valuable practice even after you’ve mastered the basics.
As you progress through the fundamentals of drawing, this PDF will be your silent mentor, offering guidance and inspiration. Consider it your artistic toolkit, one that grows with you as your confidence and capability flourish with each sketched line and shaded contour. Download it, and let it be your guide on the path to becoming a skilled artist in your own right.
Alternative Drawing Technique
Beyond the foundational steps of our pyramid drawing lesson, I’ve devised an alternative method that strips the process down even further. It’s a technique tailored for continuous practice, ensuring that your artistic skills are not just nurtured but truly honed.
This new approach is distilled to its essence, presenting an even simpler pathway to portray these ancient wonders. Ideal for quick sketches or those new to the craft, it provides the bedrock for budding artists to build upon, encouraging repetition and confidence.
Embrace this additional method as an exercise in minimalism and efficiency. As you adopt this streamlined process, watch your hand grow steadier and your eyes sharper. This isn’t just about drawing pyramids; it’s about elevating your entire artistic repertoire through simplicity and focus.
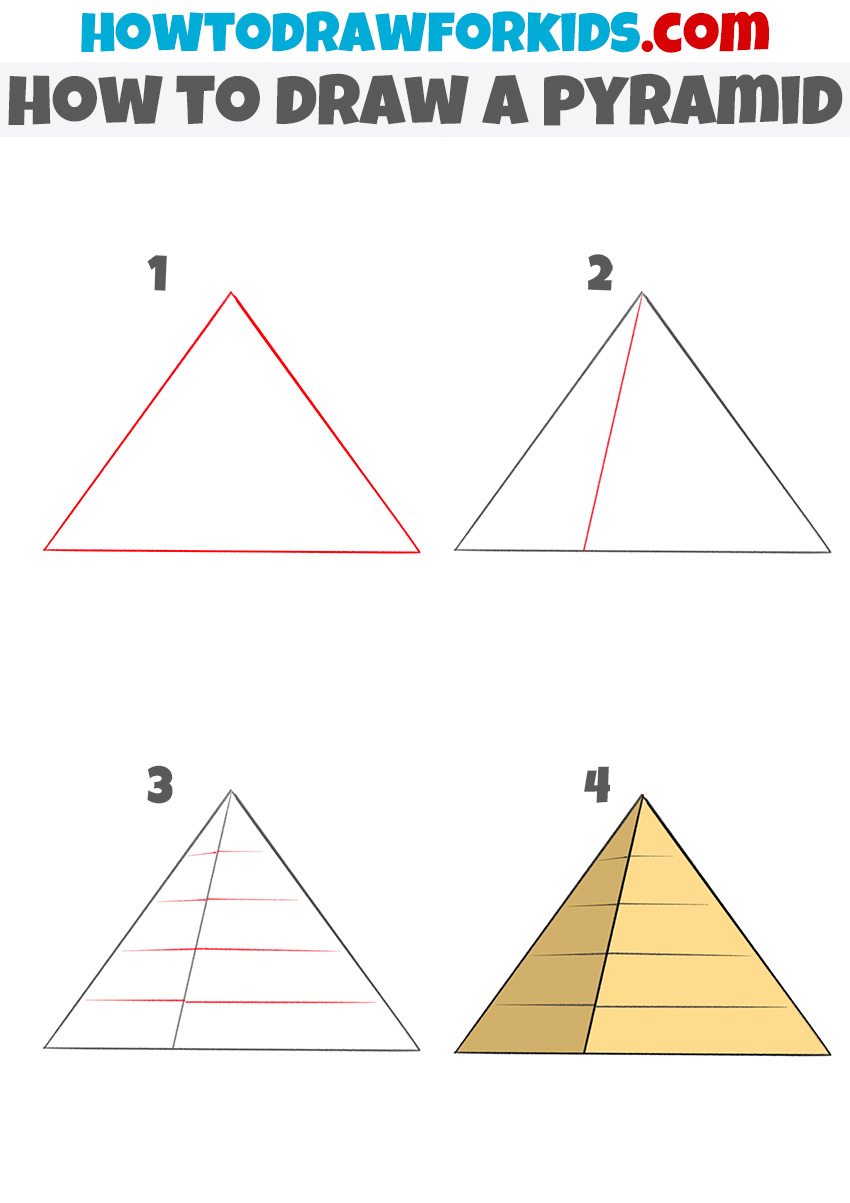
How to Draw a Pyramid for Kindergarten
In the first step of this method suitable for kindergarteners, we draw a single, upright triangle to form the base of our pyramid. It’s an inviting beginning that promises fun and ease, ensuring that the young artists remain engaged and proud of their emerging skills.
As we progress to the second step, we add a second triangle in the background, mirroring the first, to start giving our pyramid the depth it deserves. This is where our young learners get a sense of three-dimensionality, an exciting venture into the basics of perspective that’s easily graspable at their level.
In the final stages, horizontal lines are carefully drawn across the pyramid, creating layers that depict the building blocks of these ancient wonders. The fourth and final step allows the children to fill in colors, bringing their creation to life with warm tones that spark imaginations.
Turning Lines into Legacies with Pyramid Sketching
Navigating the fine details of drawing can elevate a simple sketch into a masterpiece. Here’s a curated list of technical nuances that can refine the depiction of a pyramid, enhancing the precision and beauty of your work:
- Proportion: Keep the sides of the pyramid symmetrical. It’s the symmetry that gives the pyramid its true form.
- Perspective: Even in simplified drawings, perspective matters. Ensure that the lines of the pyramid converge subtly as they rise.
- Shading: To suggest dimensionality, use light shading on one side of the pyramid to mimic the sun’s natural light.
- Line Variation: Employ varied line weights – thicker lines can define the pyramid’s outline, while thinner ones can detail the inner lines.
- Texture: To imitate the stonework, add small, varied lines within the pyramid’s layers for a textured look.
- Consistency: When drawing the horizontal lines, keep their spacing consistent to maintain the illusion of uniform blocks.
- Highlight: A gentle touch of lighter shades can serve as highlights where the sun hits the pyramid’s edges.
- Shadow: Cast a light shadow opposite to your light source to anchor the pyramid to its base and enhance its three-dimensionality.
- Color Gradients: If you’re painting, blend colors from dark to light to create a realistic gradient effect.
In wrapping up, these detailed nuances are the threads that weave complexity into our art. They are the subtle differences that invite the viewer to look closer and appreciate the technique behind the simplicity. Mastering these elements doesn’t just create a drawing; it brings a piece of history to life on the page.
Expert Answers to Your Pyramid Puzzles
As we conclude our session on sketching pyramids, I understand there may be curiosities and queries rising like the ancient structures themselves. Let’s address these inquiries with precision and clarity to aid your artistic journey:
- What type of paper works best for practicing drawing? For beginners, any standard sketch paper is fine. If you’re looking to work in detail, a slightly thicker, smoother paper can give a better finish.
- Is it necessary to use a pencil, or can I start with a pen? Starting with a pencil is recommended as it allows you to make and correct mistakes easily. Pens can be used once you’re more confident.
- How do I get the proportions of my pyramid right? Begin by sketching lightly, using a ruler if necessary. Compare the sides to ensure they’re equal in length and angle.
- My lines are shaky. How can I improve? Practice drawing lines quickly and confidently. Don’t be afraid to make bold strokes; steadiness comes with practice.
- How can I make my pyramid look more realistic? Study images of real pyramids and notice the textures, how they reflect light, and their scale against their surroundings. Try to replicate these aspects.
- Is it important to understand perspective for drawing pyramids? Understanding perspective is crucial for making your pyramids look three-dimensional, especially if you’re drawing a scene with multiple structures.
- What are some creative ways to practice pyramid drawing? Try drawing from different perspectives or imagine how a pyramid would look on another planet or in a fantasy setting. Experiment with lighting and shadow.
In synthesizing our learnings, remember that each question you ask is a stepping stone to greater mastery. Embrace the process of learning as you have embraced the complexity of the pyramids. With every attempt and each line drawn, your skill sharpens, bringing the stones of knowledge into a structure of skill.
Conclusion
With our journey through ancient Egypt concluding, the adventure into art continues. My website hosts an array of lessons, inviting you to bring to life everything from the gentle features of a doll to the sleek lines of a Bugatti. Each tutorial is a step on a path to broadening your artistic skills, woven with diversity and challenge.
To ensure you’re always in the loop for the latest artistic explorations, follow me on social media. There, announcements and fresh content await your eager hands and eyes. And if there’s a particular subject or technique you’re curious about, the comment section below is your stage.