How to Draw a Seal
In this guide, we will continue the theme of drawing animals and learn how to draw a seal by depicting its cute face and characteristic body.

How to Draw a Seal: Introduction
One of the most common mistakes young artists make when drawing animals similar to a seal is that they do not consider the unique body structure of this animal. This oversight makes the final drawing look different from the real animal.
To prevent these mistakes, in this lesson on how to draw a seal, I will explain in detail all the nuances you need to know when depicting this cute creature. I’ll demonstrate how to draw the face and body, making them look really authentic.
If you follow my nine simple steps, you will gain important skills that will help you draw other similar animals, such as a walrus.
By applying these techniques, you will achieve a high level of accuracy and recognizability in your drawings. Also, this tutorial on how to draw a seal will train your skill in creating smooth a curved lines.
Seal Drawing Tutorial
Materials
- Pencil
- Paper
- Eraser
- Coloring supplies
Time needed: 30 minutes
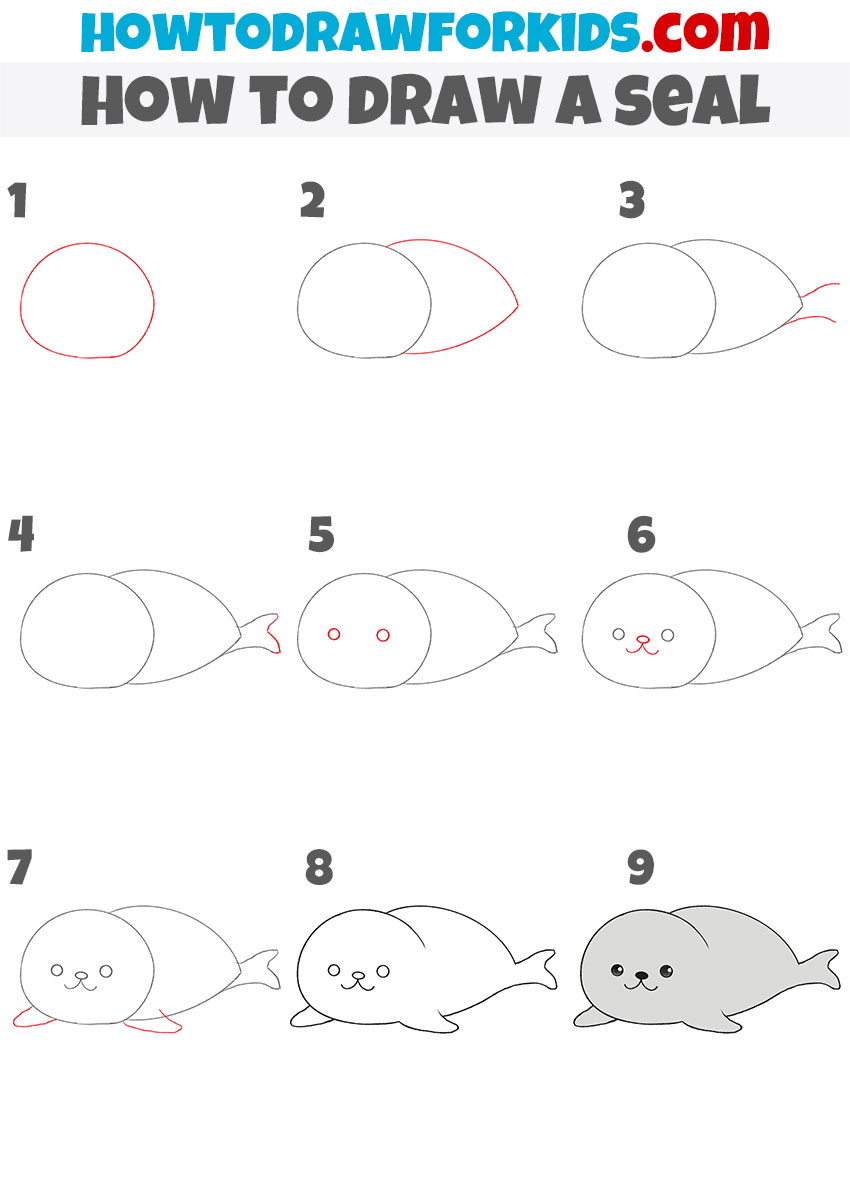
How to Draw a Seal
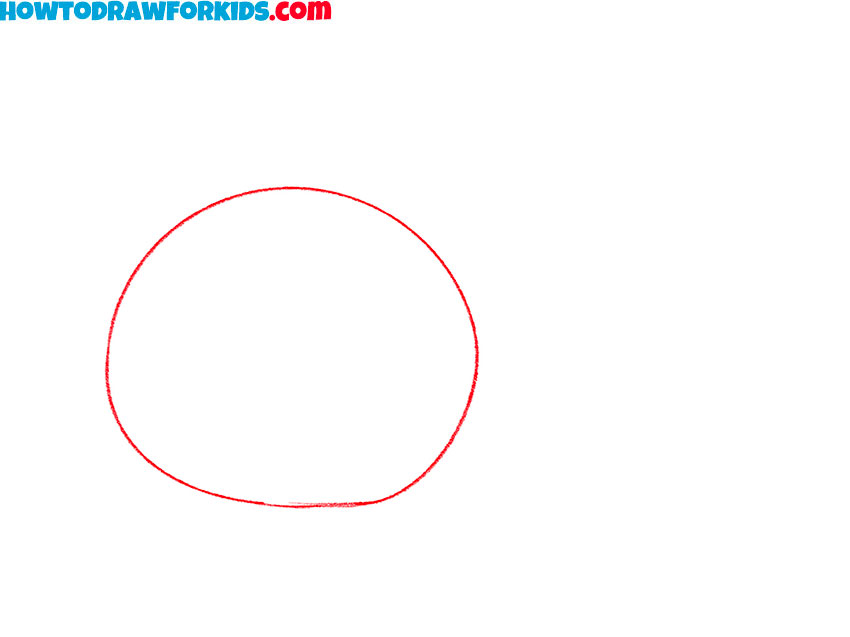
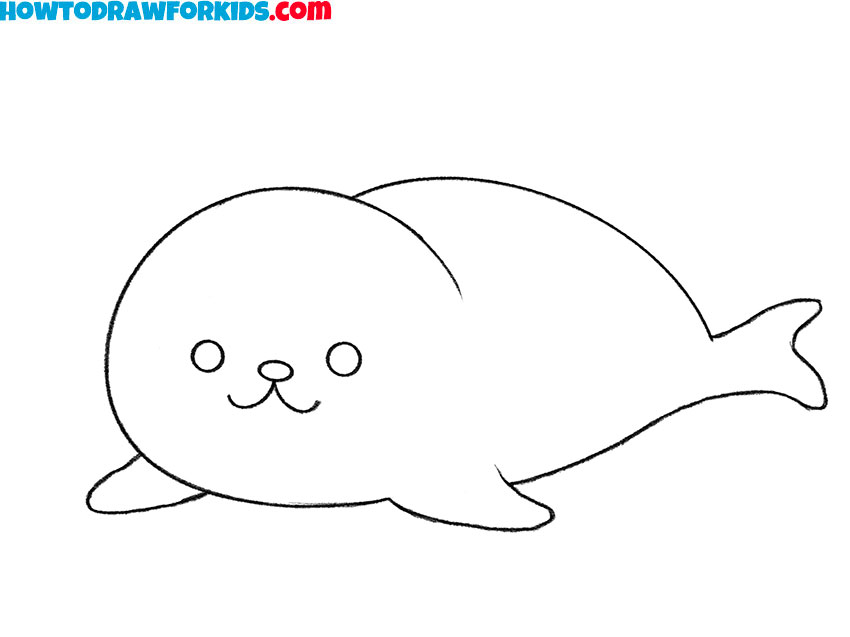
- Draw the seal’s head shape.
To begin drawing the seal, start by sketching an oval shape. This oval will serve as the seal’s head. Keep the shape smooth and rounded. As this is one of the first steps, use light pencil strokes so that you can easily make adjustments if needed.
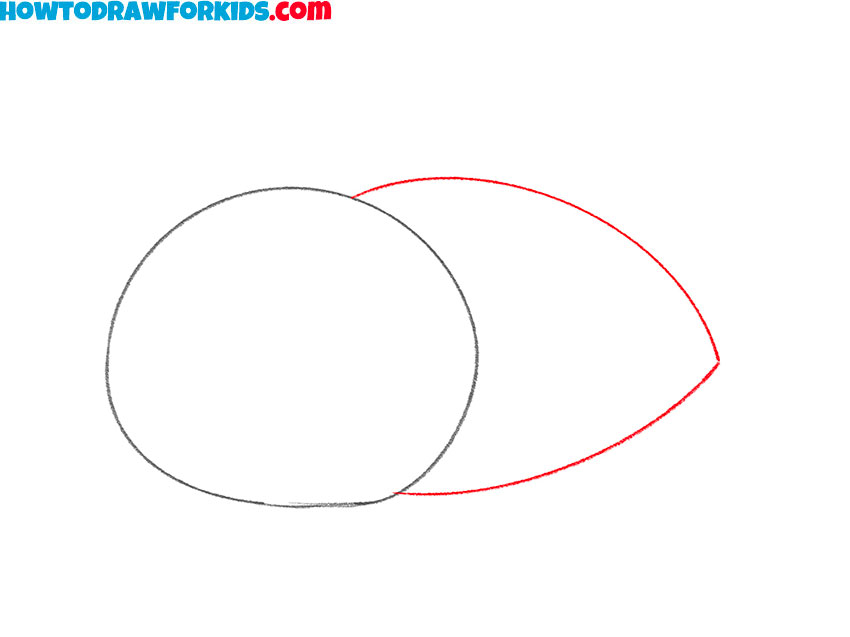
- Sketch the body outline.
Next, draw the seal’s body by adding a second shape connected to the first oval. This shape should be a rounded teardrop, tapering at the back. Make sure that the transition between the head and body is smooth. The body should be slightly larger than the head but not overly elongated.
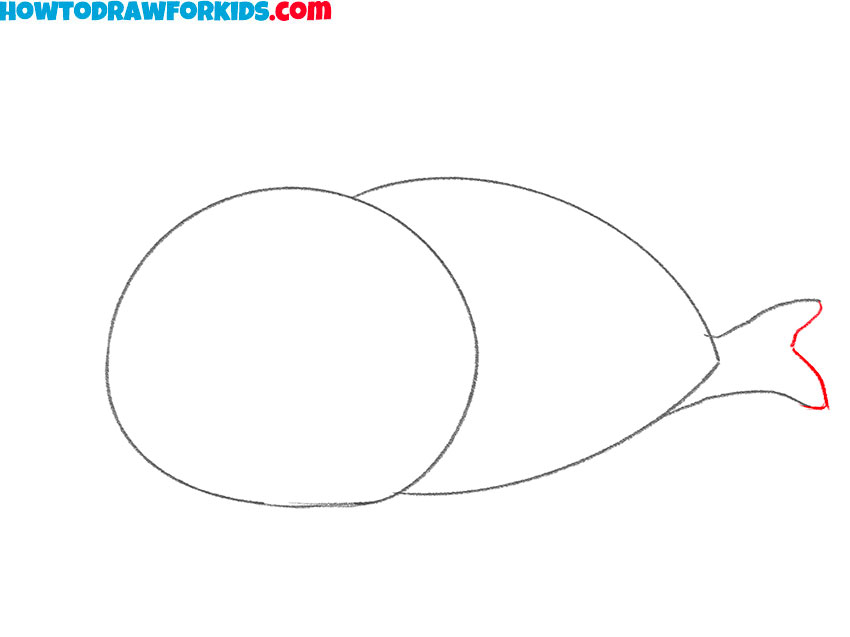
- Start adding the tail fins.
Now, it’s time to give the seal its small, flipper-like tail. Draw two slightly curved lines extending from the narrow end of the teardrop-shaped body. These lines should gently spread outward, forming the base of the tail. You can adjust the curves to the desired side.

- Finalize the tail shape.
Now, finish drawing the tail of the seal by adding the back edge. Seals have a distinctive tail shape with a small notch in the middle, creating two rounded sections. Smoothly adjust the outline of the tail to give it a more natural, flipper-like appearance. Keep the curves smooth.
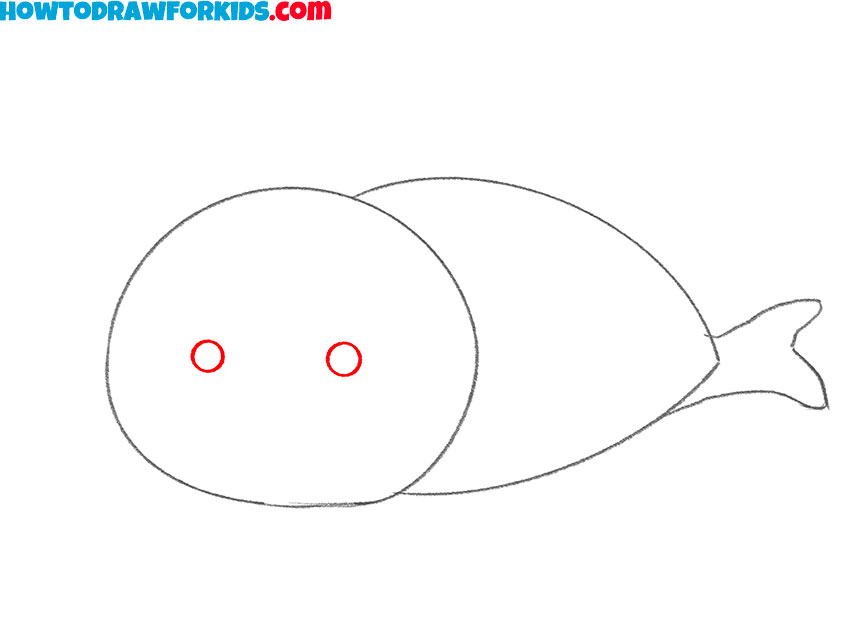
- Draw the eyes of the seal.
Next, add two small circles or ovals near the center of the head to form the seal’s eyes. Seals have large, round eyes that give them a cute look. You can make the eyes look unique by adding pupils inside or adjusting their placement.
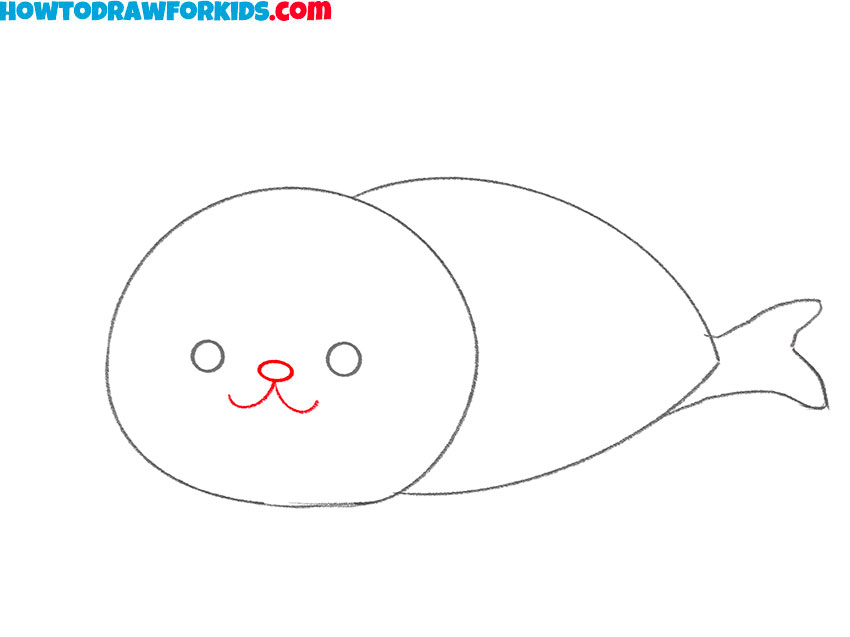
- Add the nose and mouth.
First, draw the seal’s small, rounded nose right below the eyes. The nose should be a simple, upside-down triangle or an oval, depending on the style you prefer. Below the nose, draw a couple of tiny, curved lines to form the mouth of the seal.
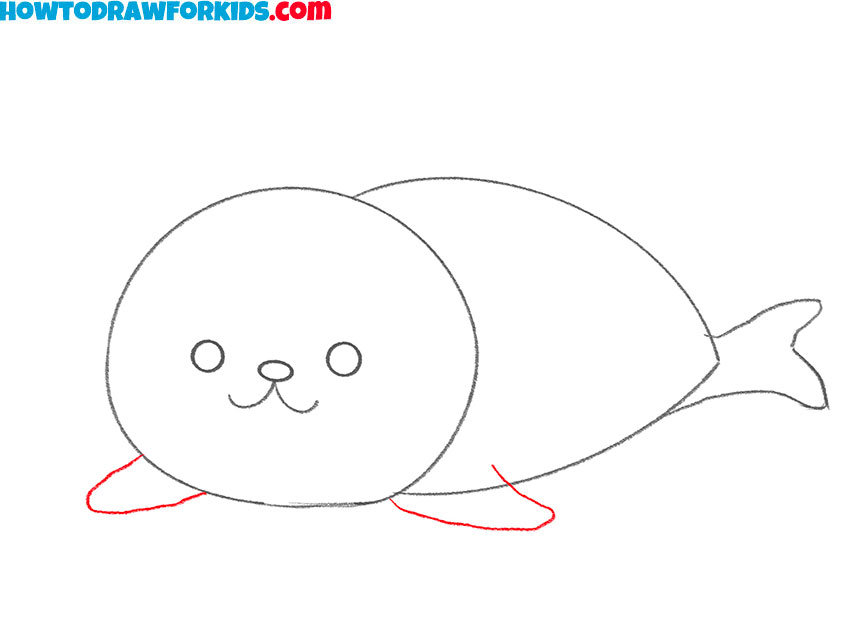
- Sketch the front flippers.
To give the seal its distinctive front flippers, draw two short, rounded shapes extending from the lower sides of the body. These flippers should be slightly curved and positioned just below the head. Try to make both flippers symmetrical, but don’t worry if they are slightly different in shape.
- Finalize the outline.
At this stage, refine your seal drawing by darkening the main lines and erasing any unnecessary guidelines from the initial steps. Go over the entire outline, making sure all the shapes are smooth and look finished. If any areas look uneven or disproportionate, make small adjustments to improve the overall look.
- Color your seal drawing.
To color this cute animal, you can use a light gray shade for the body. Keep the eyes black, leaving a small white highlight for a glossy effect. The nose can be slightly darker than the body. While seals have smooth, wet skin, adding slight variations in shading can make the drawing look more natural.

Additional Content
The seal drawing tutorial has come to an end. I hope you enjoyed this guide and are happy with the result of your efforts. Don’t forget to download this pdf. You will find a short version of this tutorial there. It will help you draw a seal even without the internet.
Conclusion
In this guide, we have learned how to draw a seal using a truly simple, even elementary technique.
Now, to further deepen and strengthen your skills, try drawing the seal in an interesting setting, adding other animals around it. Alternatively, you could draw a ball lying next to the seal or create a background featuring white hills and clouds.
Don’t forget that my website has a vast collection of animal drawing lessons, forming a complete encyclopedia of various creatures you can find in different corners of our planet. With my simple tutorials, you can draw a dog, a cat, or any other animal you like. Additionally, beyond the animal section, you can explore lessons on drawing other objects and significantly improve your artistic skills.
If you have gone through the entire website and are looking for additional materials, be sure to follow me on social media, such as YouTube, where I publish video versions of my drawing lessons. There, you can watch me draw animals or characters in real time and see how I create my tutorials. Also, don’t forget to follow me on Pinterest if you want to share your drawings or see what other young artists are creating.