How to Draw a Strawberry
Today, we will learn how to draw one of the most beloved berries in a step-by-step lesson on how to draw a strawberry.
How to Draw a Strawberry: Introduction
A strawberry is rightfully one of the most common berries on planet Earth, and almost every person on our planet probably knows what it looks like. Many people would likely want to learn how to draw a strawberry so that it is recognizable and resembles a real one.
In this drawing lesson, I’ll show you the simplest way to draw a strawberry, a method suitable for absolutely everyone. We will depict this simple-looking berry using the easiest possible lines, details, and steps.
Of course, even when drawing such a simple object as a strawberry, there are some challenges, which we will certainly address in this lesson.
As you draw, try to accurately and correctly reproduce all the berry’s few parts, make the shapes as symmetrical as needed, and add the necessary asymmetry where required.
Strawberry Drawing Tutorial
Materials
- Pencil
- Paper
- Eraser
- Coloring supplies
Additional Content
Time needed: 25 minutes
How to Draw a Strawberry
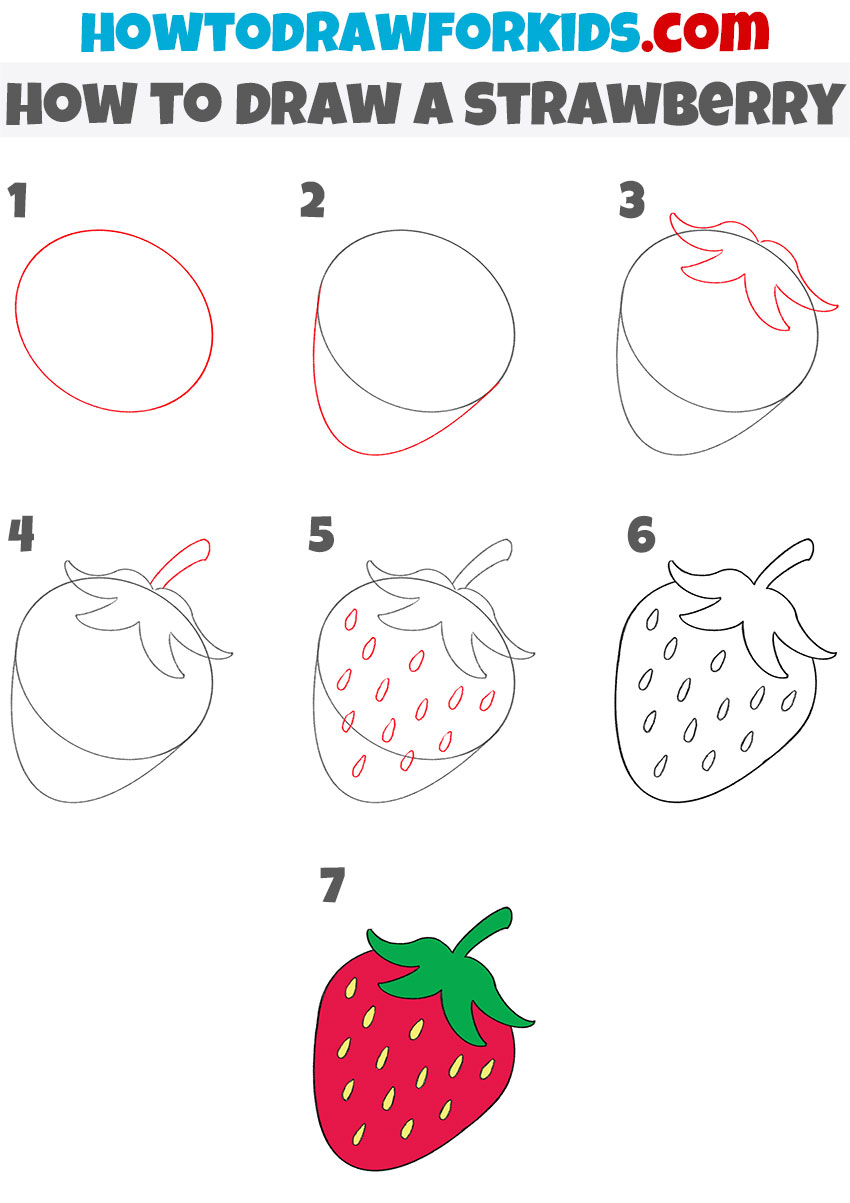
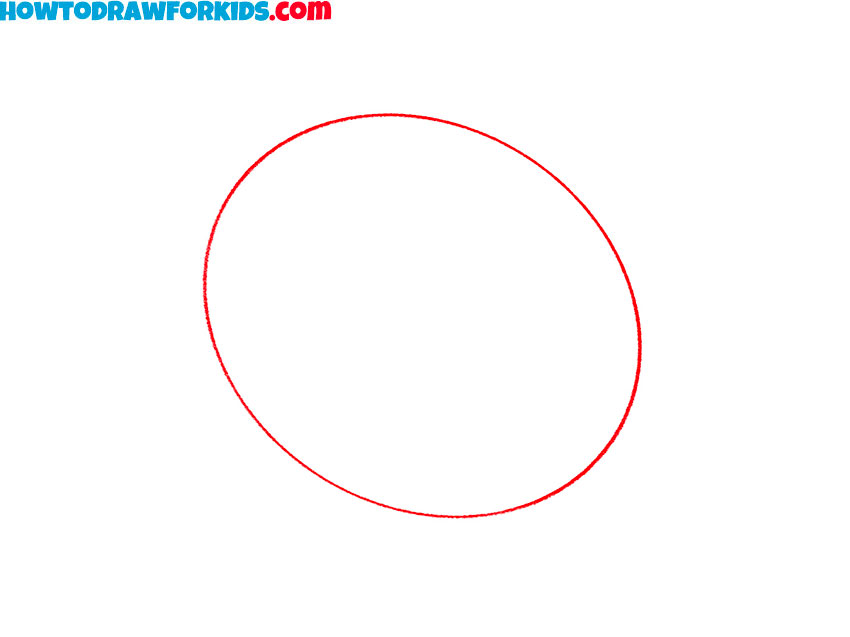
- Sketch the basic outline.
To begin drawing a strawberry, start with the basic shape of the fruit. Using smooth and curved lines, sketch an oval that is slightly tilted. The shape does not need to be perfectly symmetrical, as strawberries in nature come in slightly different forms. Keep your pencil strokes light.
- Define the strawberry’s shape.
Draw a curved line along the bottom part of the oval to create a more distinct and natural form. This line should slightly taper at the bottom to resemble the pointed end of a strawberry. The overall shape should now look more like a rounded triangle rather than a perfect oval.

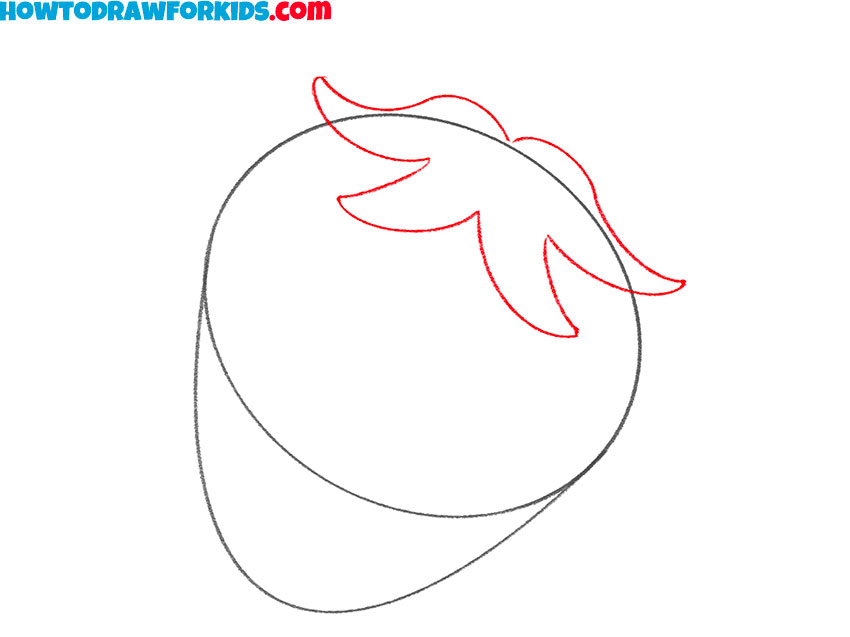
- Sketch the leaves of the berry.
Now, let’s add the leafy top to make the strawberry look more recognizable. Sketch several curved, pointed shapes emerging from the upper part of the fruit. These leaves, called sepals, should be slightly irregular, with some curving outward and others overlapping slightly.
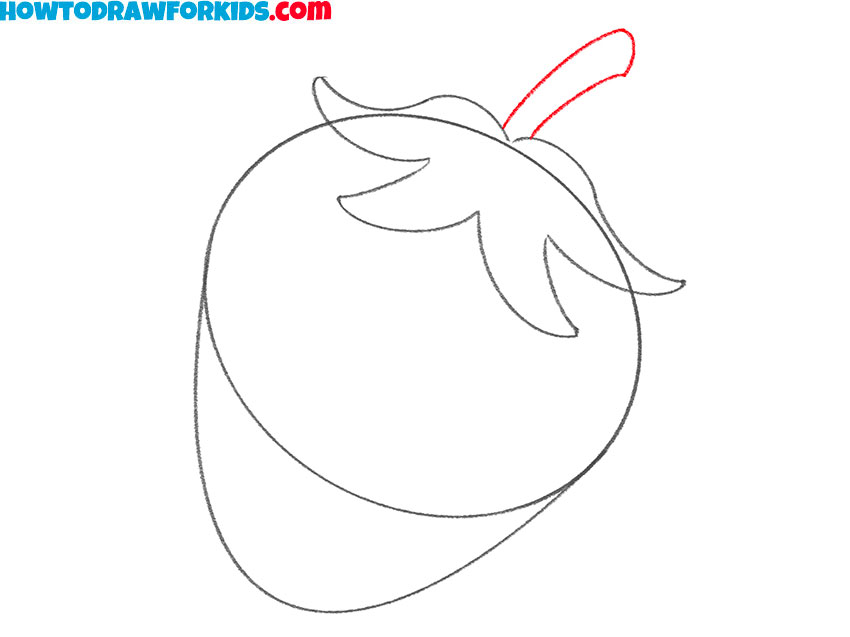
- Add the stem at the top.
The stem is a simple but important detail that connects the strawberry to the plant. To create it, draw a slightly curved, narrow shape extending upward from the center of the leafy top. Avoid making the stem of the strawberry too straight – adding a slight bend will make it look more natural.
- Draw the seeds of the strawberry.
Now, let’s add the small details that make the strawberry drawing look more realistic. Sketch the tiny seeds scattered across the surface. Avoid making them perfectly aligned – slight variations in size and spacing will make the drawing look more natural.

- Finalize the outline.
Carefully trace the main shape of the strawberry using smooth and confident strokes. Also, erase any unnecessary guidelines or overlapping lines from earlier steps to give the strawberry drawing a polished look. If any parts of the strawberry need slight adjustments to improve proportion or symmetry, refine them now.

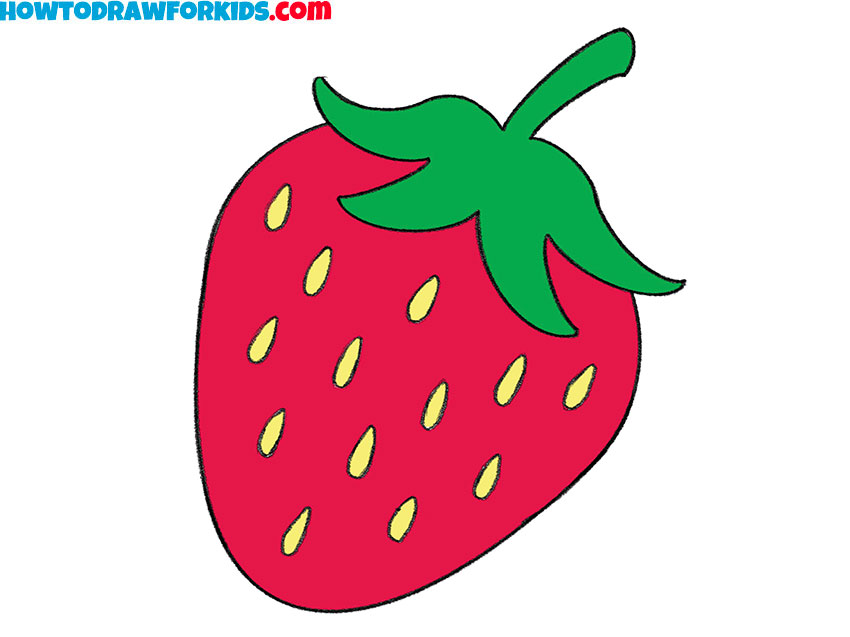
- Color your strawberry drawing.
Fill in the body of the strawberry with a bright red shade. The leaves and stem should be colored green. The seeds can be colored yellow or light cream to make them look more realistic. If you want to add extra dimension, consider shading one side of the strawberry slightly darker.

Additional Content
Traditionally, I have prepared a PDF file for you, where you can find a short version of this tutorial. You can download it and use it anytime, even without an internet connection. In this file, you will find the steps of this strawberry drawing tutorial, along with some useful additional materials. The tracing worksheet will help you practice creating confident lines, the coloring page will help you practice coloring the berry, and the grid drawing worksheet will assist you in improving your ability to replicate shapes and forms.
Conclusion
A strawberry, as I mentioned earlier, looks very simple, but as you may have noticed, even drawing such a simple object has its own nuances. Nevertheless, I hope this lesson on how to draw a strawberry was easy for you and didn’t present any difficulties.
Try improving your drawing by adding more strawberries next to this one to make the composition a bit more complex. You could also sketch a plate and draw a pumpkin and other fruits or vegetables next to the strawberry to create a full still life. Another option is to draw a strawberry growing directly in a garden by adding soil beneath the berry and surrounding plants to complete the scene. Draw trees and grass around to make your strawberry composition look more complex.
If this strawberry drawing lesson was interesting and useful for you, be sure to follow me on social media so you don’t miss new tutorials on drawing other berries, as well as other engaging content that I regularly share. Additionally, on social media, you can see how other young artists create their drawings using my lessons and share your own work.
I’m going to go get some food and then I’m coming home