How to Draw a Tooth Fairy
Welcome to this step-by-step guide on how to draw a tooth fairy. This lesson is really simple and beneficial, focusing on a beloved fairy tale character.

How to Draw a Tooth Fairy: Basic Information
Now, you’ll have the opportunity to draw a unique character. With the help of my simple instructions, you’ll learn how to draw a tooth fairy. The tooth fairy is a beloved character from fairy tales in many countries.
The picture depicts a cute little tooth fairy adorned with recognisable wings. She gracefully holds a magic wand in one hand, while the other hand carries a recently fallen tooth, symbolizing her role in the beloved fairy tale tradition. With the guidance of this simple, step-by-step instruction, you will be able to effortlessly draw these enchanting elements.
Drawing the tooth fairy also introduces basic concepts of character design, such as creating distinctive features and attributes that define a character’s personality. This knowledge is essential for artists interested in developing their own original characters and stories.
A really important aspect of this tutorial is learning to depict movement and posture. The pose of the fairy, with its slightly angled legs and outstretched arms, creates a sense of dynamism and grace, which is key in making drawings appear more lively. Additionally, drawing the wings requires understanding symmetry and how to balance elements within a composition.
Tooth Fairy Drawing Tutorial
Materials
- Pencil
- Paper
- Eraser
- Coloring supplies
Time needed: 30 minutes
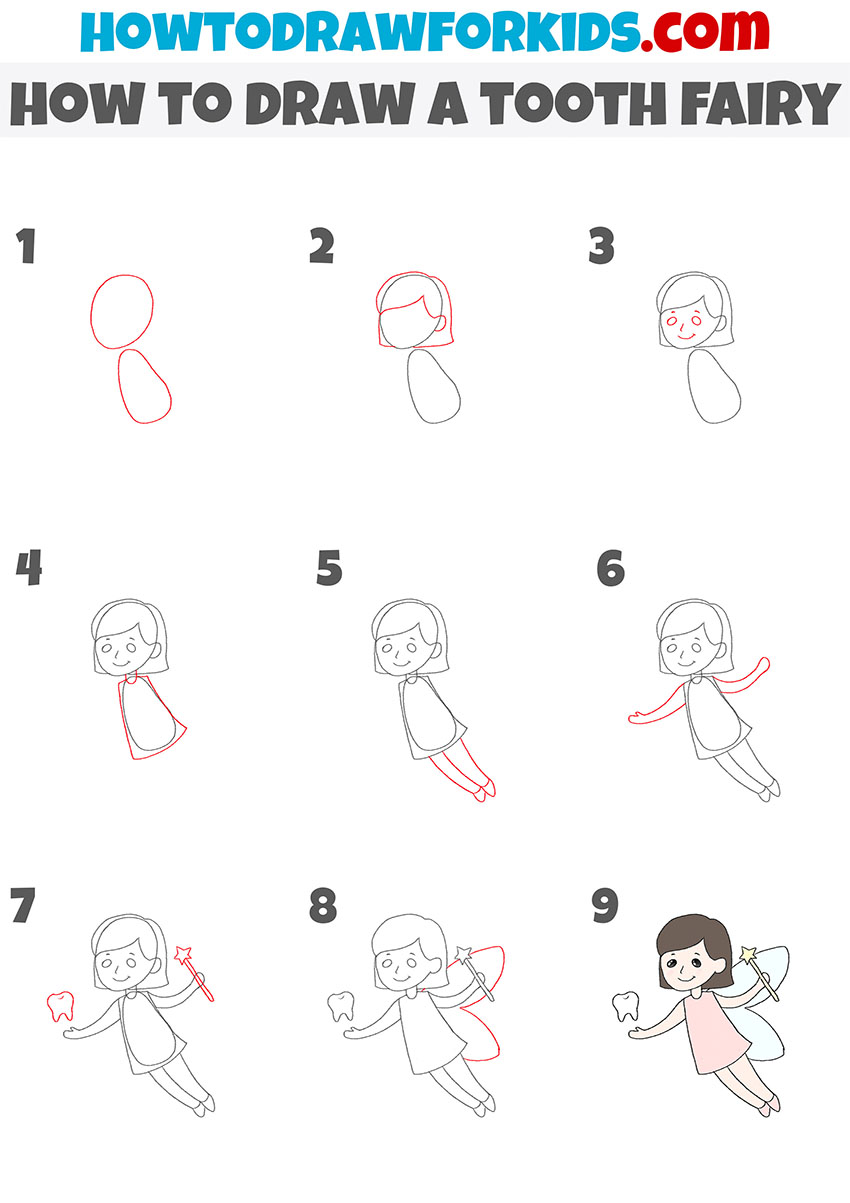
How to Draw a Tooth Fairy
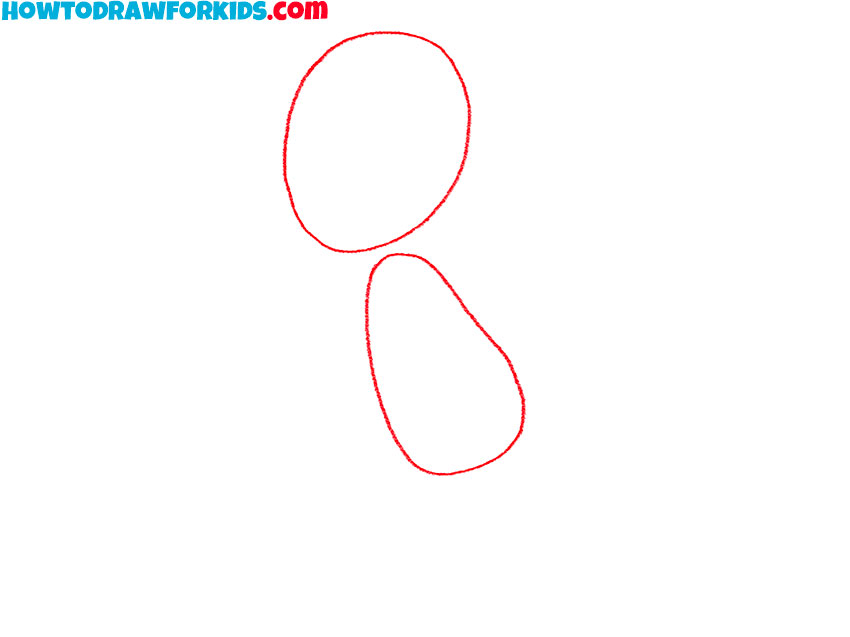
- Draw the head and torso of the tooth fairy.
For the head, draw an oval shape that will serve as the foundation for the facial features. Below the head, sketch a rounded, slightly elongated oval shape to represent the body. This shape will later become the torso and will help in positioning the other body parts accurately.
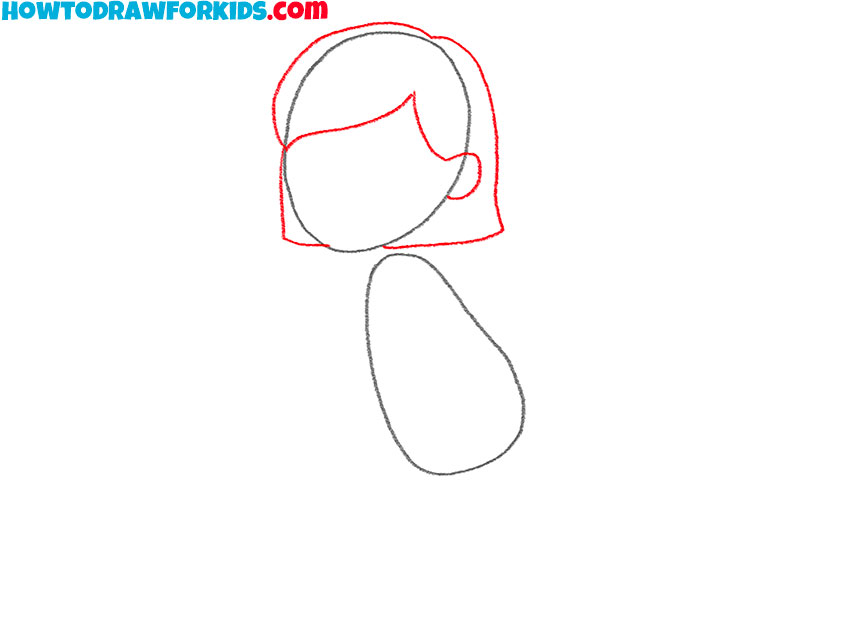
- Add the ear and hair.
Start by outlining the hair around the head, giving it a smooth, flowing look that frames the face. You can draw the hair with a slight curve to show natural movement. Next, draw the ear of the tooth fairy using a short curved line at the level of the eyes.
- Illustrate the elements of the face.
Begin by sketching two large, round eyes on the face, spaced evenly apart. Below the eyes, draw a small, curved line for the nose and a simple, cheerful smile to give the fairy a friendly expression. You can also add a few lines for eyebrows above the eyes.
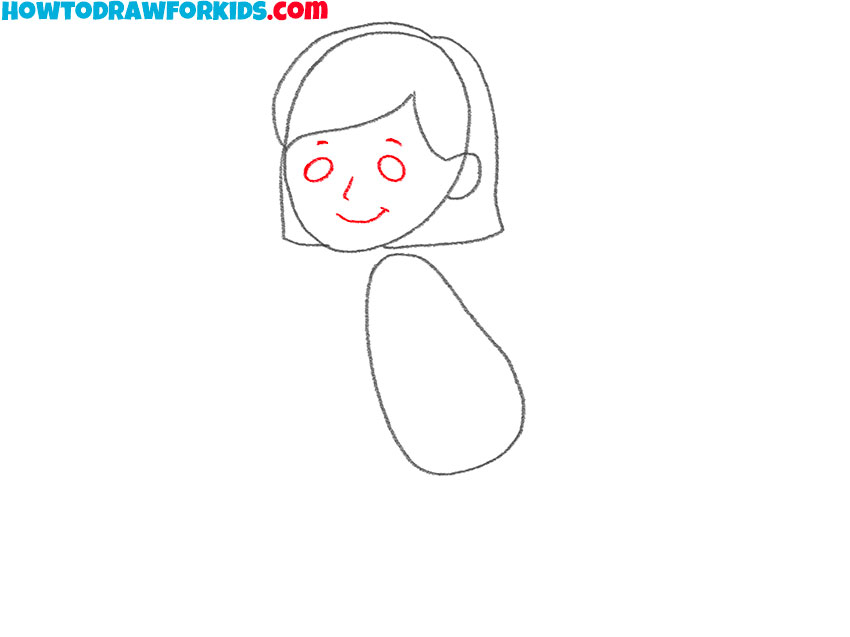
- Add the neck and dress.
Draw two short lines extending from the bottom of the head to connect with the body shape, forming the neck. Sketch two curved lines that form the sides of the dress, flaring out slightly towards the bottom. Connect these lines with a curved line at the bottom to complete the dress shape.
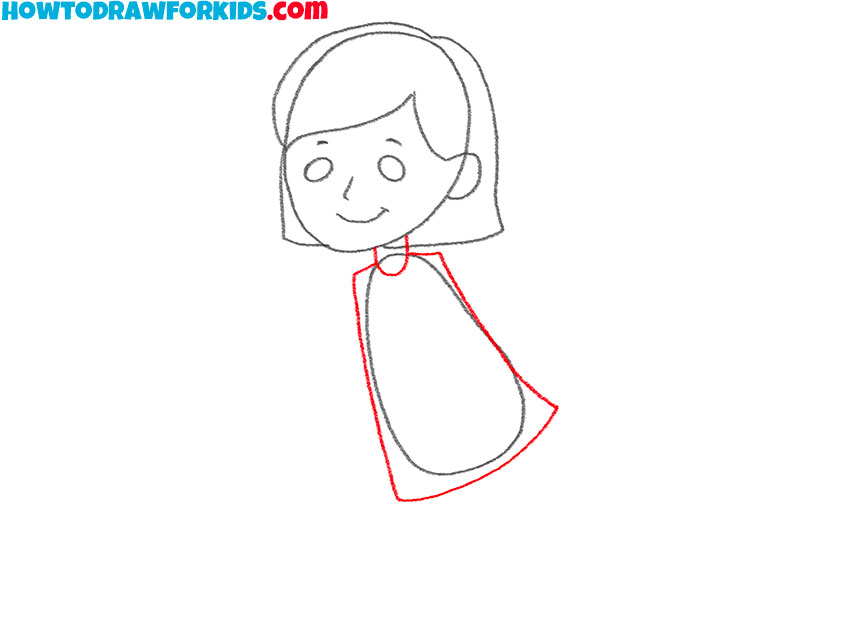
- Illustrate the legs and feet.
From the bottom of the dress, draw long and slightly curved lines extending downward to represent the legs. At the end of each leg, sketch small, rounded shapes for the feet. Make sure the legs are slightly angled to give the appearance that the fairy is flying or floating.
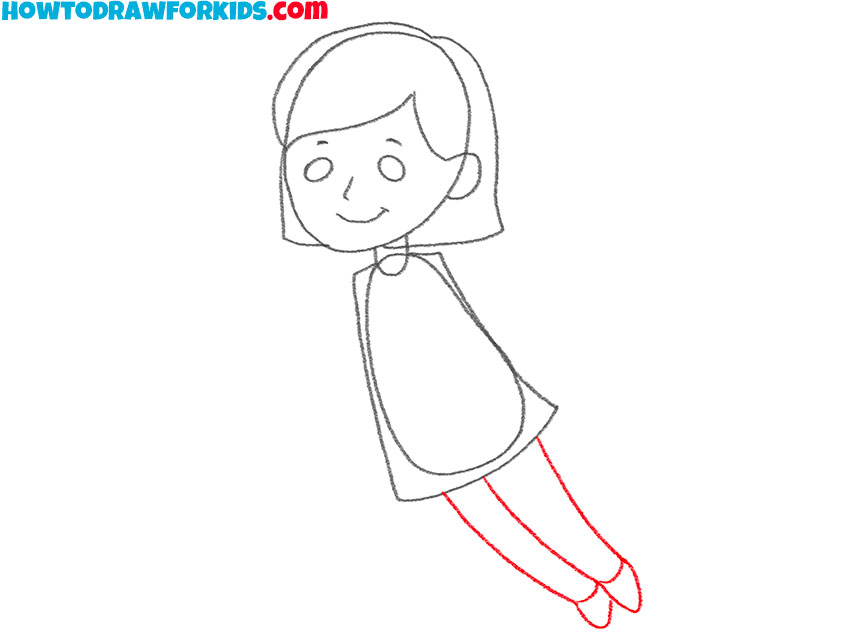
- Draw the arms.
From each side of the upper body, draw two long, curved lines extending outward to form the arms. At the end of each arm, sketch small, rounded shapes for the hands. The arms should be positioned as if the fairy is waving or holding something, giving a dynamic feel to the drawing.
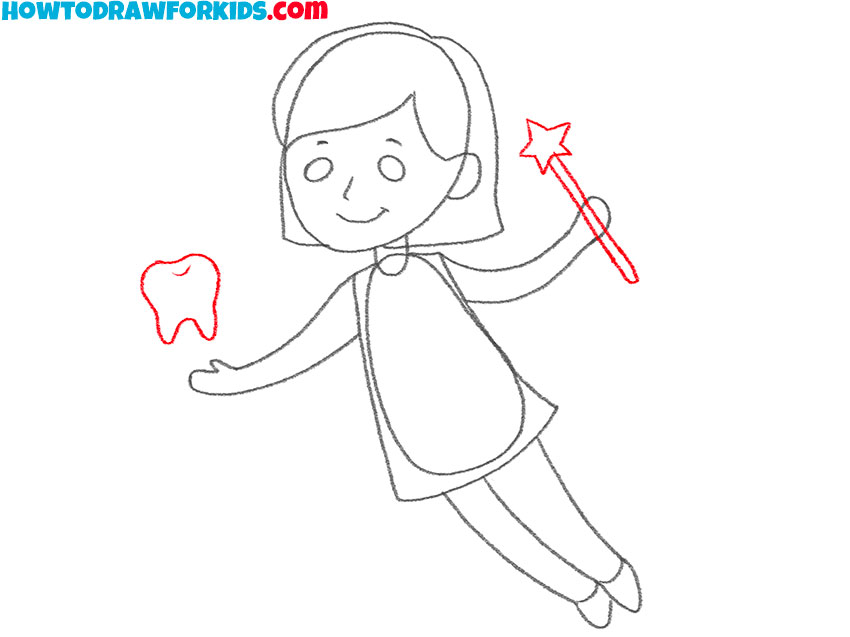
- Draw the magic wand and tooth.
To give your tooth fairy drawing its recognisable appearance, add a wand and a tooth. In one hand, draw a straight line with a star at the end to represent the magic wand. In the other hand, draw a small tooth shape to illustrate the fairy’s purpose.
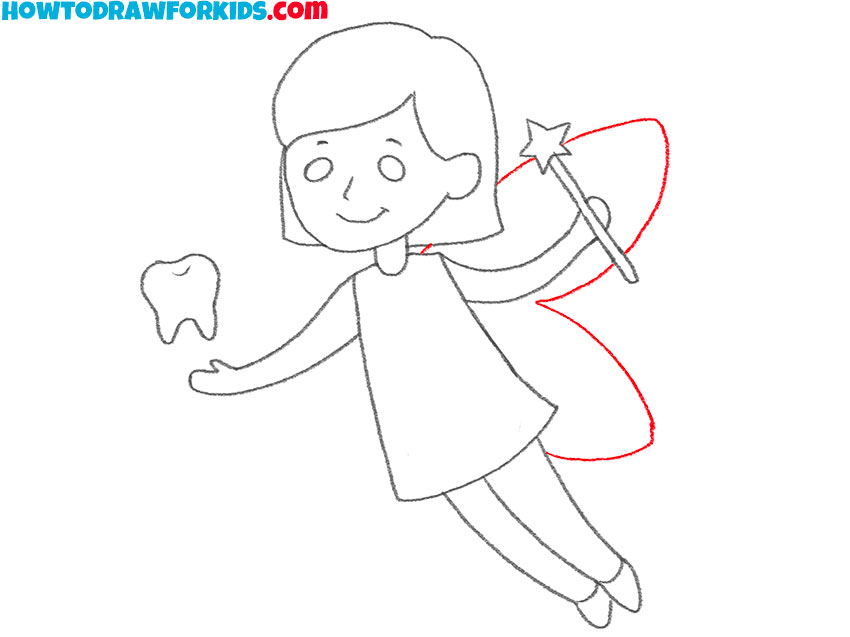
- Add the wings of the fairy.
Now, draw the wings to transform your character into a true fairy. From the back of the body, sketch two large, symmetrical wing shapes extending outward. The wings should have a delicate, curved outline to give them a fairy-like appearance.
- Color the tooth fairy drawing.
Use soft, pastel shades to color the hair, dress, and wings. You can use a light pink or blue for the dress, a gentle yellow or brown for the hair, and soft, translucent colors for the wings. Color the wand with a bright shade to make it stand out, and use white for the tooth.

Additional Content
Your tooth fairy drawing is complete! You’ve successfully mastered this simple but interesting lesson and learned how to quickly and easily create a fairy-tale character. Additionally, I’d like to remind you that you can now download a concise version of this lesson in PDF format. By saving this file, you’ll have access to the lesson at any time, even without an internet connection.
Adding Some Backgrounds to the Tooth Fairy
Draw your tooth fairy flying through a starry night sky. Fill the background with a deep navy or midnight blue and add stars of various sizes. You can also include a glowing crescent moon.
Depict your tooth fairy in a meadow filled with flowers. Draw a variety of blooms in different shapes and colors, creating a sea of petals. Add butterflies and bees buzzing around. The bright, cheerful colors of the flowers will create a really cute atmosphere.
Illustrate a fairy village as the background for your tooth fairy. Draw small and cute fairy houses with different details, surrounded by gardens and tiny cobblestone paths. Include other fairies and magical creatures going about their day.
Sketch your tooth fairy in a bedroom. Draw a bed with a pillow where a tooth might be hidden, along with toys, books, and a nightlight casting a soft glow. This setting illustrates the fairy’s traditional role in the familiar environment where she collects teeth.
Depict your tooth fairy visiting a dentist’s office. Draw a dental chair, various dental tools, and a friendly dentist in the background. This modern and relatable setting connects the fairy to the real-world context of dental care, making your drawing more educational.
Depict your tooth fairy at an academy for tooth fairies. Draw a grand hall with fairies studying, practicing magic, and learning about their duties. Include books, magical tools, and a wise fairy instructor.
Conclusion
Congratulations on completing the tooth fairy drawing tutorial! Throughout this guide, you’ve trained your drawing skills.
First and foremost, you learned how to draw the iconic magical character in a simplified yet recognizable form. Additionally, you learned how to create various interesting backgrounds and seamlessly integrate your drawing into them.
If you enjoyed this tutorial, please share it with your friends and classmates! Don’t forget to follow me on social media to stay updated with new tutorials and art tips. Please leave your comments below with any wishes, questions, or suggestions. Your feedback is invaluable as it helps me improve and create drawing instructions that you’ll enjoy.