How to Draw a Tractor
Young artists, join me in drawing the mightiest of farm machines with my three special methods on how to draw a tractor. It’s easy, engaging, and designed just for kids. You’ll be amazed at what you can create with just a few simple lines and shapes!
Get ready to transform a blank page into a bustling farm with my drawing lesson on how to draw a tractor! With three methods to choose from, kids will find it easy and entertaining to create their own farm scene. These steps are crafted to foster young imaginations and develop drawing skills.

How to Draw a Tractor: Basic Information
Gather around, young farmers and artists! Today, I’m going to show you how to draw a tractor with wheels that look ready to roll right off the page. My simple method breaks it down into easy-to-follow steps that will have you drawing tractors like a pro.
As we go through each stage, you’ll learn to craft the sturdy body, the big wheels, and all the little details that make a tractor unique. By adding each part one by one, I ensure your tractor is as realistic as it is fun to depict. The process is designed to be easy enough for even the smallest hands to achieve great results.
Once you’ve finished this lesson, you’ll know exactly how to draw a tractor that’s both impressive and accurate. So let’s put our creativity to work and sketch a tractor that any farmer would be proud of!
Tractor Drawing Tutorial
Materials
- Pencil
- Paper
- Eraser
- Coloring supplies
Time needed: 30 minutes
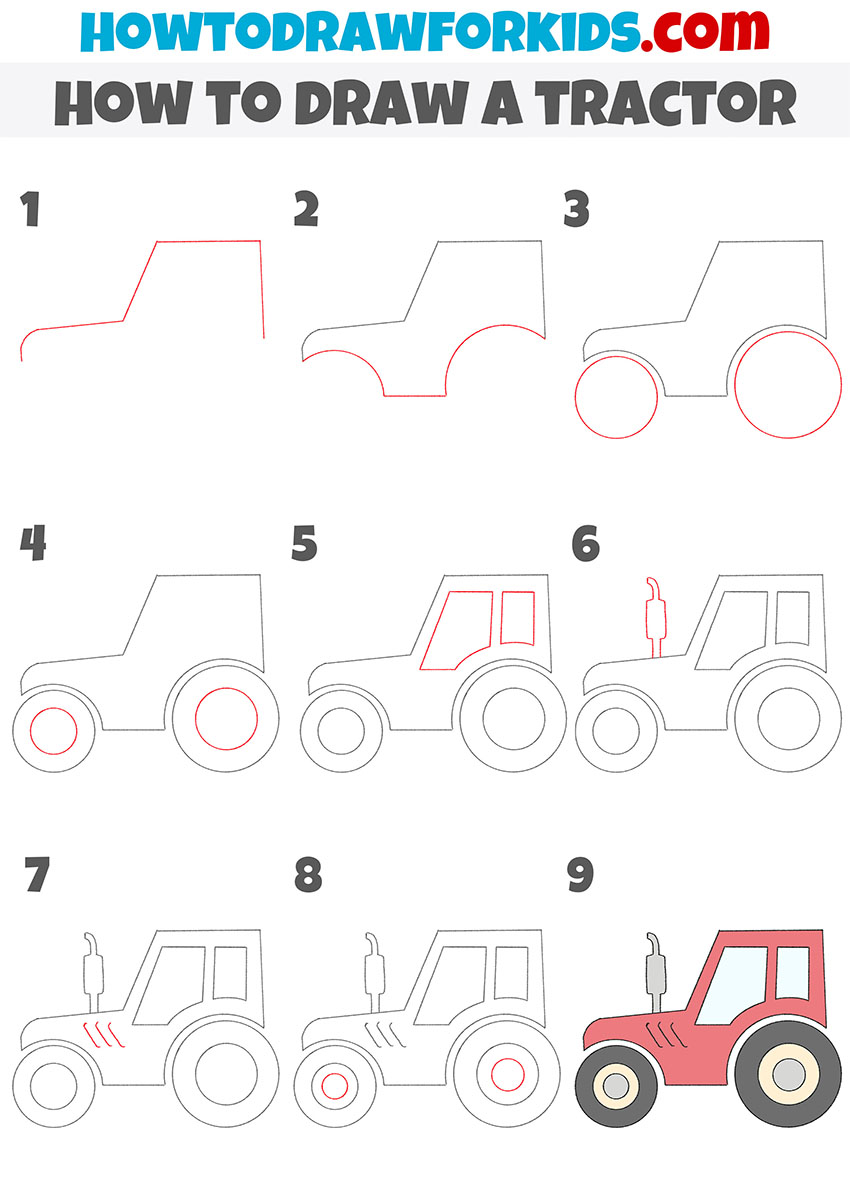
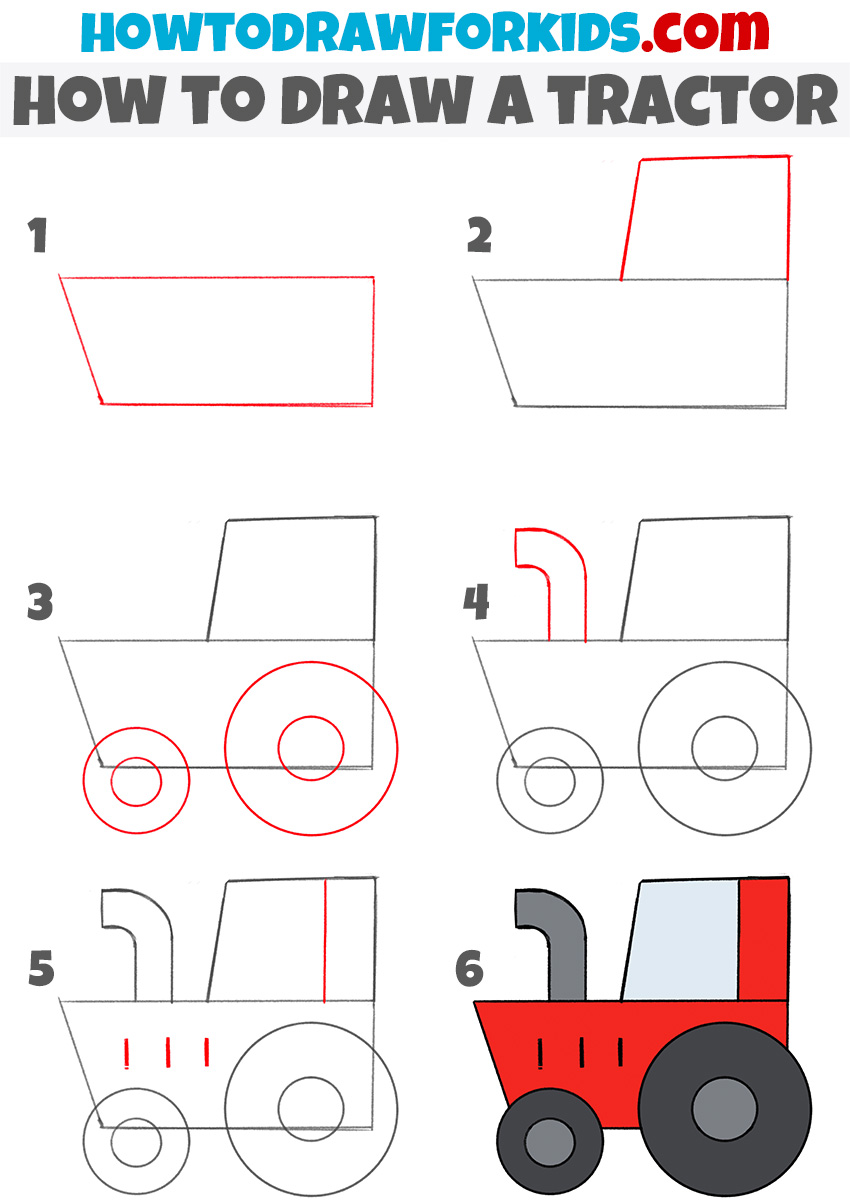
How to Draw a Tractor
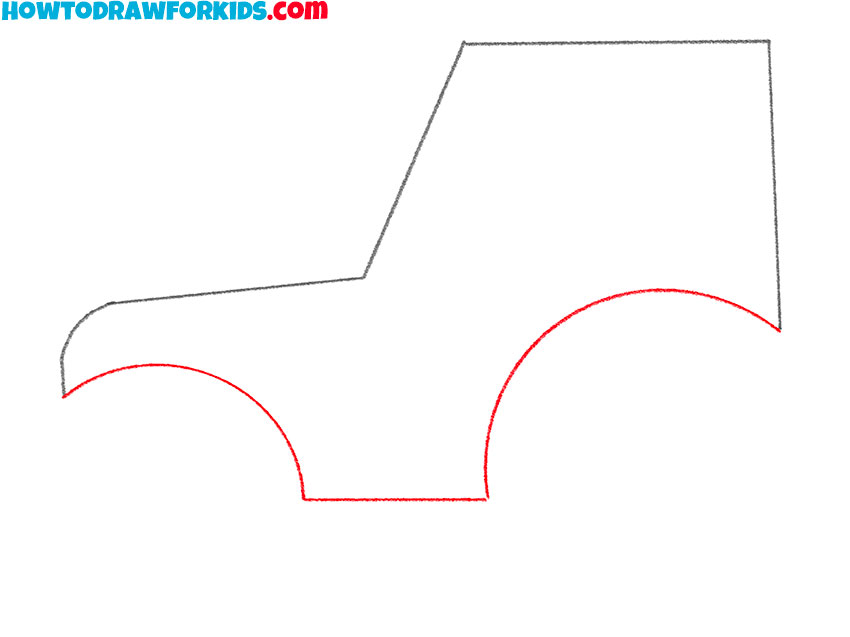
- Start drawing the cab and the front of the tractor.
So, we begin with the basic shape of the tractor’s body. Draw a line that slopes down and then levels out to the right, creating an angled ‘L’ shape. This line will define the hood and front of the tractor.

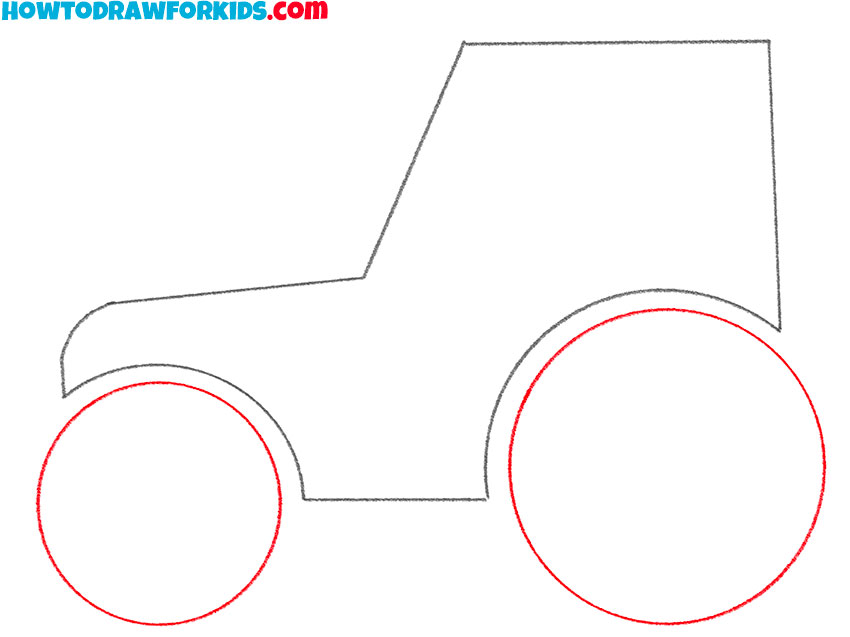
- Add the bottom of the tractor.
Draw incomplete circles from the ends of the drawn lines and connect them with a straight line. This step is crucial as it indicates where the wheels will be placed.
- Depict the contours of the tractor wheels.
For the wheels, draw two large circles at the bottom of the tractor body. The circle on the right should be slightly larger than the one on the left – these are typical proportions of tractor wheels.
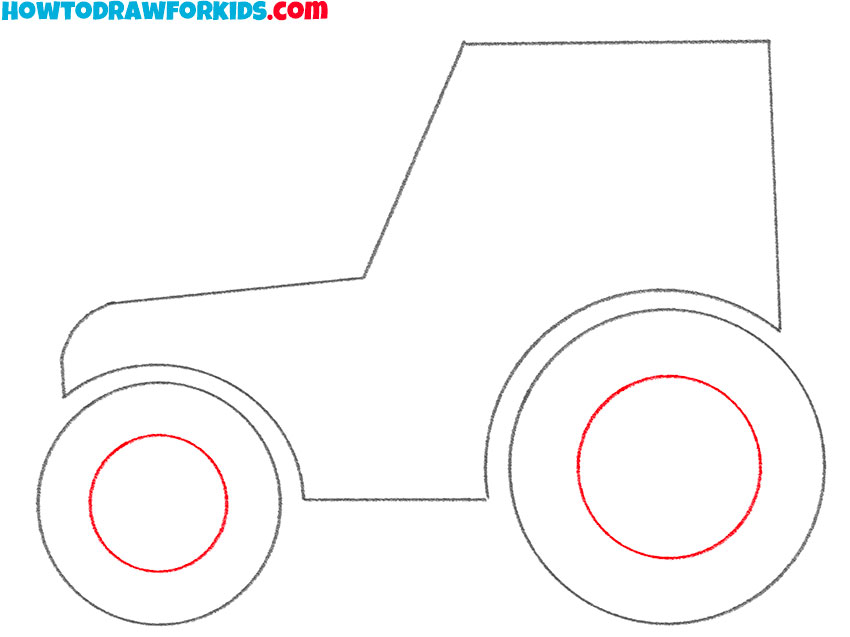
- Sketch out the inside of the tractor wheels.
To create the inner contours of the wheels, which will represent the rims, draw a smaller circle within each of the larger wheel circles drawn previously.
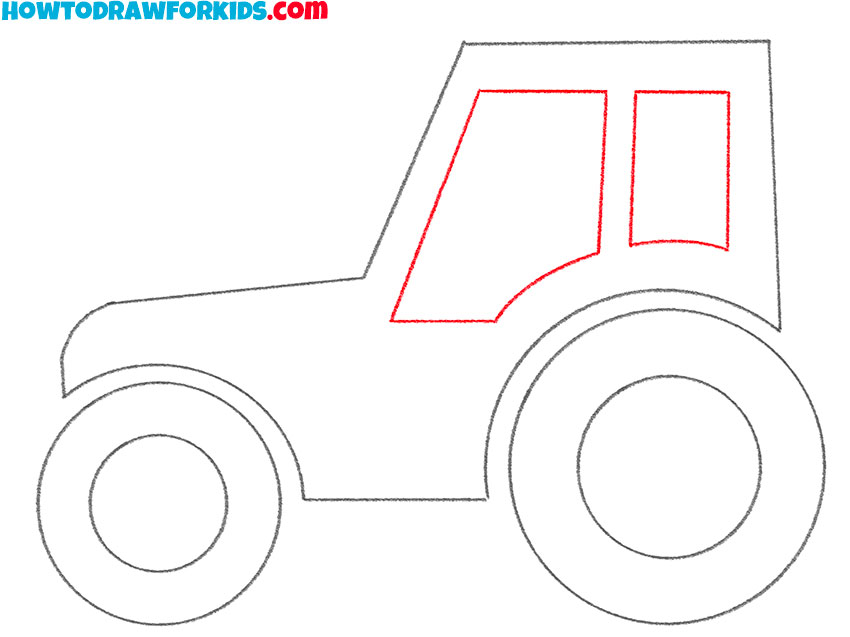
- Draw the windows on the tractor cab.
To complete the cabin, draw a smaller pentagon within the larger one for the window, and then add another small rectangle at the back for the rear window.
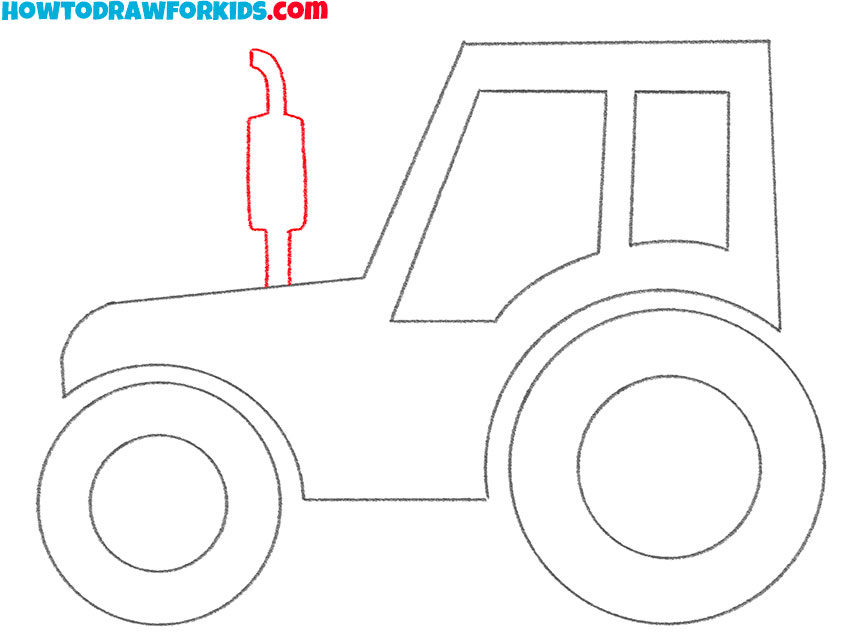
- Depict the exhaust pipe.
For the exhaust pipe, draw a thin, vertical rectangle that rises above the tractor’s body, near the rear of the cabin. The extension in the center should look symmetrical.
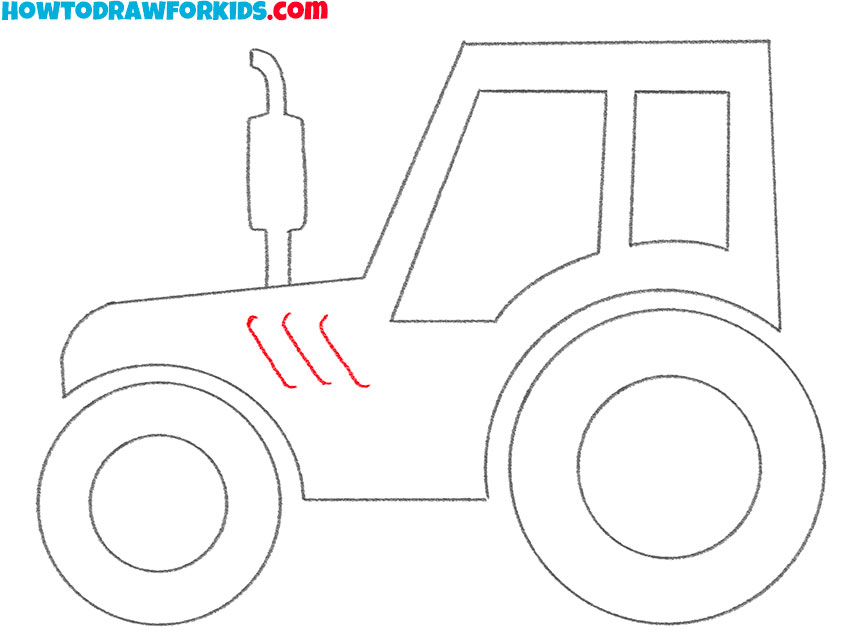
- Add details.
Add some details to the tractor with lines to represent the grille on the front of the tractor, just beneath the hood. Draw three slightly curved horizontal lines that follow the contour of the front body.
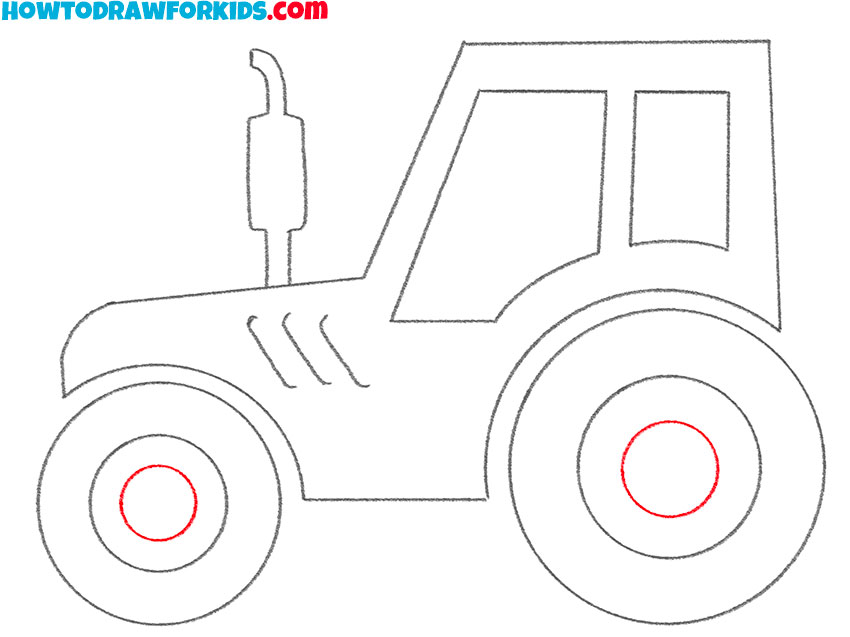
- Finish drawing the tractor wheels.
To show the wheel’s depth, draw smaller circles inside the larger ones, creating the wheel rims. The circles should be concentric and evenly spaced within each wheel to simulate the look of tires.
- Color the drawing.
Finally, add color to your tractor. Fill in the body with a vibrant red, leaving the window areas white. The wheels can be colored in shades of gray or black.
Additional Content
Little doodlers, I have a treat for you! You can now download a free PDF version of our tractor drawing lesson. This shortened guide is specially made for easy understanding and can be used without any internet connection.
Whether you’re on a family trip or just away from your desk, this PDF will be your perfect companion to practice drawing tractors anywhere you wish!
Alternative Drawing Techniques
And that’s not all! To help you boost your drawing abilities, I’ve created several alternative techniques for drawing a tractor. Each one is a new way to challenge yourself and perfect your skills. Give them a try and watch your artistic talents flourish!
How to Draw an Easy Tractor
This drawing method for a tractor is quite similar to the first, with only subtle differences in detail and color to distinguish it. Starting with simple geometric shapes, it guides young artists through each part of the tractor step by step. Small additions, like the lines for the grille and the structure of the cab, add a bit of complexity.
The coloring phase brings the tractor to life, teaching kids how to apply shades for a more dynamic image. This technique reinforces a straightforward approach to drawing, empowering even the youngest artists to create confidently.

How to Draw a Tractor for Kindergarten
This second alternative drawing method for a tractor is wonderfully suited for kindergarteners due to its simplicity and minimal steps. With just six stages, children can easily follow along, starting with basic rectangles and moving on to add circles for wheels.
Each step builds upon the last, gradually forming the recognizable shape of a tractor. This technique emphasizes straight lines and simple shapes, making it a great exercise for developing early motor skills and an understanding of geometric forms.
Conclusion
Bravo on finishing your tractor masterpiece! If you’re hungry for more drawing adventures, my website is brimming with them. Try your hand at sketching a slippery snake or a ghoulish ghost next.
Make sure to follow my social media pages, so you never miss out on the artistic fun. There’s a whole world of drawing out there, just waiting for your pencil to bring it to life!