How to Draw a Tsunami
This simple tutorial will teach you how to draw a tsunami. I have prepared a super easy guide for you that you will absolutely love!
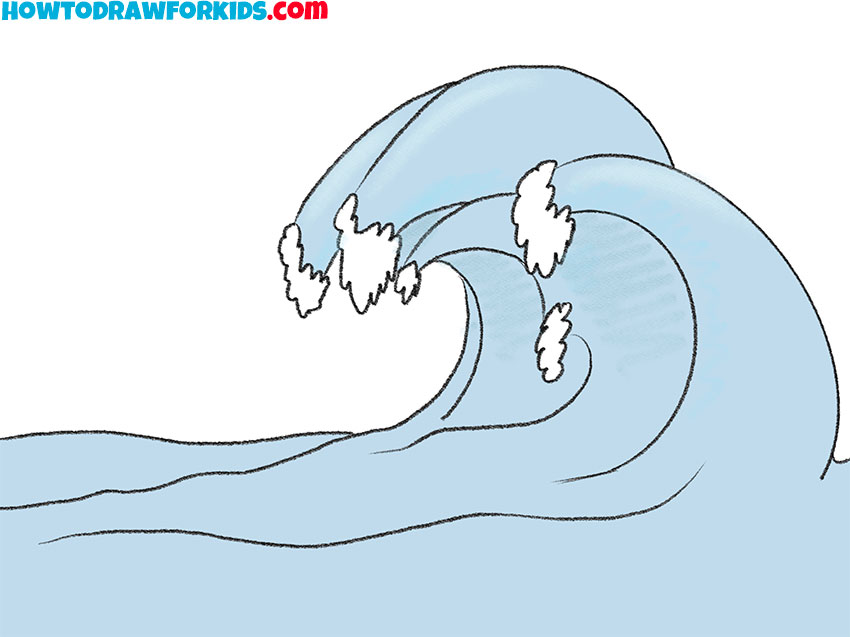
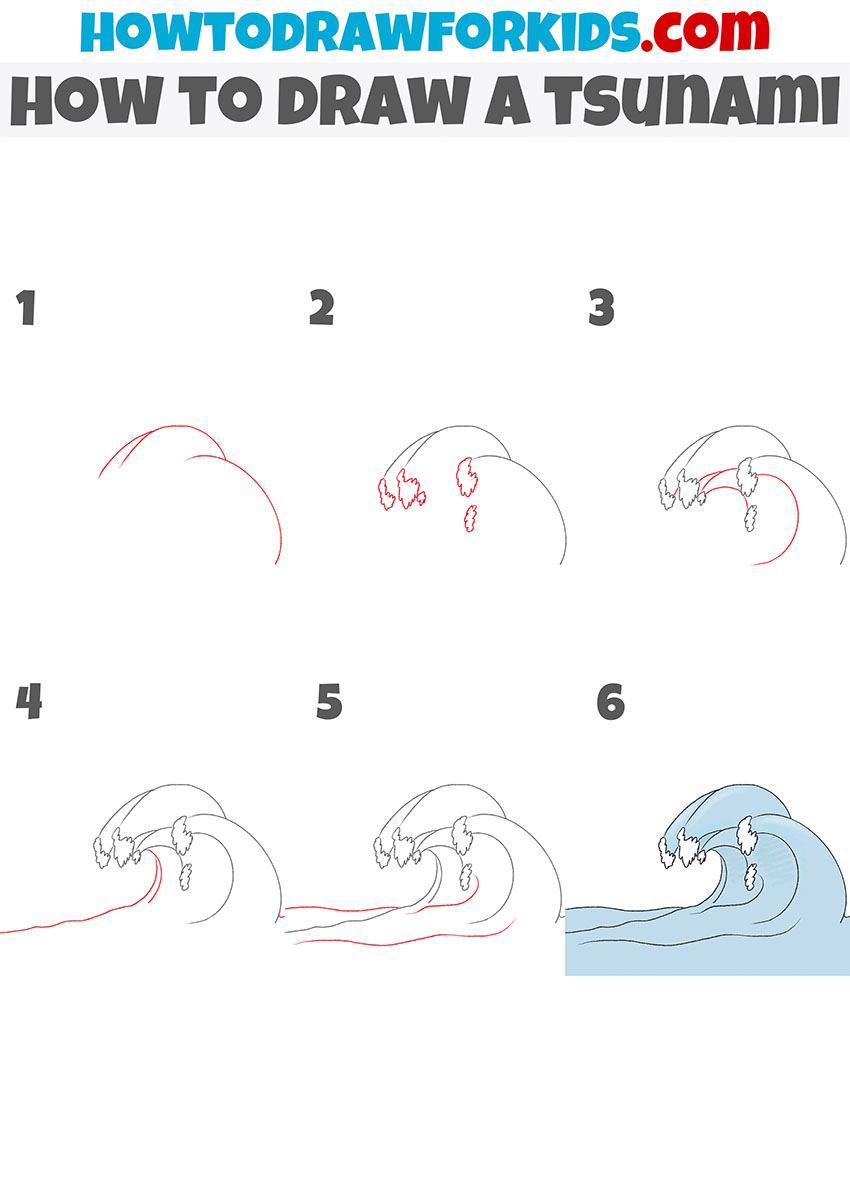
I am happy to offer you an easy step-by-step guide on how to draw a tsunami. The instruction includes only six steps that even a beginner can easily draw.
In this lesson, you will acquire useful skills that will be useful to you for drawing any sea waves. Arbitrary lines are allowed here, and the shape of the waves may differ from my example. The main thing is to remember the sequence of steps so that you can easily draw sea waves if necessary.
So grab your art supplies and start painting. Tune in to exciting creative work, and I wish you success.
Materials
- Pencil
- Paper
- Eraser
- Coloring supplies
Time needed: 30 minutes
How to Draw a Tsunami
- Draw the top outline.
Depict two smooth curved lines that are connected to each other.

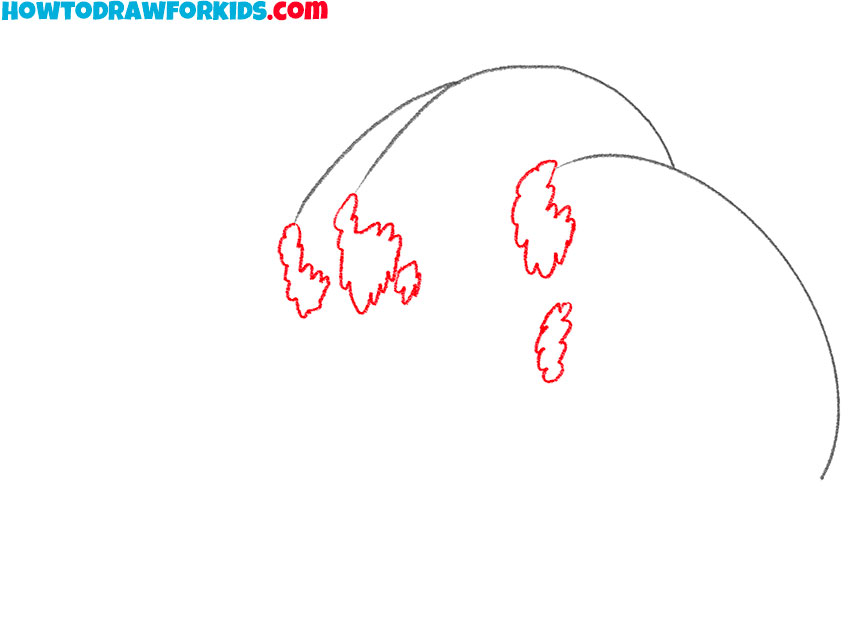
- Sketch out the foam.
With the help of jagged lines depict lush foam at the tops of the waves.
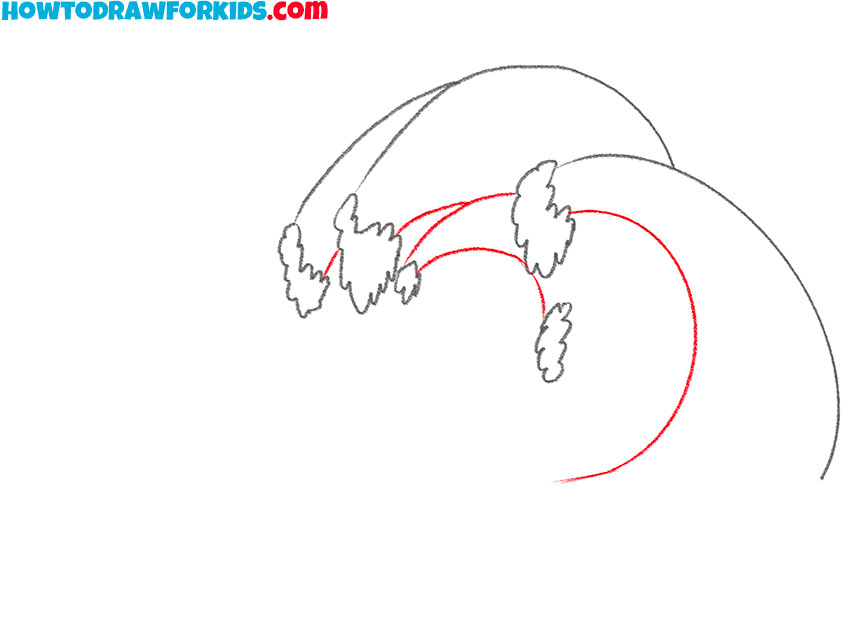
- Depict the bottom outline of the wave.
Sketch out a few smooth curved lines as shown in the example.
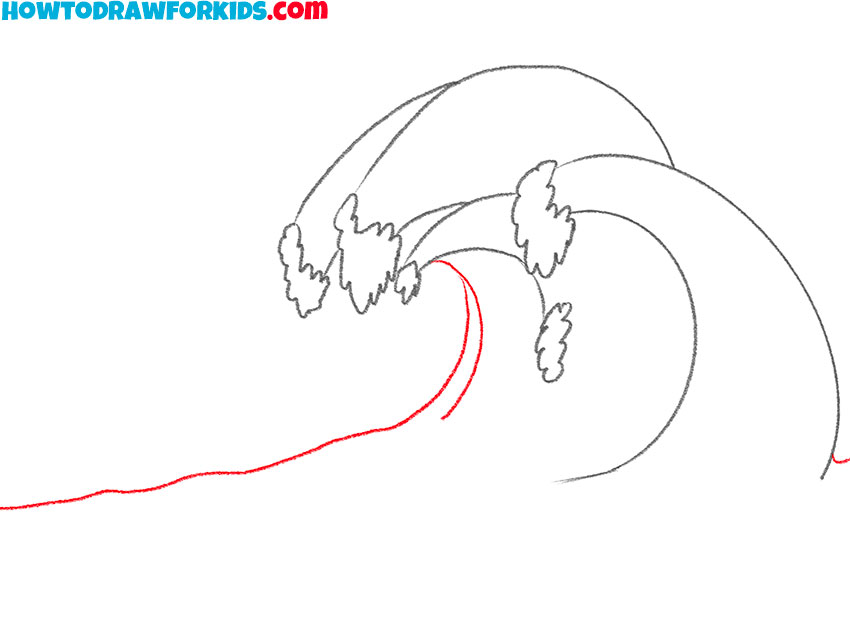
- Add the rest of the outlines.
Continue the lines and depict the lower parts of the waves.
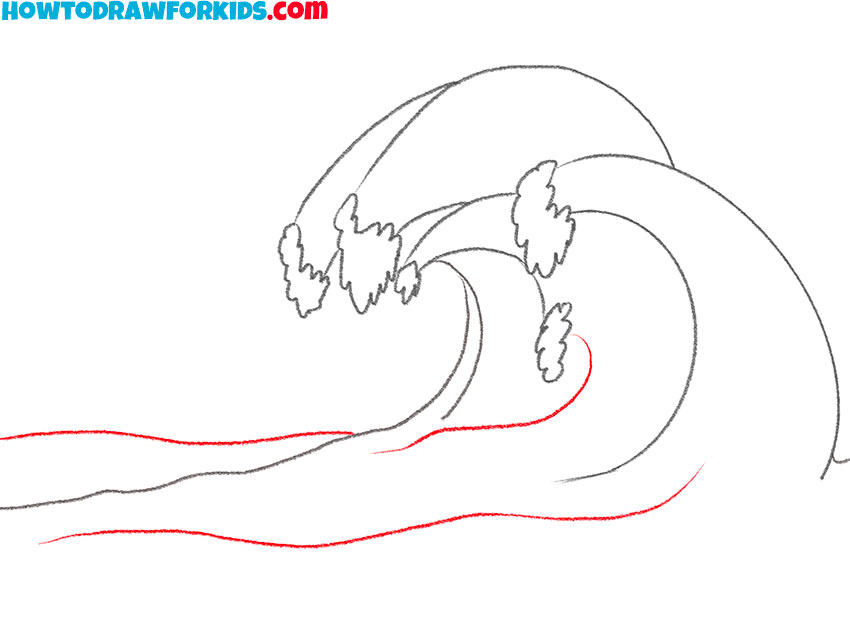
- Detail the surface of the water.
Sketch out some smooth curved lines.
- Color the drawing.
For coloring, use different shades of blue.

The lesson is over, and now you can evaluate the result of your work. If you were careful at every step of the drawing, then you should get a great drawing. Share your opinion in the comments and suggest ideas for the next drawing lessons. Right now you can download a PDF file with a short version of the lesson. In this file you will find simplified instructions and additional useful content.
I create special lessons for you that are very simple and quick. Thanks to these guides, you are convinced that you can get excellent results even after simple steps. If you want to see certain lessons, write your wishes in the comments.

