How to Draw a Violin
Let’s learn how to draw a violin, one of the most elegant instruments with a recognizable appearance and distinctive sound.
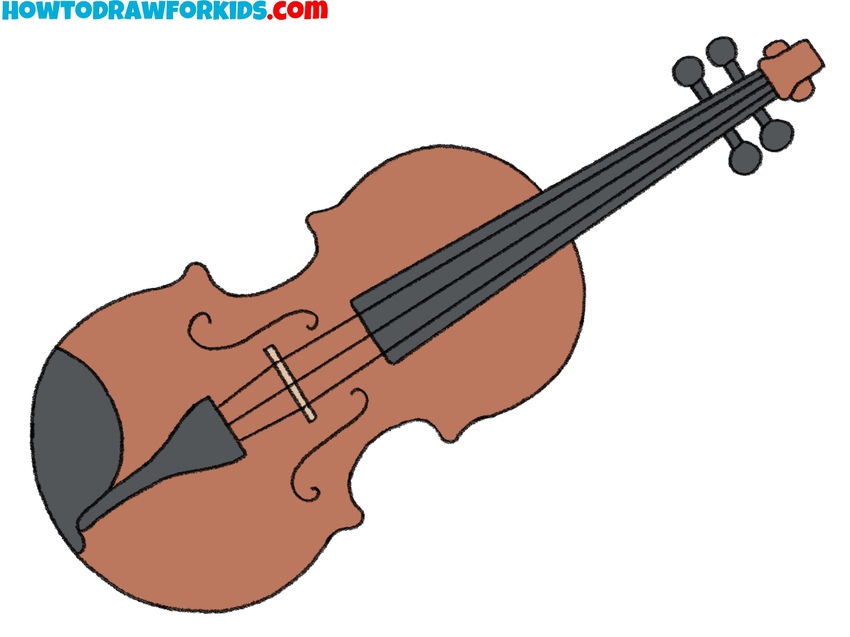
How to Draw a Violin: Introduction
Violins have been a part of classical music for a long time, evolving from other musical instruments that have existed since ancient times. As a result, the violin is not only a key instrument in classical music but also a common subject in visual art. It appears in many paintings and other artistic works.
In this lesson, I’ll show you how to draw a violin while maintaining its characteristic appearance. The tutorial includes all the necessary details to create a recognizable violin without overwhelming the process with excessive complexity.
As is the tradition on my website, I have supplemented the main violin drawing lesson with additional tutorials. These extra materials provide a deeper understanding of the subject, allowing you to explore different techniques and approaches to drawing a violin.
By following these lessons, you’ll be able to create a detailed and accurate violin drawing while developing a better grasp of its structure.
Violin Drawing Tutorial
Materials
- Pencil
- Paper
- Eraser
- Coloring supplies
Time needed: 30 minutes
How to Draw a Violin
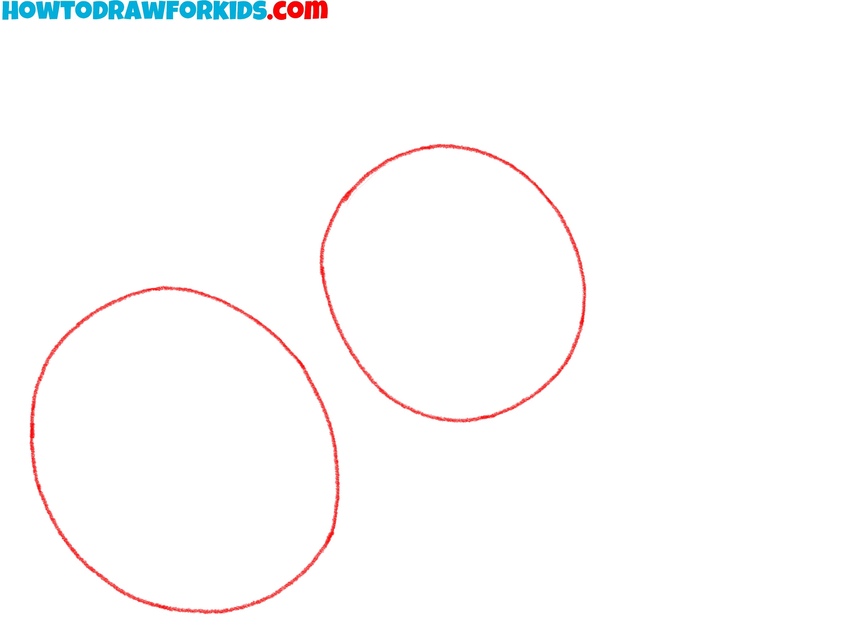
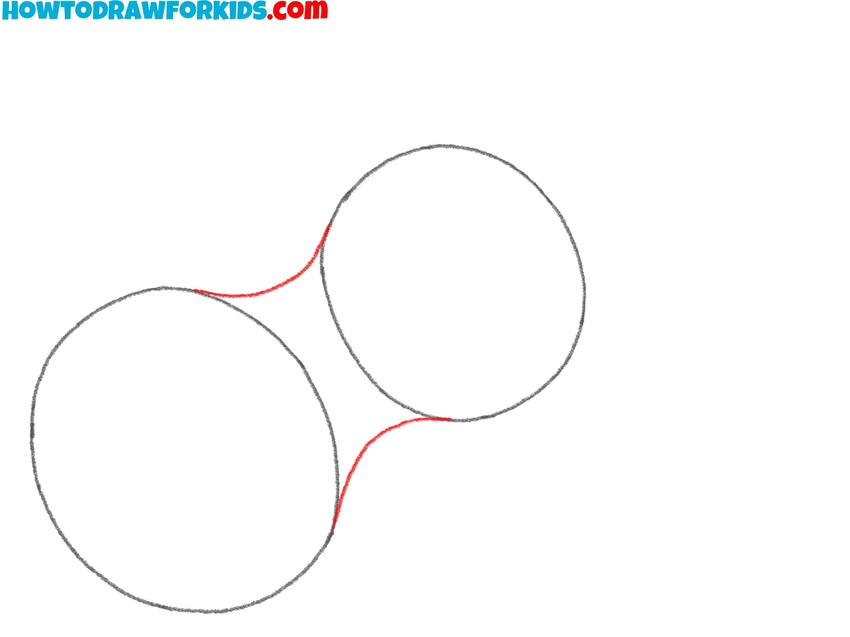
- Draw the violin’s upper and lower bouts.
Start by sketching two circles to form the main body of the violin. The lower circle should be slightly larger than the upper one, as the lower part of the violin is wider. These initial shapes will help you align the violin’s components accurately, making it easier to add details later.
- Outline the violin’s waist.
Using the two circles as a base, connect them by drawing curved lines on each side to form the characteristic hourglass shape of the violin’s body. The curves should be smooth. Be mindful of symmetry – both sides should look similar. You can adjust the curves as needed to refine the silhouette.
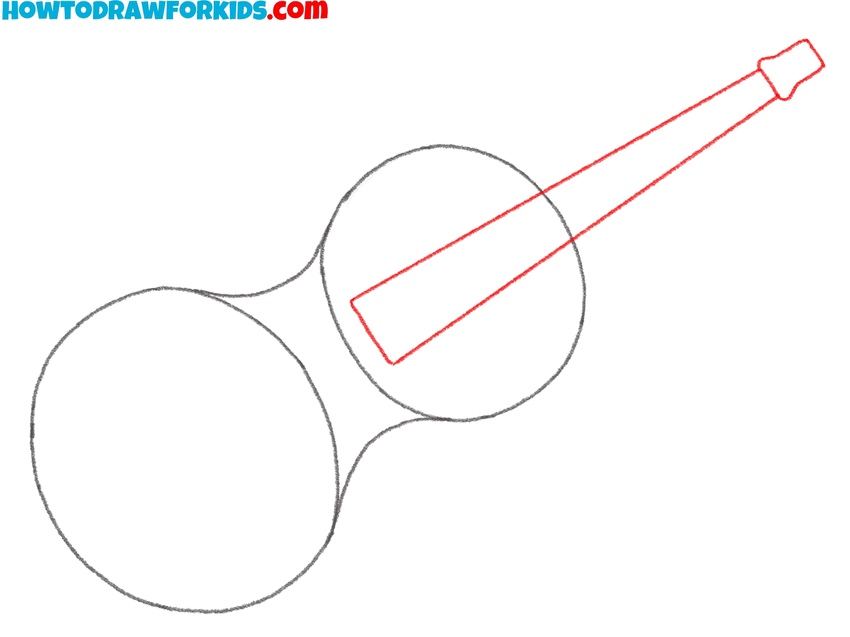
- Draw the neck and scroll.
Now, continue creating the violin’s body parts by drawing the neck, which is the long, narrow section extending from the upper body. The neck should be slightly tilted, as violins are often drawn at an angle. At the end of the neck, sketch a rectangular shape for the scroll, where the tuning pegs will later be added.
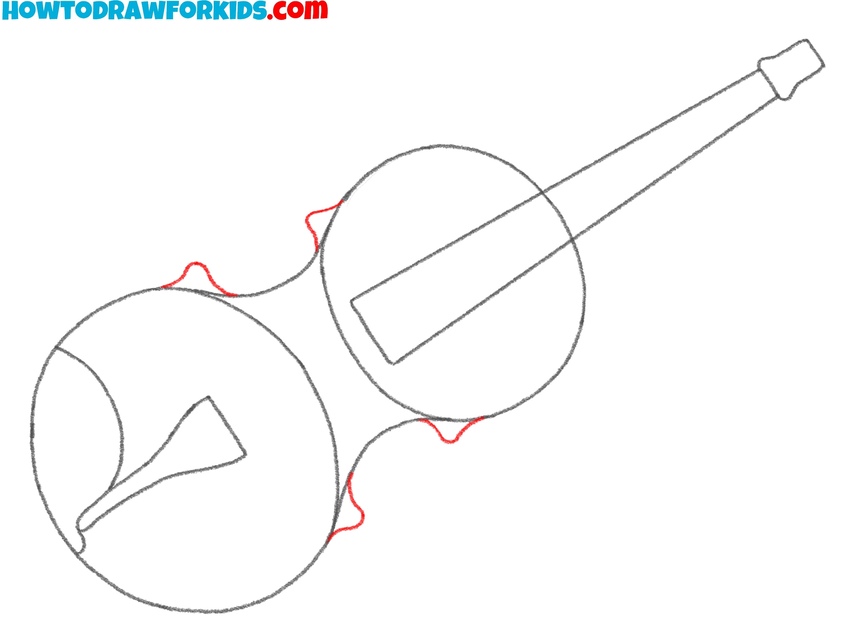
- Add the chinrest and tailpiece.
Using a short curved line ad the borrow of the body, draw the chinrest of the violin. Next, sketch the tailpiece, which anchors the strings at the bottom of the violin. The tailpiece is typically triangular, slightly tapering as it reaches the lower part of the violin.

- Add the corner blocks.
At this stage, adjust the body of the violin by adding small curved extensions on the sides, known as the violin’s corner blocks. The corner blocks should be slightly pointed but not too sharp. They give the violin a more finished look and help to give the instrument its traditional form.
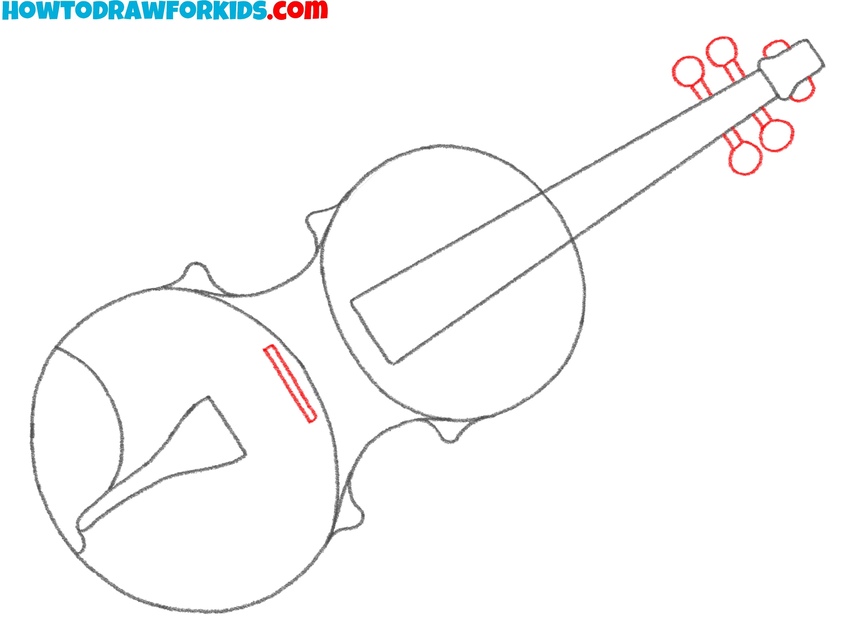
- Add the tuning pegs and bridge.
These pegs are small, rounded knobs that allow musicians to adjust the violin’s strings. Draw four small circles near the scroll’s edges, with two on each side. Connect them with the scroll, using short lines. Draw the bridge near the bottom of the violin body.
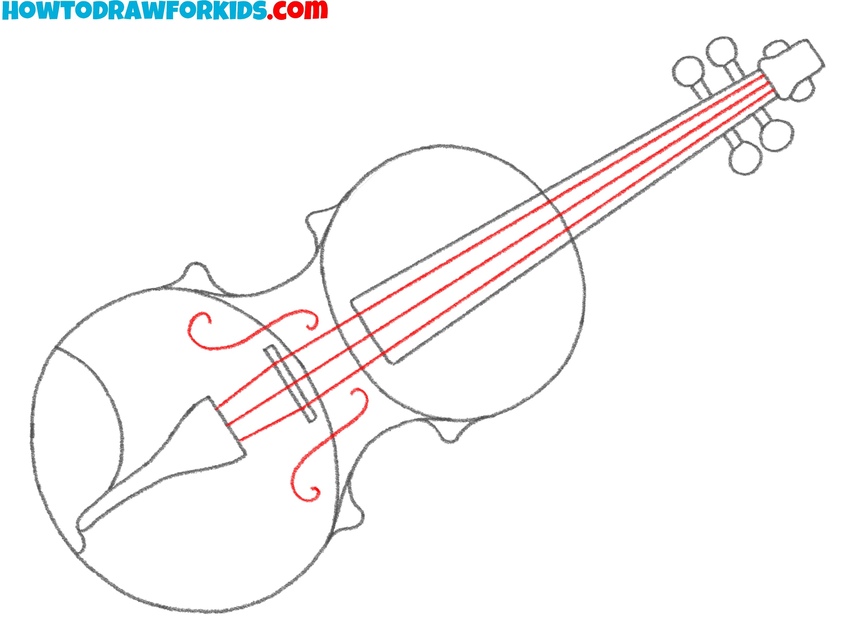
- Draw the strings and f-holes.
Using straight, evenly spaced lines, draw three or four strings extending from the tailpiece to the pegs. Keep the lines thin and parallel to maintain accuracy. If needed, use a ruler or light sketching to ensure the strings are straight. Next, draw the f-holes using two elongated S lines.
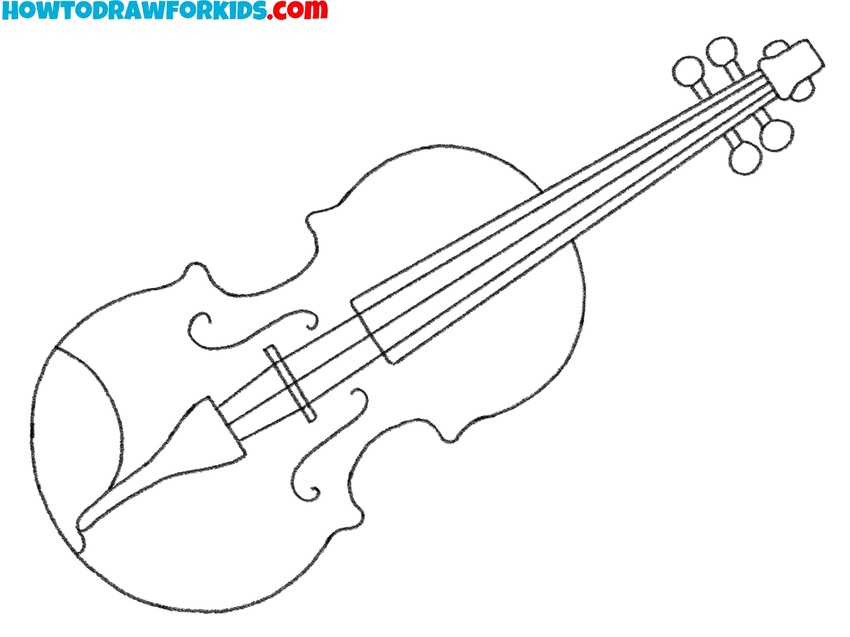
- Finalize the details and correct the shapes.
Now that the main components of the violin are drawn, go over the entire sketch and adjust the details. Make sure the f-holes, tailpiece, bridge, and strings are located correctly. Add any missing elements and correct the errors. This is also the time to clean up any unnecessary guidelines.
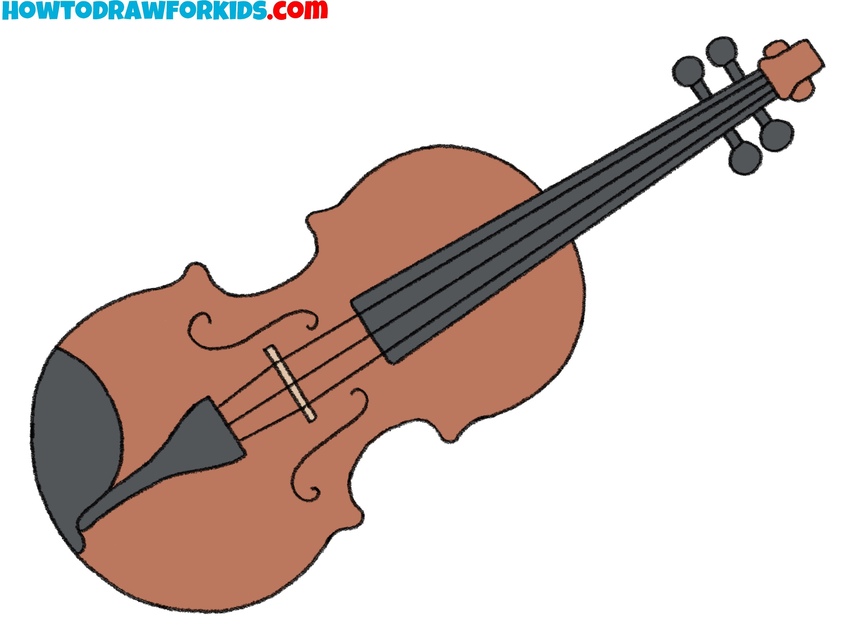
- Add color to complete the drawing.
Most violins have a rich brown or reddish-brown wooden body, with a darker tailpiece, neck, and tuning pegs. Use a warm brown shade for the main body and a darker black or deep brown for the neck, tailpiece, and scroll. The strings should remain a light black.
Alternative Violin Drawing Tutorial
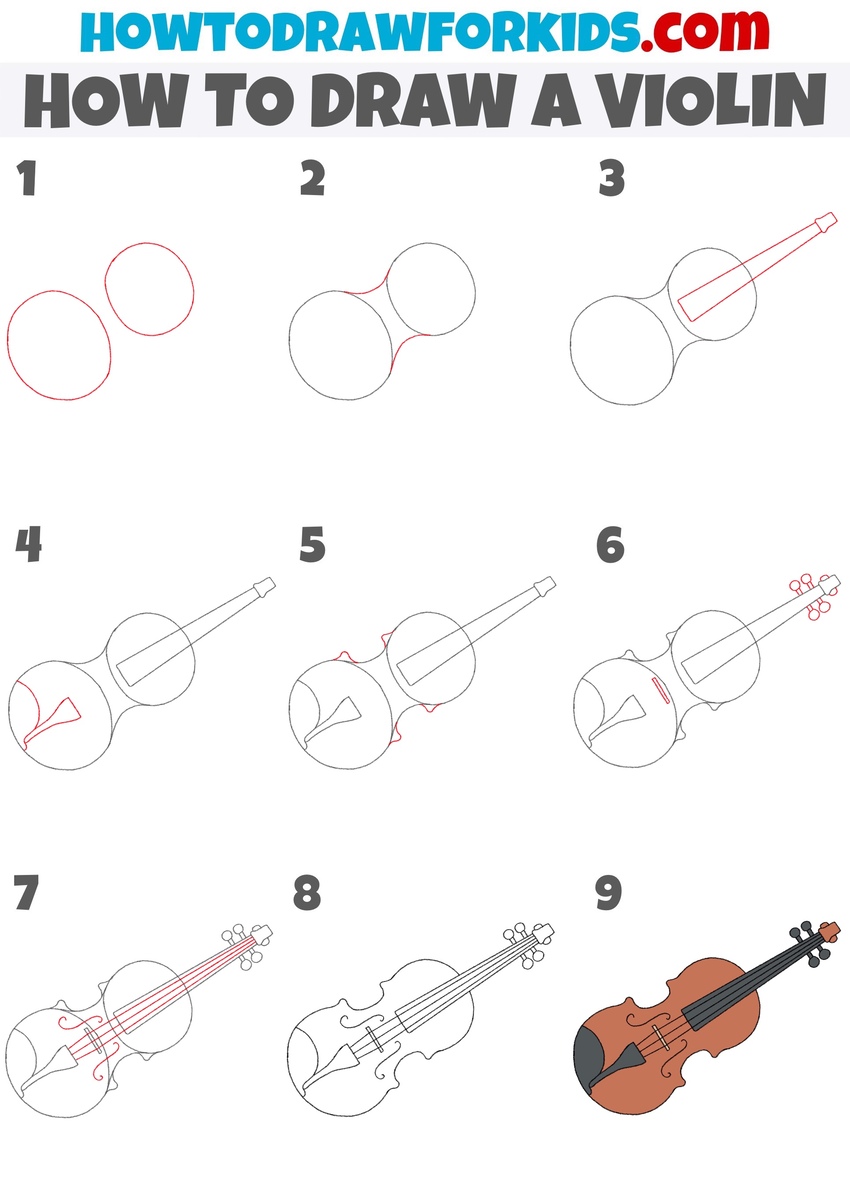
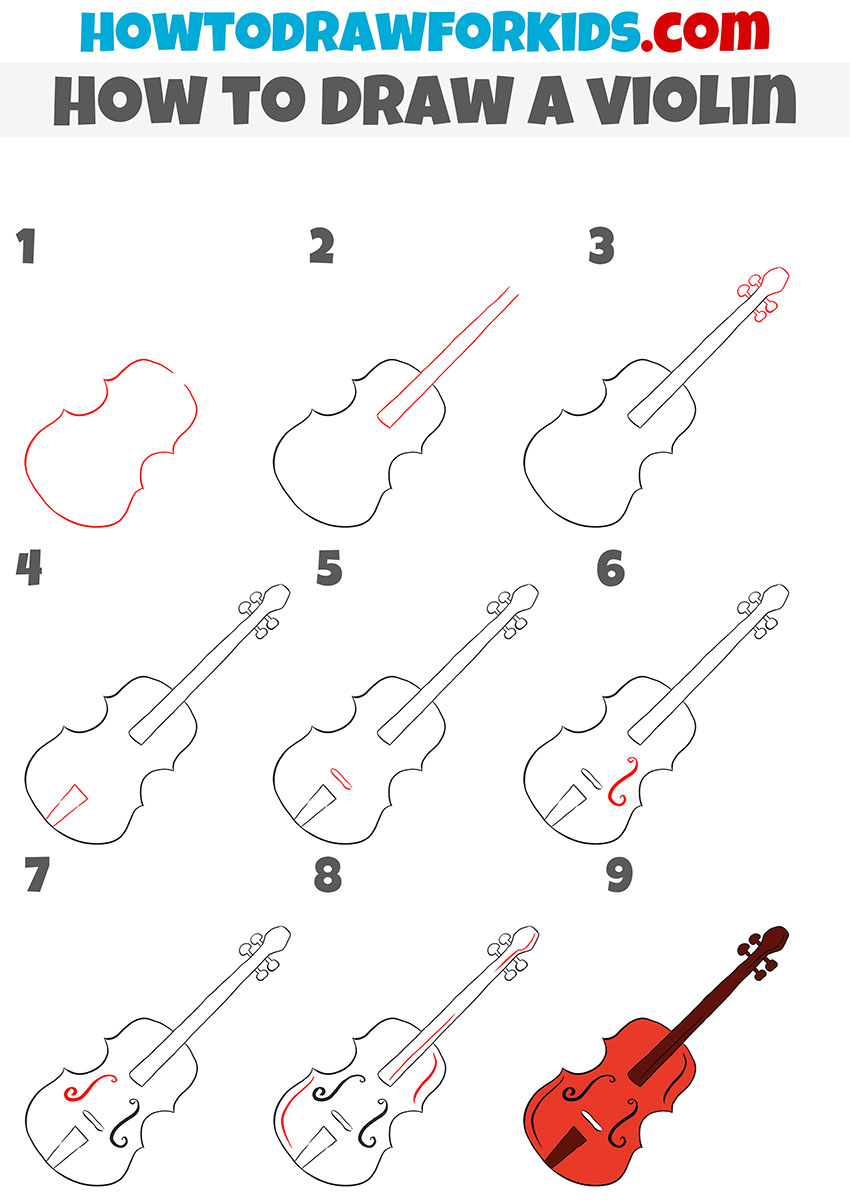
This method shows more simplified and slightly stylized approach, with fewer construction lines and a simplified structure. Compared to the first tutorial, this one demonstrates a more immediate shape of the violin rather than building it up with circles, making it quicker to complete. The tuning pegs are more pronounced, the strings are not drawn separately, and the violin’s body details are added progressively rather than all at once.
Start by drawing the outline of the violin’s body, creating a symmetrical shape with curved cutouts for the distinctive contours. Add the neck and scroll. Draw the tuning pegs, placing them evenly on both sides of the scroll. Sketch the bridge and tailpiece in their correct positions at the lower part of the violin. Add the f-holes, making sure they follow the curvature of the body.
Refine the violin drawing by adding additional structural details, including the fine contours of the body and decorative lines. Now, you can draw the strings or leave it as in my example. Once the structure is complete, finalize the drawing of a violin by applying color, using warm brown tones for the body and darker shades for the fingerboard, tailpiece, and pegs.
Conclusion
Today, we learned how to draw a violin using a truly basic approach, which is characteristic of all my drawing lessons. If you’d like to try drawing other similar musical instruments with distinctive appearances, be sure to check out my guitar drawing lesson, where I demonstrate the process of drawing one of the most well-known musical instruments in the world.
If you want to draw a violin in a more complex and interesting setting, try drawing hands holding the instrument. My hand-drawing lesson will help you with that.
You can also explore my other drawing lessons, which include tutorials on musical instruments, people, animals, characters, and much more.
All of these are available in large numbers on my website, and I’m sure you’ll find exactly what you’re looking for.

