How to Draw Abraham Lincoln
The quest to learn how to draw Abraham Lincoln invites us to connect with history through the tip of our pencils. In this drawing lesson, the aim is to make the process of sketching this historical figure accessible. Every line and shade is a step towards bringing a piece of the past into the present, a tribute to Lincoln’s enduring legacy.

How to Draw Abraham Lincoln: Basic Information
In learning how to draw Abraham Lincoln, you’ll find that my approach breaks down complex features into simple shapes. This method was crafted to ensure that anyone can start drawing with confidence. It’s about more than just creating an image; it’s about understanding a figure pivotal to American history.
The distinctive characteristics of Abraham Lincoln on this illustration are the focus of our lesson. Notice the weight of the lines, the economy of strokes defining his eyes, nose, and lips. These are intentional, as they capture the solemnity and depth of his persona. My technique breaks down complex contours into simple shapes.
To draw Abraham Lincoln is to immortalize a legacy. As you progress through each numbered step, you’re not just drawing a face; you’re piecing together history. With this lesson, I aim to connect you to Lincoln’s narrative, ensuring that each feature you draw resonates with the strength and integrity he represented.
Abraham Lincoln Drawing Tutorial
Materials
- Pencil
- Paper
- Eraser
- Coloring supplies
Time needed: 30 minutes
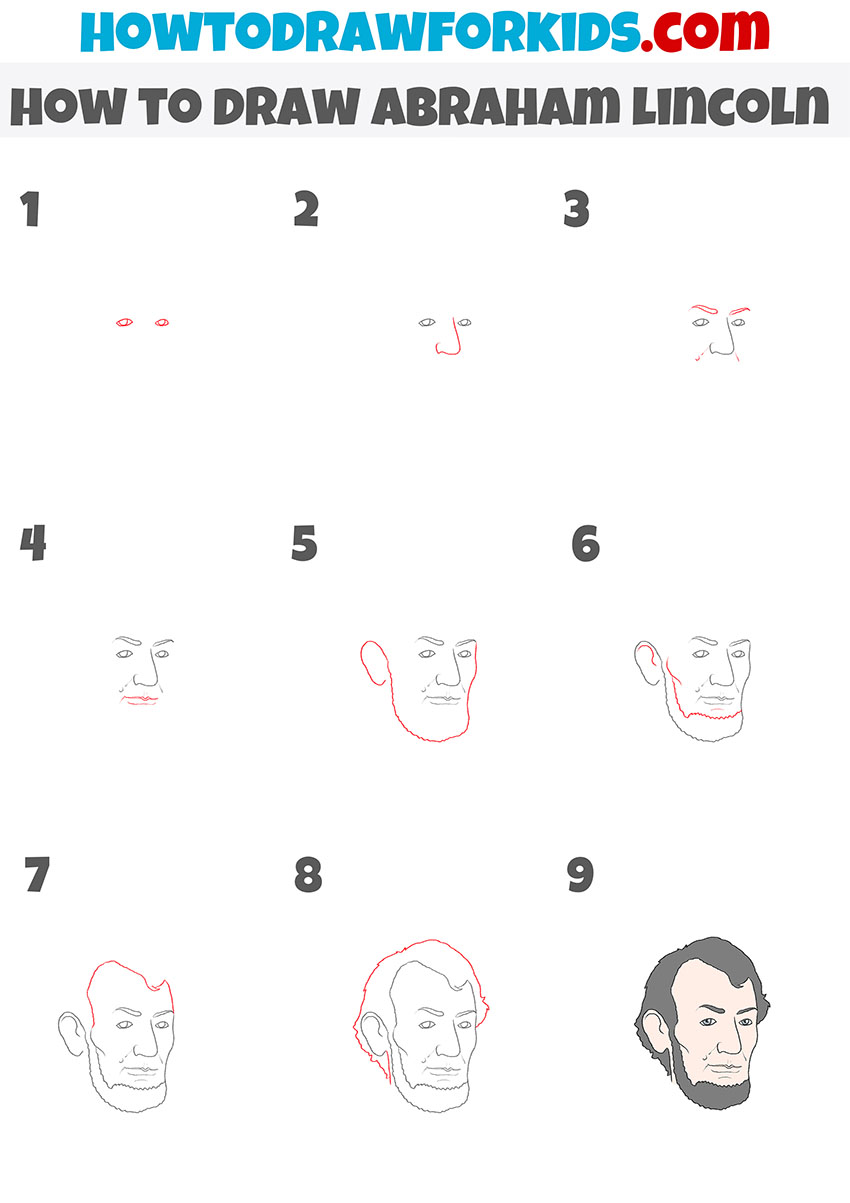
How to Draw Abraham Lincoln
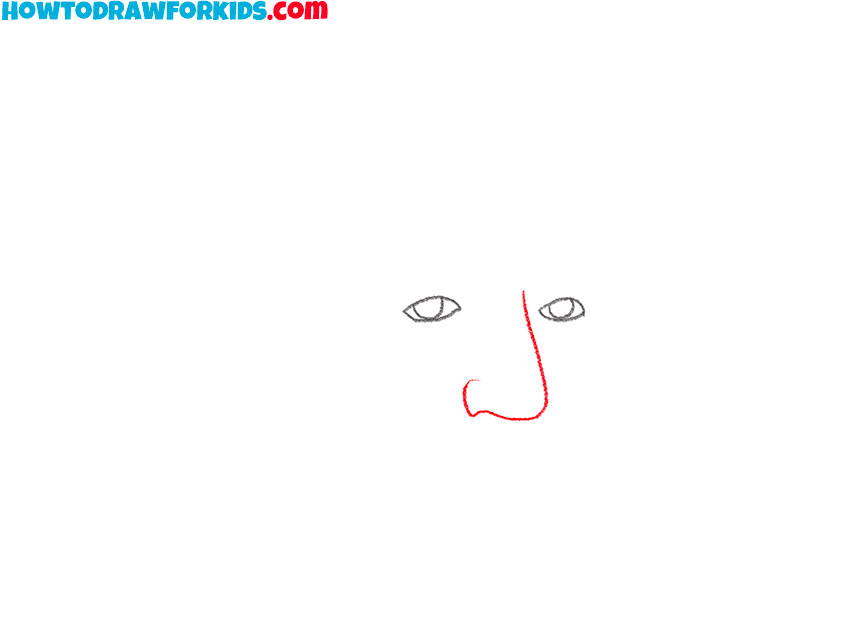
- Draw the eyes.
First, draw two almond shaped eyes.

- Depict the nose.
Add a curved line to depict the large nose.
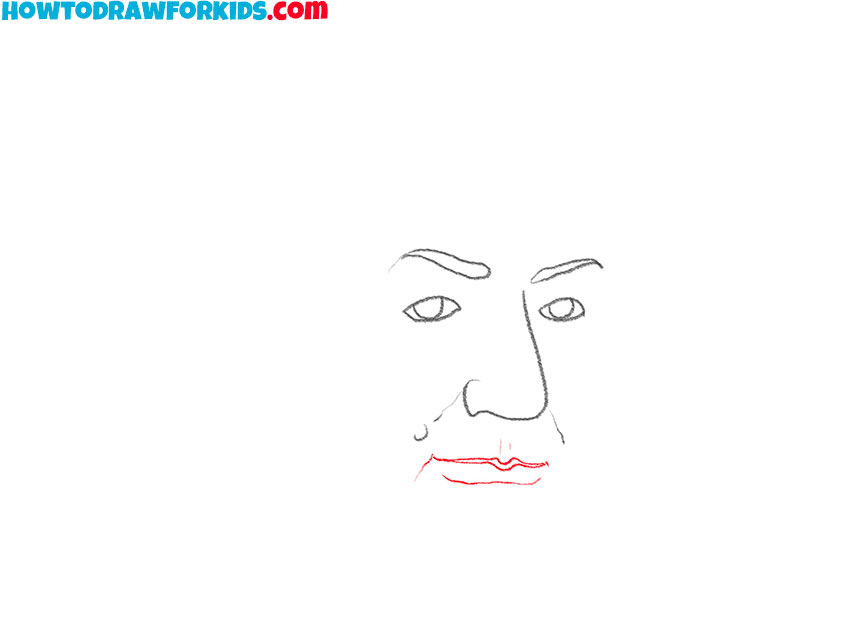
- Add the eyebrows and nasolabial folds.
Draw the eyebrows in the same shape as in the example. Depict the thin nasolabial folds.

- Sketch out the mouth.
The mouth is wide, the upper lip is much thinner than the lower.
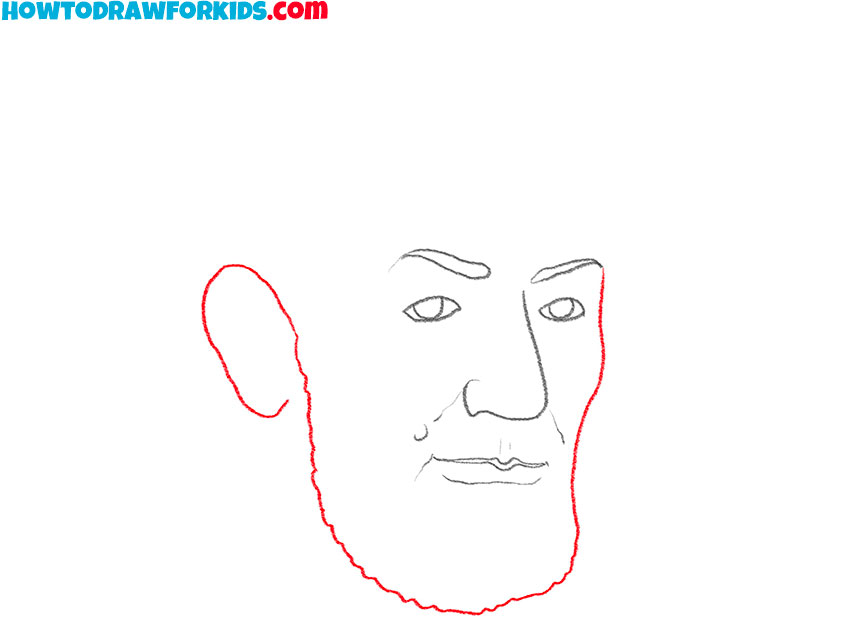
- Depict the outline of the beard and ear.
Draw a jagged line to depict the lower outline of the beard, and add the rounded ear on the side.
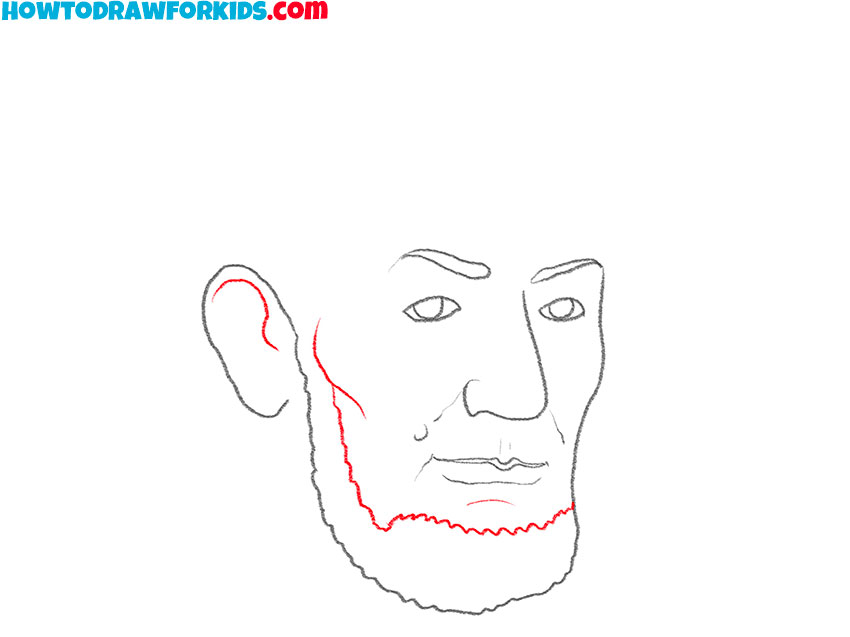
- Add the rest of the beard and ear.
Sketch out the lower outline of the beard, cheekbones, and the inside of the ear.
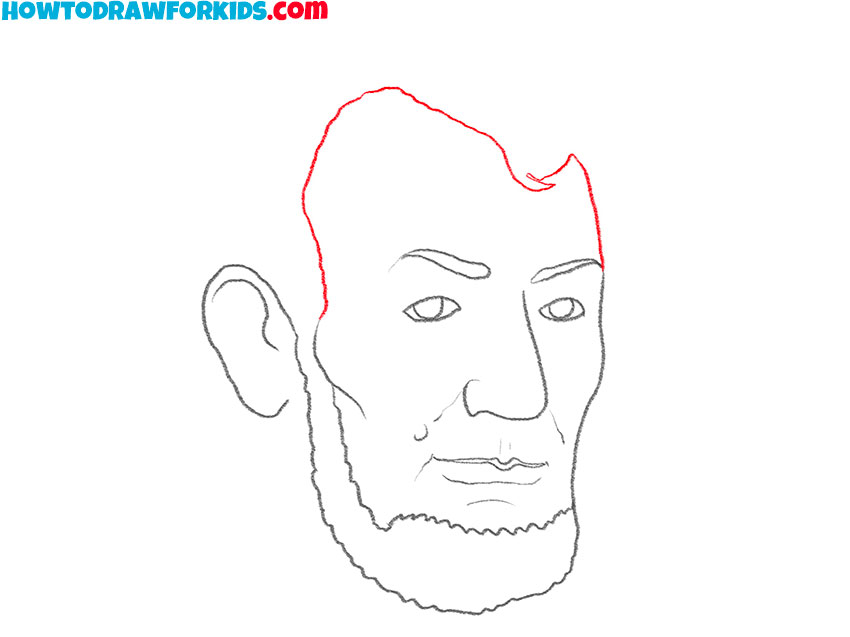
- Draw the hair above the forehead.
Depict a jagged line to depict the bottom outline of the hair.
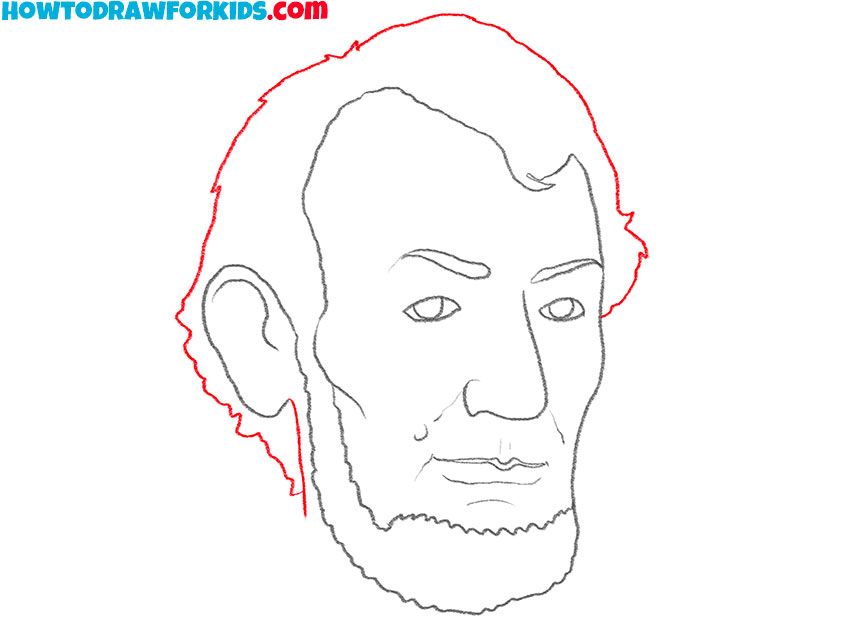
- Add details.
Use jagged lines to depict the hairstyle. Draw a straight line down from the ear.
- Color the Abraham Lincoln.
Use beige for skin and dark gray for the beard and hair.
Additional Content
In my efforts to make this drawing tutorial as user-friendly and accessible as possible, I’ve taken an extra step beyond the online tutorial. I’ve compiled a comprehensive yet concise PDF file that encapsulates the essence of the Abraham Lincoln drawing lesson.
This free downloadable resource ensures that the art of drawing Lincoln is available to you at any moment, free from the constraints of internet connectivity. It contains all the key instructions and visual aids from the online lesson, neatly organized for easy reference.
Perfect for learners of all ages, this PDF can be printed or stored on any device, enabling you to practice your drawing skills whether you’re at home, on a train, or waiting in a lobby. It’s a convenient tool to keep the inspiration flowing, ensuring that your artistic journey with Lincoln is always just a click away.
Alternative Drawing Technique
Recognizing the importance of practice in the mastery of any skill, I’ve crafted an alternate technique for drawing Abraham Lincoln that complements the main tutorial. This variant approach gives you the chance to engage with the subject matter from a new angle, reinforcing your learning and improving your drawing skills.
It presents a set of different challenges, encouraging you to adapt and explore various aspects of your artistic capabilities. With this additional technique, you’re not just repeating what you’ve learned; you’re building upon it, enhancing your ability to capture not just Lincoln’s likeness but the essence of any portrait you may undertake.
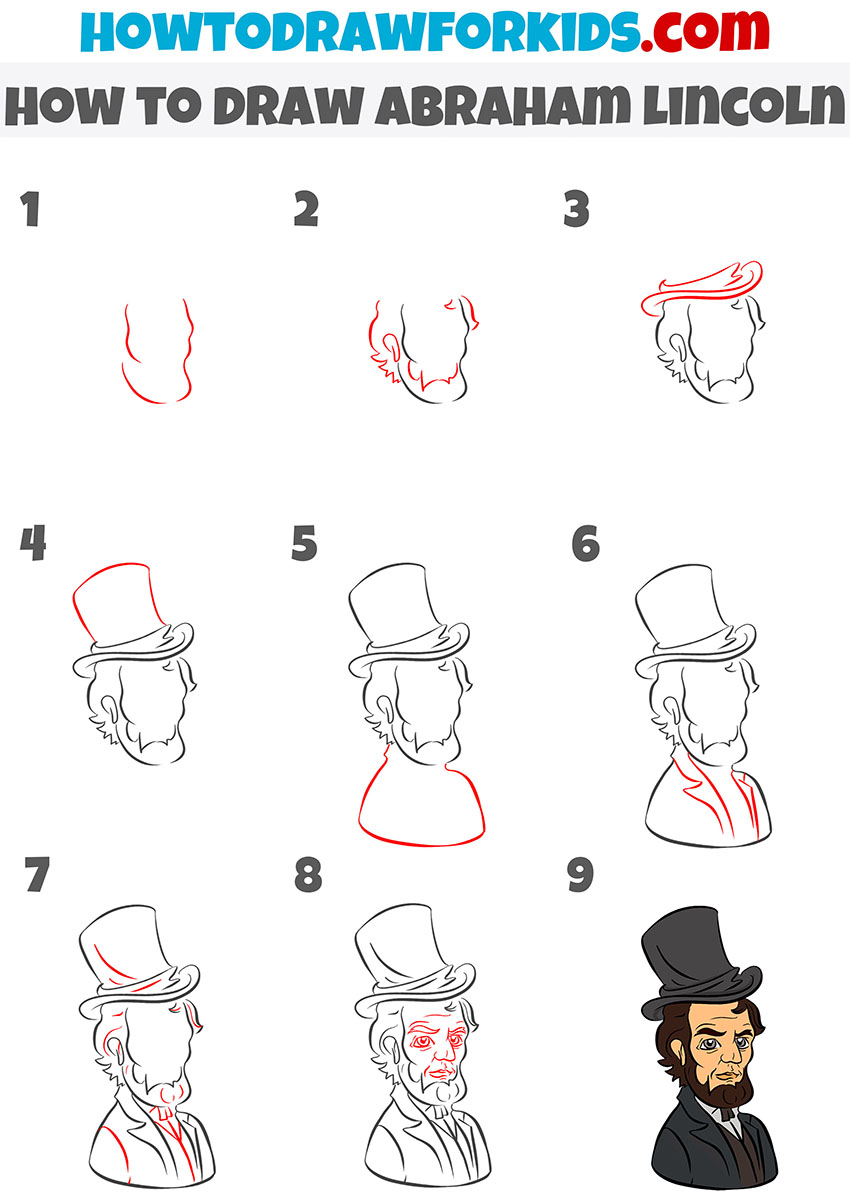
How to Draw Abraham Lincoln: Extra Practice
This method unfolds with a gentle start, sketching the bare outlines of Abraham Lincoln’s face and neck. It carefully guides the artist, introducing Lincoln’s distinct features such as the beard and hairline in a gradual manner. The process is clear and leads from broader shapes to specific details without overwhelming the learner.
Attention then shifts to the iconic elements that render Lincoln’s image so memorable; his top hat is sketched in, followed by the contours of his suit. Each step is deliberate, inviting the artist to layer the drawing with thoughtful strokes, ensuring that Lincoln’s iconic look is captured with simplicity and ease.
In the concluding phase, the focus is on the subtle touches that breathe life into the portrait, like the soft shadows and the thoughtful expression in Lincoln’s eyes. These final additions are key to portraying not just Lincoln’s appearance, but also the depth of his persona.
FAQ for Perfecting Your Lincoln Portrait
As you’ve traveled through the steps of drawing Abraham Lincoln, you may find yourself pondering over aspects of the process. Here, I have gathered some of the most frequently asked questions to provide further clarity and insight into this artistic endeavor.
- What if my proportions don’t look exactly like the ones in the tutorial? Your personal touch is what makes your drawing unique. Proportions can be adjusted; the key is to capture the essence of Lincoln’s features.
- How can I improve my shading technique to give more depth to Lincoln’s face? Practice is your ally. Start with light strokes and gradually build up the areas of shadow, observing how light interacts with the form.
- My drawing looks flat. How do I add more dimension to it? Dimension is achieved through contrast. Increase the range of your shading from light to dark to enhance the three-dimensional effect.
- Can I use different tools or mediums to draw Abraham Lincoln using this method? Absolutely! This method is versatile. Feel free to experiment with pencils, charcoal, or even digital tools.
- What should I focus on to ensure the likeness is captured? Pay close attention to the eyes, nose, and mouth – these features are vital for capturing Lincoln’s likeness.
As we conclude this artistic chapter, it’s important to remember that every question you ask is a step towards greater mastery. The path of art is not linear; it winds and turns, offering lessons and discoveries at each curve. Let the questions you hold be the seeds from which your artistic prowess blooms.
Conclusion
As we place our pencils down, the image of Abraham Lincoln looks back at us from the canvas, a testament to the skills you’ve honed through this tutorial. If this journey through time has ignited your artistic curiosity, my website awaits with a treasury of tutorials, from the dynamic lines of an airplane to the eerie charm of a zombie.
Follow me on social media for the latest updates and tantalizing previews of what’s to come. Your engagement is the lifeblood of our community- comment with your desires for new lessons, and together, we’ll tailor a curriculum that breathes life into your artistic dreams and brings joy to your creative spirit.