How to Draw Abraham Lincoln
The hero of today’s tutorial is one of the most respected figures in human history, as here we will learn how to draw Abraham Lincoln.

How to Draw Abraham Lincoln: Introduction
In learning how to draw Abraham Lincoln, you’ll find that my approach breaks down complex features into simple shapes. This method was crafted to ensure that anyone can start drawing with confidence. It’s about more than just creating an image; it’s about understanding a figure pivotal to American history.
The distinctive characteristics of Abraham Lincoln on this illustration are the focus of our lesson. Notice the weight of the lines, the economy of strokes defining his eyes, nose, and lips. These are intentional, as they capture the solemnity and depth of his persona. My technique breaks down complex contours into simple shapes.
To draw Abraham Lincoln is to immortalize a legacy. As you progress through each numbered step, you’re not just drawing a face; you’re piecing together history. With this lesson, I aim to connect you to Lincoln’s narrative, ensuring that each feature you draw resonates with the strength and integrity he represented.
Abraham Lincoln Drawing Tutorial
Materials
- Pencil
- Paper
- Eraser
- Coloring supplies
Time needed: 25 minutes
How to Draw Abraham Lincoln
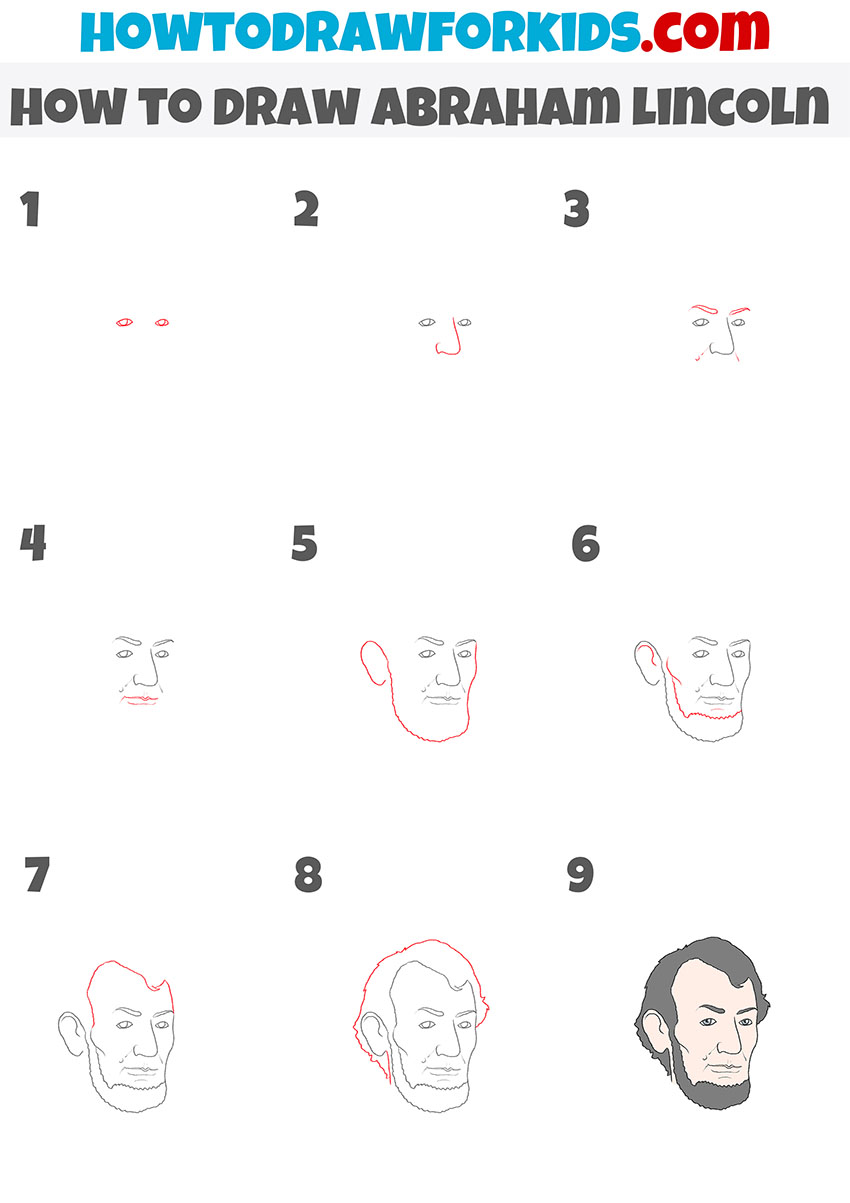
- Sketch Lincoln’s eyes.
This drawing begins with the most notable part of any face, that is with the eyes. Lightly sketch two narrow ovals to draw the eyes, of Abraham Lincoln. leaving space between them to fit the nose later. Make the shapes symmetrical in size and level on the page. Add circles inside each eye shape to illustrate the pupils.

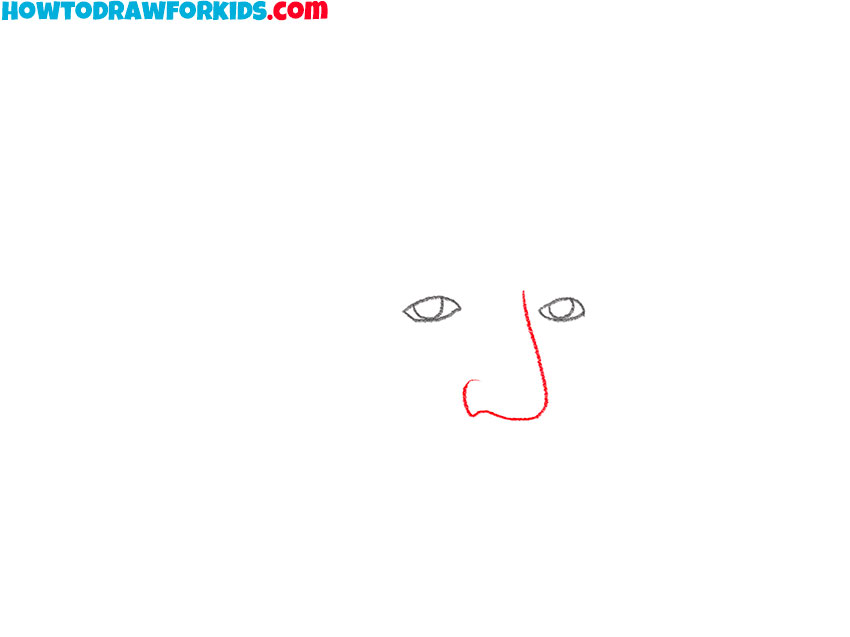
- Draw the nose shape.
Now, it’s time to portray the center of the face by drawing the nose. Place it directly between and slightly below the eyes, using long vertical curves to illustrate the bridge, and add a rounded shape at the bottom for the tip. Sketch the nose narrow to convey Lincoln’s distinctive features.
- Sketch the eyebrows and wrinkles
Expression is created largely through the eyebrows, so here you’ll add two slightly angled shapes above the eyes. Use short, curved strokes to draw them thicker near the center and tapering to the sides. Above and around the nose, add a few faint lines to convey wrinkles, as Lincoln was often depicted with a serious, thoughtful expression.

- Place the lips on the face.
To complete the main facial features, sketch the mouth beneath the nose. Use a slightly curved horizontal line for the upper lip and a broader shape below for the lower lip. Small details, like a slight curve upward at the corners, can make the portrait look more like real Abraham Lincoln.

- Draw the ear and beard outline.
Abraham Lincoln is famously recognized for his beard, so adding this feature is very important. But first, sketch the ear, using an elongated half-oval shape. Then, starting from the ear, sketch a line around the face that curves downward to form the parts of the beard, that cover the cheek, jaw, and chin. Lincoln is known for having a long, narrow face, so reflect this in your portrait.

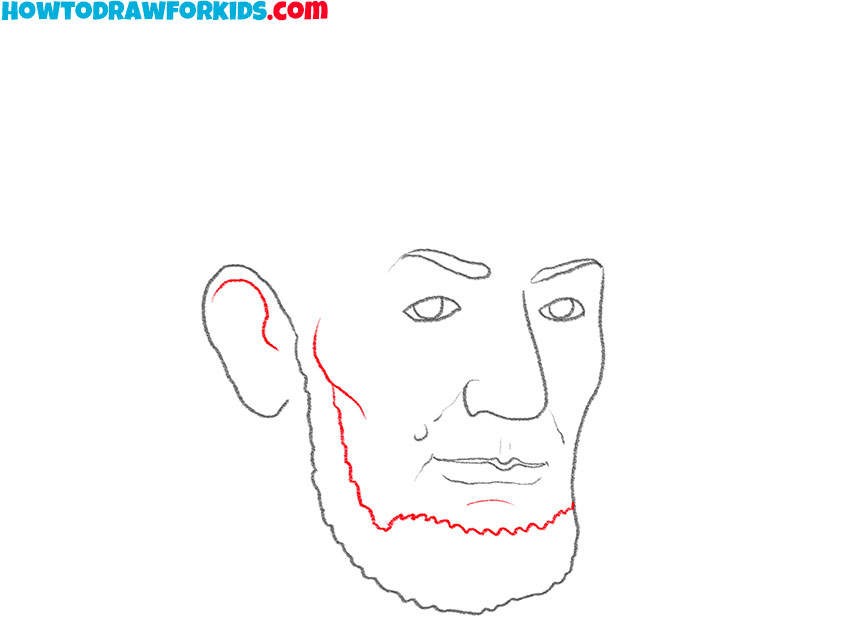
- Finalize the shape of Lincoln’s beard.
Starting from near the ear, sketch a line down along the jaw and across the chin to form the inner beard’s outline. Use small and jagged strokes to convey the texture of facial hair. The beard should frame the lower part of the face without connecting to the upper lip, as Lincoln’s beard did not include a mustache. Also, draw some lines inside the and sketch the cheekbone.
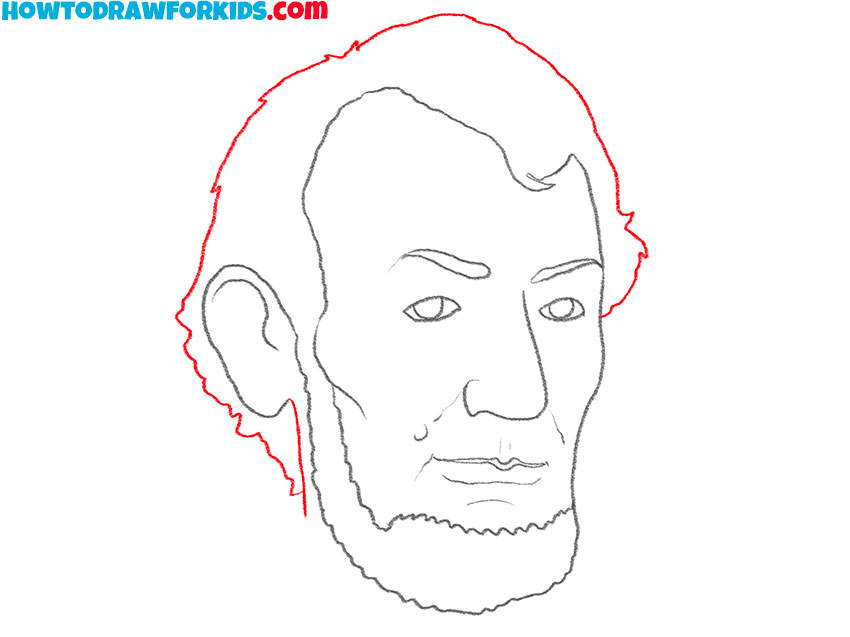
- Create the forehead outline.
After finishing the lower face, it’s time to define the forehead and hairline. Sketch the hairline on above the forehead using long and smooth lines. Lincoln’s hairline had a slightly uneven quality, so you can add small irregularities. Connect this line to the inner edge of the beard.

- Finalize the shape of Lincoln’s haircut.
Finalize the haircut using short, flowing strokes along the top and sides of the head to convey the texture of Lincoln’s wavy hair. To make the haircut look more realistic, vary the length and direction.
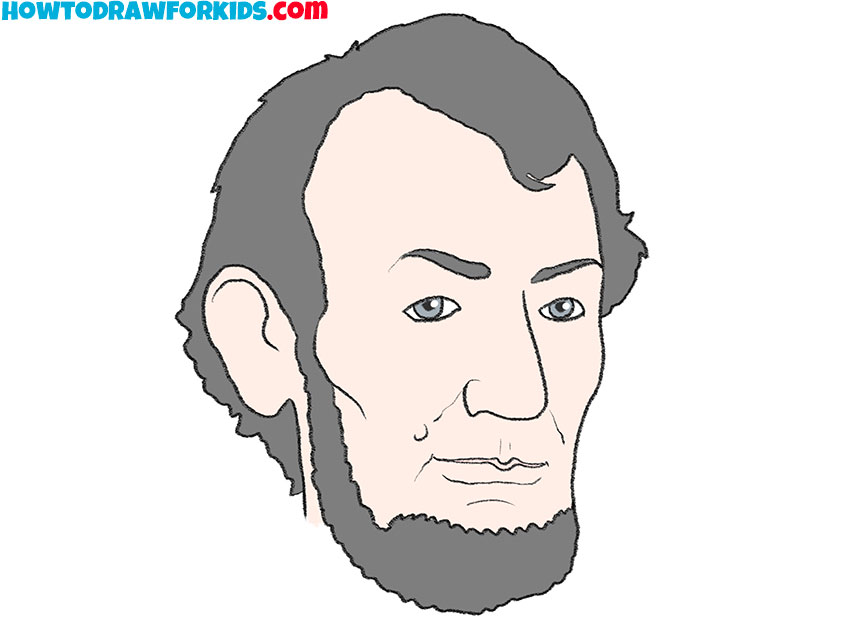
- Color the portrait using realistic tones.
The last step is to finishing the portrait with color. Use a light skin tone for the face, leaving the eyes white and irises light blue or gray. The beard and hair should be filled with a dark brown or gray tone. Color the eyebrows in the same shade as the hair.
Additional Content
In my efforts to make this drawing tutorial as user-friendly and accessible as possible, I’ve taken an extra step beyond the online tutorial. I’ve compiled a comprehensive yet concise PDF file that encapsulates the essence of the Abraham Lincoln drawing lesson.
How to Draw Abraham Lincoln in a Hat
To create this version, first outline the shape of the head and bears. Continue the drawing with the tall hat, using long curved lines.
Sketch the shoulders and coat with simple strokes, placing folds and details to convey fabric without adding unnecessary complexity. Draw the face using simple shapes. In the coloring stage, use dark tones for the suit and hat, coloring the skin tones light.