How to Draw a Giraffe
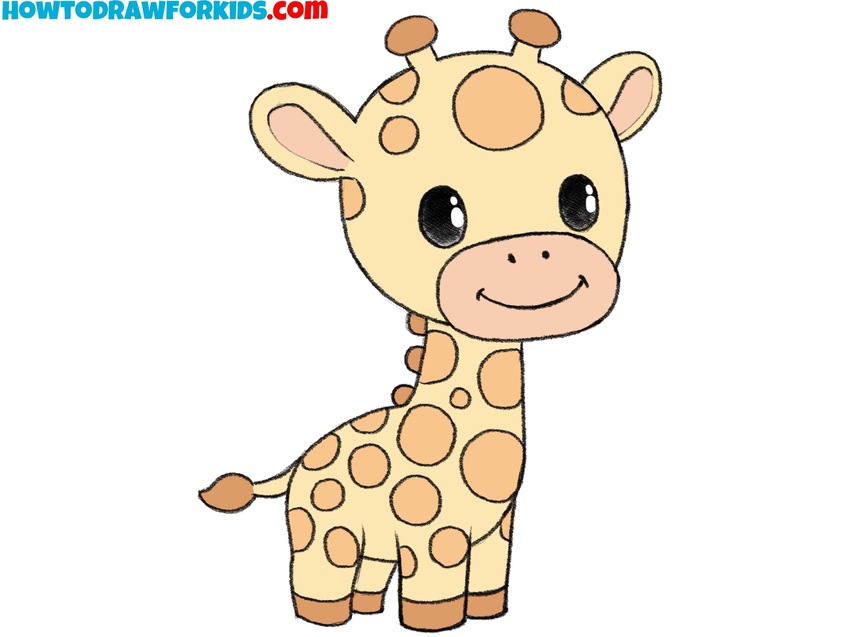
In this very simple instruction, I will show you how to draw a giraffe – one of the most graceful and unusual animals living on planet Earth.
How to Draw a Giraffe: Introduction
For all animal lovers, I have created this simple lesson on how to draw a giraffe. First, we will draw this unique animal using a basic lesson, and then I will introduce several additional methods to reinforce the knowledge you’ve gained.
Before starting your drawing, it’s helpful to familiarize yourself with the giraffe’s unique anatomy. Their long necks and legs are defining features, and it’s really important to convey these details simplified but naturally. Studying real-life references or photos can help understand how the different parts of the giraffe’s body relate to each other.
In a simplified or cartoon drawing, try not to add excessive detail to your giraffe drawing. Focus on the most important features of the giraffe, like its long neck, rounded spots, and basic facial features. This will help keep the drawing clean and clear without overcrowding it with unnecessary elements.
It’s important to be flexible with your drawing. If something doesn’t look quite right, don’t hesitate to adjust the shapes or proportions of the giraffe. Making small changes during the sketching process will lead to a more polished giraffe drawing.
Giraffe Drawing Tutorial
Materials
- Pencil
- Paper
- Eraser
- Coloring supplies
Time needed: 30 minutes
How to Draw a Giraffe
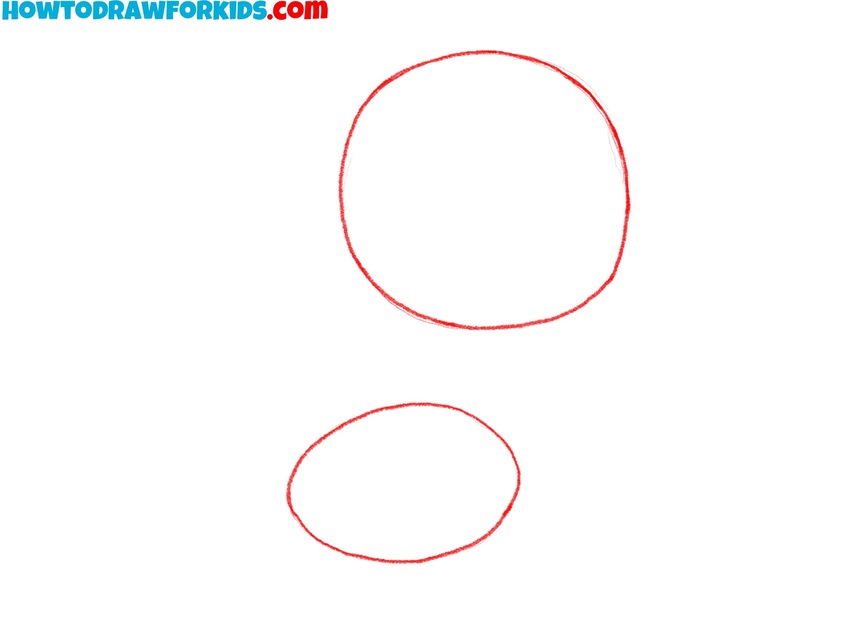
- Sketch the head and body shapes
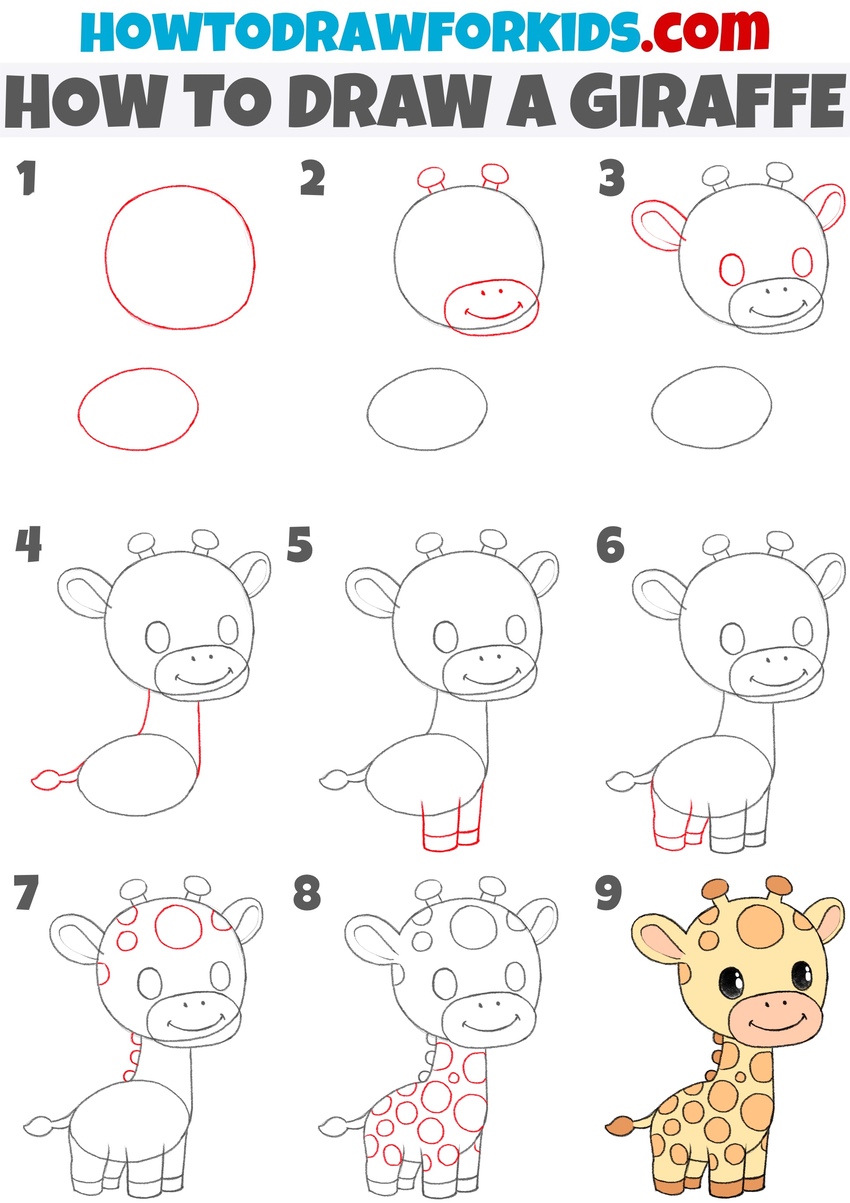
Begin by drawing two simple shapes for your drawing. First, create a large circle for the giraffe’s head. Then, below the head, sketch an oval horizontally for the body. These shapes will form the base for your giraffe drawing. Keep the shapes light so they can easily be refined later.
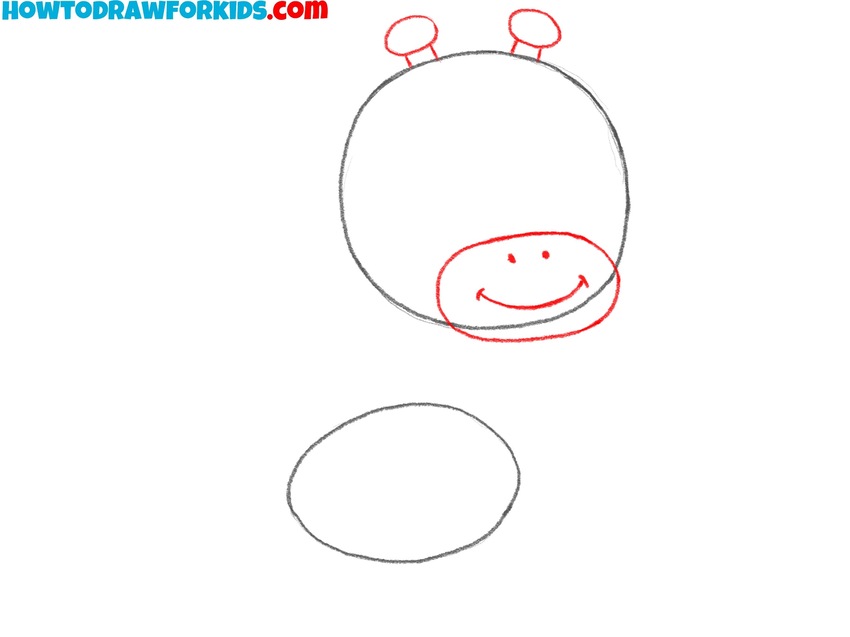
- Add the facial features and horns.
On top of the head, draw two small round horns with slightly wider tops. Below the horns, draw a large curved line to shape the muzzle. Inside the muzzle area, draw two small dots for nostrils and a simple curved line for a smiling mouth.
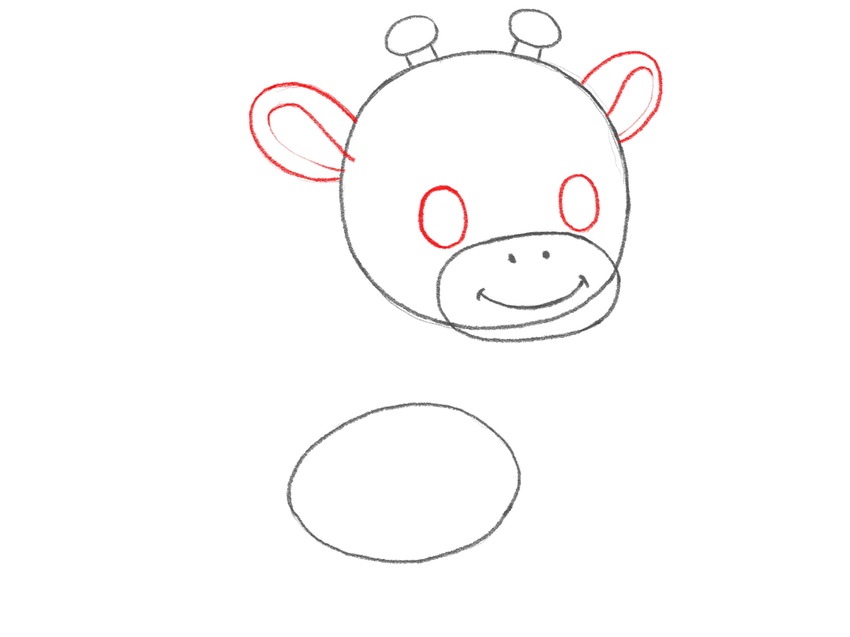
- Detail the head of the animal.
Next, draw the giraffe’s ears on both sides of the head. Each ear should resemble an elongated oval. Then, draw the inner lines of the ears, to give them a bit more realistic look. After the ears, add two small circular shapes inside the face for the eyes.
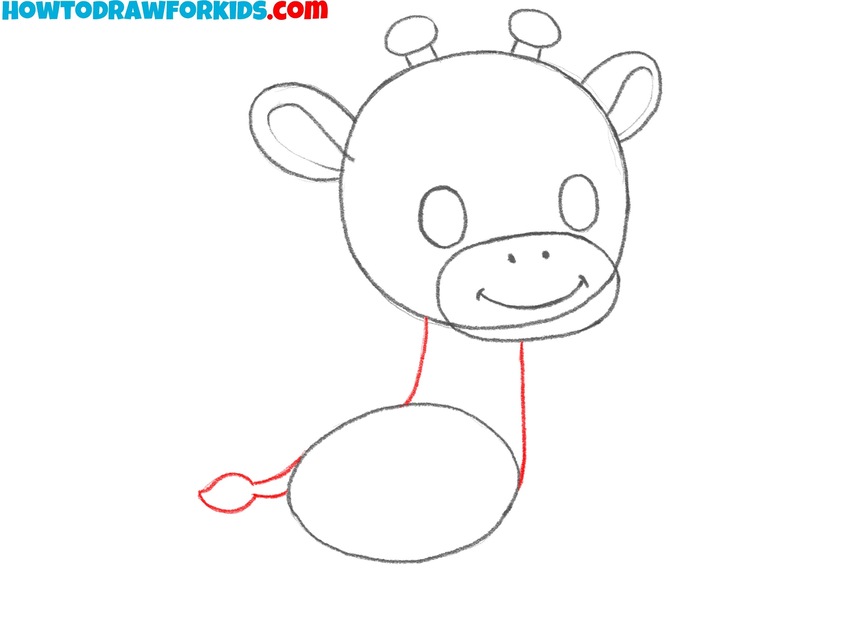
- Draw the neck and the tail.
From the bottom of the head, draw two smooth, slightly curved lines to create the giraffe’s long neck. These lines should extend down to meet the body oval. Then, move to the back of the body and add a small tail. The tail consists of a thin, curved line with a tiny tuft at the end.
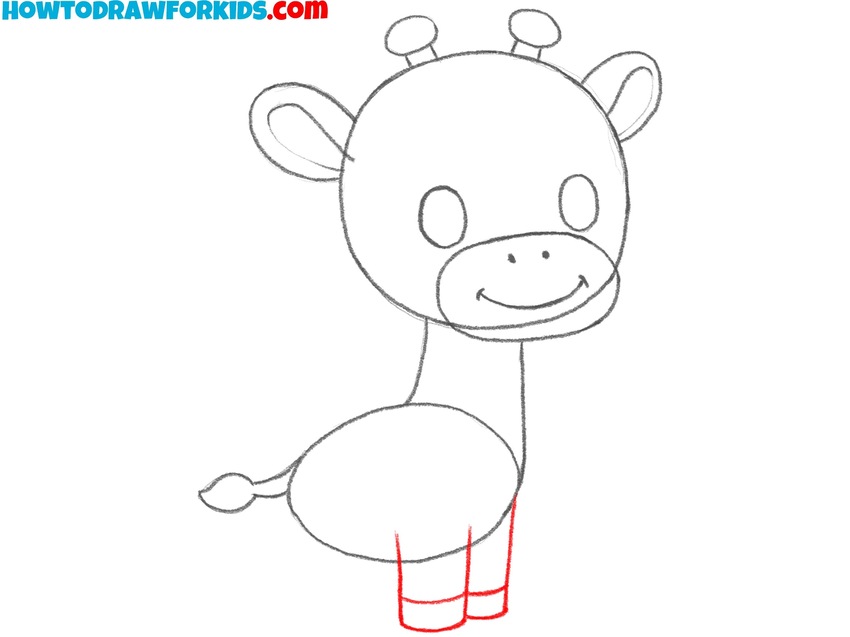
- Illustrate the front legs.
Starting from the bottom of the body oval, draw two parallel legs with slightly rounded hooves at the bottom. These legs should be short and positioned close to each other. Don’t forget to separate the hooves with two simple short lines. Be sure to keep the legs really simple.
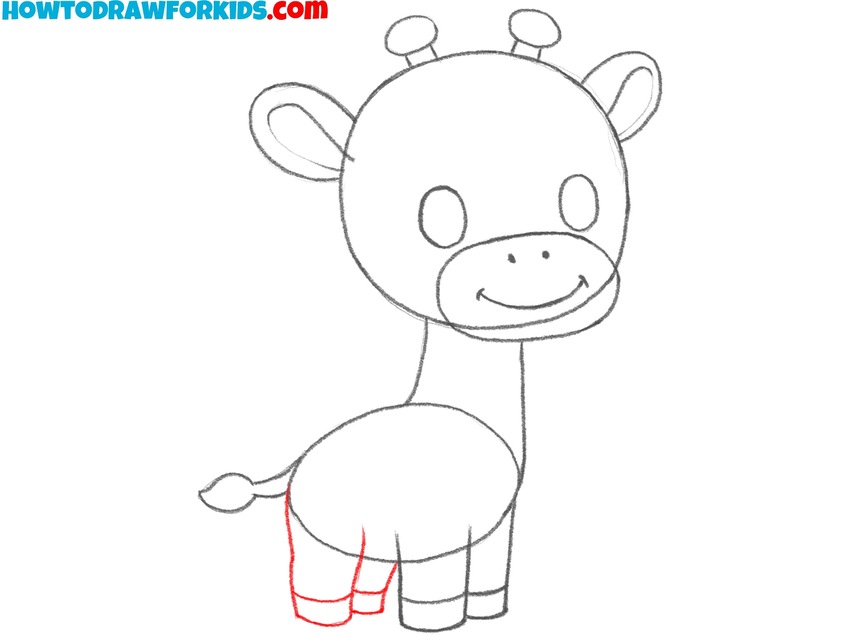
- Add the hind legs.
In this step, draw the remaining two legs on the back side of the body. Just like the first pair, these legs should have small rounded hooves at the bottom, making sure all four legs are similar in shape and size. The hind legs should be slightly more curved than the front legs.
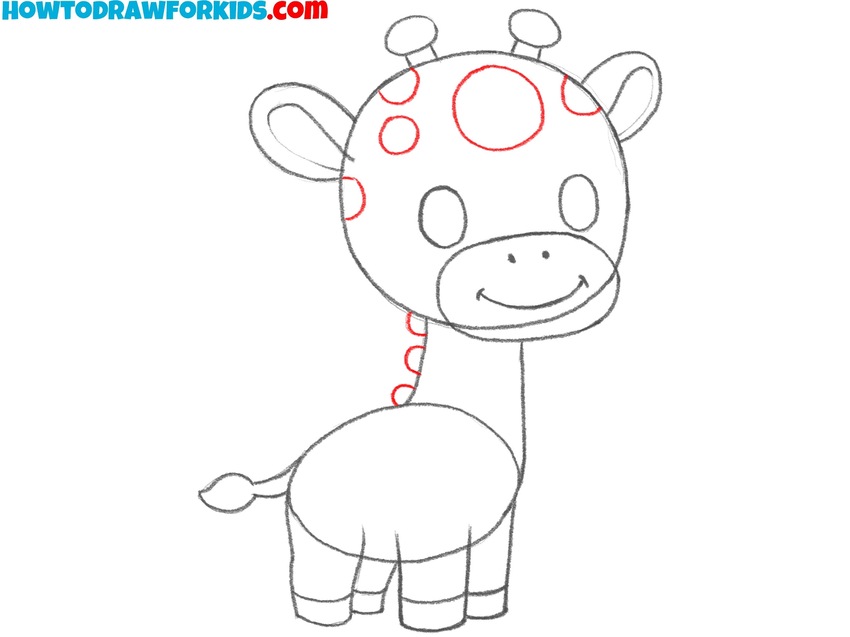
- Start drawing the giraffe’s spots and mane.
Start by drawing large circular spots across the head, and neck, making them irregular in shape for a natural look. After adding the spots, draw the giraffe’s short mane along the back of the neck. This can be done by adding small, rounded rectangles or curved lines that follow the contour of the neck.
- Add more spots and final details.
Continue adding spots to the giraffe’s body to complete its recognizable pattern. At this time, we draw the pattern on the body and legs of the animal. Vary the size and placement of the spots. Make sure to check for any missing details and smooth out the lines of your giraffe drawing.

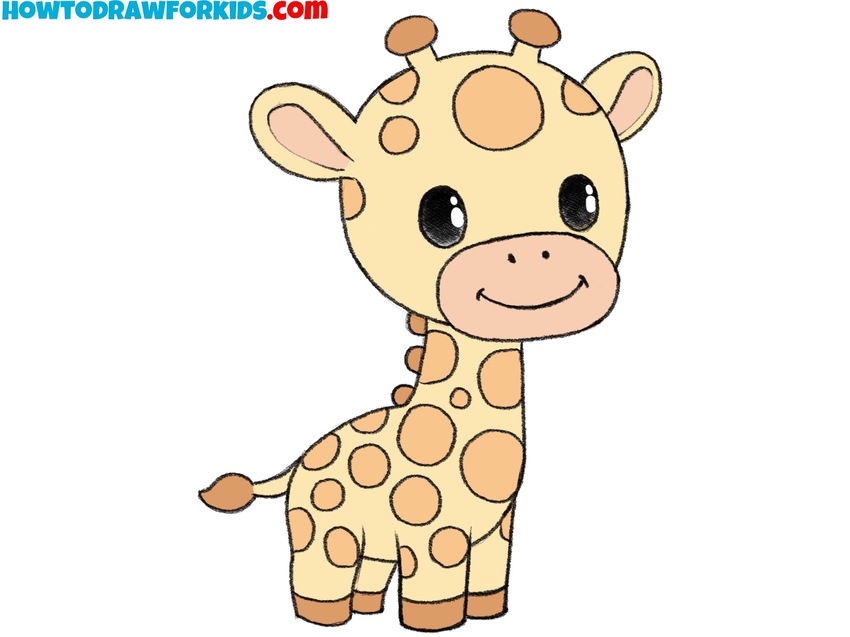
- Color your giraffe.
Use light tan or yellow for the giraffe’s body and a slightly darker shade for the spots. Color the muzzle area a soft beige, and use brown for the hooves, horns, and the tip of the tail. The eyes can be filled in with black, leaving small white highlights.
How to Draw a Giraffe: Video Tutorial
How to Draw a Giraffe: Alternative Methods
The main drawing lesson is complete, the video on drawing a giraffe has been watched, and now it’s time to move on to additional and alternative tutorials. Let’s go through all the instructions together to reinforce the skills you’ve learned and find out which style and method works best for you.
Giraffe for Preschoolers
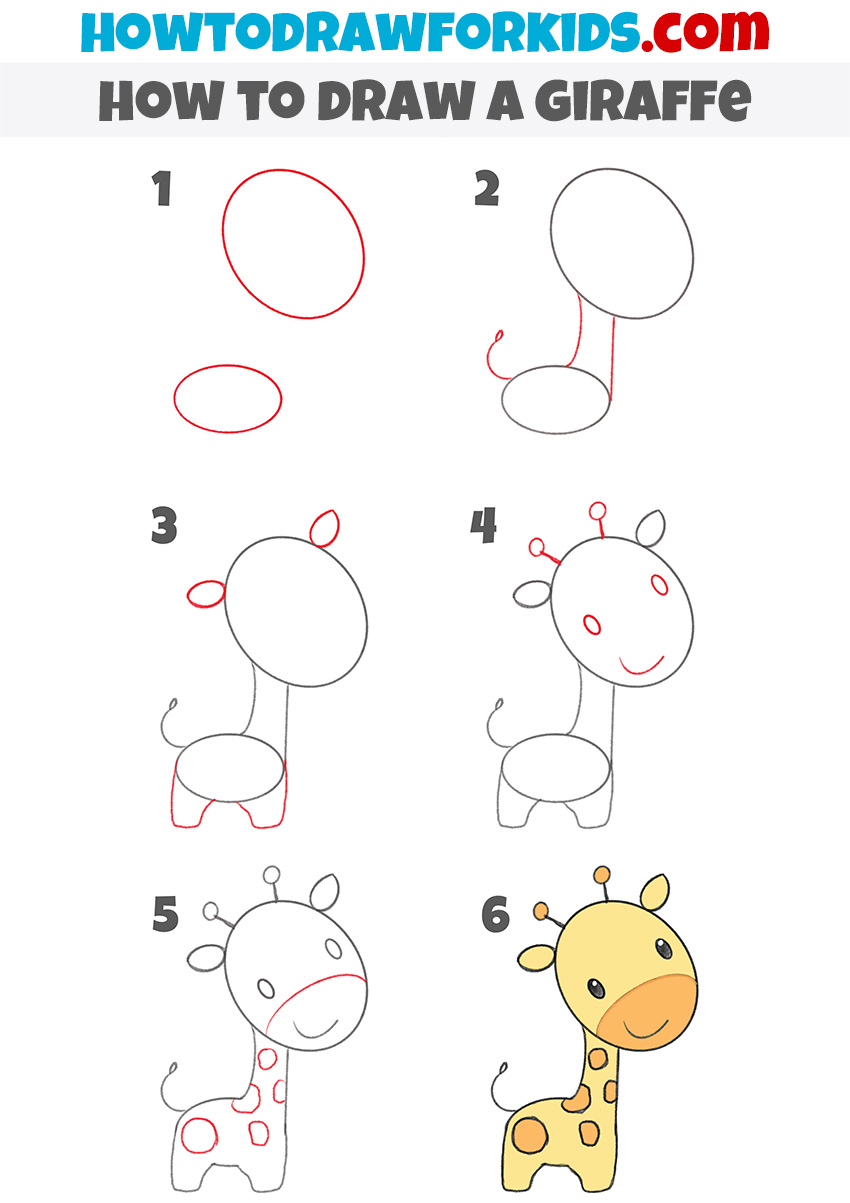
If the tutorial above was too difficult, this very simplified giraffe tutorial for preschoolers might be more suitable for you. In the picture, you see a very simple and cute, almost toy giraffe. This is a basic model and will be easy to replicate. The construction of the figure of a giraffe will be very simple, there is no need to draw individual elements here.
First, draw two simple ovals, one larger for the head and a smaller one for the body. Connect the two ovals with two straight lines to form the giraffe’s neck. Next, draw the tail by adding a small curved line with a loop at the end. After that, add the ears and legs, keeping them simple and rounded.
For the giraffe’s face, draw two small ovals for the eyes, two dots for the nostrils, and a curved line for the mouth. Add the giraffe’s horns as small circles on top of the head. Then, draw irregular spots on the body to represent the giraffe’s coat pattern. Finally, add some color to complete your giraffe drawing, using light yellow for the body and brown for the spots.
Simple Giraffe Drawing Tutorial
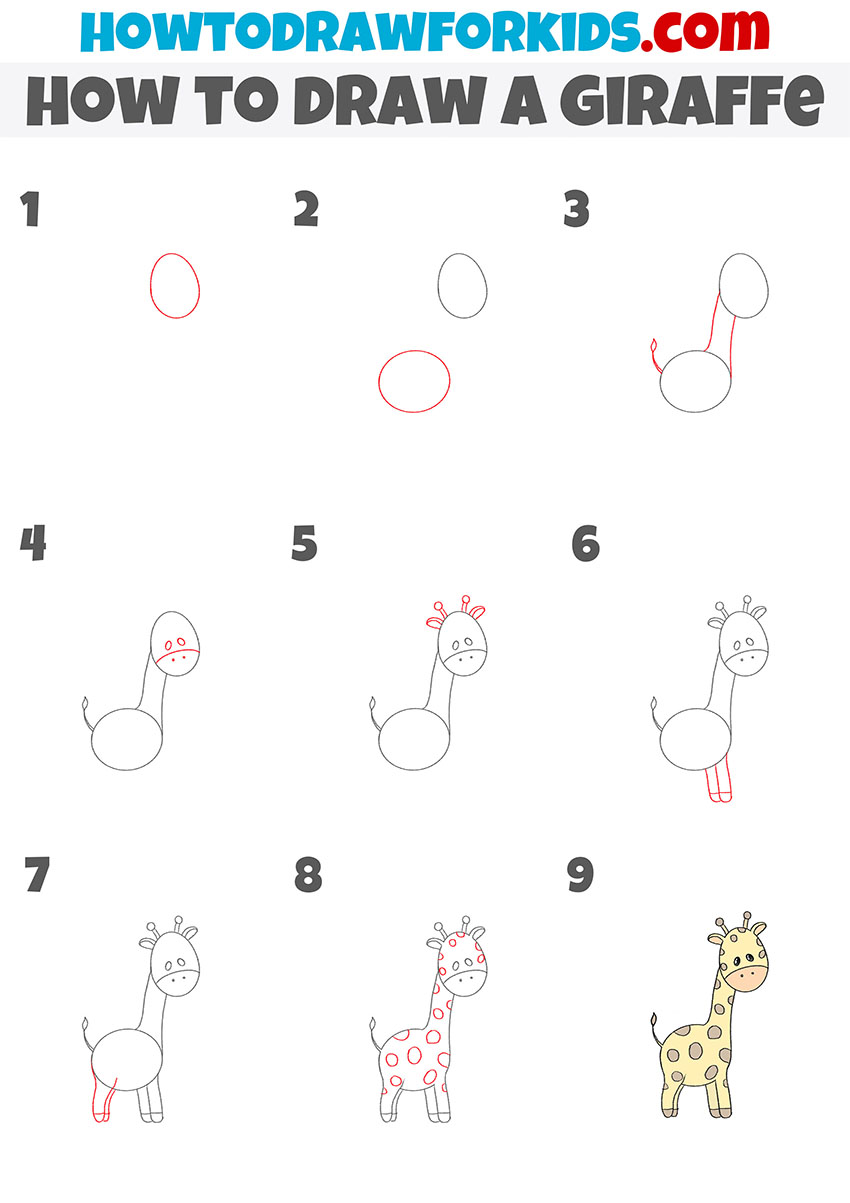
This giraffe drawing guide is a bit more detailed but still simple, resulting in a slightly different style compared to other tutorials. In this step-by-step instruction, the giraffe is drawn in a cartoon style and looks very cute. Surely you have seen such a giraffe in cartoons, in printed materials, or on any products for kids. There are also toys in the form of a giraffe.
Begin drawing a giraffe by sketching two ovals, one representing the head and the other for the body. Link the two shapes with a pair of straight lines to form the neck. Add a small curved line at the back for the tail. For the face, draw simple circles for the eyes, small dots for the nostrils, and a curved line for the mouth.
Next, draw the horns and the ears on either side of the head. Move on to drawing the legs beneath the body using straight lines with rounded ends. Then, add a series of large, uneven spots across the body to resemble the giraffe’s distinctive markings. To complete your giraffe drawing, add color with a light yellow tone for the body and brown for the spots, horns, and hooves.
Easy Giraffe Drawing Tutorial
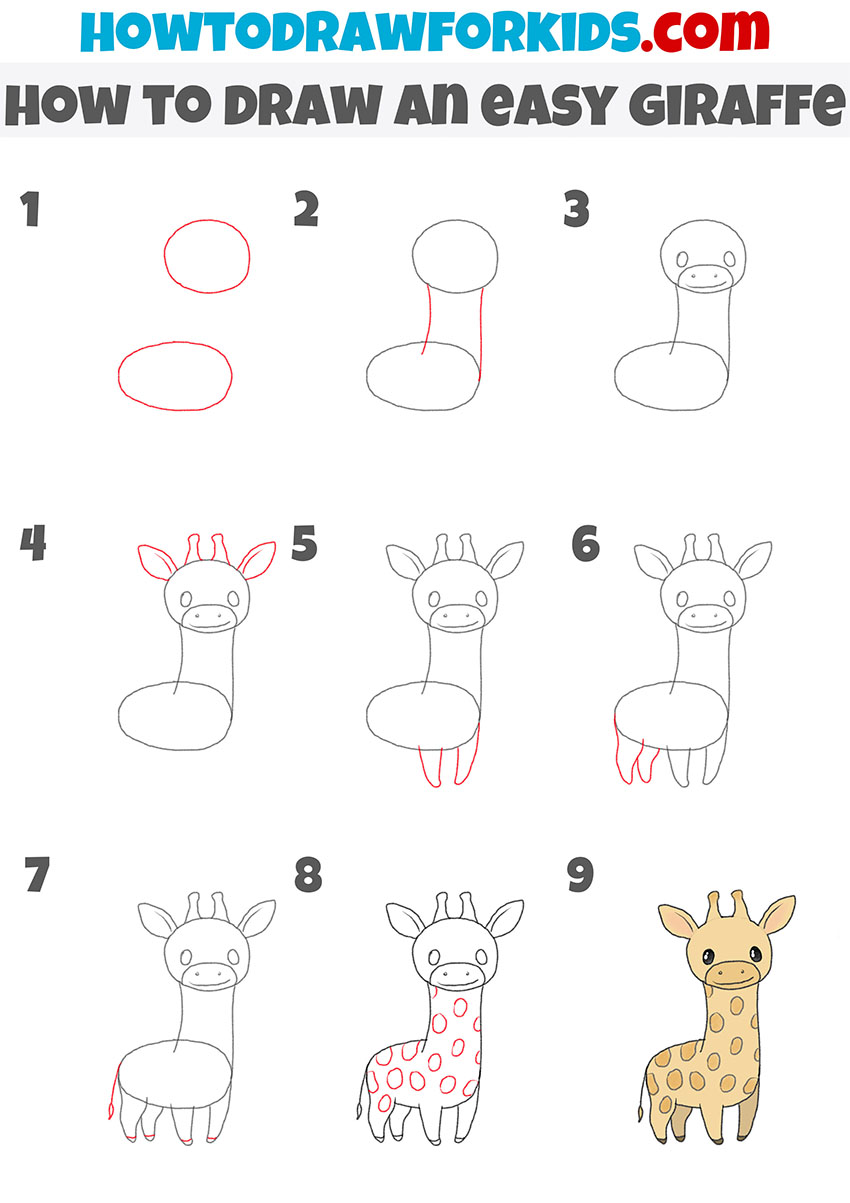
This guide is similar to the main tutorial and the previous one, but it will give you a completely different result in terms of style. While the structure and steps are familiar, the final drawing creates a unique look for the giraffe. In this giraffe drawing lesson, you will first draw the outlines of the head, torso and neck, then add its facial features and legs.
Start by drawing two ovals, one for the head and one for the body. Connect the shapes with two vertical lines for the neck. Add a small circle for the nose and two dots for the eyes to form the face. Draw the horns and ears on top of the head.
Next, sketch the front and back legs beneath the body, keeping them simple and proportional. Add a small, curved line for the tail. Once the basic outlie is done, draw rounded patterns all over the giraffe’s body to create its recognizable pattern. To finish, color the giraffe using a soft tan or yellow shade for the body and darker brown for the spots, tail, and other features.
Alternative Giraffe Tutorial
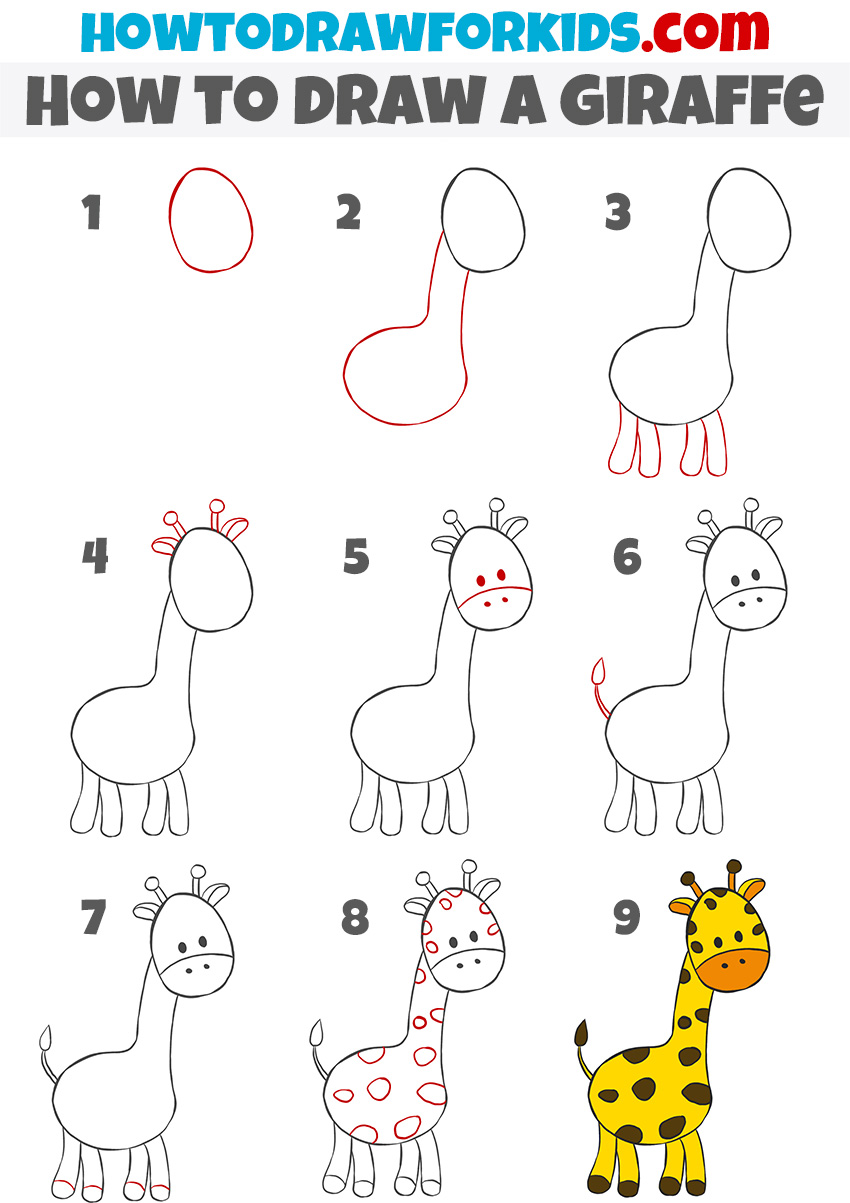
Here is another additional giraffe drawing tutorial that follows a different sequence of steps compared to the previous guides. In this version, the process does not start with the basic shapes and outlines. Instead, it shows how to create the details step by step.
First, begin by drawing the head as a simple oval shape. Then, immediately connect it to the body with a long, curved neck. Afterward, draw the four legs directly beneath the body, keeping them short and rounded. Next, add the small details such as the ears, ossicones (horns), and facial features like the eyes, nose, and mouth.
Following this, you can include the tail, which is thin and ends in a tuft. Once the basic structure of your giraffe drawing is in place, add circular spots across the body and neck to represent the coat pattern. Finally, color the giraffe, using yellow for the body, brown for the spots and hooves, and a darker shade for the muzzle.
Conclusion
So, this was a lesson on drawing a giraffe where we covered several different but equally effective and interesting methods. I hope these instructions were helpful and showed you how to create cool drawings of giraffes.
If you found this lesson useful, be sure to visit the animals section to learn how to draw a dog, practice drawing a cat, and more.
If you prefer video format, head over to my YouTube channel where you can find video versions of my lessons. While you’re at it, be sure to follow me on Pinterest to stay updated on new projects and announcements.

