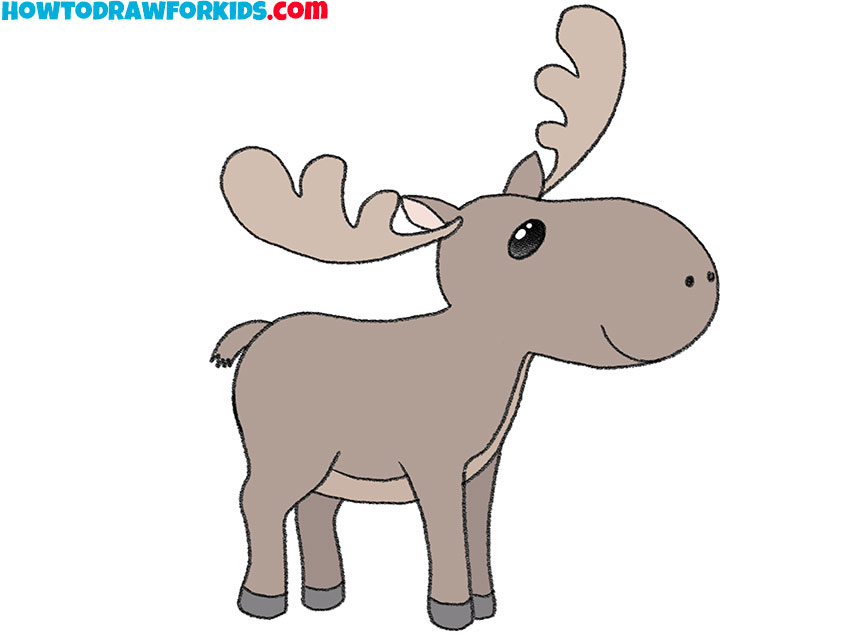
How to Draw a Moose
Let me guide you through a creative adventure on how to draw a moose! With two distinct methods suitable for children, you’ll master the art of moose drawing. We’ll tackle those impressive antlers and the moose’s majestic stance, breaking it down into easy steps that will make learning to draw as enjoyable as a walk in the woods.
How to Draw a Moose: Basic Information
Today, I invite you to learn how to draw a moose, a magnificent creature of the wild, with my simplified drawing technique. We’ll transform simple shapes into the grand stature of a moose, focusing on its characteristic antlers and robust build. This approachable method is tailored to help anyone create a friendly-looking moose with ease.
Pay close attention to the curves and lines that we’ll use to craft the moose’s head and body, ensuring each feature is proportional and lively. The antlers receive special attention, as they are the crown glory of the moose, adding to its grandeur. With just a few shapes, we will capture the essence of this noble forest dweller.
By the end of this tutorial, you will confidently draw a moose, armed with a new set of artistic skills. My method ensures that each part of the moose is rendered with care, from the broad antlers to the sturdy legs. So, pick up your pencil and let’s journey into the wilds of creativity together.
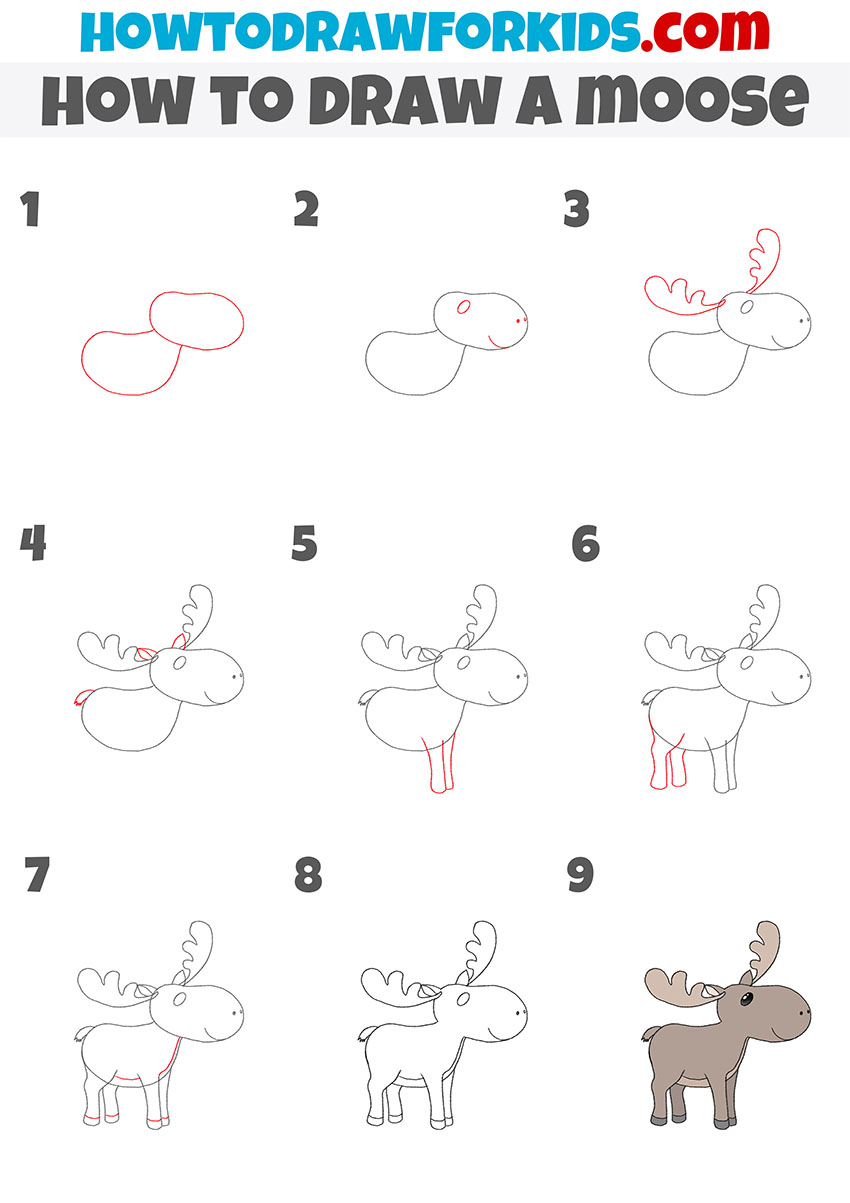
Moose Drawing Tutorial
Materials
- Pencil
- Paper
- Eraser
- Coloring supplies
Time needed: 30 minutes
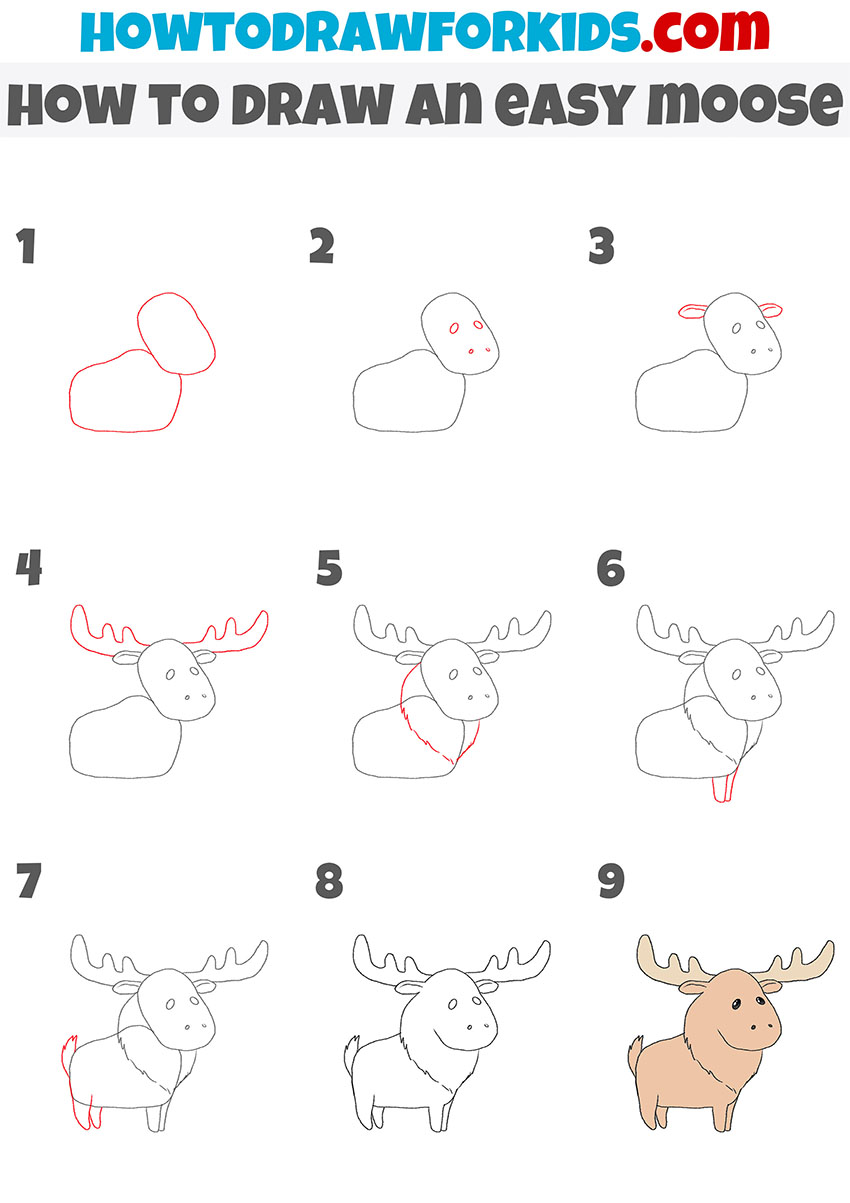
How to Draw a Moose
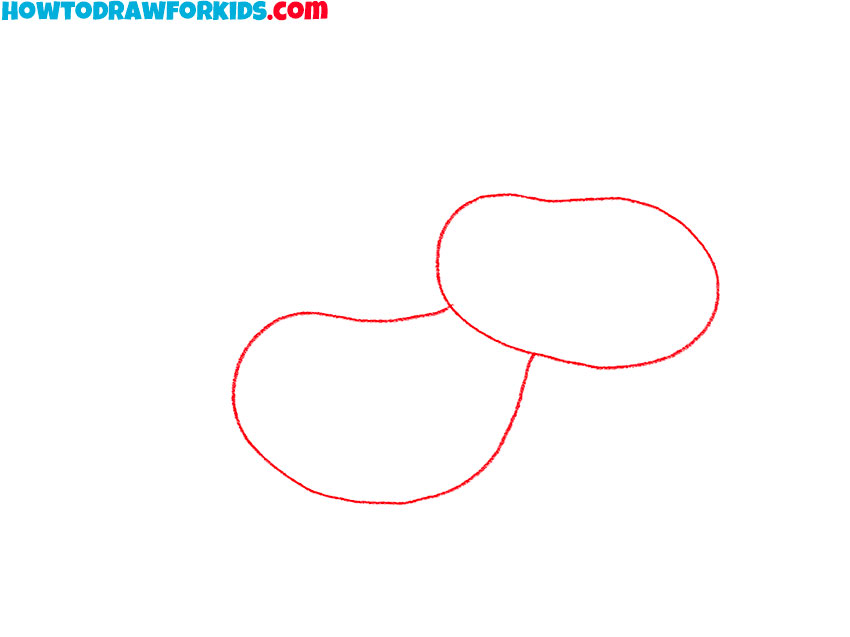
- Draw the head and torso.
The head has a rounded shape, while the front part is larger. Add the torso with a smooth line.
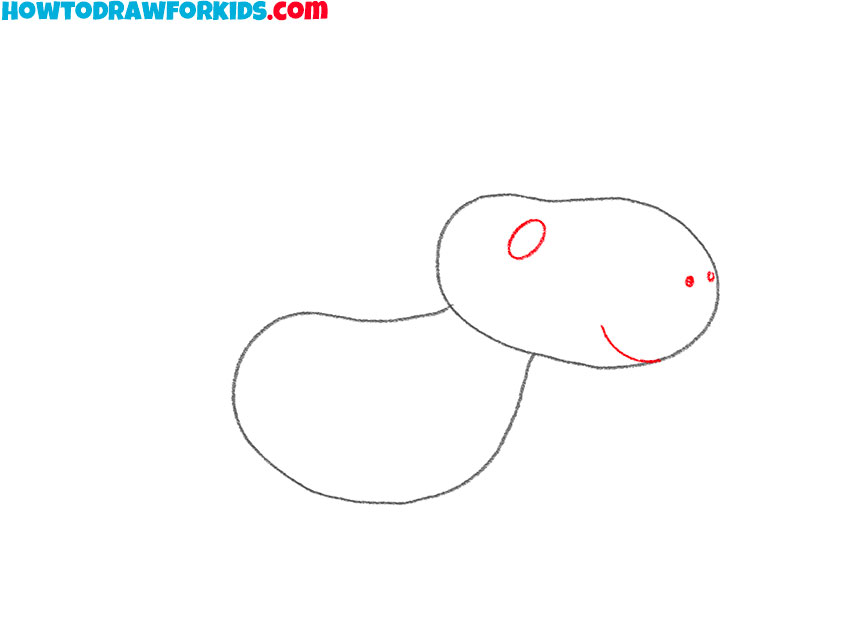
- Add elements of the muzzle.
Draw the eye in the form of an oval, depict the nostrils with two points, depict the mouth.
- Depict the horns.
Add the lower part with a smooth rounded line, draw the upper part with a wavy line.
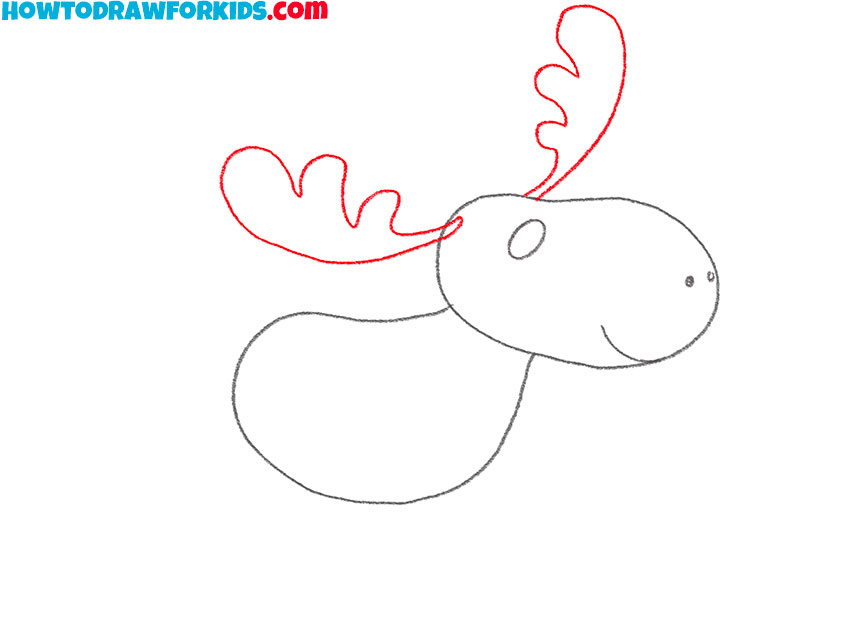
- Sketch out the ears and tail.
Add small pointed ears and the short tail.
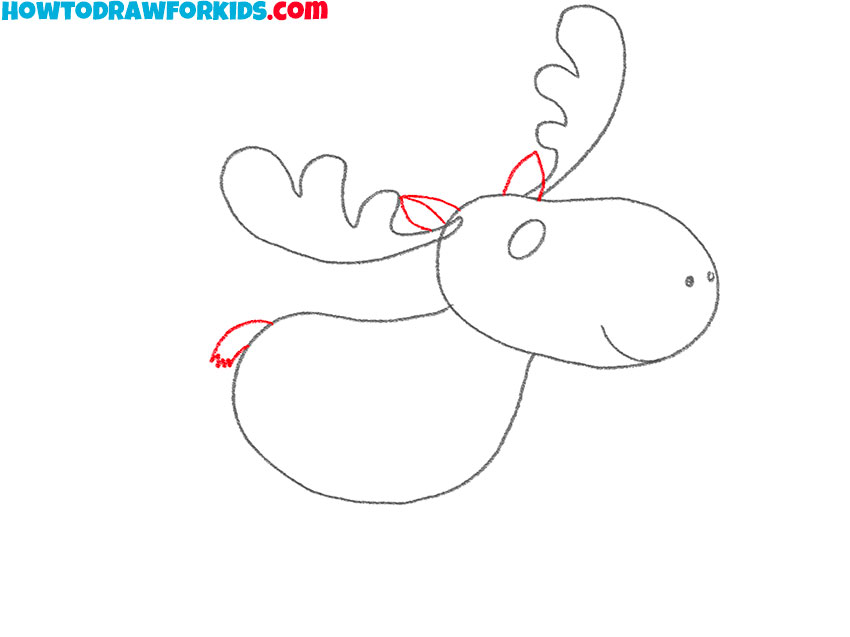
- Draw the front legs.
With smooth lines, depict the front legs, which are located next to each other.
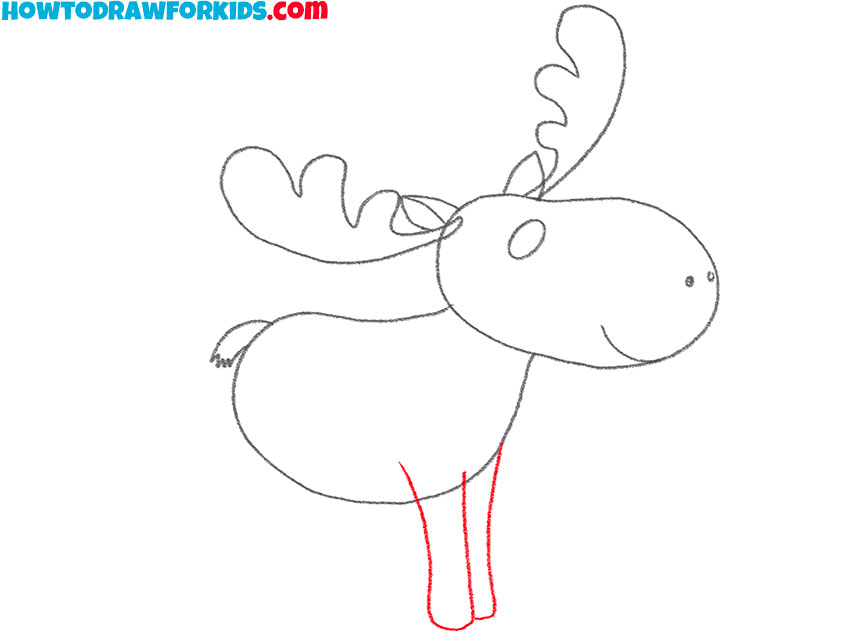
- Depict the hind legs.
With the help of curved lines, draw the hind legs.

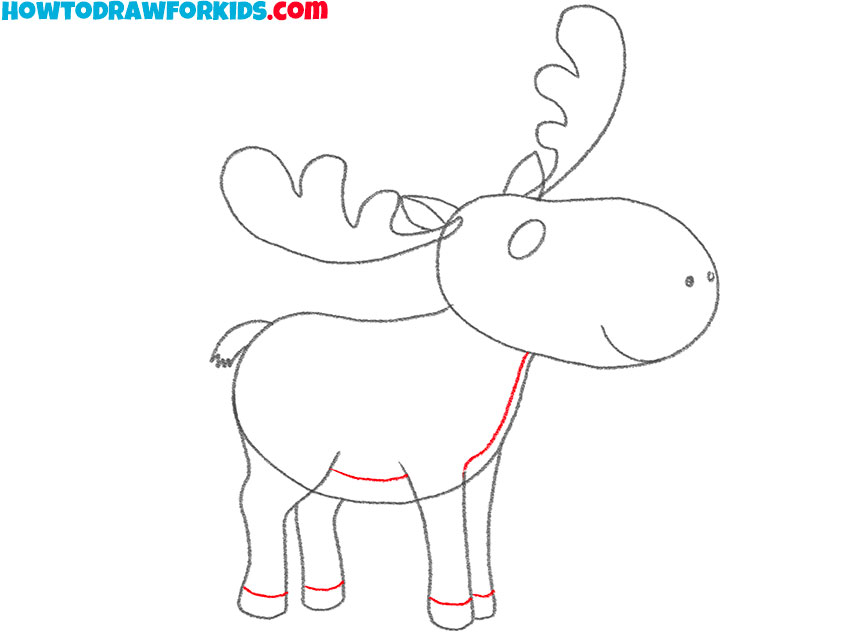
- Add the belly and hooves.
Draw a line on the stomach and on the chest. At the bottom of the legs, add transverse lines.
- Correct inaccuracies.
Check your drawing and correct mistakes if necessary, remove any unnecessary lines.
- Color the moose.
You will need several shades of brown.
Additional Content
Adding to the resources available, a free, downloadable PDF version of the moose drawing lesson has been created for convenience and ease of use. It’s a great way for kids to keep the instructions close at hand, ready to be used anytime, internet or not.
This PDF simplifies the drawing process into a portable, print-friendly guide that can accompany young artists on all their adventures. It’s an invitation to keep their creativity flowing, practicing their new skills in any setting. The joy of drawing a friendly moose can now be captured with just a pencil and paper, thanks to this handy guide.
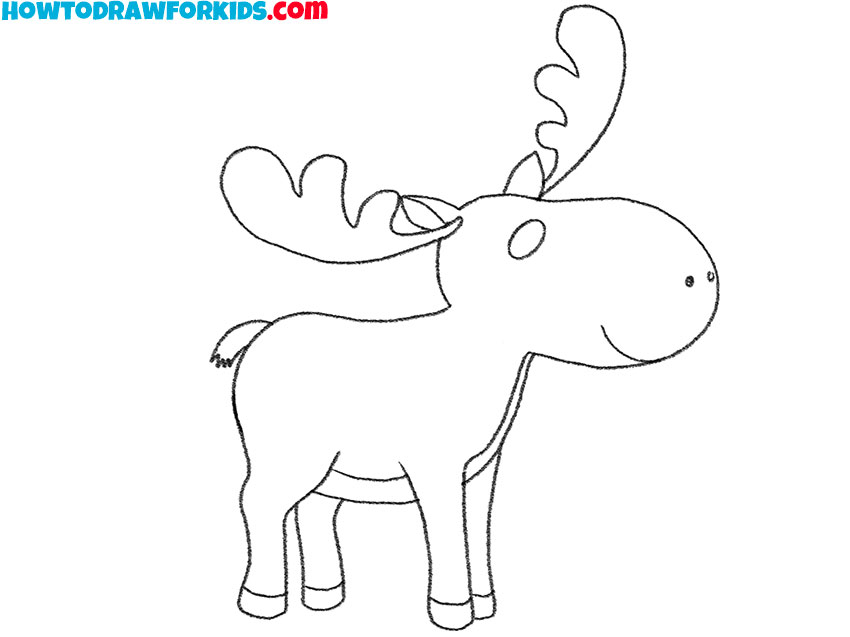
Alternative Drawing Method
To offer you more variety and challenge in your artistic endeavors, I’ve crafted yet another drawing technique for creating the noble moose. This supplementary method is designed to provide a fresh set of details, encouraging you to expand your repertoire and perfect your drawing technique.
How to Draw a Moose: Extra Practice
Here, we’ll focus on adding a bit more detail to our moose, particularly the mane around its head, which was simplified in the first technique for ease.
By including these extra touches, young artists can practice a slightly more advanced skill set, adding depth to their artwork without overwhelming them. This technique strikes a balance between simplicity and detail, perfect for budding artists ready to take the next step in their creative journey.
Cool Tips for Drawing the Mightiest Moose
You’ve just taken a fabulous journey through the wilderness with your pencils and have created an amazing moose. Before you go off on your next drawing adventure, let me share some tips and tricks that will make your moose even moose-ier the next time you draw.
- Start with Light Lines: Begin with gentle pencil strokes so you can easily erase if you need to make changes.
- Check Those Proportions: Make sure the head isn’t too big for the body unless you’re going for a super-cartoony effect!
- Antlers Are Awesome: Take your time drawing the antlers. They’re a moose’s pride and joy, so make them big and bold.
- Mane Attraction: When you’re adding the mane, use wavy lines to give it a nice, furry texture.
And there you have it! Some neat tricks to tuck up your sleeve for the next time you’re sketching out a moose in the wilds of your imagination. Every time you draw, you’re getting better, and each picture tells a story.
Conclusion
Well, look at that! You’ve got a magnificent moose, and it’s all thanks to your awesome drawing skills. The fun doesn’t stop here, though. My website is chock-full of other great lessons that you’re sure to enjoy. Why not give a cute cat a try, or rock out while drawing a cool guitar?
And don’t forget to hit follow on my social media pages, so you’re always in the loop with our latest artsy adventures. Let’s keep our pencils busy and our imaginations buzzing – more drawing fun awaits!