How to Draw an Excavator
Machines may look complicated, but they can be simplified into simple forms, as we’ll see in this tutorial on how to draw an excavator.
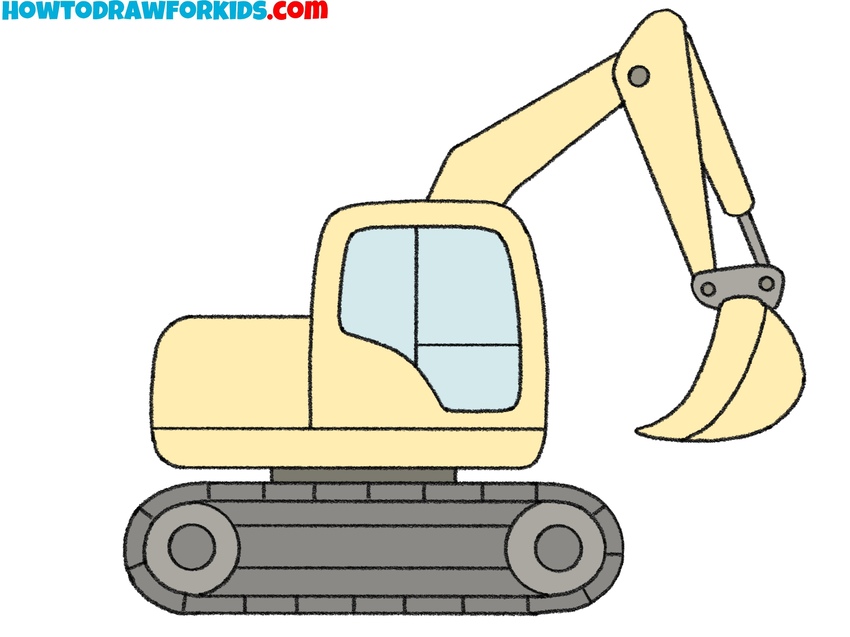
Now I will show you how to draw an excavator. This is a specialized technique that performs excavation and loading of bulk materials. Such equipment is used for the construction of any objects, for the extraction of minerals, and for other purposes.
An excavator is a large machine. There are various modifications of excavators, which differ in their structure and purpose. This tutorial shows the simplest model of this machine. The main elements are the driver’s cab, engine, chassis, and bucket, with which the excavator develops the soil. All these parts are shown in the figure.
Consistently follow all the drawing steps, be careful and accurate, then you will have an excellent result!
Materials
- Pencil
- Paper
- Eraser
- Coloring supplies
Time needed: 30 minutes
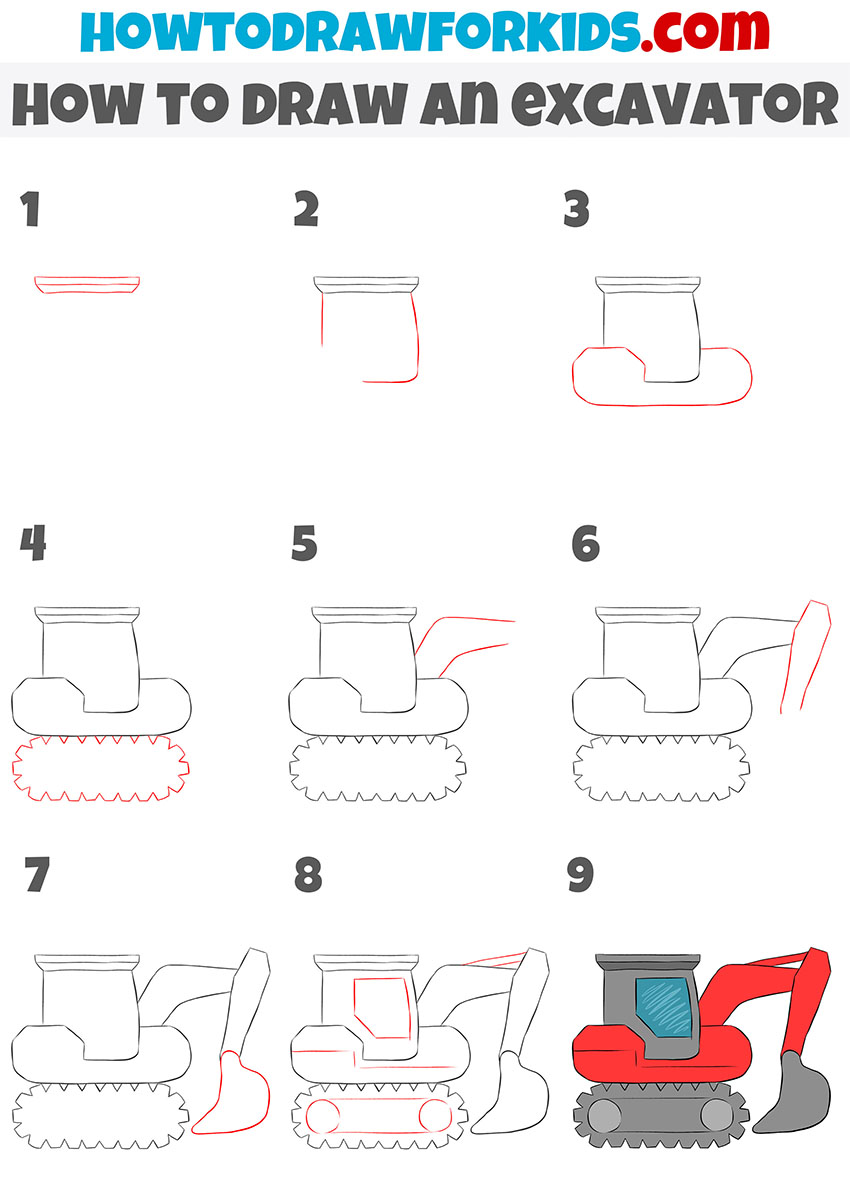
How to Draw an Excavator
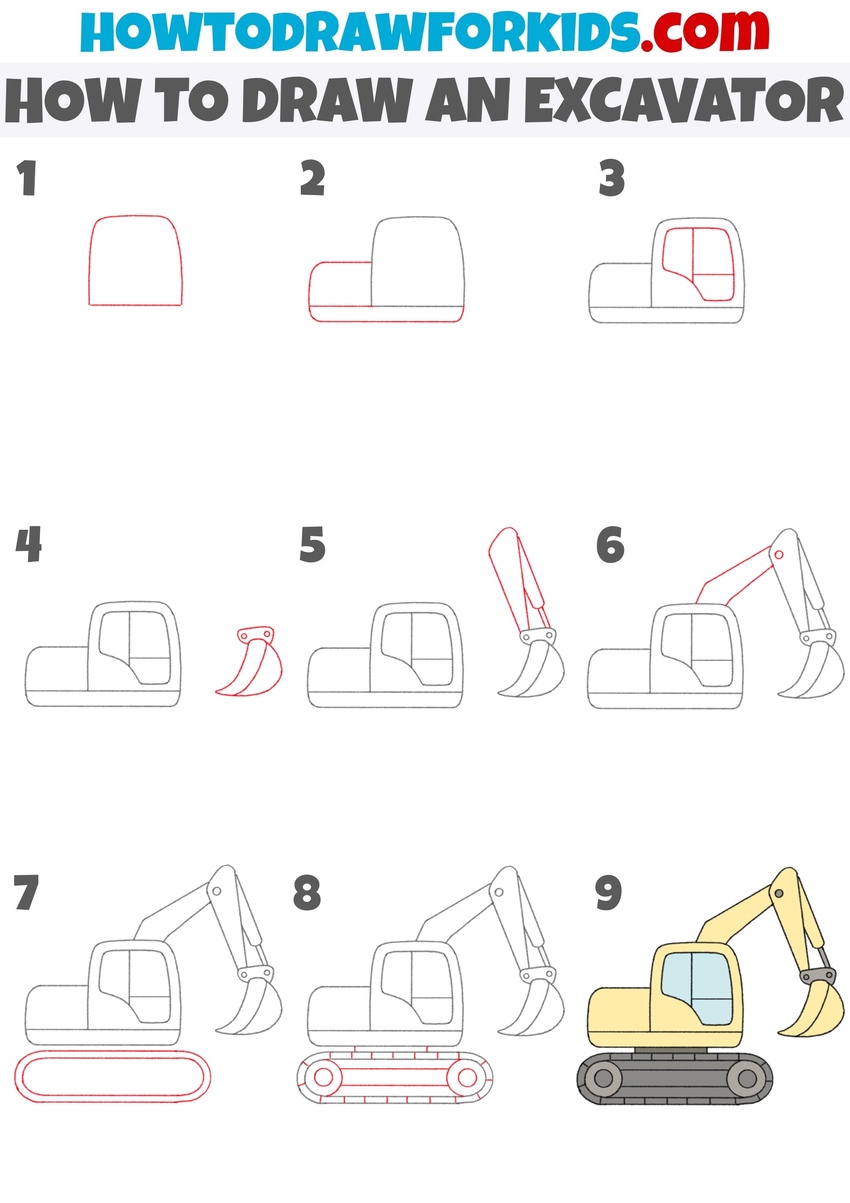
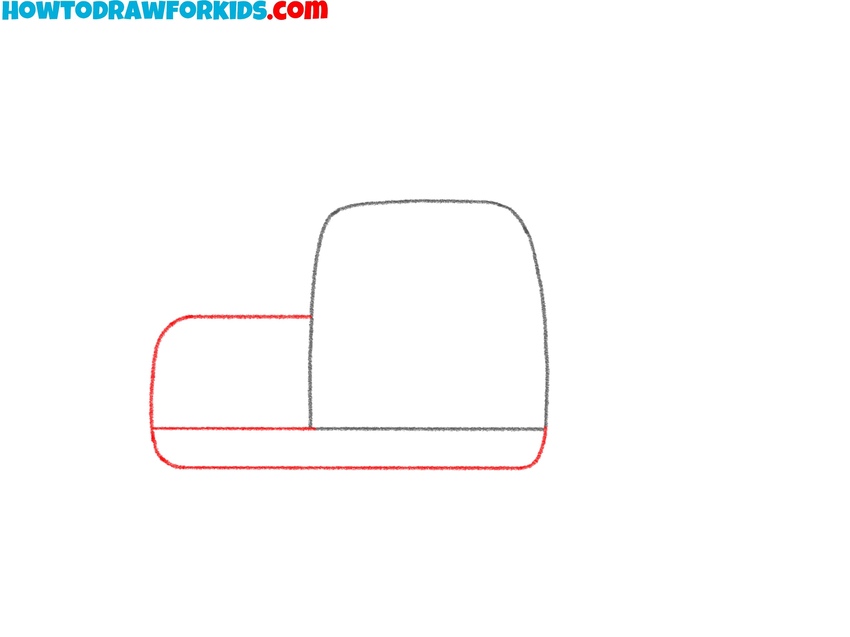
- Sketch the excavator cab.
Our excavator starts with the cab, where the operator sits. Sketch a large rectangle with rounded corners for the main part. You can make the top edge curved, and the bottom keep flat to connect it with the base later. You can sketch a slightly taller cab to make it look more modern, or a squarer cab to resemble older models.

- Sketch the counterweight base.
Now continue the drawing by attaching a long rectangular base to the left side of the cab. This piece represents the engine housing and part of the counterweight, which balances the excavator arm. This part can also be drawn more rounded or squared.
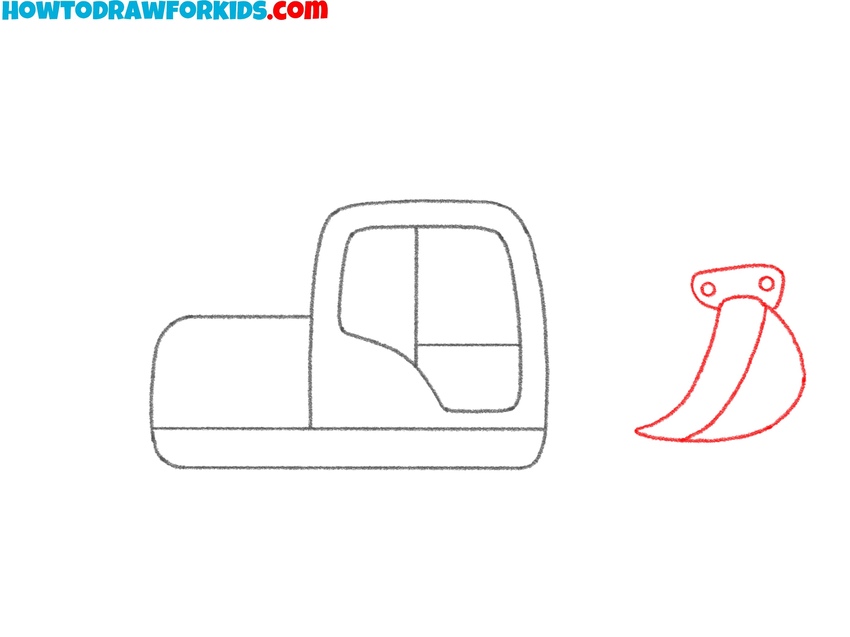
- Sketch the cab windows.
To show where the operator looks out, add windows inside the cab. Draw a large shape with curved corners that fills most of the cab’s surface. Inside it, divide the shape with one vertical and one horizontal line to define window panels. But you can make only one large window instead of several, or add extra frame lines for a more detailed look.

- Draw the excavator bucket.
Shift attention to the working tool of the excavator: the bucket. To prepare, leave the cab and body as they are and sketch a simple curved shape on the right side, detached from the machine for now. The bucket should look like a claw with a sharp edge. Add two small circles or joints on top of the bucket, since this is how it will later connect to the arm.
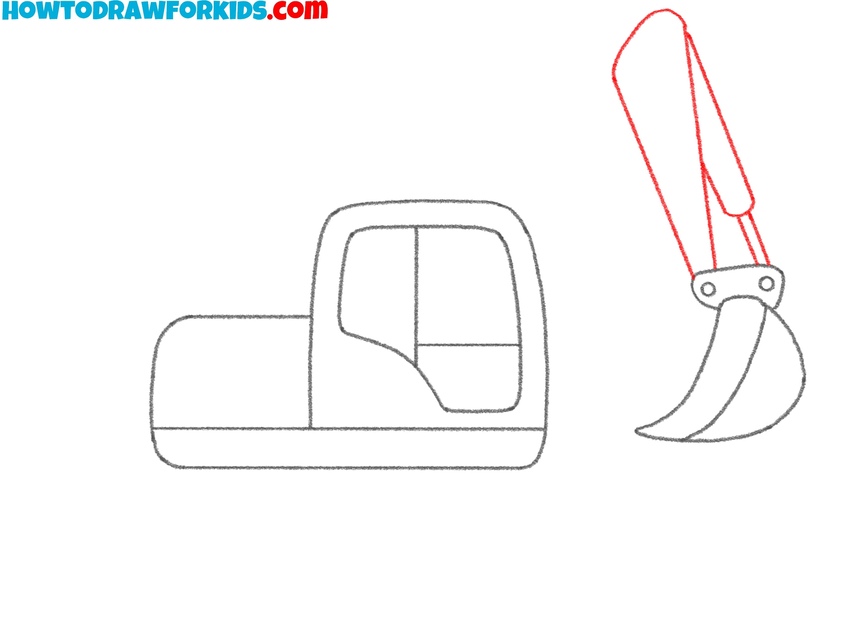
- Add the arm to the bucket.
With the bucket shape complete, draw a short connecting section that attaches top edge. This part consists of a large metal frame on the left and a hydraulic piston on the right. If you can draw these details right, your excavator will look very realistic.
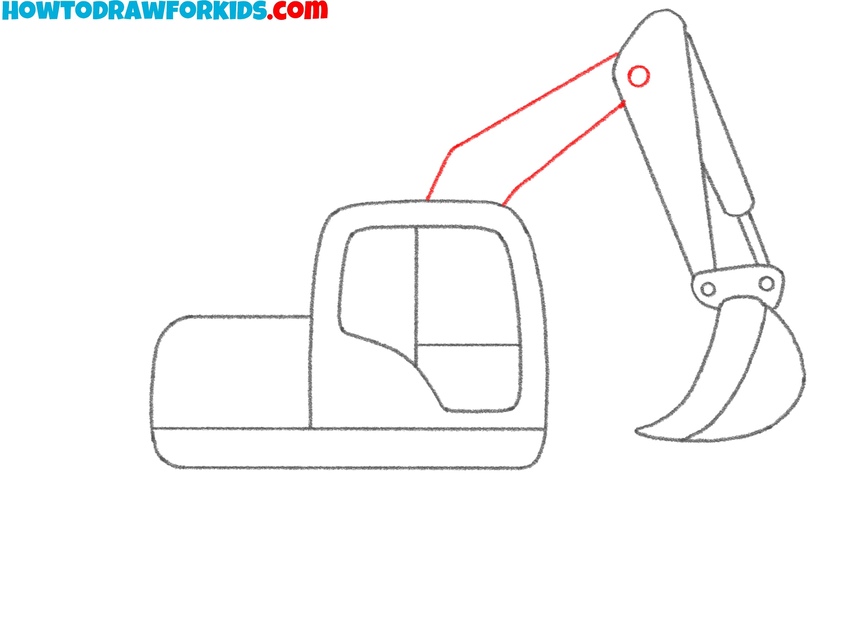
- Connect the arm segments.
The next step is one of the most important, because here we connect the bucket and body of the excavator. Extend a thick, angled section from the hinge to the cab and connect it to the part of the arm, drawn in the previous step. Together, these two parts form the “boom” and the “stick.”
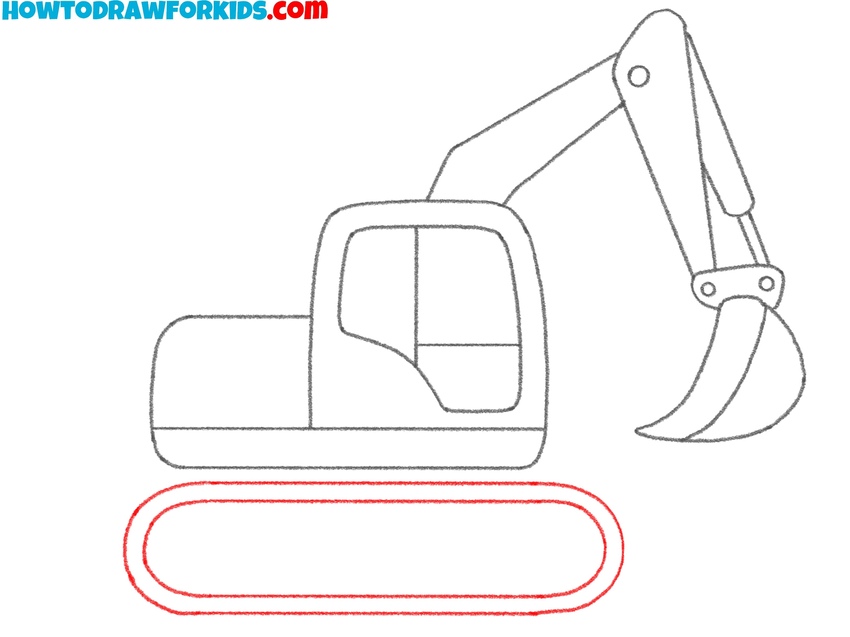
- Draw the excavator track.
Excavators move on tracks, not wheels. Under the body, sketch a long rounded rectangle to form the base. Make it wider than the cab. Inside, draw another smaller rounded rectangle to show the thickness of this part. You can draw the tracks longer for a heavy-duty look.
- Detail the crawler tracks.
Now finalize the tracks by adding details. Draw two large circles at either end of the track base to represent the sprocket and idler wheels. Connect them with straight horizontal lines and add smaller circles in between if you want to suggest rollers. Then sketch the tread pattern with evenly spaced short lines along the track surface. Experiment with more detailed tread patterns, or keep it very simple.

- Add construction yellow and gray tones.
The excavator comes together in this final step, so paint the cab and arm with a bright construction yellow, because it is a common choice that makes the machine look authentic. The windows should be light blue or gray. The tracks are usually dark gray or black to show heavy rubber and steel.

Bonus: Easy Excavator Drawing Tutorial
To draw the simplified version of your excavator, outline the top edge first and then build the cabin below it. Add the track area with even, repeating shapes to convey the mechanical surface.
Next, construct the arm with connected sections, leading to the bucket. Continue by refining the outline and joining all the major parts together so the structure appears believable.
Then, place details such as the windows and mechanical joints. Once the main shapes are clear, trace the lines again to sharpen the drawing. The last step is to add color to paint the cabin, tracks, and working arm.