How to Draw an Ice Cube
In this drawing lesson, you will learn how to draw an ice cube. This lesson will be simple and enjoyable for you to complete.
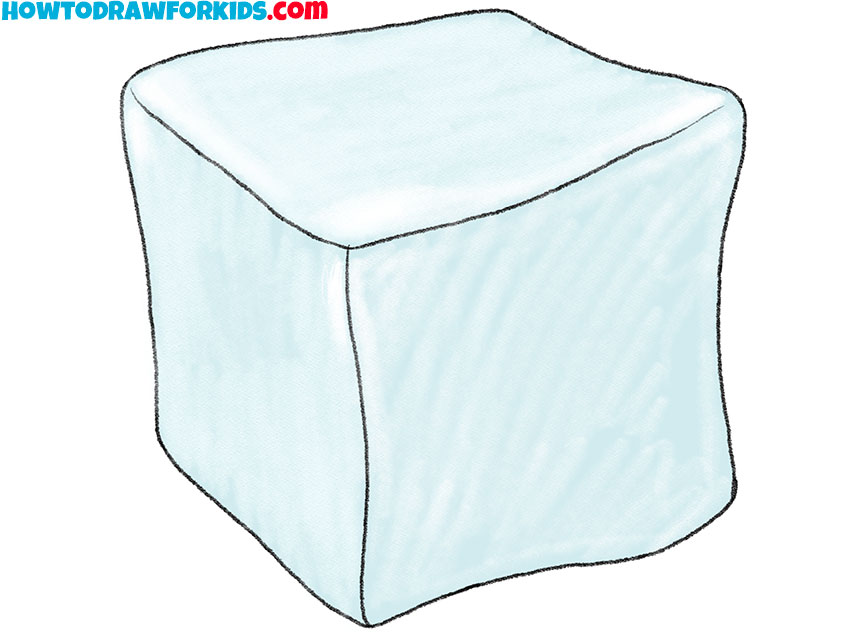
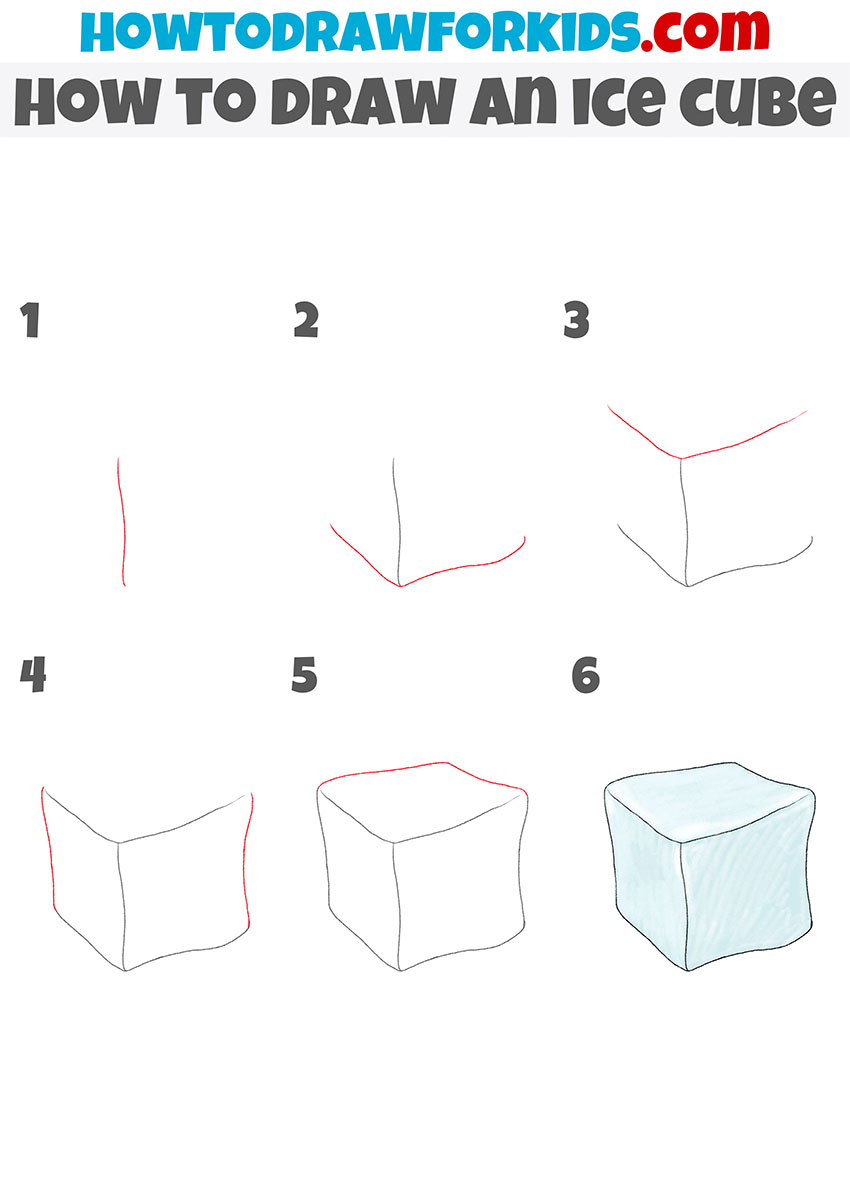
I suggest you follow this wonderful and very simple drawing lesson, in which I will tell and show you how to draw an ice cube step by step.
This step-by-step instruction consists of only six steps, which are easy for any aspiring artist and child to follow. Ice is solid water. We see it quite often in our daily life. To make an ice cube, you need to freeze water in the refrigerator by pouring it into special ice molds.
Ice cubes are often added to various drinks to keep them cool. Also, an ice cube can be used for cosmetic purposes for facial massage.
The ice cube you draw with these instructions will not have a perfectly even and regular geometric shape. Therefore, when drawing a cube, you do not have to draw perfectly straight lines, but on the contrary, all the faces of the cube should be slightly curved.
Materials
- Pencil
- Paper
- Eraser
- Coloring supplies
Time needed: 25 minutes
How to Draw an Ice Cube
- Draw one face of the ice cube.
To complete this simple step, you should draw one vertical line.

- Add the bottom faces of the ice cube.
From the bottom point of the drawn line, depict two more curved lines in different directions.

- Depict the top faces of the ice cube.
Now you should draw a line near the top of the line you drew in the first step.

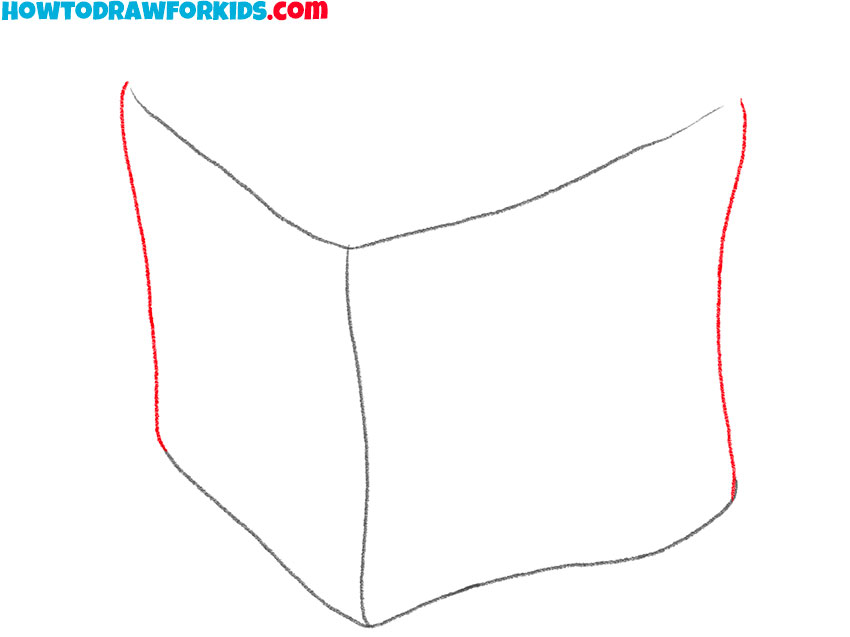
- Sketch out the side faces of the cube.
Connect the edges of the drawn lines with two curved lines on the sides.
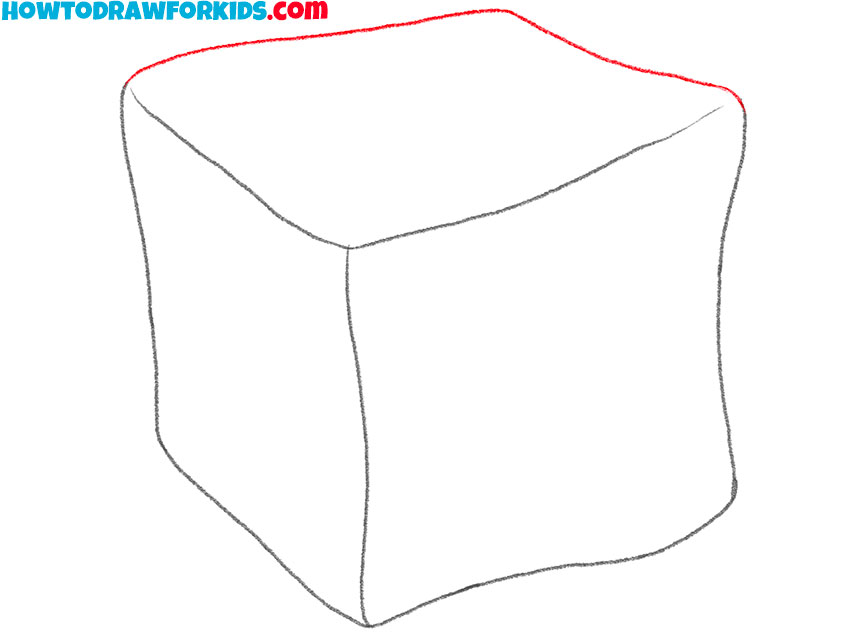
- Finish drawing the outline of the ice cube.
Connect the top edges of the drawn lines with a curved line.
- Color the drawing.
To color the ice cube, you should use different shades of blue.

I remind you that below you can download a free PDF file, in which you will find all the basic information of this lesson and additional materials for your workout.

