How to Draw an Open Door
In this tutorial, I will show you how to draw an open door. I promise this tutorial will be helpful for you.
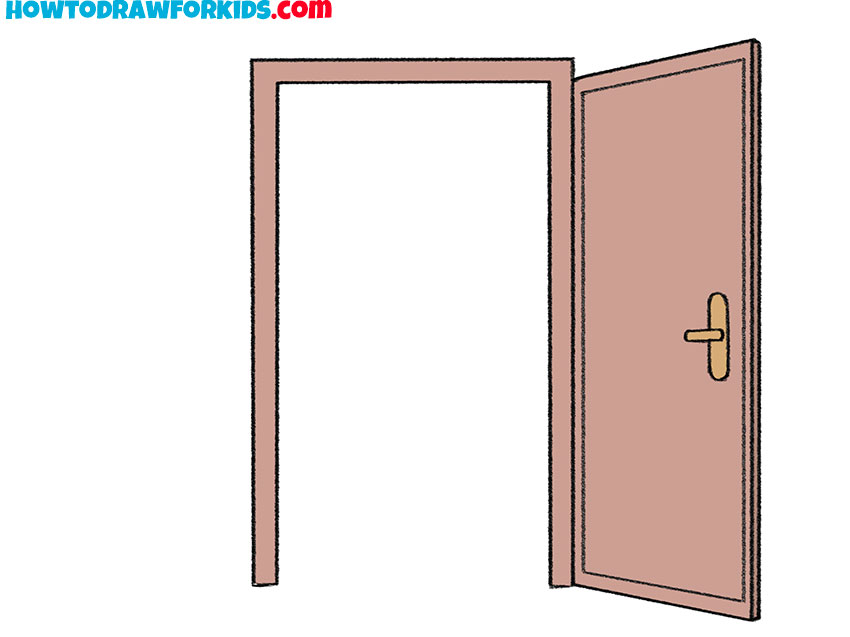
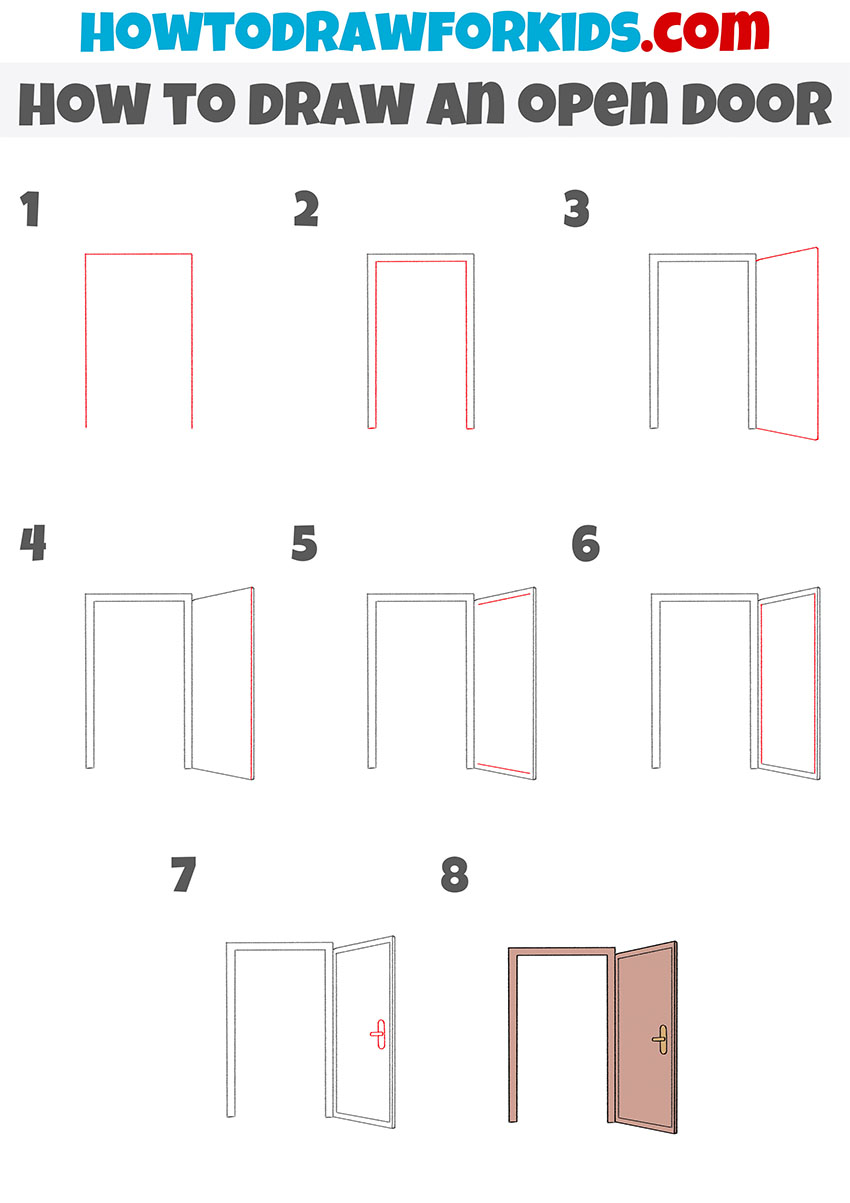
In the lesson on how to draw an open door, straight lines will be used. In the process, you can use any tools at hand, but I recommend that you draw all the lines yourself.
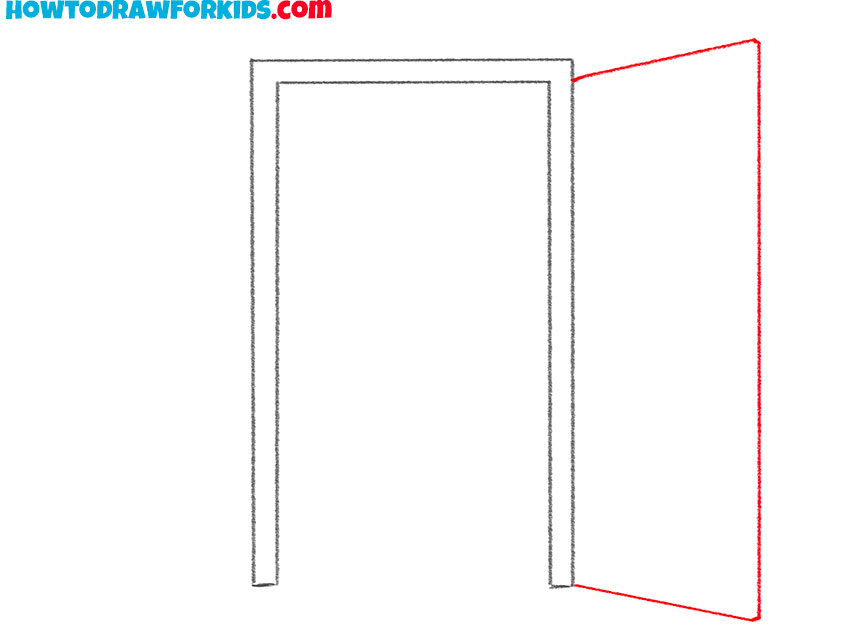
In this lesson, you will practice drawing an object in perspective. Please note that the sides of the door are of different sizes, try to keep all these proportions, thus you will show which part of the door is closer to us and which is farther from us.
You can use the acquired skills in the future when you want to draw an interior. So, if you have all the art supplies at the ready, then you can start the lesson.
Materials
- Pencil
- Paper
- Eraser
- Coloring supplies
Time needed: 30 minutes
How to Draw an Open Door
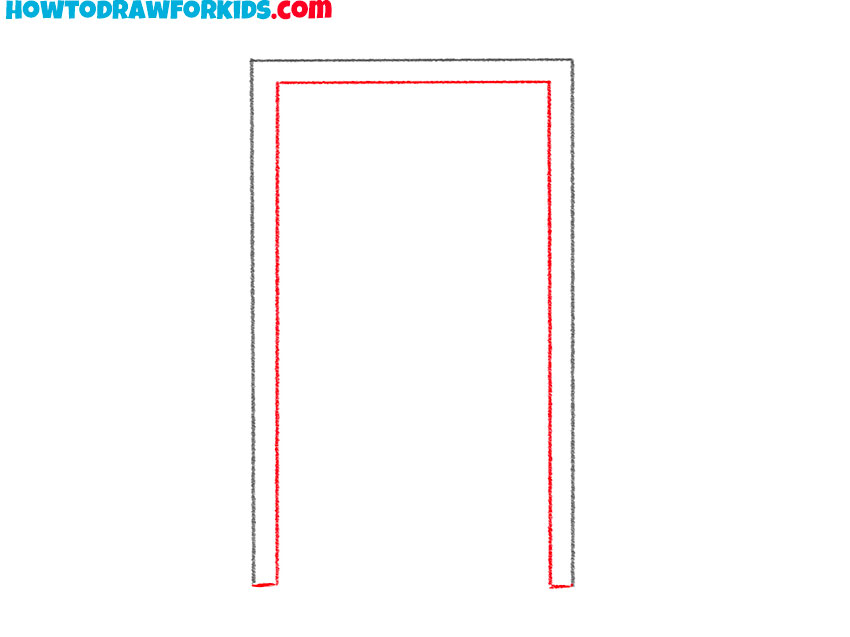
- Draw the outer contour of the frame.
Depict two vertical lines and draw a horizontal line at the top.

- Add the inner outline of the frame.
Depict lines to depict the thickness of the door frame. Add short connecting lines at the bottom.
- Depict the outline of the door.
On the right side, draw straight lines and add one line to depict the outline of the door.
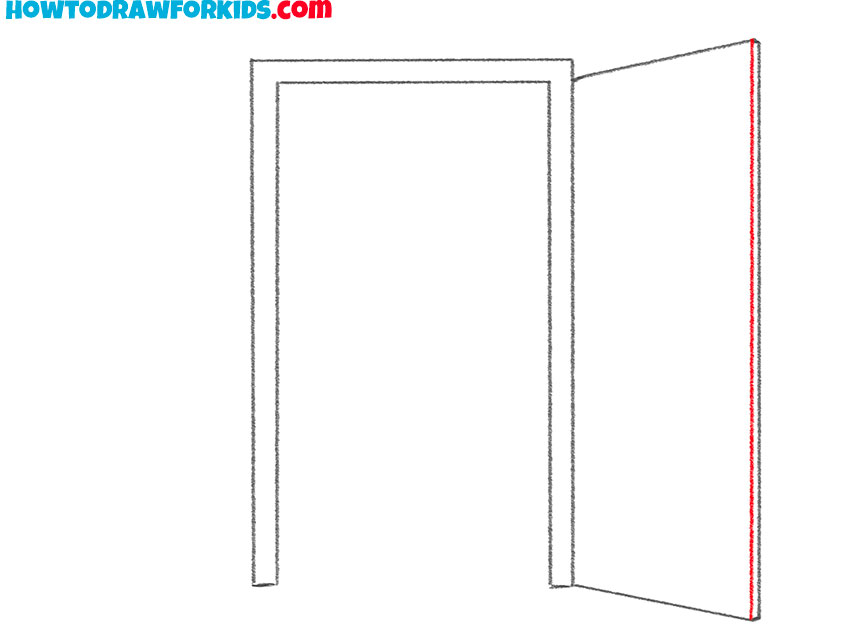
- Sketch out the thickness of the door.
Draw one vertical line as shown in the example.
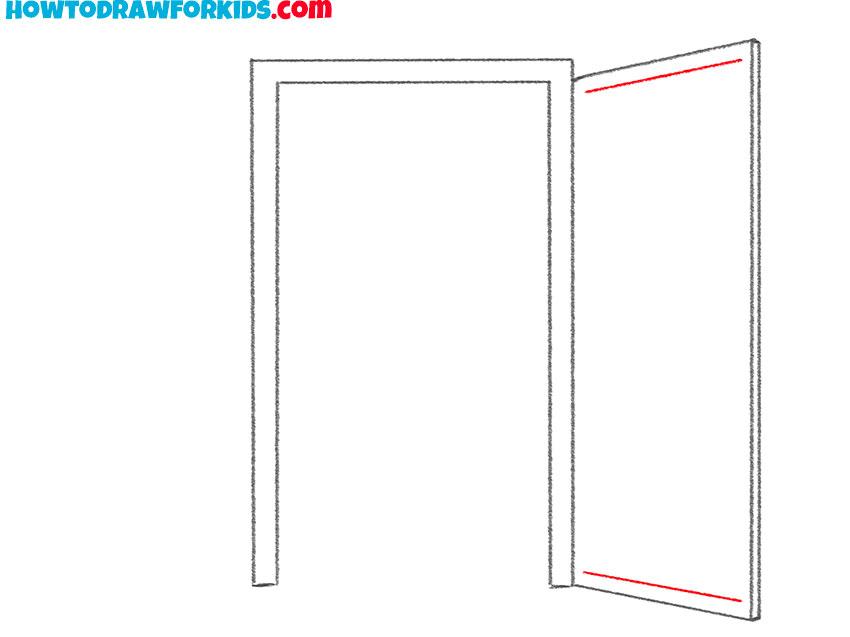
- Start drawing the relief of the door.
Sketch out two parallel lines at the top and bottom of the door.
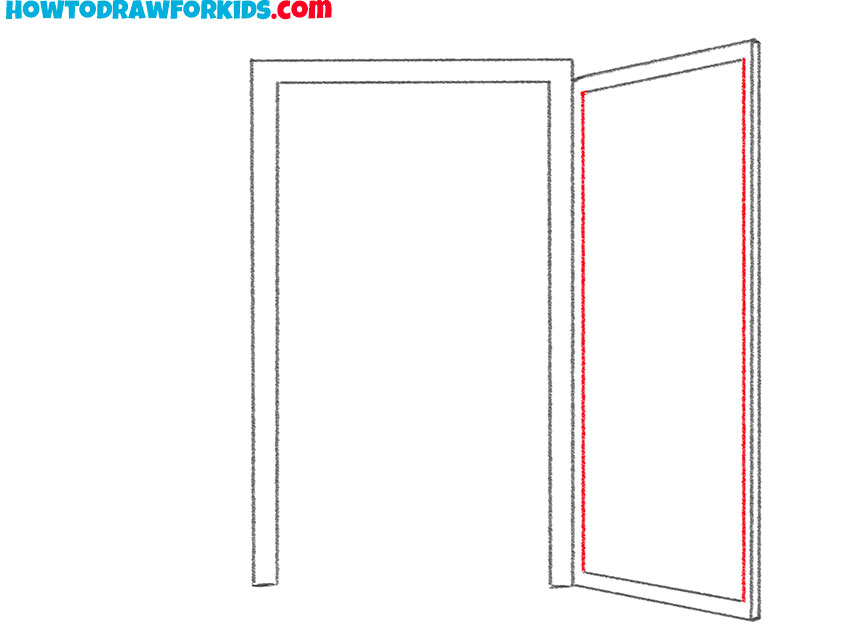
- Continue to draw the relief of the door.
Depict two vertical lines to make a closed path.
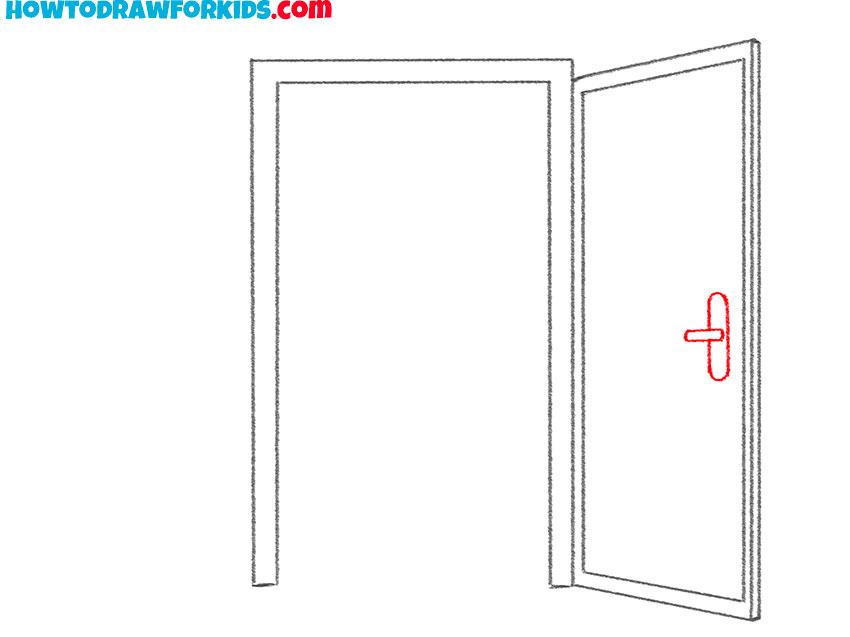
- Add the handle to the door.
In the middle of the door leaf, add the handle of the same shape as in the example.
- Color the open door.
Choose any color for the drawing.

Finally, I suggest you download a PDF file that contains a short version of the lesson and additional useful materials. Use this file any time you want to repeat the lesson again.


