How to Draw Black Adam
Learn how to draw Black Adam in a simplified style with this clear nine-step tutorial designed for kids and beginning artists.
Prepare to Draw Black Adam
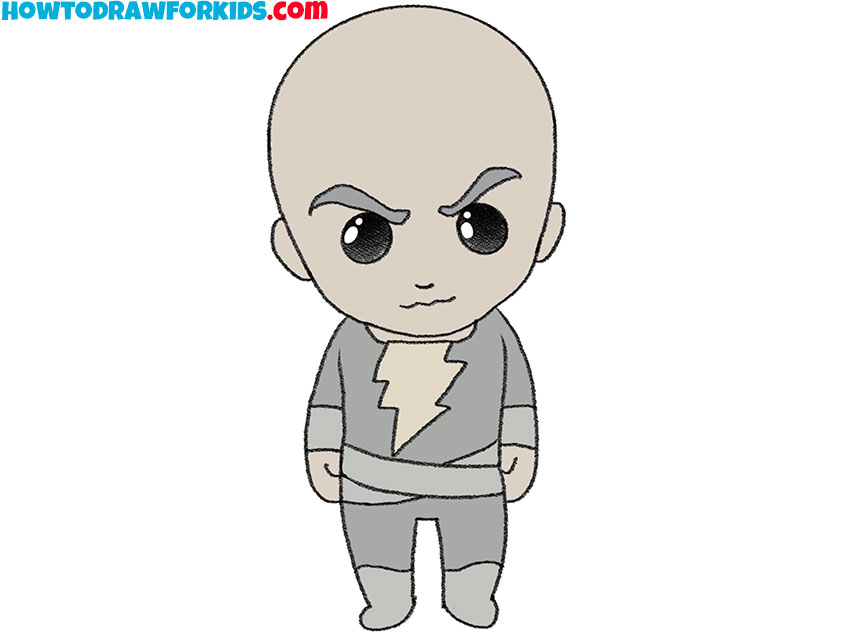
Black Adam is a good character for practicing simple figure construction because most of his design is based on clear, easy-to-see shapes.
The face, lightning emblem, and costume are the details that make him look as a comic book character, even in a simplified drawing.
This tutorial shows how to build the character in a really simple order, starting with the largest shapes and adding smaller details only after the overall figure is in place.
Pay close attention to the size of the head, the placement of the facial features, and the position of the lightning emblem.
These parts have the biggest effect on the finished drawing and help the character look accurate without adding unnecessary details.
Black Adam Drawing Tutorial
Materials
- Pencil
- Paper
- Eraser
- Coloring supplies
Time needed: 30 minutes
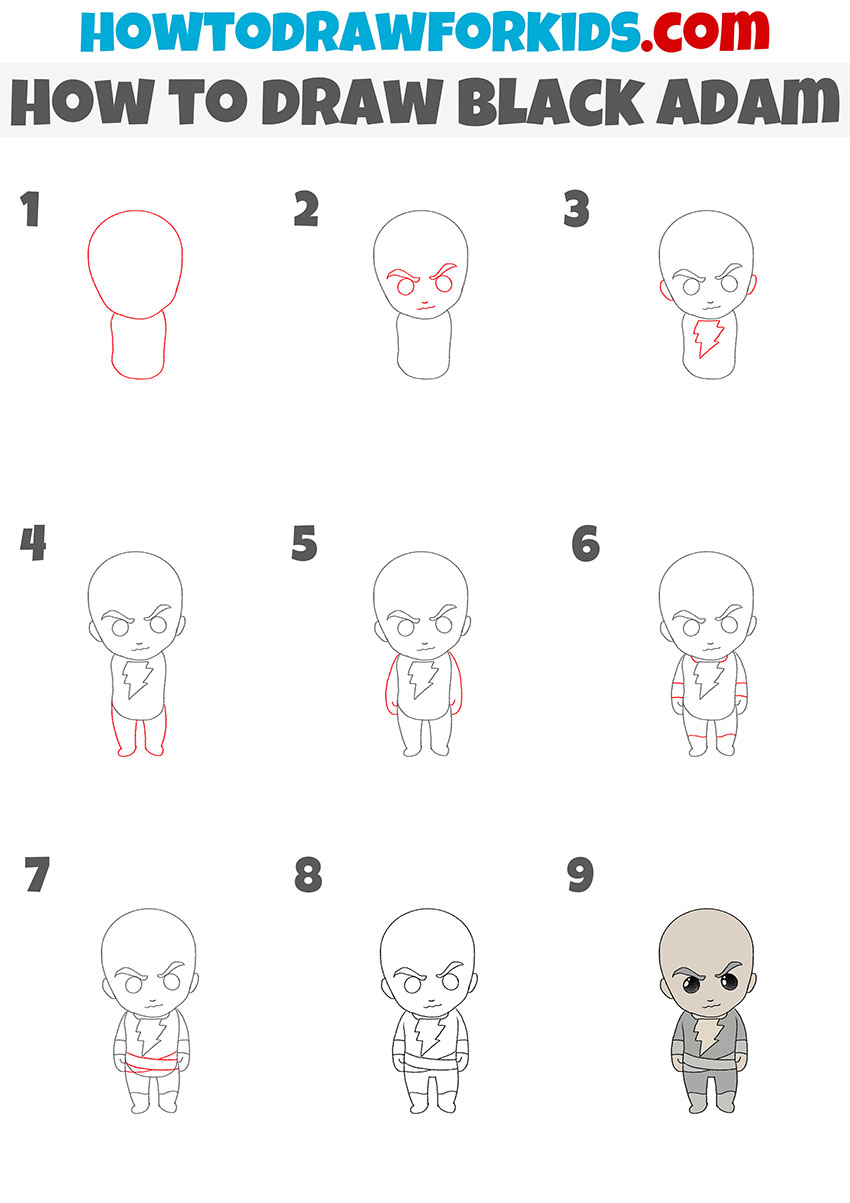
How to draw Black Adam step by step
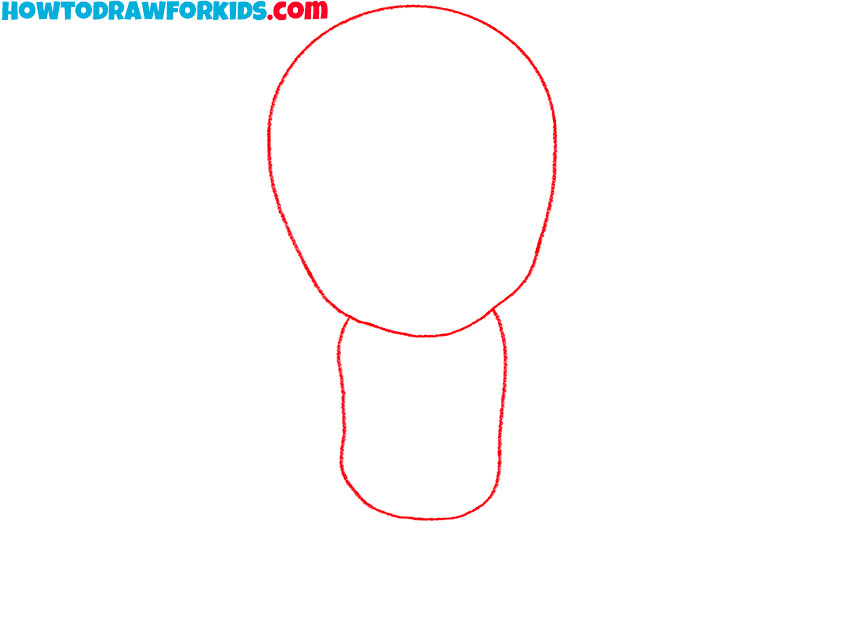
- Draw the head and torso.
Draw a large rounded head with a slightly wider upper part. Add a small torso below it, keeping the body much shorter and narrower than the head.
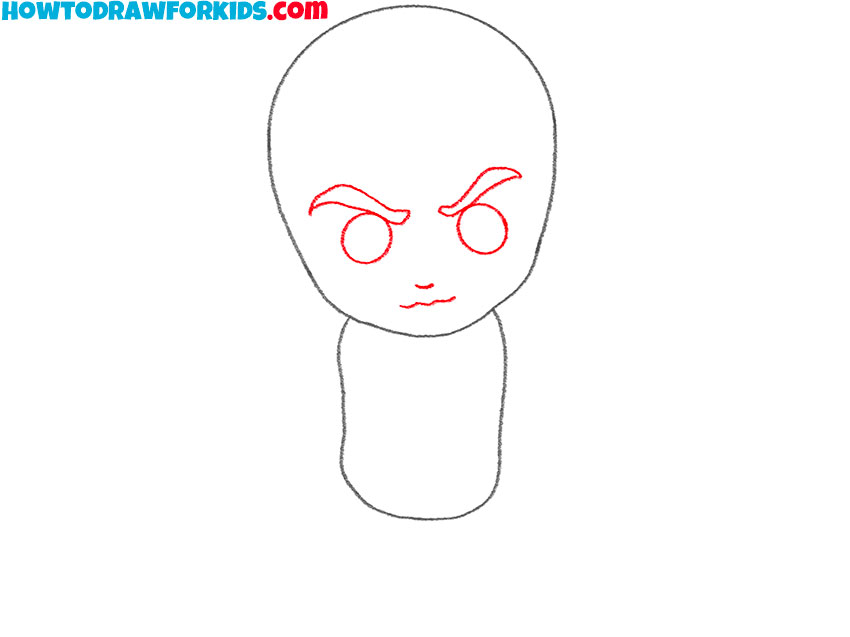
- Add the facial features.
Draw the large eyes, angled eyebrows, small nose, and straight mouth in the lower half of the head. Leave enough room above them for the high forehead.
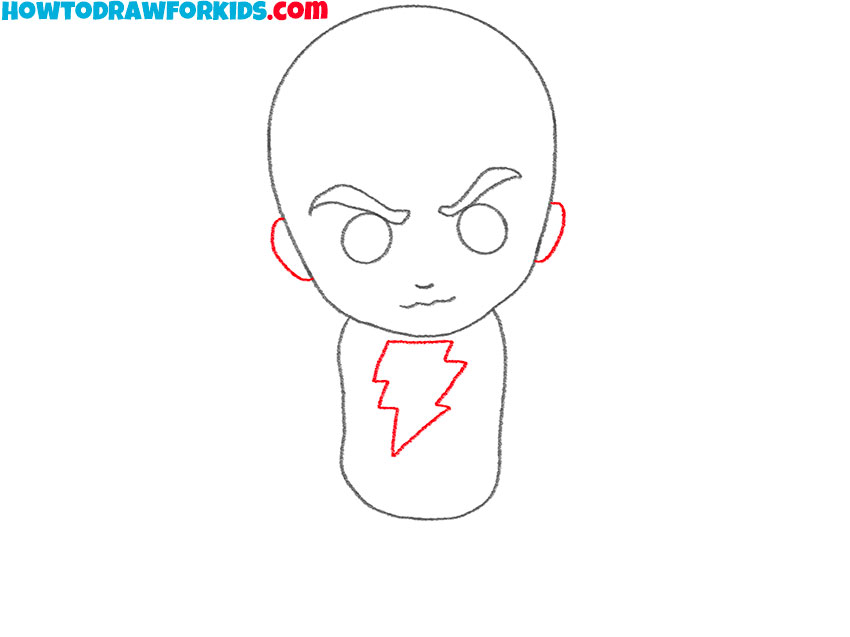
- Draw the ears and emblem.
Add one ear on each side of the head between the eye and nose levels. Then draw Black Adam’s large lightning bolt in the center of the torso.
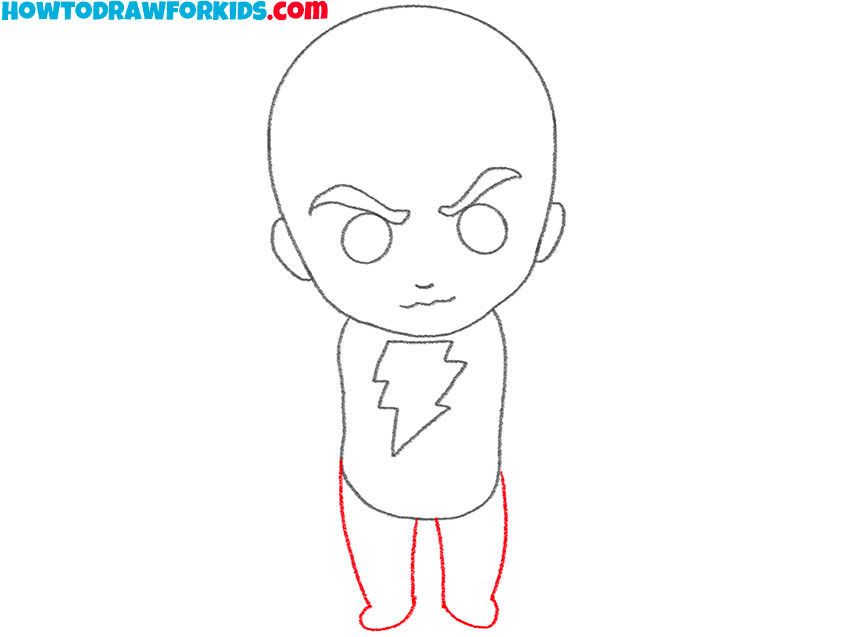
- Sketch the short legs.
Draw two short legs below the torso and narrow their outlines slightly near the feet. Turn the feet outward to create a simple, balanced standing pose.
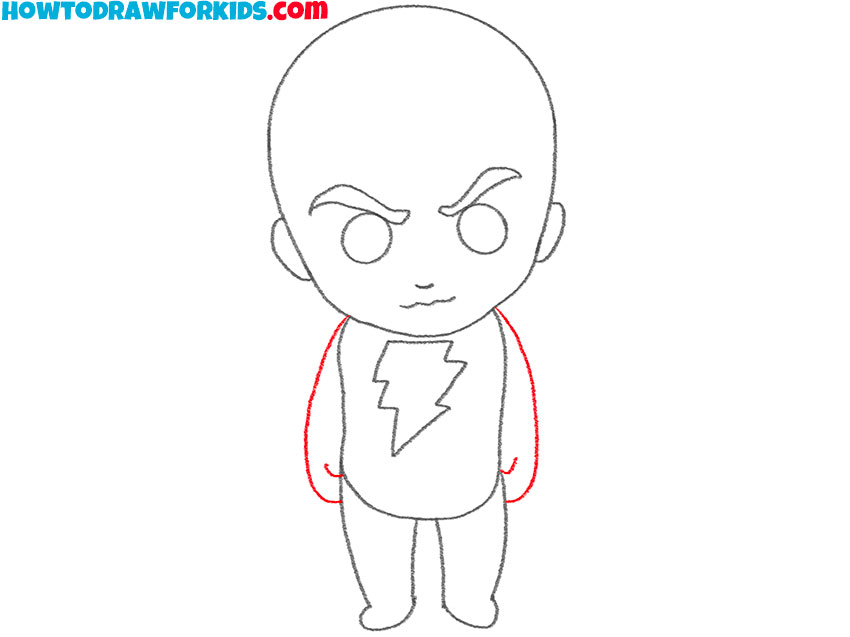
- Draw the arms and hands.
Draw the arms close to the sides of the body, beginning near the lower edge of the head. Add small rounded hands and keep both limbs similar in length.
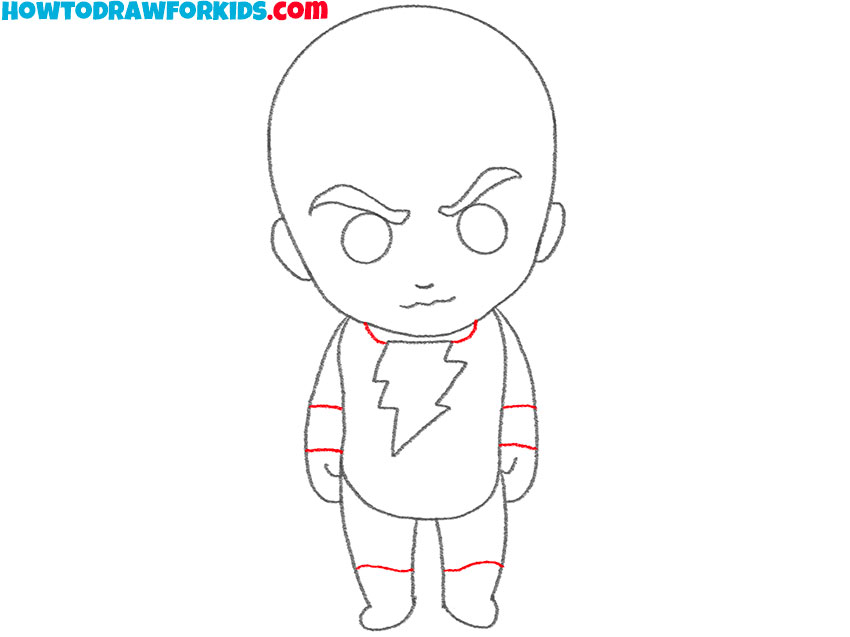
- Add the costume details.
Outline the wide collar around the neck, then add the cuffs and upper edges of the boots. Keep these superhero costume details clear and symmetrical.
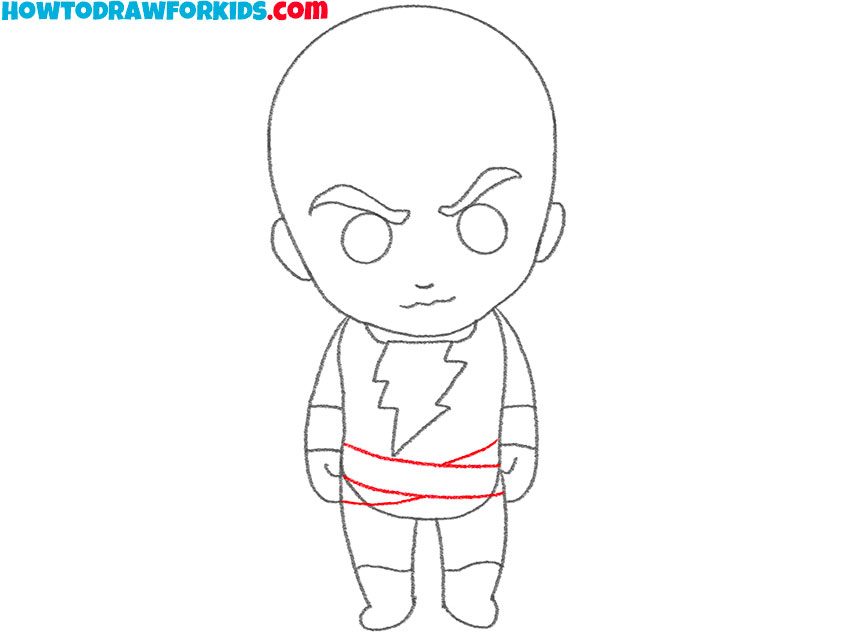
- Draw Black Adam’s belt.
Add two curved horizontal lines across the lower part of the torso to form the wide belt. Keep the upper and lower edges evenly spaced on both sides.
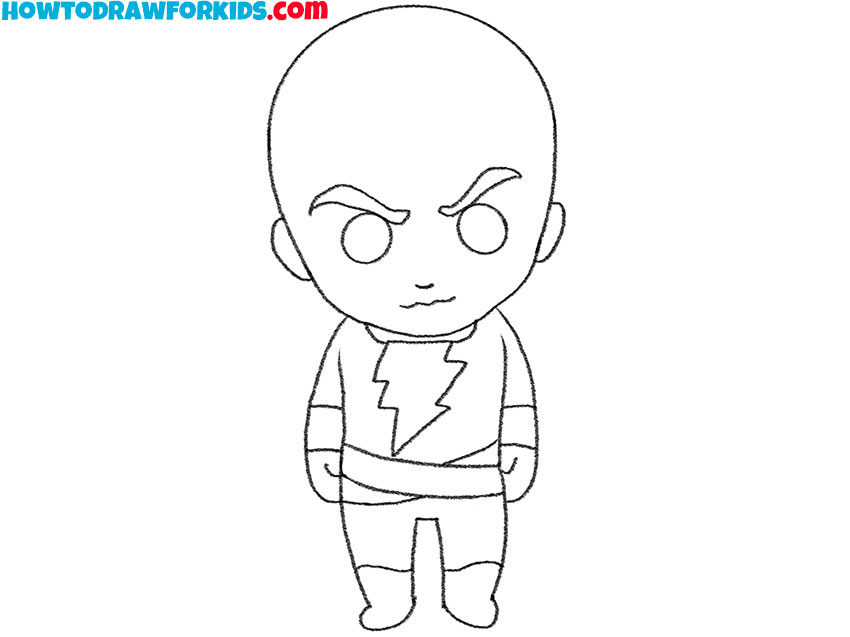
- Correct the sketch.
Check the proportions and placement of the details. Erase unnecessary lines, correct uneven shapes, and carefully darken the final Black Adam outline.
- Color Black Adam.
Color the suit black and dark gray. Use gold for the lightning emblem, collar, cuffs, belt, and boots, then leave small white highlights in the eyes.
Black Adam Drawing Worksheets
Download the free PDF to repeat this Black Adam drawing tutorial without opening the webpage. You can save the file to your device or print the pages and complete the exercises with a pencil.
The printable pack includes the step-by-step tutorial, a coloring page, a tracing worksheet, and a grid drawing worksheet.
Mistakes to Avoid
Before coloring the drawing, check the main outlines and details. These points will help you find common problems and correct them without redrawing the entire character.
- Making the head too small: The head should be noticeably larger than the torso. This proportion is an important feature of the simplified character design.
- Adding too many costume lines: Focus on the lightning emblem, collar, cuffs, boots, and belt. Extra details can make the simplified figure look cluttered.
- Changing the facial expression: Keep the eyebrows angled and the mouth nearly straight. These features give Black Adam his serious appearance.
- Misplacing the lightning bolt: Draw the emblem large and centered on the torso. Uneven sides or a tilted position can make the costume less recognizable.
- Drawing the limbs too long: Keep the arms and legs short so they match the compact torso and do not make the superhero figure look stretched.
Compare the left and right sides of the figure before darkening the outlines. Small changes to the arms, legs, belt, or facial features can make the finished sketch look much more balanced.
What’s Next?
Now you know how to draw Black Adam with simplified shapes and exaggerated proportions.
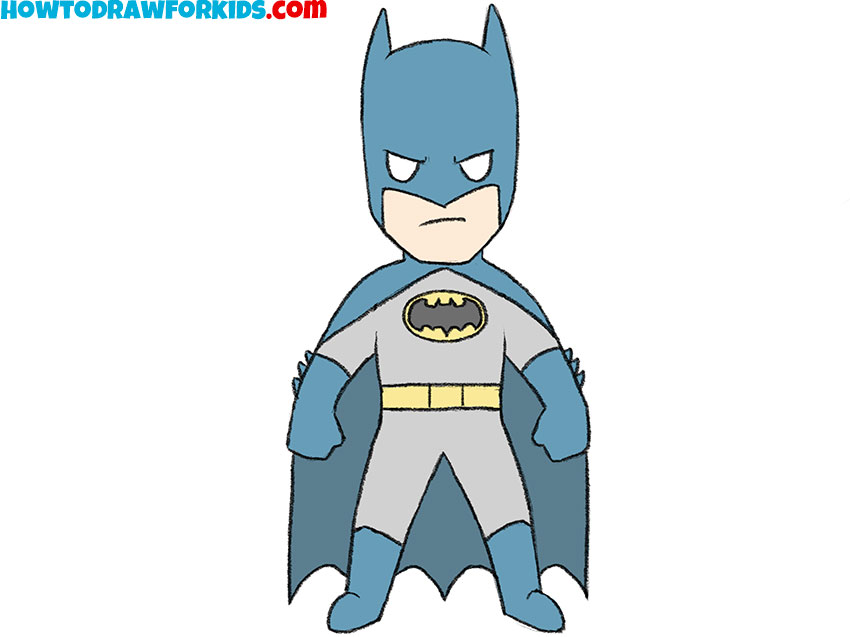
For more practice with comic book characters, try to draw Superman or follow a detailed Batman drawing tutorial.
Use the printable worksheets to repeat the Black Adam sketch offline. Follow me on social media to see new drawing tutorials and updates about additional printable materials.