How to Draw Cartoon Milk
Drawing anthropomorphic food is very popular in cartoon. In this tutitual I’ll show you how to draw cartoon milk using two simple methods.

How to Draw Cartoon Milk: Introduction
In this tutorial, you will learn how to draw cartoon milk. This is a continuation of my previous tutorial on how to draw milk, where I showed a more realistic result.
You know that milk can come in different packages. In this case, the milk is contained in a rectangular tetra-pack box. Using skills from this tutorial, you can draw cartoon mail in a bottle or any other type of packaging.
Cartoon food characters like this one are often used in educational materials and animated shows. They combine object drawing with basic character design, and of course, this helps develop multiple drawing skills at once. This tutorial can be adapted to draw other similar objects too, if you want to draw other cartoon food.
Cartoon Milk Drawing Tutorial
Materials
- Pencil
- Paper
- Eraser
- Coloring supplies
Time needed: 30 minutes
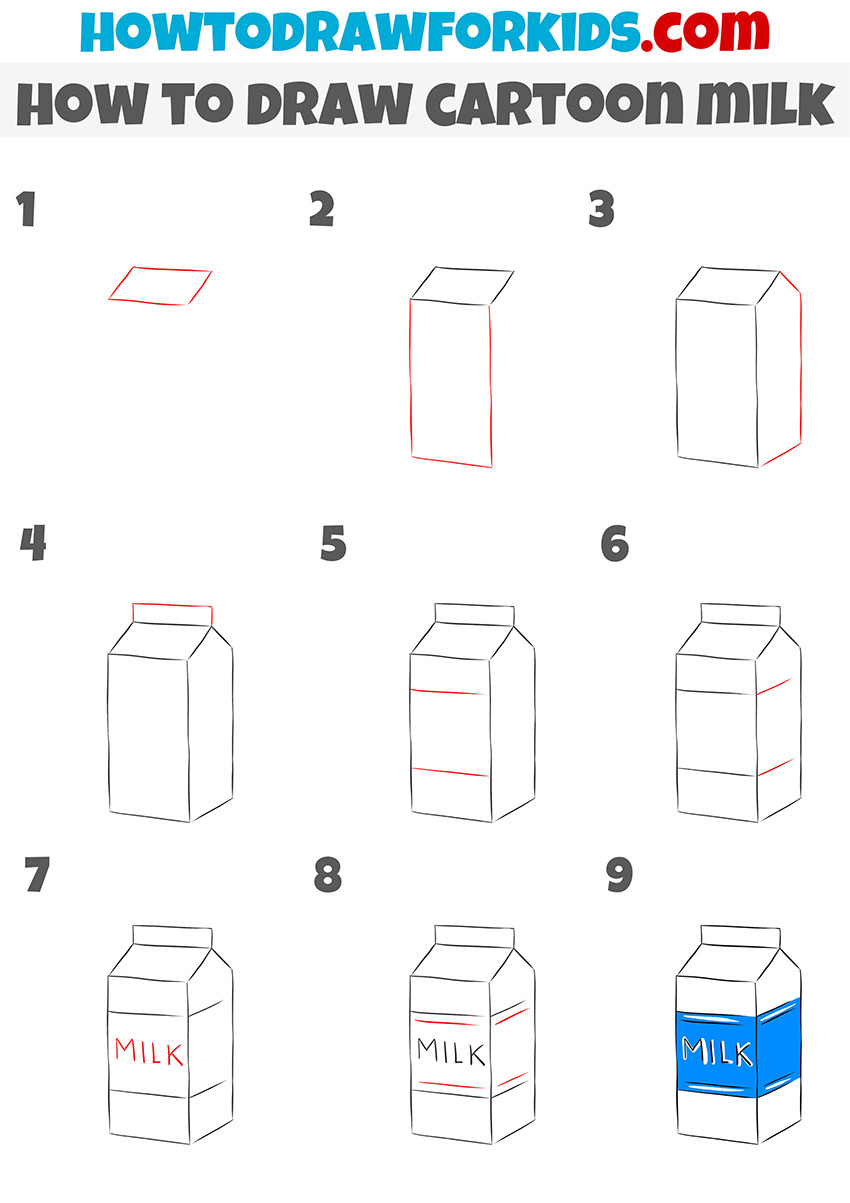
How to Draw Cartoon Milk
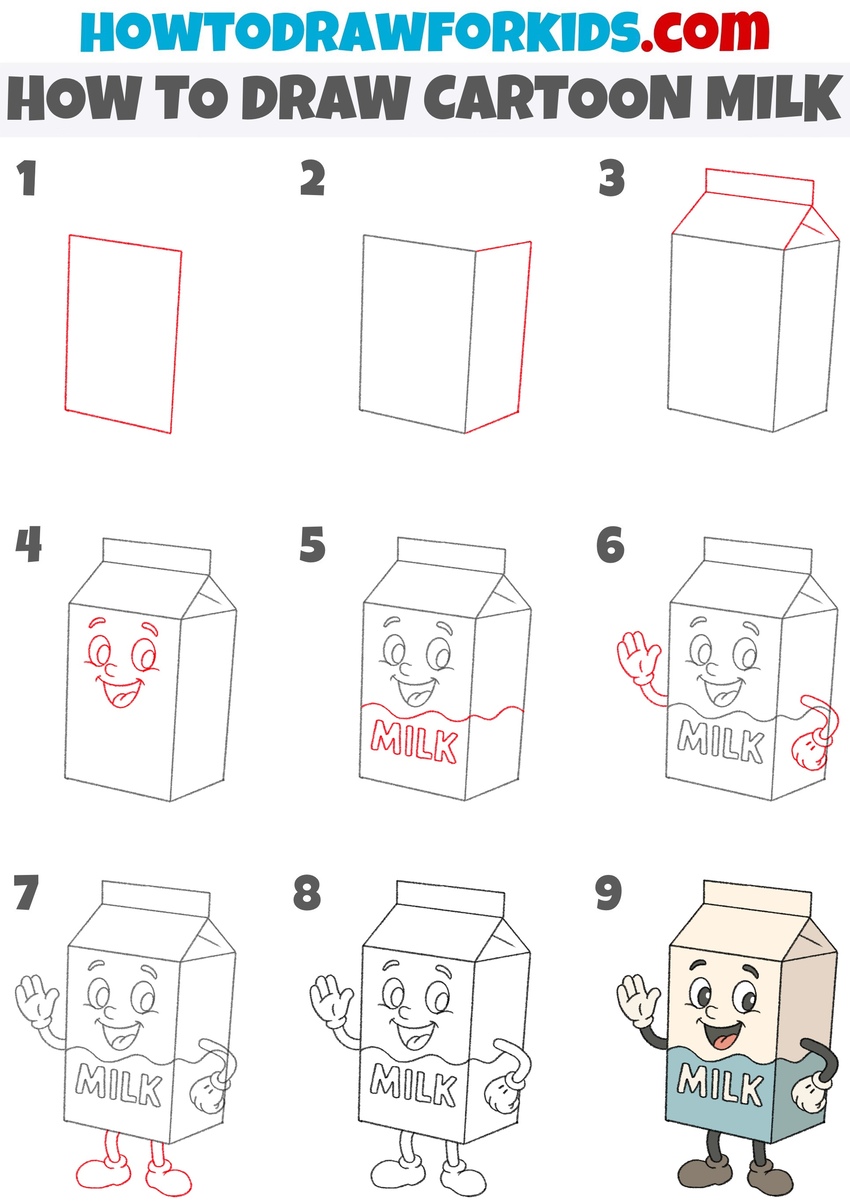
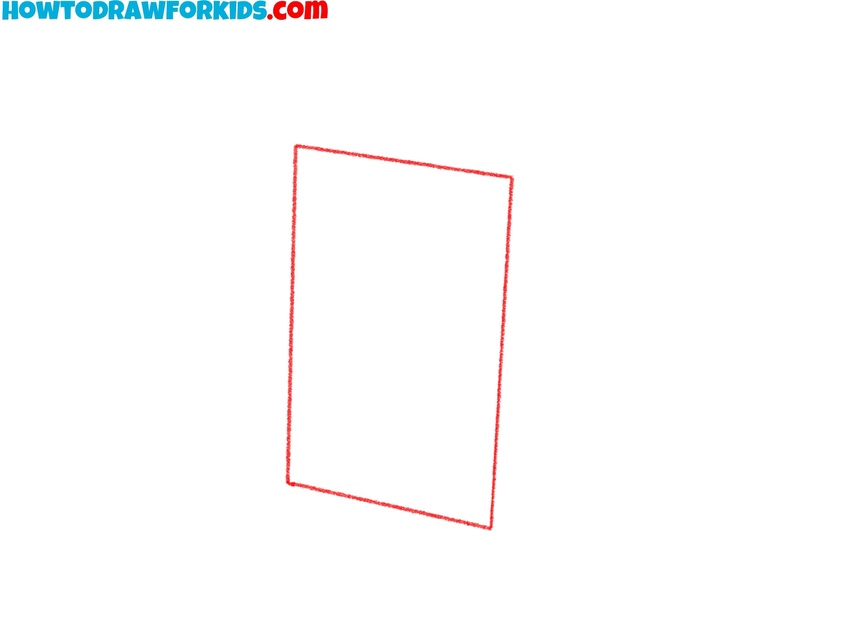
- Draw the front side of the carton.
Create a tall, narrow rectangle that forms the front face of the milk carton. Keep the edges straight and simple. You can use a ruler if needed, to create perfectly smooth and straight lines. Adjust the shape depending on the angle and turn of the subject.
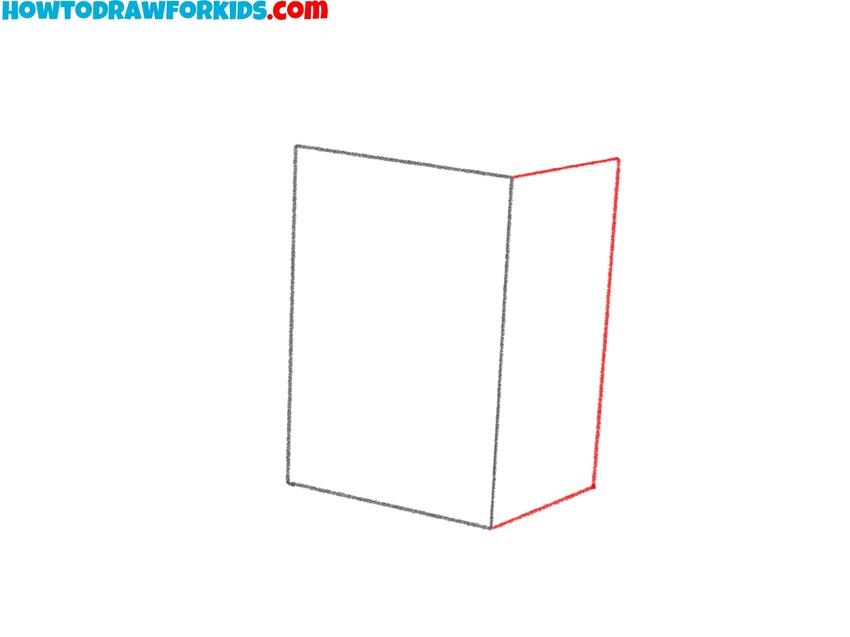
- Create the side face.
Draw the side plane to create a three-dimensional box. Connect the top and bottom corners of the initial rectangle with two diagonal lines going to the right, then close the shape with a vertical line. You can adjust the angle of the side lines depending on the perspective.
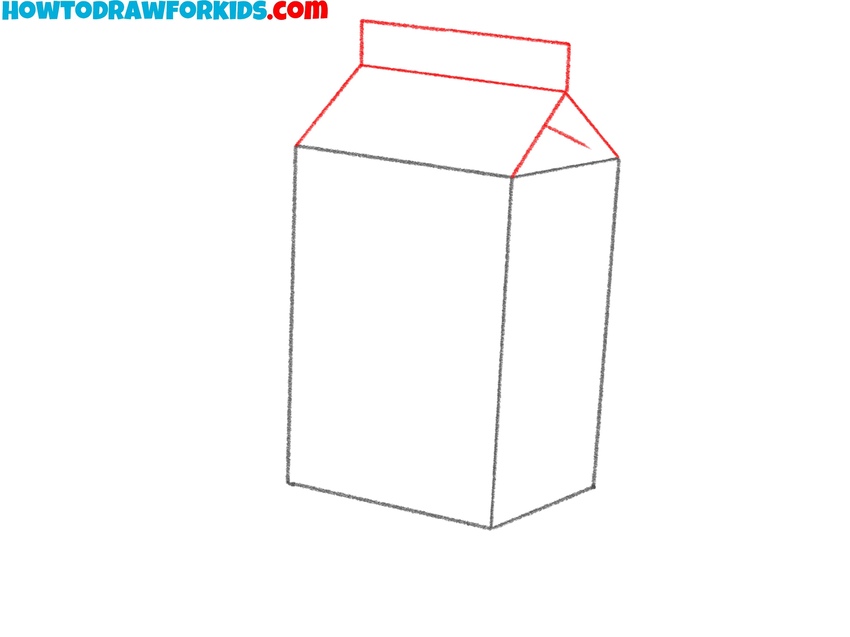
- Draw the top of cartoon milk.
Now move to the top of the package. Extend two diagonal lines from the top corners of the front face upward, then add a horizontal flap across the top. After that, draw a triangle shape for the side top flap, completing the angled roof.
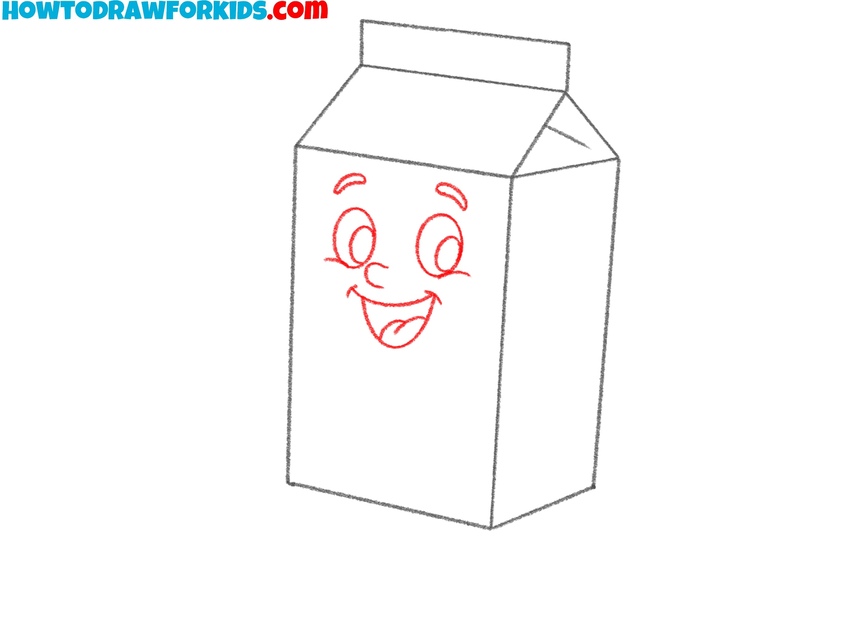
- Draw the facial features of cartoon milk.
Now, let’s make the milk pack look really cartoon. Place two rounded eyes near the top of the front panel. Below them, draw the nose and wide, smiling mouth with a tongue. The expression can be changed depending on what mood you want your character to have.
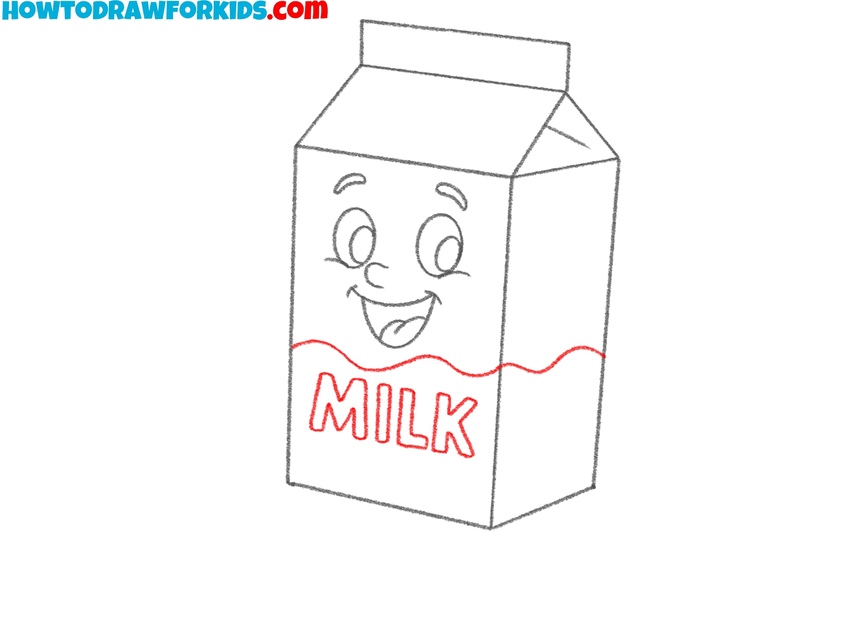
- Add text and liquid division line.
Let’s make it clear, that this is a milk box. To do this, write the word “MILK” below the face using bold, rounded letters. Then draw a wavy line across the carton to separate the colored top and bottom parts. You could replace the text with a different word if desired.
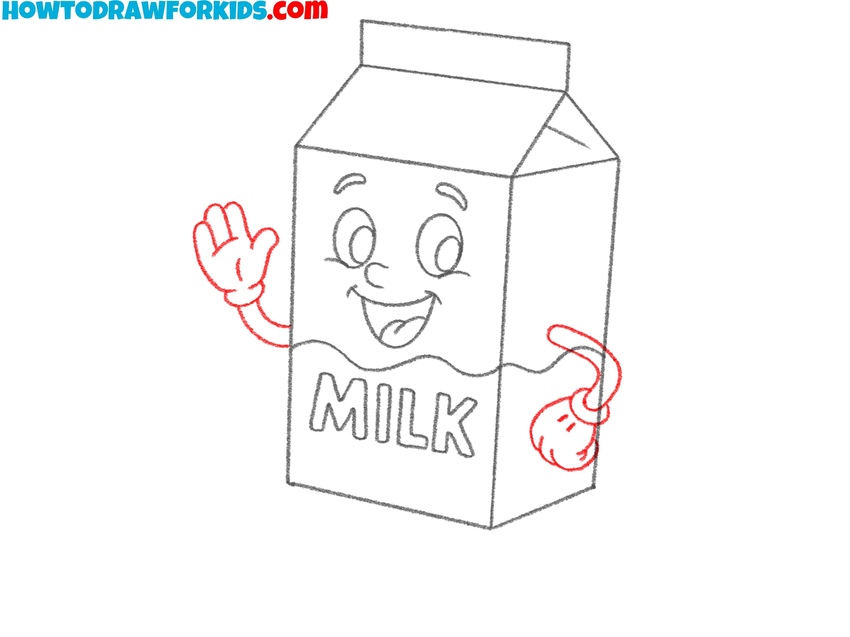
- Draw the arms of cartoon milk.
Draw two arms coming from the sides of the milk carton. One arm is raised and waving with a cartoon-style hand, while the other bends down with the hand resting on the side. Use curved lines for the arms and rounded shapes for the hands. You can try changing the arm positions.
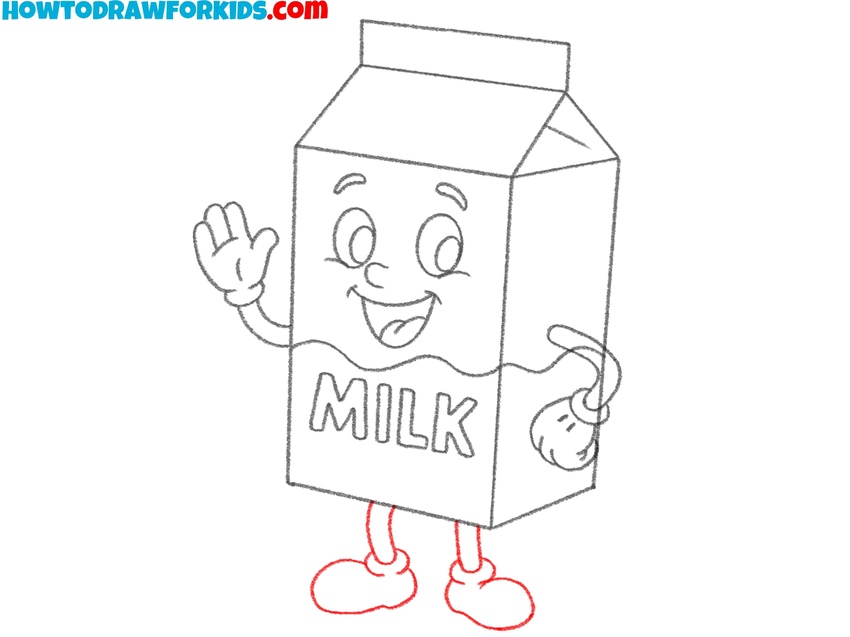
- Add the legs and shoes.
Finish the body of cartoon milk by sketching two short legs coming down from the bottom edge of the carton. Make the feet rounded like cartoon shoes. You can adjust the leg positions for different poses like running or sitting.
- Finalize the sketch.
Review the cartoon milk drawing and make sure all the lines are clear and look finished. Add any missing details or small fixes. You can reinforce the outer lines to make the cartoon character look even more cartoonish. If you want to add accessories like a cap, backpack, or glasses, this is the right stage to do it.

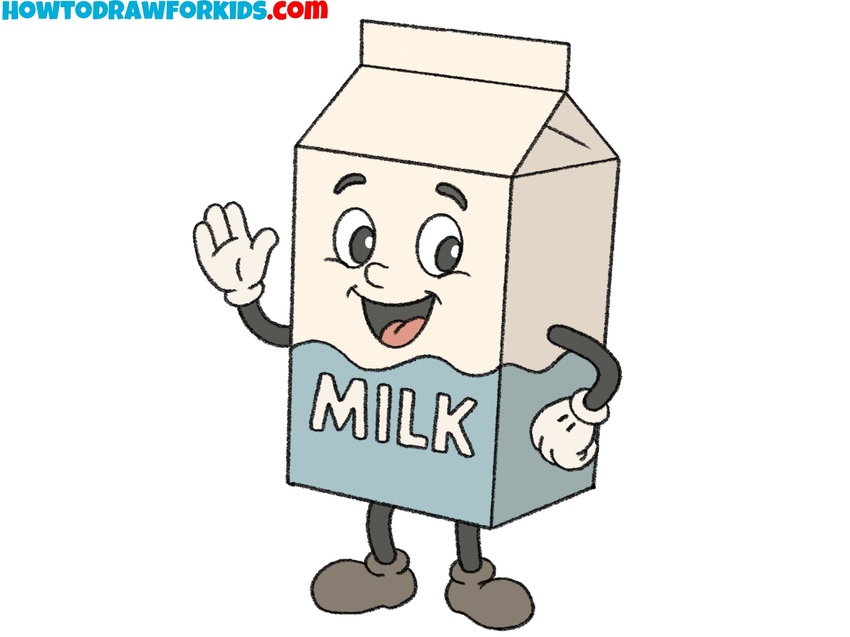
- Color the cartoon milk box.
Fill the top portion of the cartoon milk carton with a soft beige or cream tone, and choose a light blue or similar cool shade for the bottom half. Shade the limbs with a gray tone. The gloves can be white or light gray and shoes can be done in a darker neutral like brown or gray.
Simple Cartoon Milk Drawing Tutorial
This additional tutorial on how to draw cartoon milk shows an even more simplified version of a milk carton, with very simple shapes and details. Compared to the first version with anthropomorphic features, this version avoids any facial expression or arms. Additionally, the sequence of steps is also very different. This version starts from the top and moves downward.
Draw a small quadrilateral for the top plane of the milk carton. Add two vertical lines going down from each side, then connect them with an angled bottom edge to form the front and side faces.
Draw a narrow rectangle on top to represent the sealing strip. Then add two horizontal lines across the front face to mark the label areas. Repeat these steps on the side face. Add the word “MILK” in capital letters to the center of the front panel.
Apply a dark blue color to the center band where the text appears. Leave the rest of the carton white. Optionally, add small shadows with light gray.
Conclusion
In these two tutorials, you practiced drawing cartoon milk cartons in different styles. Both styles use very basic shapes and help to train your skills in drawing anthropomorphic cartoon characters.
You can try adding your own label, changing the expression on the cartoon version, or experimenting with patterns and colors.
If you enjoyed this lesson, check out other food-themed tutorials on the site. Don’t forget to leave a comment if you have questions or want to show your result, and feel free to share this guide with someone who’s learning to draw.