How to Draw Chess
The subject of today’s drawing tutorial is one of the oldest board games that develops the mind and strategy, as we learn how to draw chess.
How to Draw Chess: Introduction
In this tutorial, you will learn how to draw chess. The game of chess is an officially recognized sport. This game originated a long time ago and has not lost its popularity to this day. There are many professionals and amateurs of this intellectual game in the world. Chess can be played by two people, or you can compete in two groups.
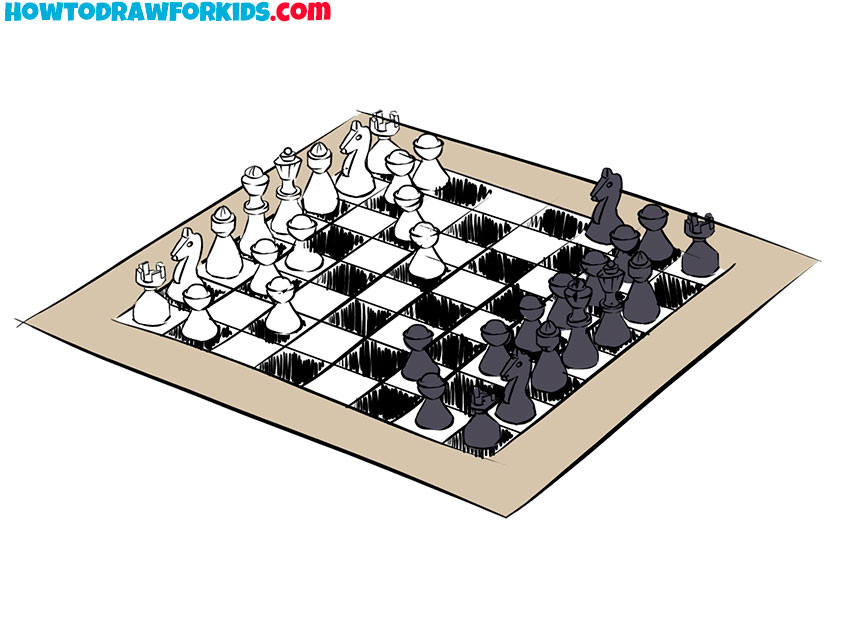
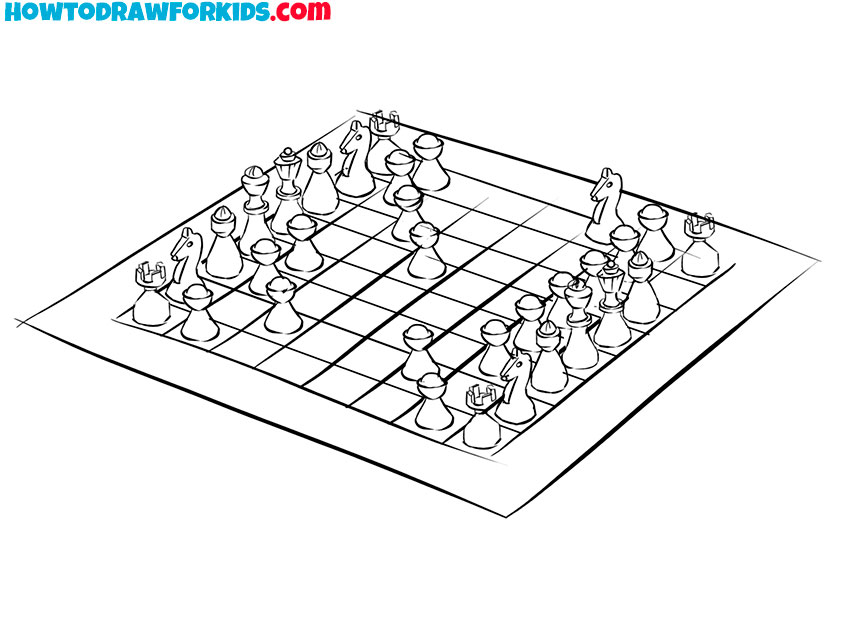
In the picture you see a chessboard divided into black and white squares. All the chess pieces are on the board. You will need attention, accuracy, and patience to consistently draw all the elements of chess.
This tutorial will take longer than the other tutorials because there will be many small elements. But at the end of the lesson, you will receive satisfaction from the work done.
Chess Drawing Tutorial
Materials
- Pencil
- Paper
- Eraser
- Coloring supplies
Time needed: 30 minutes
How to Draw Chess
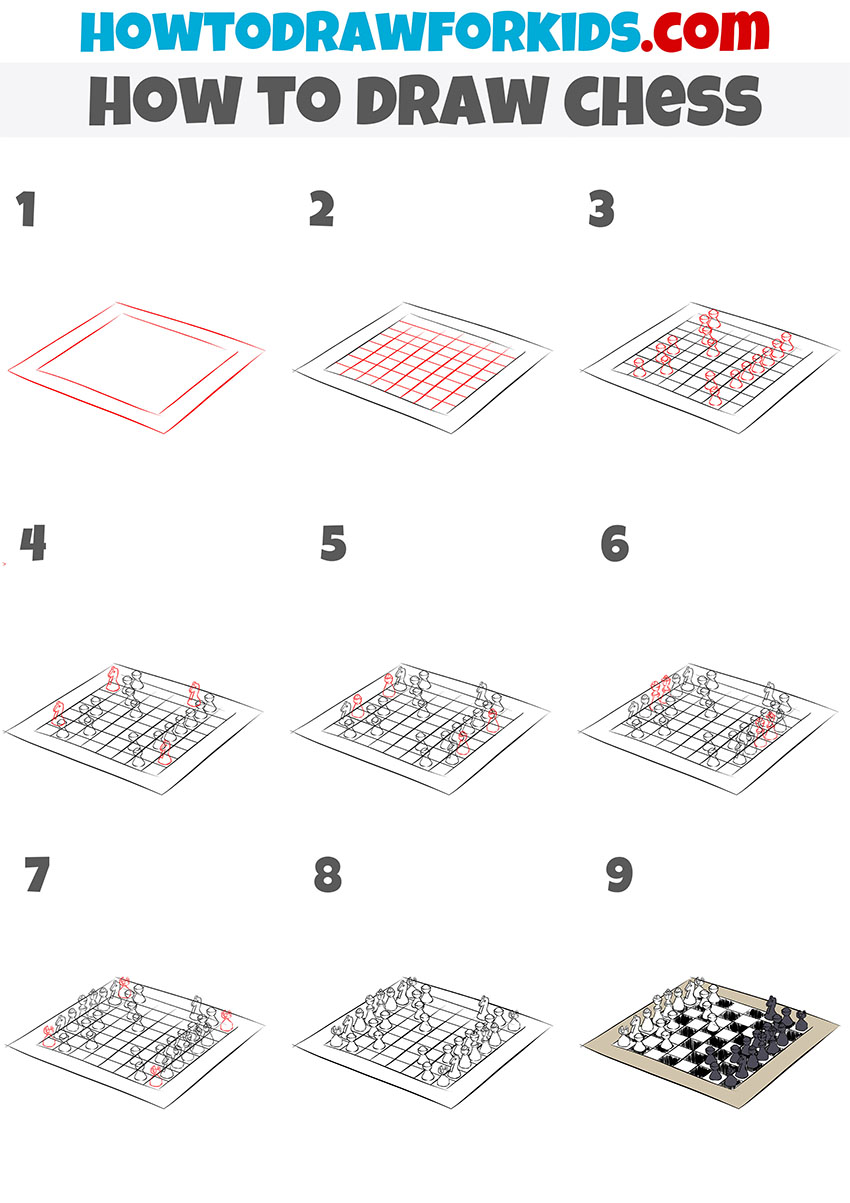
- Draw the base of the chessboard.
Every drawing of chess or other similar games needs a clear base, because the board is the foundation where all other elements will be placed. To set this up, sketch a large square in perspective. Inside this square, add another smaller square, leaving a frame around it. This will become the playing area.
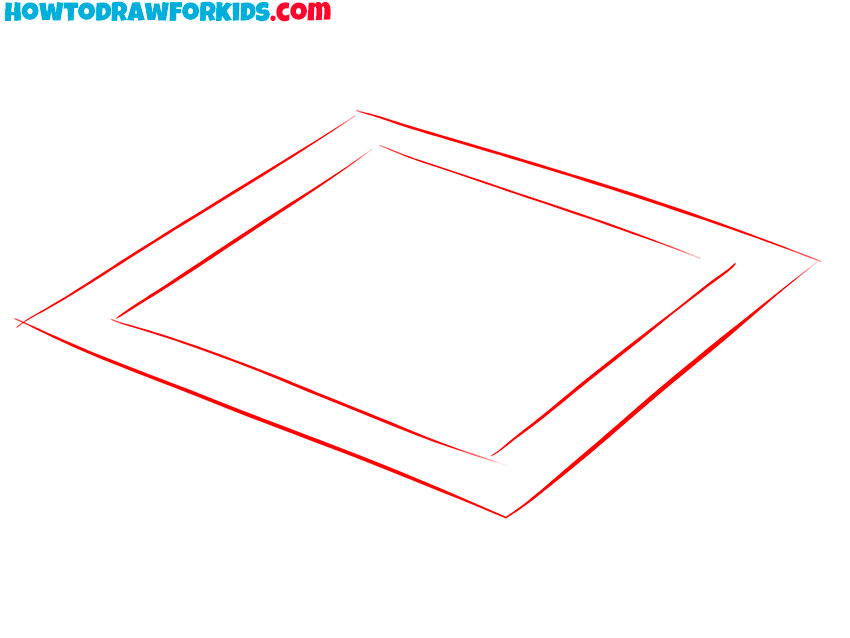
- Draw the chess grid.
The purpose of this stage is to create the 8×8 grid of the chessboard. Inside the smaller square, sketch evenly spaced vertical and horizontal lines. This will divide the area into 64 squares, which is standard for a chess game.
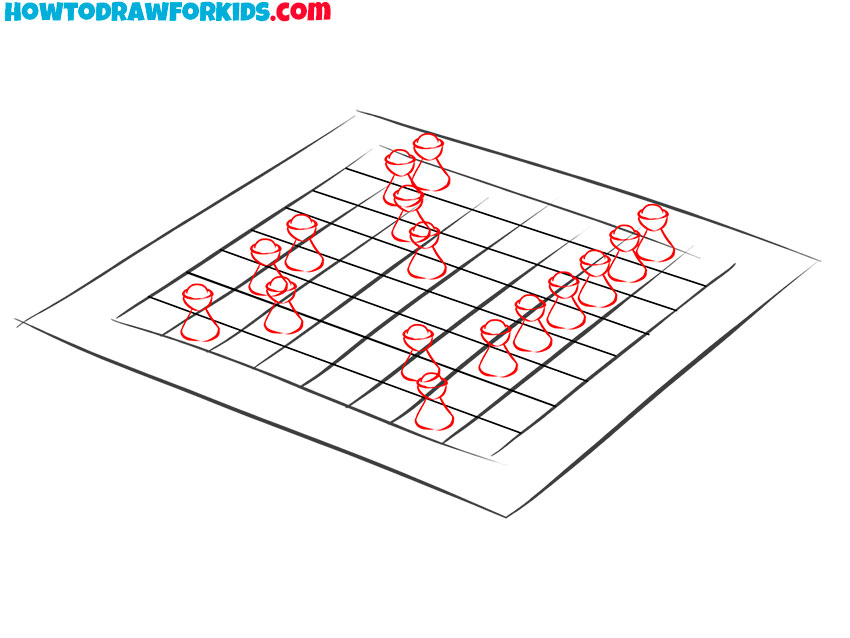
- Sketch the row of pawns.
Once the grid is ready, you can illustrate the first chess pieces. The pawns form the front row for both players, so draw a line of small rounded pieces across the second row from each side. Place each pawn in the center of a square. A pawn is usually drawn as a small column with a circular top.
- Draw the knight figures on the chessboard.
The chessboard looks more complete once you start placing the major pieces, starting with knights. These pieces stand beside the rooks, one square inward. In chess drawings like this one, knights are often simplified into horse-shaped figures. A curved top or a small notch can help convey the horse’s head.

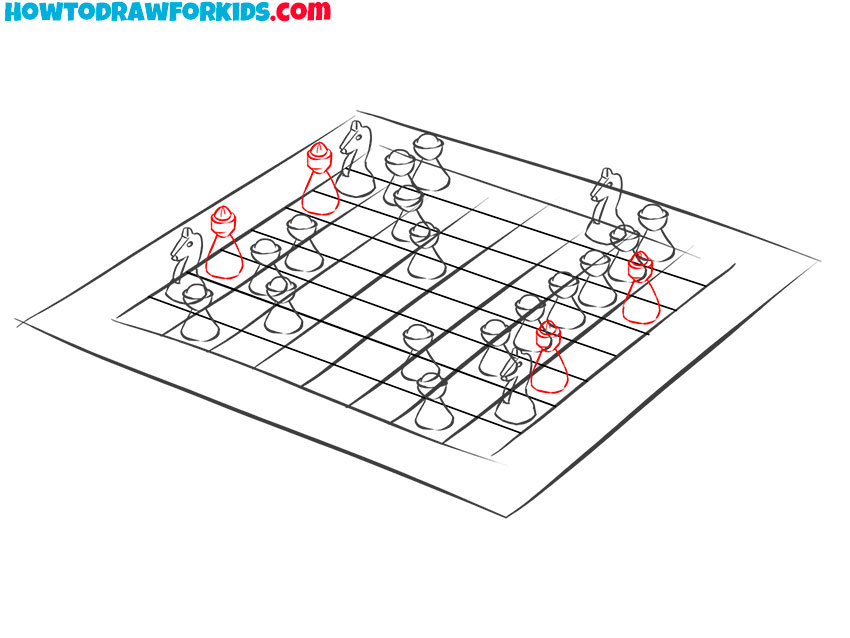
- Sketch the bishop pieces.
After the knights, add the bishops, which sit directly next to them toward the center. Bishops are taller and slimmer than knights, so sketch them with a narrow body and a rounded top. To illustrate the bishop’s unique look, you can draw a small line or dot at the top.
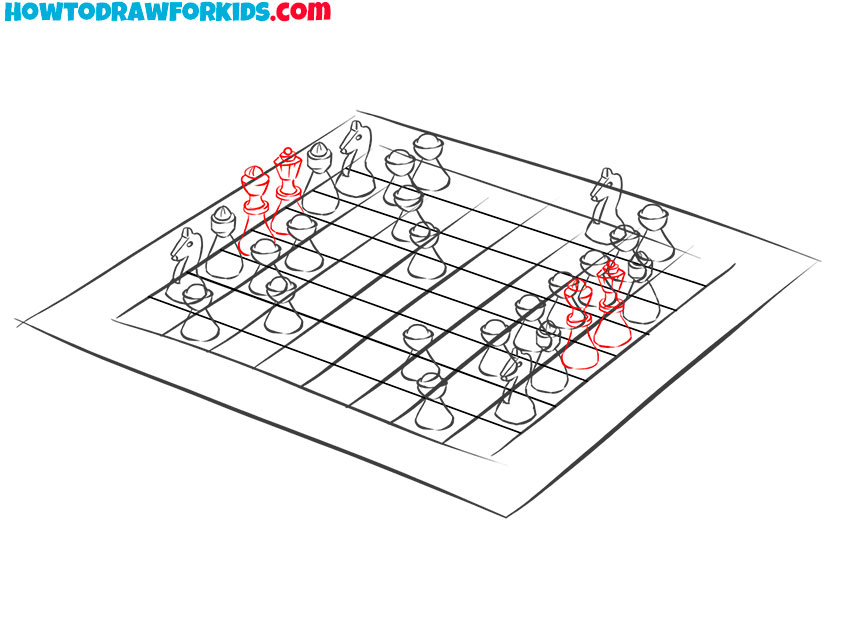
- Place the kings and queens.
Now, place the kings and queens in the center. Remember the rule: the queen always goes on her own color. This means the white queen is placed on a light square and the black queen on a dark square, directly opposite each other. The kings occupy the remaining central squares.
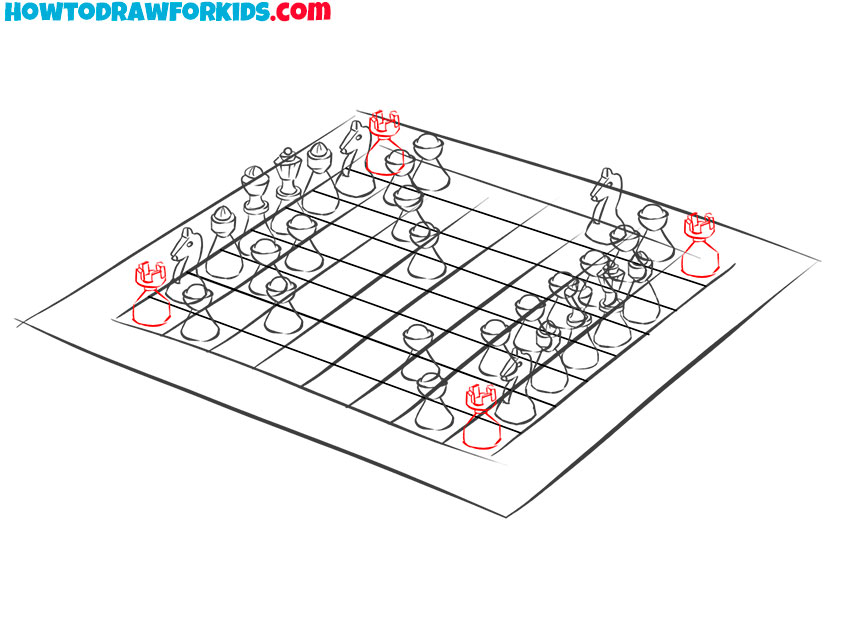
- Add the rooks in the corners.
In this step, draw the rooks at each of the four corners of the board. These are the castle-shaped pieces, so sketch them as slightly larger blocks compared to the pawns, with a flat top and a small notch to covey the battlement design. Check that they stand taller than the pawns.
- Correct proportions and finalize the setup.
With all pieces of your sketch are placed, go back over your lines and adjust proportions, if necessary. Trace the outlines of the chessboard and pieces. If any pieces look tilted, correct their vertical alignment so they stand straight on the squares. This is also the stage to add small details, if they were missed.
- Color the chessboard and pieces.
And now, fill the squares of the grid alternately with dark and light tones to create the classic checkerboard pattern. Next, color one side’s pieces darker to represent the black set, while leaving the opposite side lighter for the white set.

Additional Content
I have prepared a short PDF version of this tutorial for you. You can download this file and return to the lesson any time it is convenient.
Conclusion
If you want to continue, visit my Games category to check other board game drawing tutorial, or visit the Steve from Minecraft drawing tutorial to sketch one of the most popular games of our time standing around cubes and right angles.
You can also check the king drawing tutorial to try creating this medieval character using a simple approach, or check the knight drawing tutorial to train this skill even further. Also, share your work, leave your thoughts in the comments, and come back for more tutorials.


This is nice but I find something wrong here the place where you mentioned elephant that’s really called bishops . Elephants are just rooks other name those are bishops in Hindi known as unth
Thank you for pointing that out. The error are already fixed.