How to Draw Christmas Lights
This simple tutorial will show you how to draw Christmas lights and teach the basics of sketching festive decorations step by step.
I have prepared for you a fun lesson on how to draw Christmas lights. This is another lesson that is devoted to drawing Christmas decor items.
After learning how to draw Christmas lights, you can use these skills when drawing a Christmas tree or any other Christmas-related drawing. This lesson doesn’t include any difficult elements, as it is specially created for kids and beginners.
So Christmas lights are electric lights, used to decorate various rooms, buildings, and the Christmas tree during the Christmas celebrations. Christmas lights always symbolize joy.
The Christmas lights that you will sketch with these instructions will consist of three bulbs, so if know how to draw a light bulb, the task will be much easier. I now suggest that you begin to do this work.
Materials
- Pencil
- Paper
- Eraser
- Coloring supplies
Time needed: 15 minutes
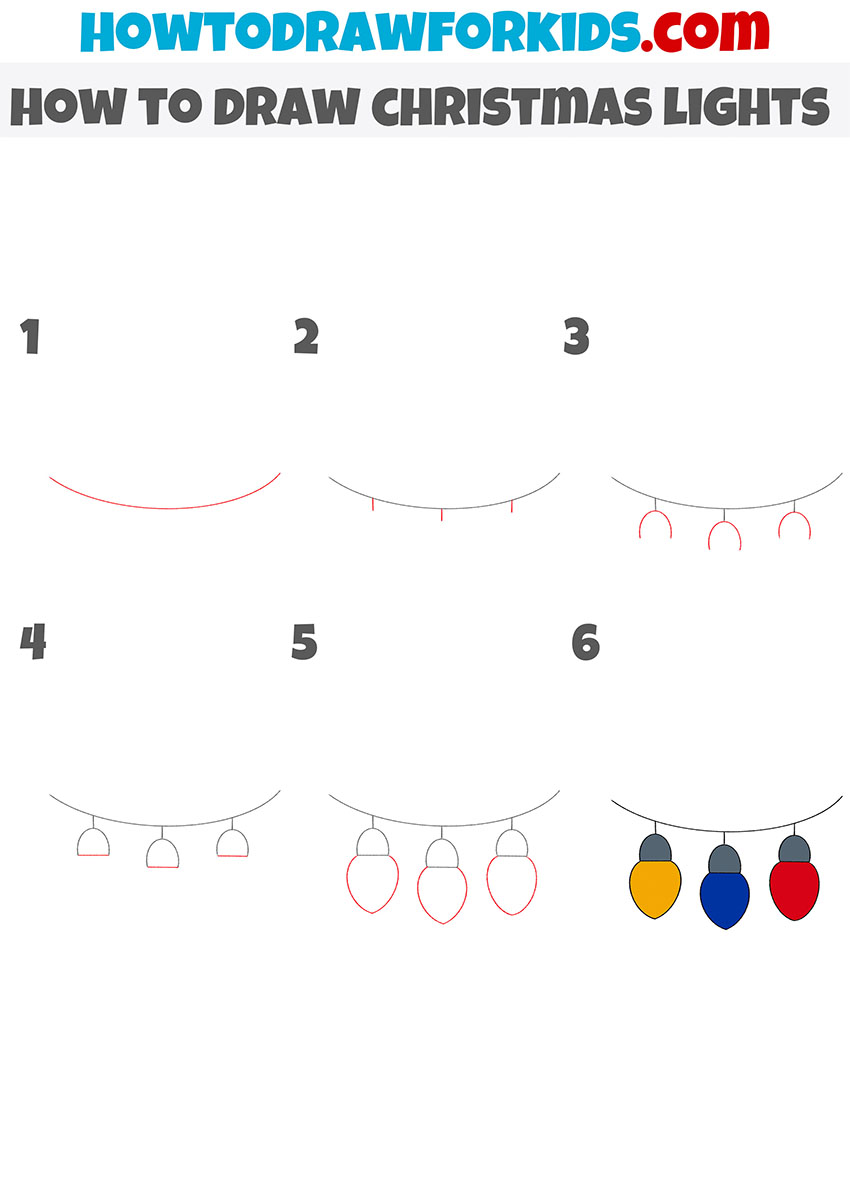
How to draw Christmas lights step by step
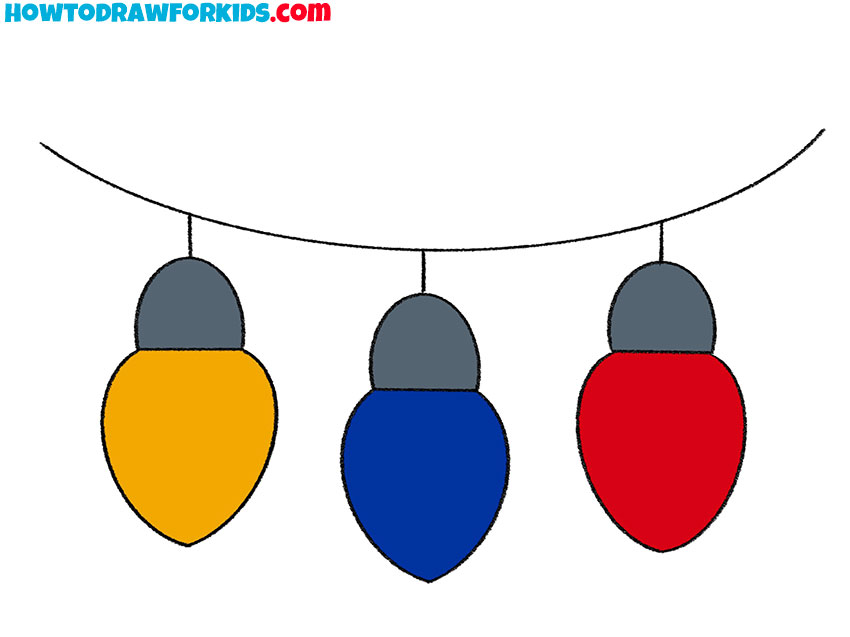
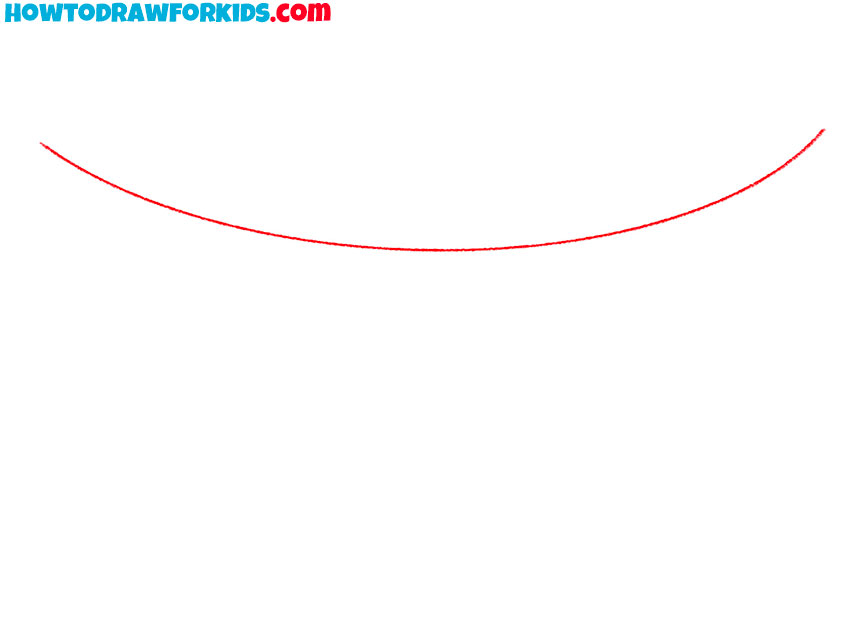
- Sketch the main curved wire.
Start with a single smooth and curved line – this will represent the wire where the Christmas lights will hang. The curve should dip gently toward the center, showing the natural sag of a string under weight. Don’t make the curve too steep or uneven.
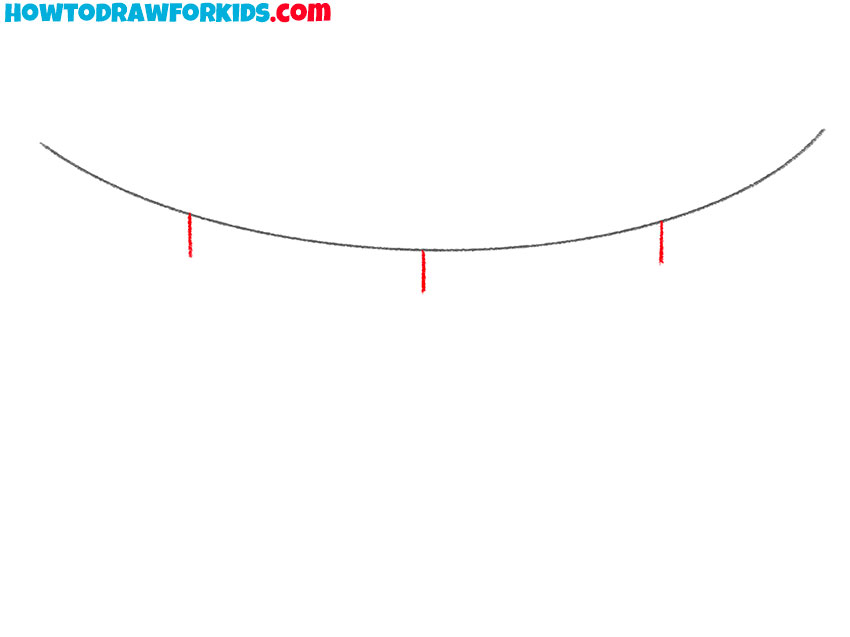
- Mark the spots where each light will hang.
Add three short vertical strokes evenly spaced along the wire. These simple short lines represent the short wires that attach the light bulbs to the long wire. Keep the spacing consistent to make the garland look realistic. It’s helpful to imagine dividing the wire into equal parts before placing these lines.
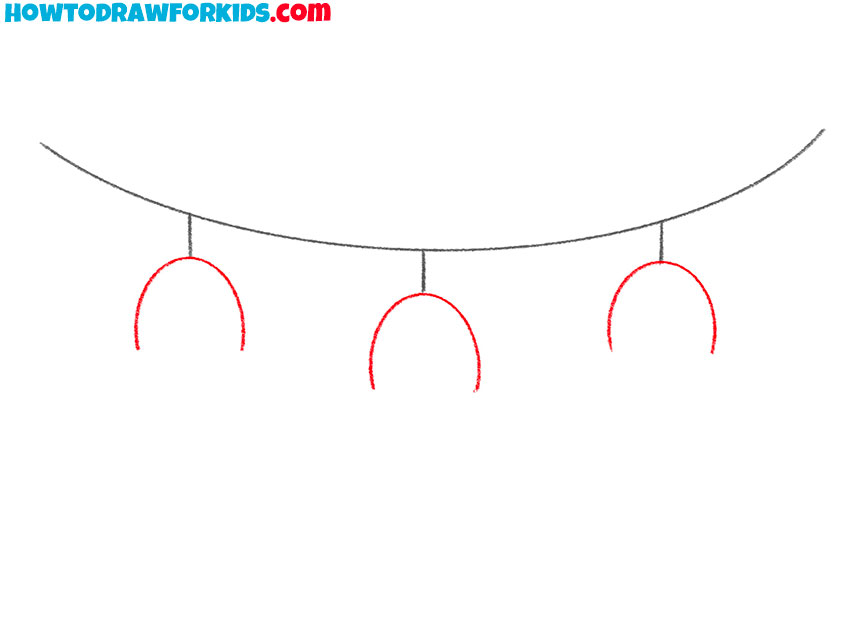
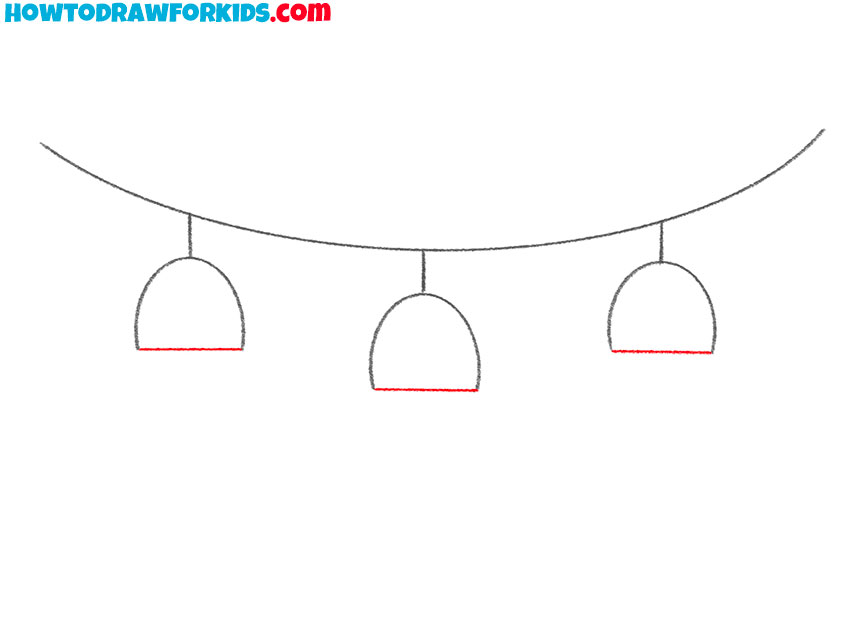
- Draw the holders of the Christmas lights.
From each small mark, draw a curved line downward, forming three small arches. These will become the holders that connect the bulbs to the short wires. It is very important to make all three curves the same size and shape.
- Sketch the socket edges of the bulbs.
Now cover the bottom edges of the light bulb holders with short horizontal lines of equal size. It’s the time to check the symmetry of your Christmas lights drawing, clean up the illumination, and make any necessary adjustments for a cleaner result.
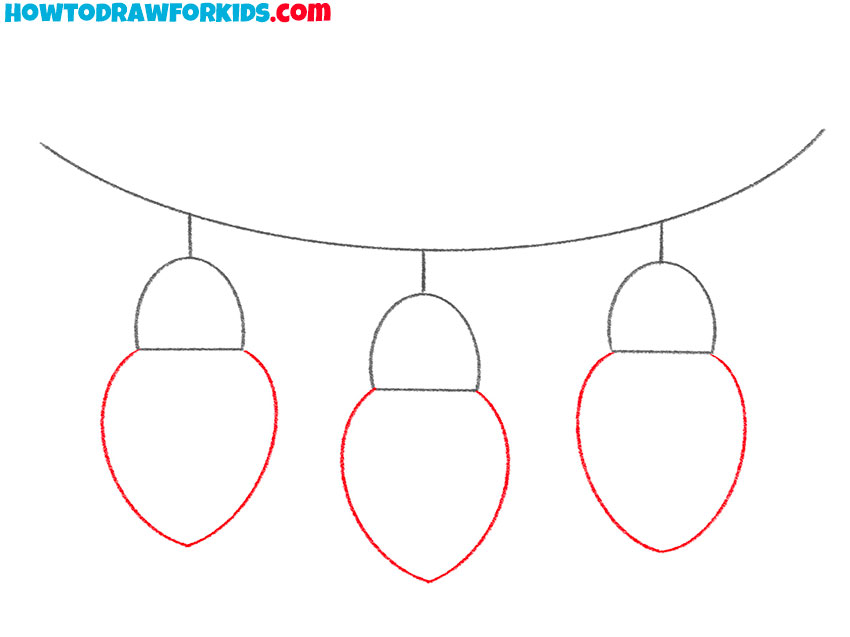
- Draw the bulbs of the Christmas lights.
Now draw the bulbs themselves below each base. At the bottom of each holder, sketch a small rounded shape for each bulb. Keep them all the same width and height. You can reproduce the outlines of the light bulbs exactly as in my illustration, or make them more elongated or rounded.
- Add bright colors like red, blue, and yellow.
Now, paint in the bulbs with bright festive colors – red, yellow, and blue are classic choices. Or you can paint all the bulbs light yellow. Color the bases in gray or dark blue to contrast nicely with the bulbs. To give a glowing effect, you can leave a small uncolored spot near the center of each bulb.

Now you can share this lesson with your friends and leave a comment. Below you can download a PDF file that contains a short version of this tutorial and additional useful materials that I have prepared for you.