How to Draw Darth Vader
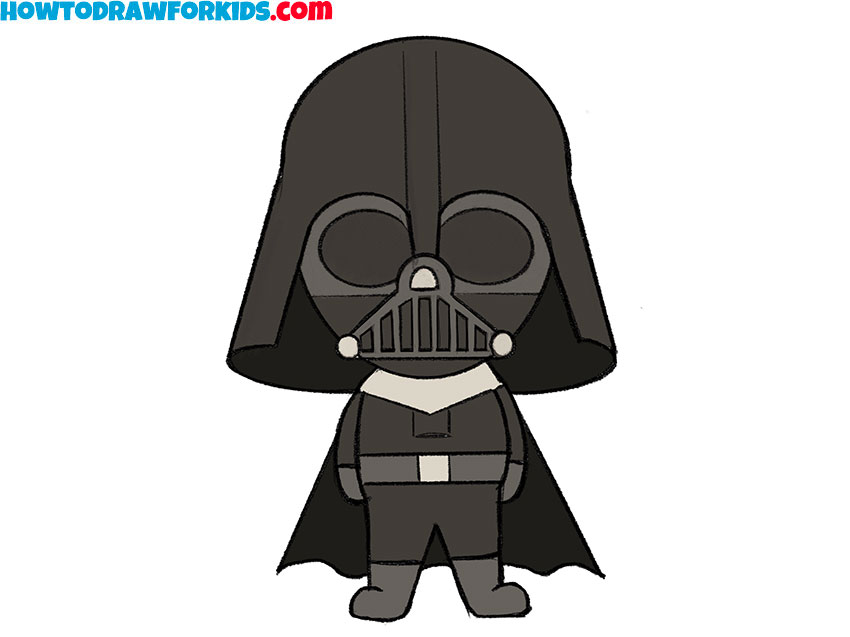
Learn to draw Darth Vader, the iconic villain from Star Wars, one of the most well-known and popular movie franchises in film history.
How to Draw Darth Vader: Introduction
In this drawing tutorial, you will work with an interesting and unique character and learn how to draw Darth Vader from Star Wars. First introduced in the movie Star Wars, the tall, black-clad Darth Vader is a well-known villain. His head is covered by a mechanical helmet, and the sound of his breathing is a mechanical hiss.
These details make the character easily recognizable, and you will be able to identify him instantly. In this lesson, you will learn how to draw Darth Vader, focusing on these distinctive features to create a likeness similar to the character seen in the films.
To make this process simple, I have used a straightforward style typical of my site. The design has been simplified by removing small details and emphasizing the most basic and recognizable features of Darth Vader.
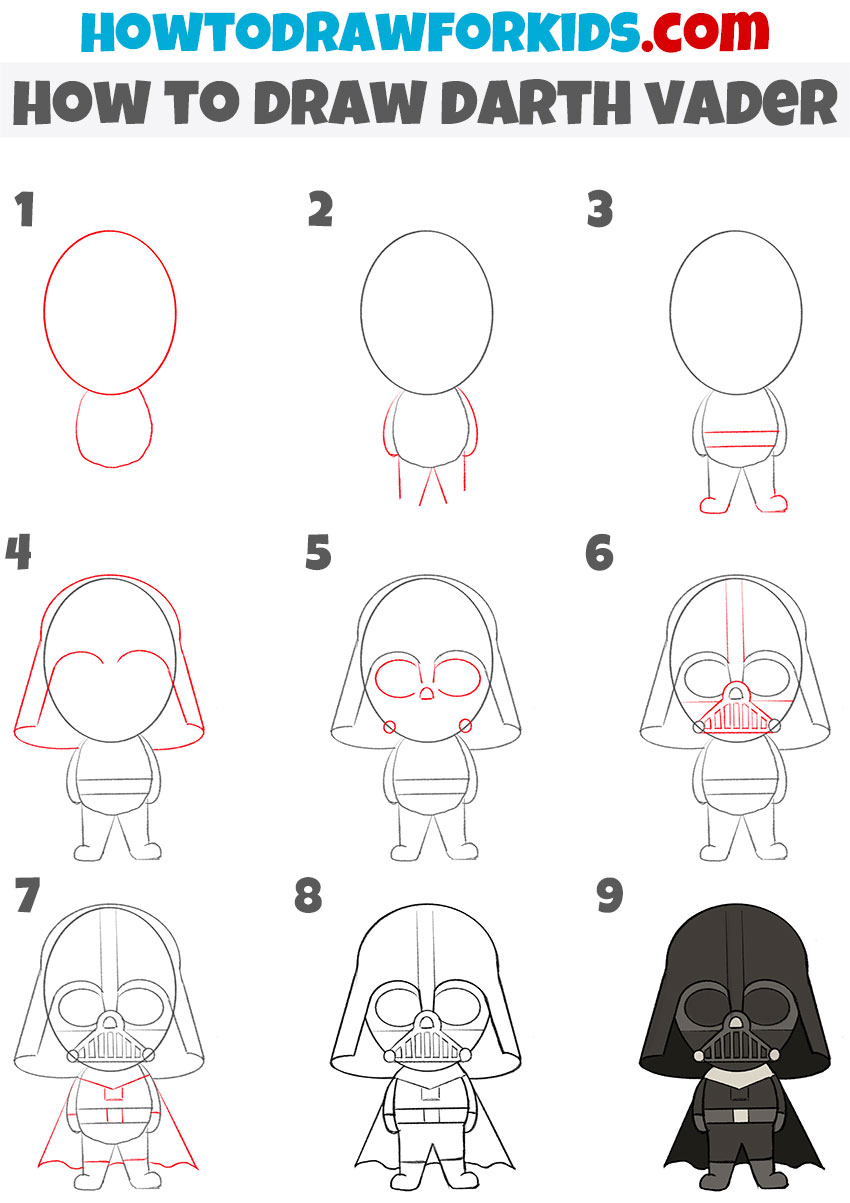
I’m sure you’ll do a great job with this drawing lesson and learn how to draw Darth Vader, and at the very end you will get a really cool illustration. This lesson consists of nine simple steps, and it will be easy even for kids. Now let’s start drawing this villain step by step!
Darth Vader Drawing Tutorial
Materials
- Pencil
- Paper
- Eraser
- Coloring supplies
Time needed: 40 minutes
How to Draw Darth Vader
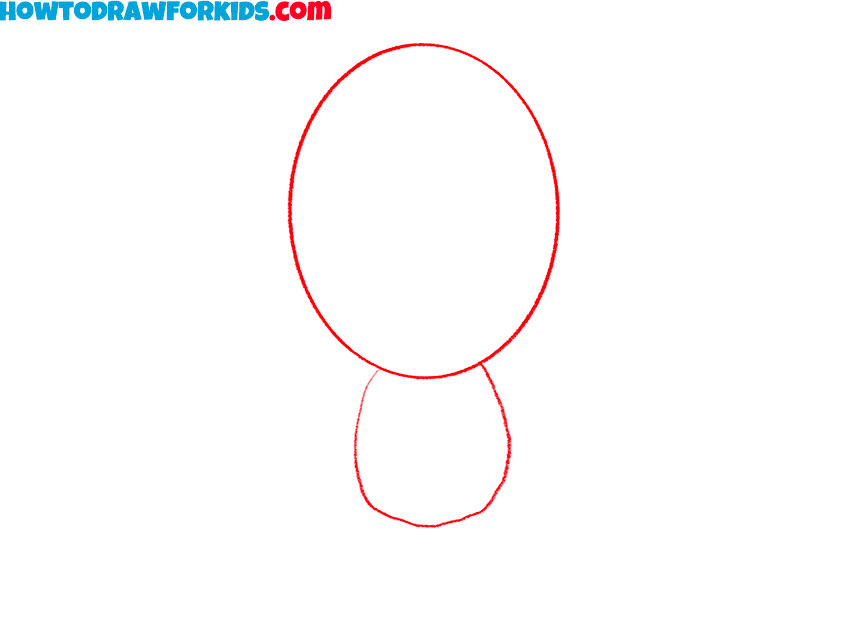
- Sketch Darth Vader’s had and torso.
To begin this tutorial on how to draw Darth Vader, start by sketching two basic shapes to outline the figure. Draw the head as a large vertical oval. Below this, add a smaller, rounded shape to represent the body. Use light pencil strokes, as these guidelines will be refined later.
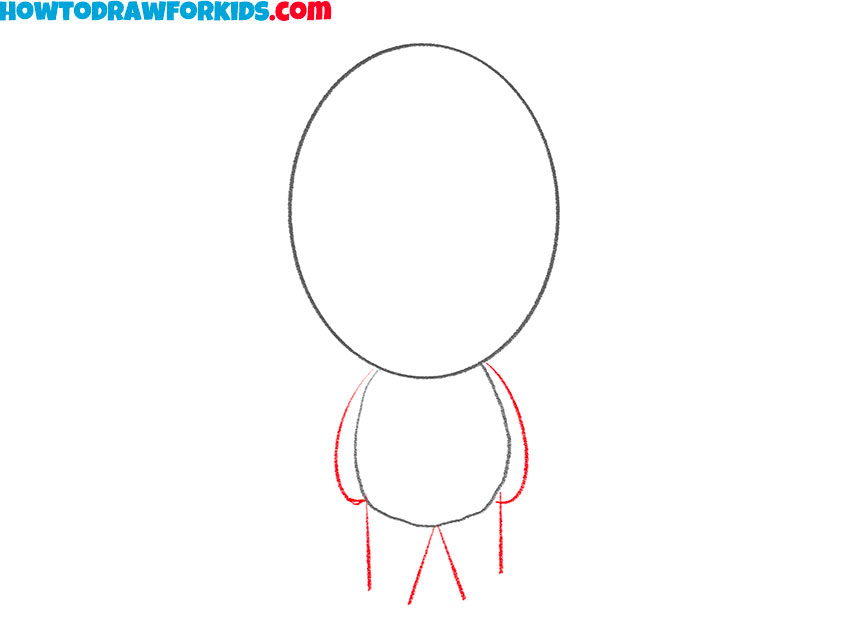
- Draw the arms and legs of Darth Vader.
Next, sketch simple lines and shapes for the arms and legs. For the arms, draw curved lines on each side of the body, forming a slight bend. For the legs, add straight lines extending downward. To make the legs of Darth Vader look more natural, draw them as slightly tapering towards the bottom.
- Define the belt and feet.
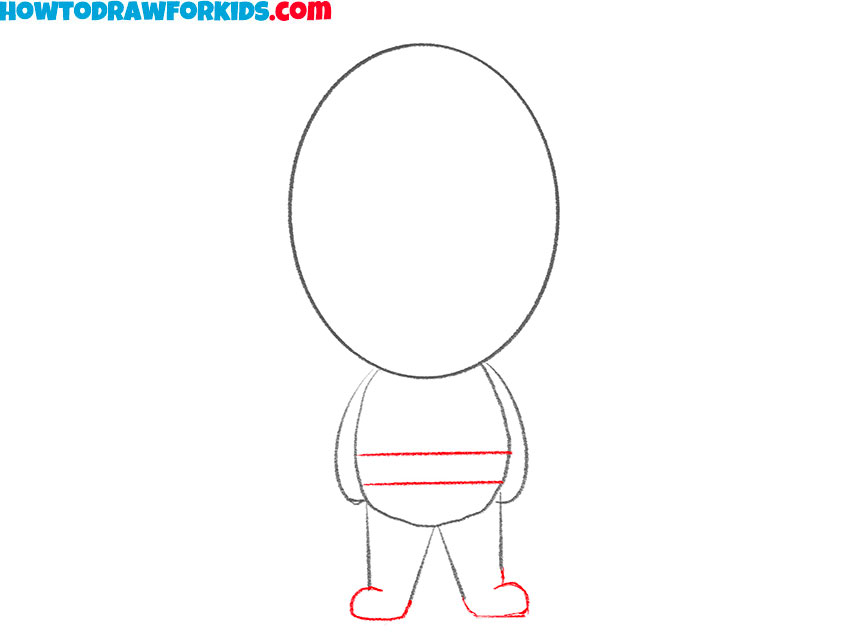
Draw two horizontal lines across the middle of the body to outline Darth Vader’s iconic belt. The belt lines should be straight and perfectly parallel. Below the legs, sketch small, rounded shapes to create his boots. Feet should be the same shape and size.
- Sketch the outlines of the helmet.
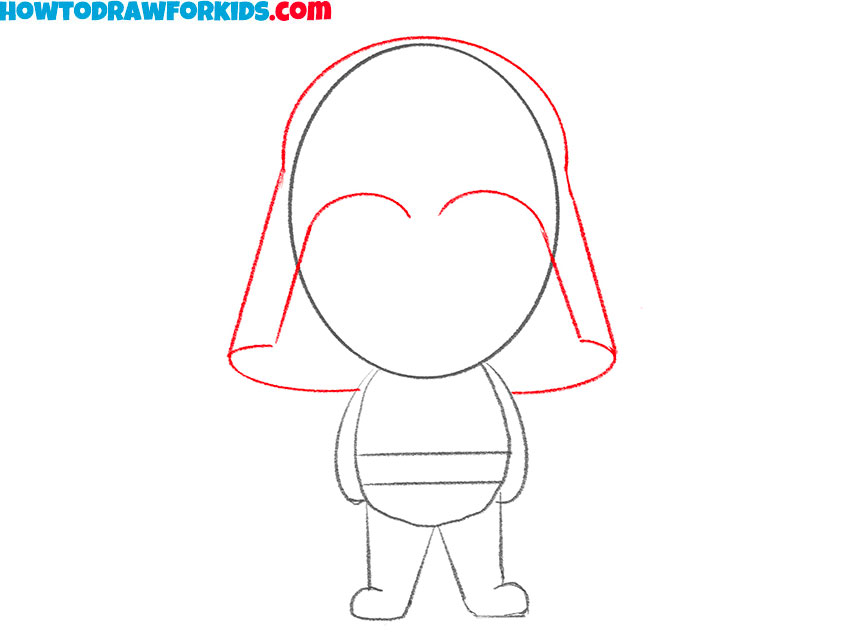
Darth Vader’s helmet is one of his defining features. Draw a wide, rounded outline extending from the top of the head to the shoulders. This shape should curve outward slightly at the sides to mimic the flared helmet. Add a heart-like shape on the face to mark the beginning of the mask design.
- Add the eyes and nose.
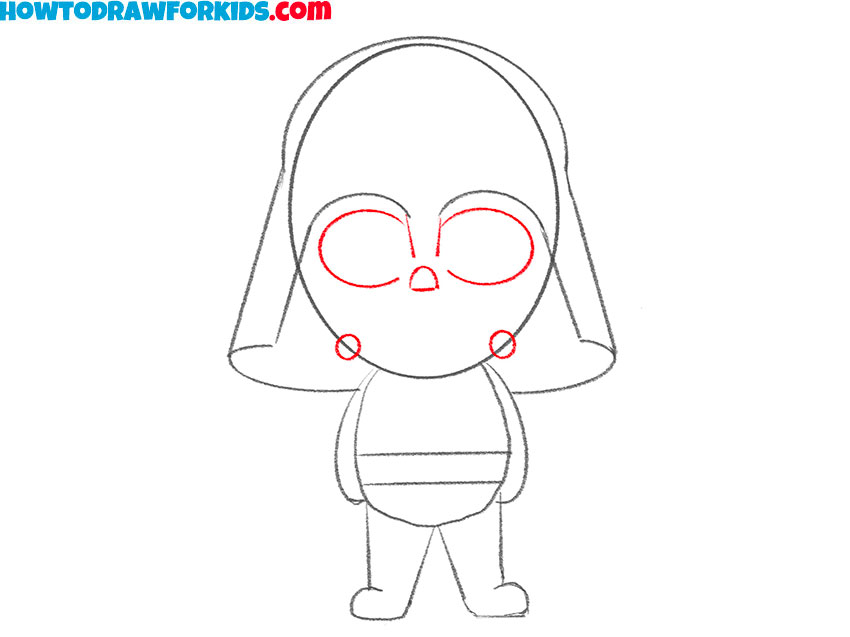
Sketch two large oval shapes for the eyes, positioned within the heart-shaped outline. Add a small oval in the center of the face to represent the nose. At the bottom of the face, draw two circular shapes to mark the helmet’s connection points. These features begin to build the iconic mask of Darth Vader.
- Detail the mask of Darth Vader.
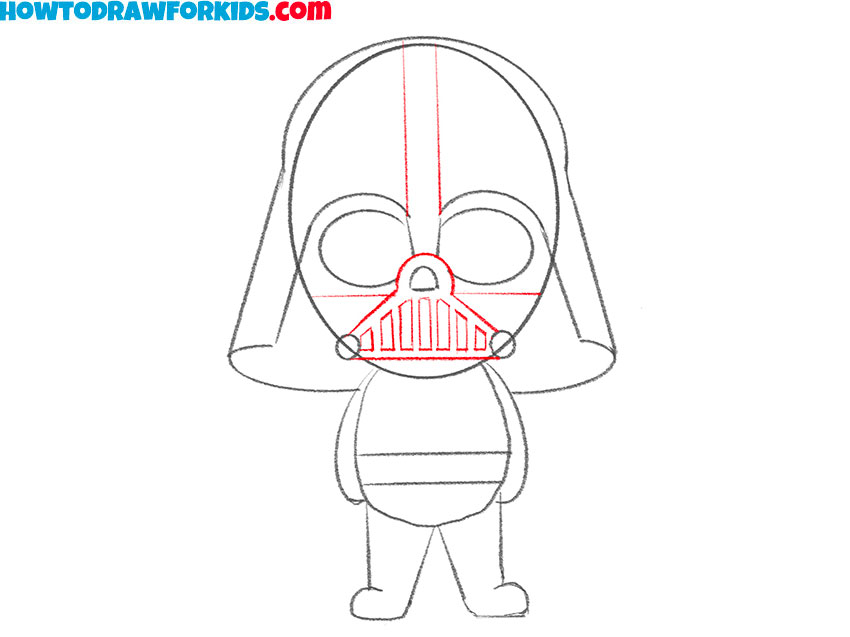
Add vertical lines to divide the helmet into sections. Draw the triangular-shaped grill on the lower part of the mask, adding horizontal lines to give it texture. This is the part of the mask that helps the villain breathe and gives the helmet its recognizable appearance.
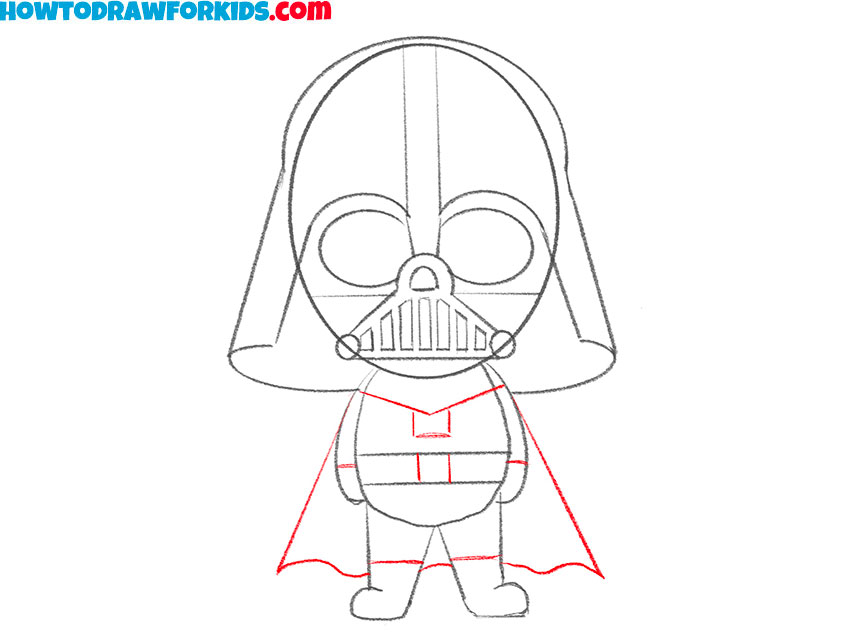
- Add the cape and chest details.
Draw an angular line on the shoulders for the top of the cape. Add a rectangular shape on the chest to depict his control panel. Draw two lines extending from the shoulders downward to create the cape’s shape. Next, draw the bottom edge of the cape using a smooth line.
- Refine and clean up the sketch.
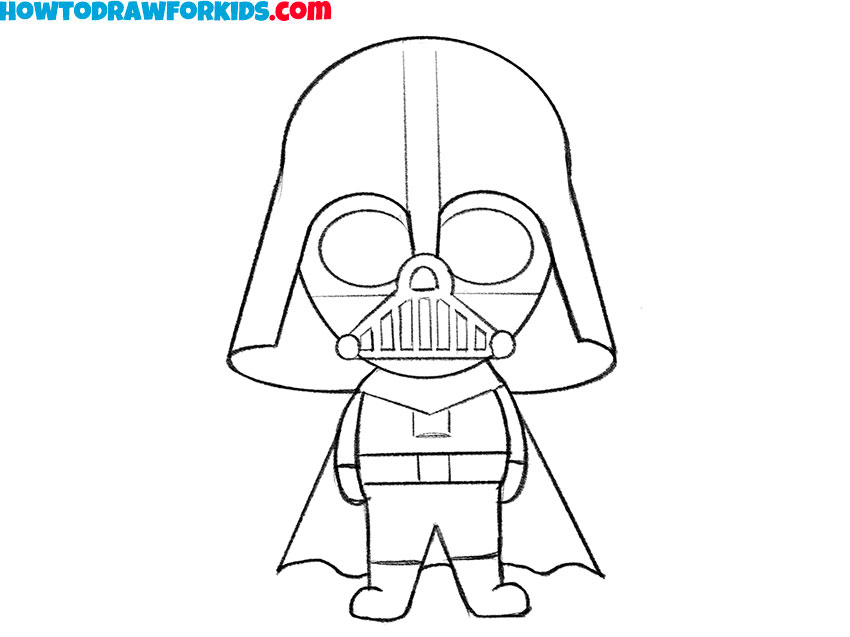
Erase unnecessary guidelines and finalize the Darth Vader drawing lines. Smooth out the edges of the helmet, cape, and body of the villain to make the image look polished. Double-check the proportions and symmetry of Darth Vader’s head, mask, and torso.
- Color your Darth Vader drawing.
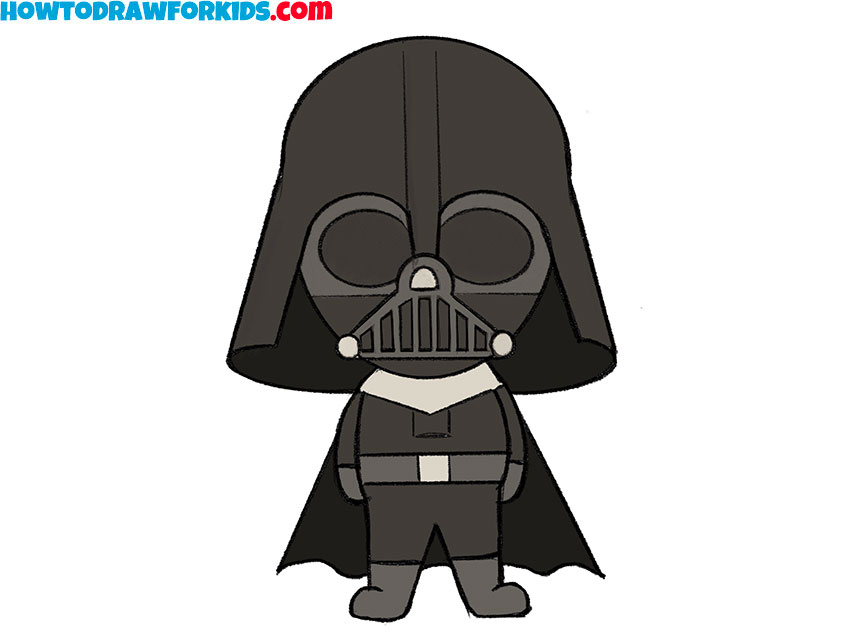
To make your Darth Vader drawing more realistic, use a range of black and gray shades for the helmet, suit, and cape. Carefully add shadows to enhance dimension and highlights to create a sense of volume. These details help the drawing appear more complete and visually accurate.
Additional Content
This step-by-step lesson on how to draw Darth Vader is now almost complete. I hope you are satisfied with the result. Be sure to download the PDF file containing the simplified version of the tutorial. This file has been prepared for your convenience, so you can revisit and complete the drawing lessons whenever it suits you.
Conclusion
This was a simple lesson where we learned how to draw Darth Vader step by step. We focused on creating his recognizable helmet, mask, suit, and cape. I hope the tutorial was straightforward and easy to follow, and that you found it helpful in improving your drawing skills.
If you enjoyed this lesson, feel free to explore other sections of my site, where you can learn how to draw Deadpool or improve your skills with my Spider-Man drawing tutorial. These lessons are designed to help you boost your ability to draw both heroes and villains, taking your skills to the next level.
Additionally, consider following me on social networks. You can subscribe to my Pinterest for illustrations and collages or check out my YouTube channel for video versions of my lessons. Don’t forget to share your thoughts in the comments, as your feedback helps inspire me to create more content.

