How to Draw Dog Eyes
Today, you will learn how to draw dog eyes in both a realistic and cartoonish style using two simple tutorials to improve your dog drawing skills.
How to Draw Dog Eyes: Introduction
To learn how to draw a dog, you need to be able to depict a dog’s head, and to depict a dog’s head, you need to learn how to draw a dog’s eyes. This lesson will guide you through this process in two distinct styles.
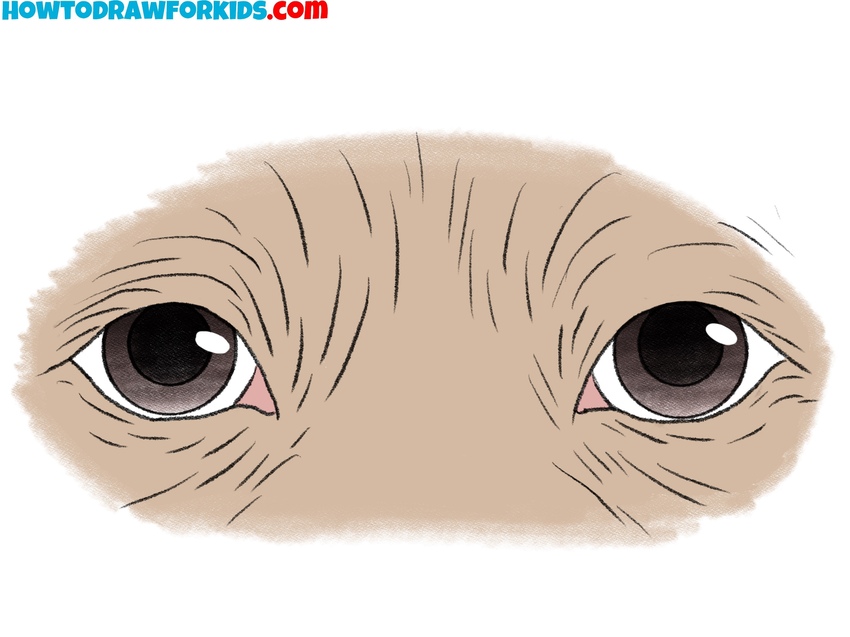
First, we will focus on drawing a dog’s eyes in a realistic style. I will explain how to depict the eyes, their details, and the surrounding areas, creating a convincing look without relying on complex artistic techniques.
Then, I will introduce a different approach, showing how to draw dog eyes in a more cartoonish style, often seen in cartoons where dogs have large, slightly human-like eyes.
This lesson will also be useful for improving general drawing skills. By practicing these two methods, a young artist can enhance their ability to draw animal eyes and apply these skills to drawing wolf’s eyes and other animals.
Dog Eyes Drawing Tutorial
Materials
- Pencil
- Paper
- Eraser
- Coloring supplies
Time needed: 30 minutes
How to Draw Dog Eyes
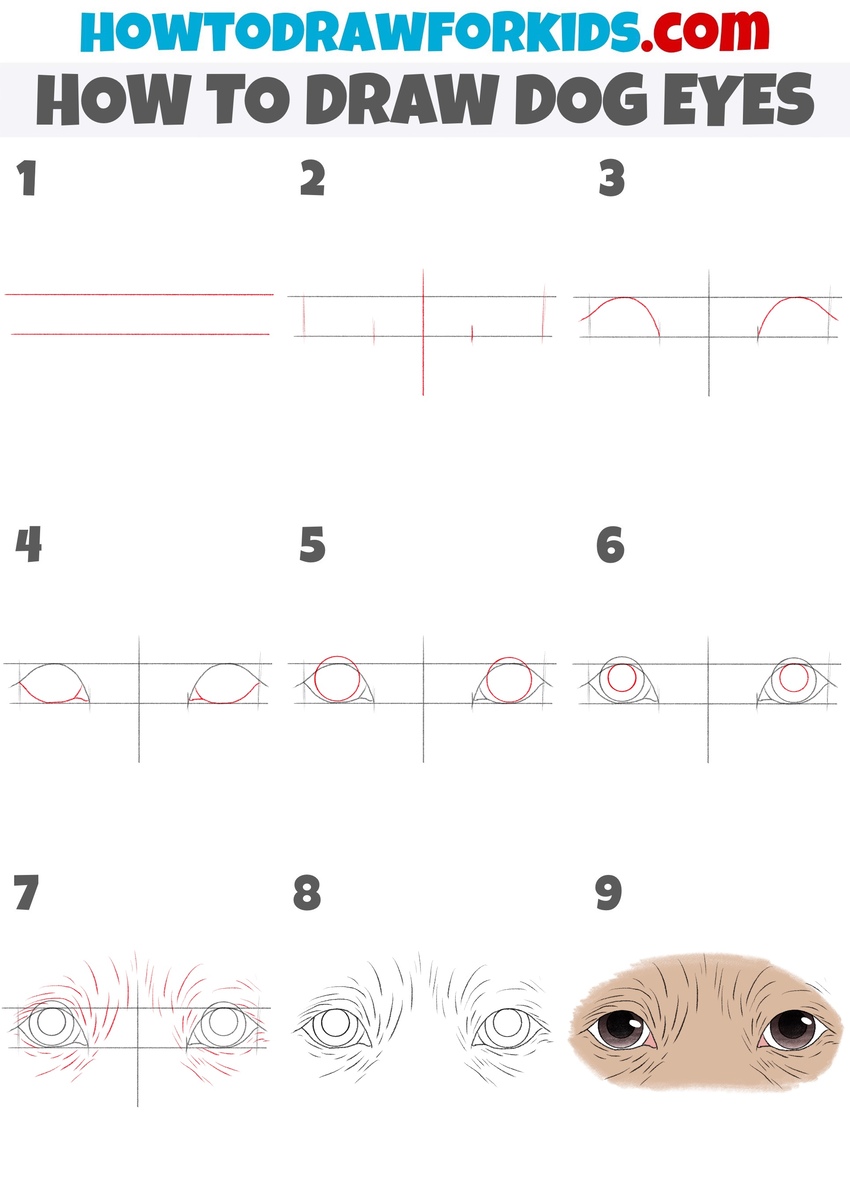
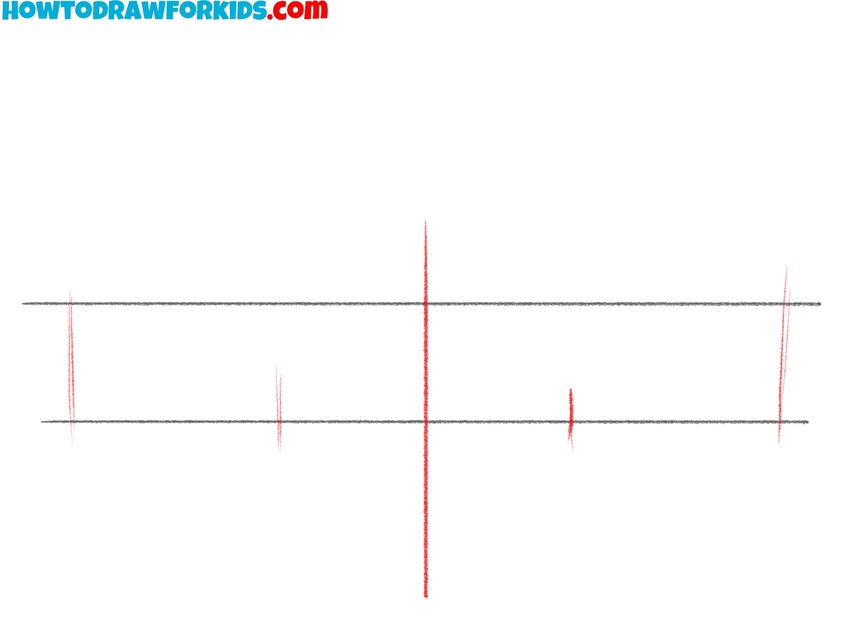
- Sketch the horizontal guidelines.
To start learning how to draw a dog’s eyes, create two horizontal parallel lines across your paper. These lines will serve as the base for positioning the eyes. Ensure the space between the lines is wide enough to accommodate the size of the dog’s eyes. Use a light pencil stroke so the guidelines can be erased later.

- Sketch the vertical guidelines.
Draw a vertical line at the center of the horizontal guidelines. This will serve as the midpoint of the face. Add smaller vertical markers equally spaced from the centerline to outline the placement of the dog’s eyes. These divisions ensure that the eyes are properly spaced and proportional.
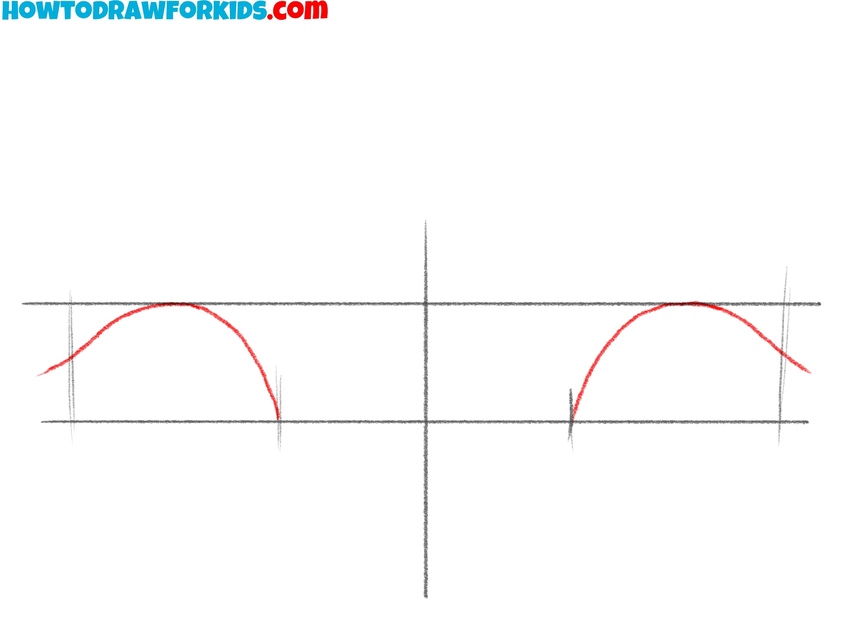
- Switch the upper eyelids.
Using the guides, sketch curved lines for the top edges of each eye. These arcs will define the shape and position of the upper eyelids. Pay attention to the natural curve, as it determines the expression and realism of the dog’s eyes. Keep these lines smooth and symmetrical.
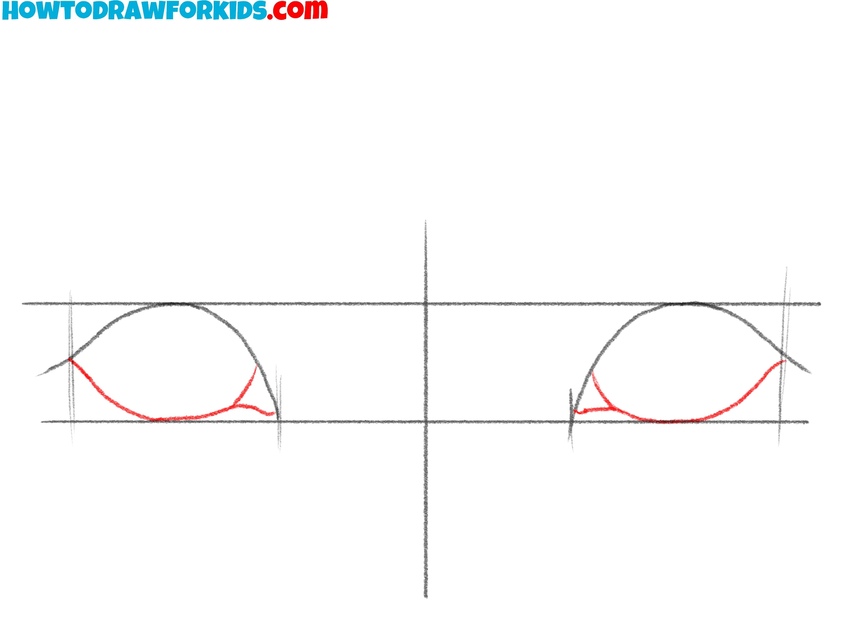
- Add the lower eyelids.
Next, draw the lower arcs beneath the upper lines to complete the almond-shaped structure of each eye. Make sure these lines connect smoothly to the upper arches, forming the basic outline of the dog’s eyes. Check the symmetry of the eyes before moving on to the next step.
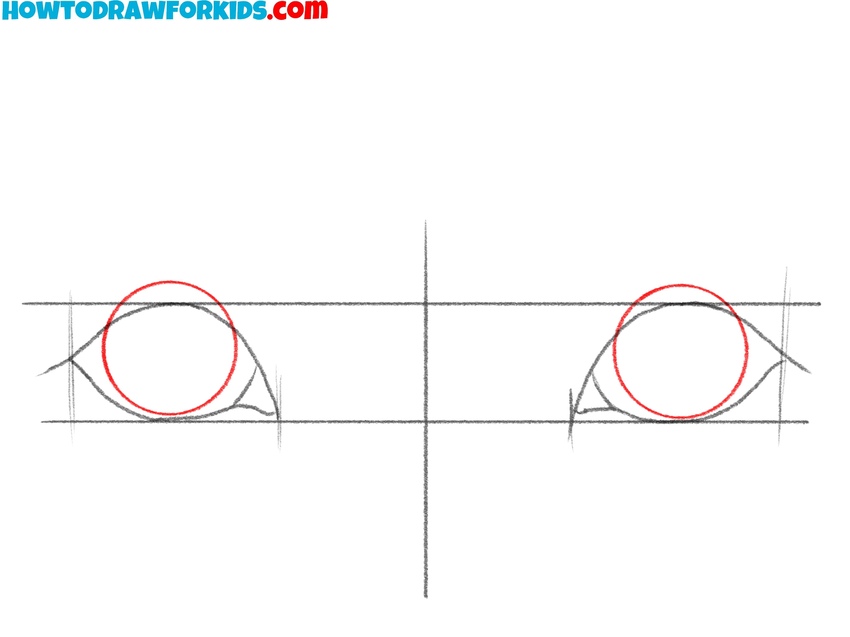
- Add the circles of the irises.
Inside each eye shape, draw a large circle to represent the iris. Position the circles centrally within the eye outlines to give them a natural look. The iris circles inside the dog eyes should have a perfectly round outline and be of the same size.
- Draw the pupils inside the irises.
Within each iris, draw a smaller circle to indicate the pupils of the dog. These should be centered within the iris circles. You can adjust the size and position of the irises and pupils slightly to align with the direction the dog is looking.
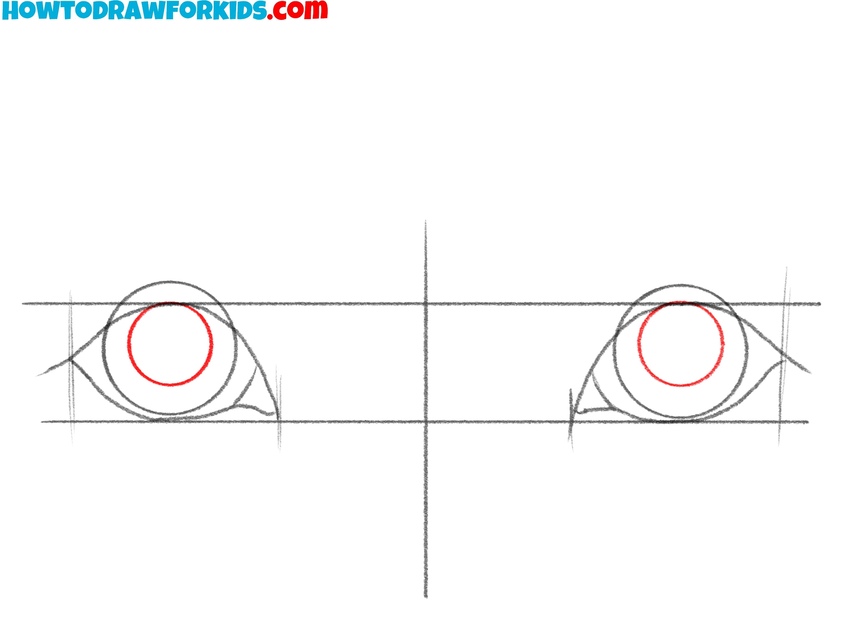
- Sketch the fur around the eyes.
Begin adding fur details around the eyes to give the drawing a more realistic appearance. Use short, curved strokes of different size around the upper and lower edges of the eyes to mimic the texture of the dog’s fur. Vary the direction of the lines to follow the natural growth pattern.
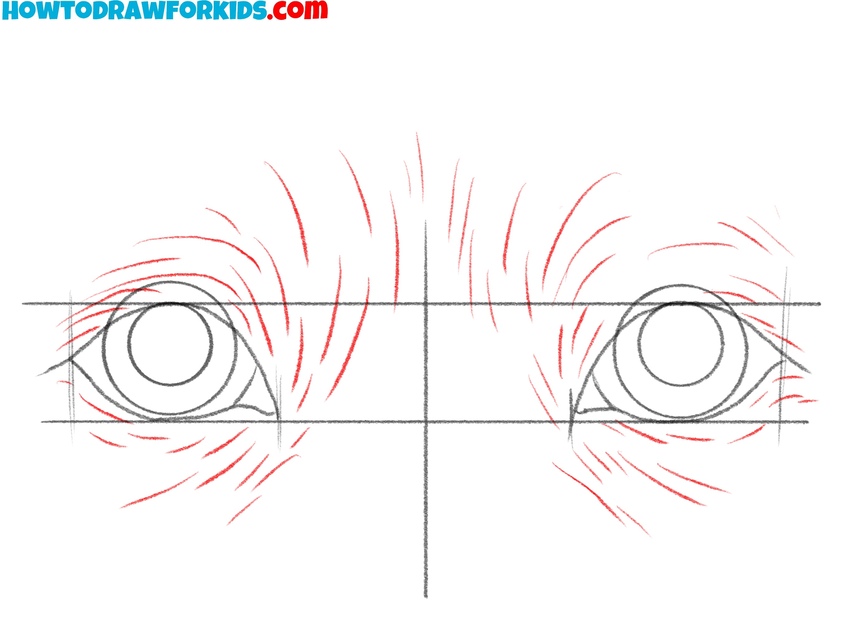
- Finalize the dog eyes sketch.
Refine the lines on the dog eyes drawing, erasing the guidelines sketched earlier. Darken and trace the desired lines to accentuate them and give them a finished look. To make the drawing of dog eyes look more natural, you can add more defined fur strokes around the eyes.
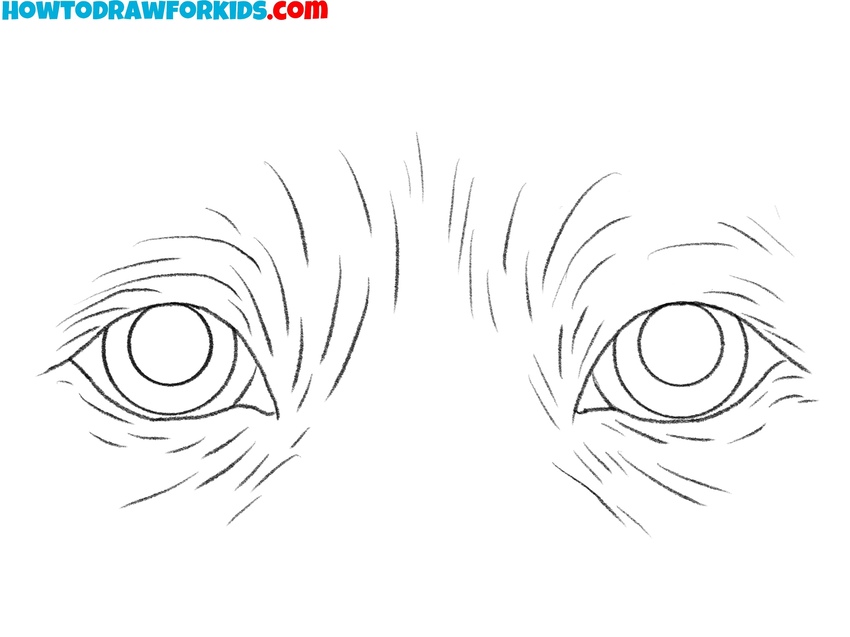
- Color the dog eyes and the fur around them.
Complete your drawing by adding color to the dog’s eyes and surrounding areas. Choose colors for the iris, for example brown or dark gray. Add shading to the fur around the eyes, using natural colors, for example brown, beige or gray. Then, color the pupils black, leaving white highlights.
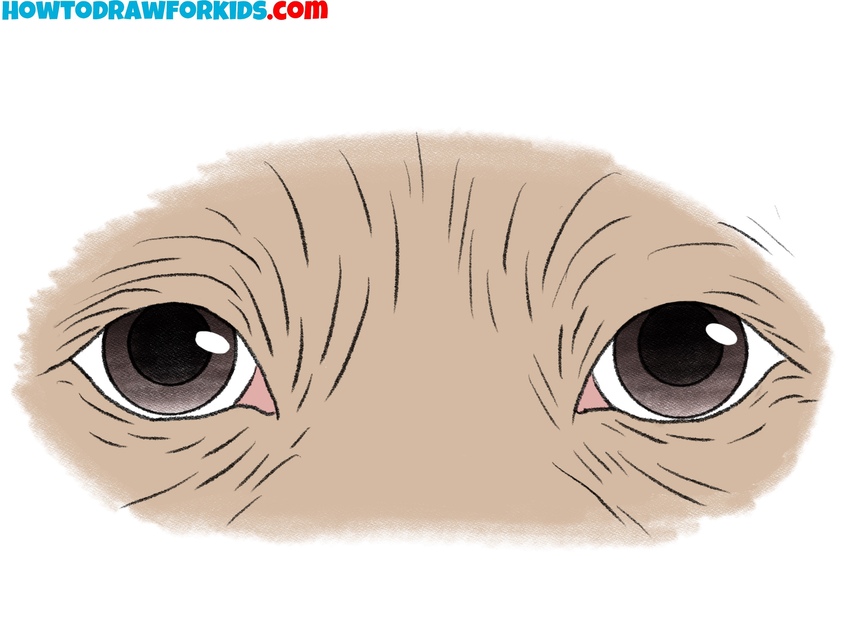
Cartoon Dog Eyes Drawing Tutorial
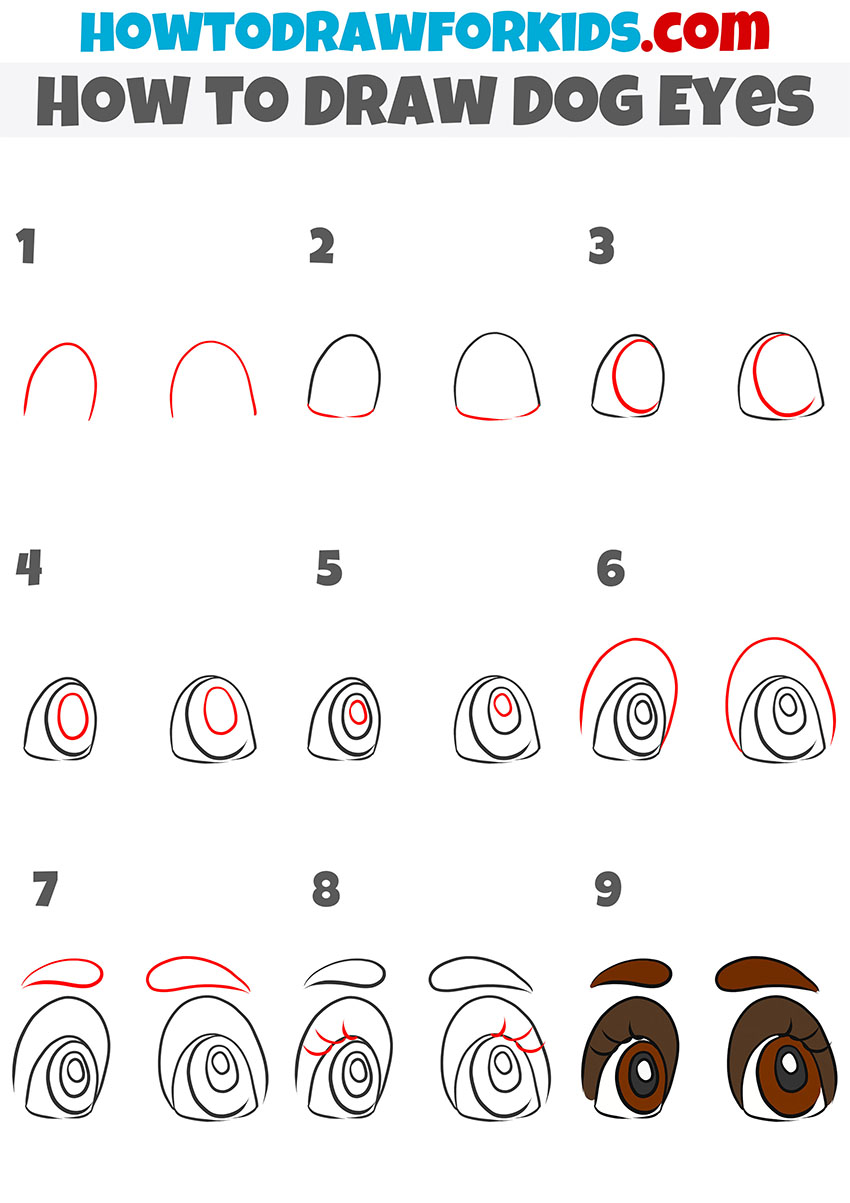
This is an additional tutorial on how to draw dog eyes in a cartoon style, offering a more simplified approach compared to the first tutorial. While the first guide demonstrated realistic details like fur texture and natural eyes shape, this tutorial shows bold outlines and basic shapes to create a cartoonish look. The knowledge gained in this lesson will be extremely useful if you want to learn how to draw a cartoon dog.
Start by sketching two large, arched shapes for the eyes. Add a curved line at the bottom of each shape to define the lower edge. Inside each eye, draw a large circle for the iris and a smaller circle for the pupil in the center. Outline these elements with bold, clean lines to maintain the cartoonish appearance.
Draw an arc above each eye to form the fur of the dog. Add two more arcs above the eyes to create the dog’s eyebrows. Include a few eyelashes to make the dog eyes look more cartoonish, and add small ovals inside the pupils to indicate highlights or reflections. Finish by coloring the pupils, iris, and surrounding areas.
I also want to remind you that for your convenience I have prepared for you a short version of this additional tutorial on how to draw dog eyes in PDF format. You can download this file and return to the lesson at any time, even if you are not connected to the Internet.
Conclusion
So, dear young artists, today we have mastered two tutorials on how to draw dog eyes. First we depicted the dog’s eyes in a simple but quite realistic style, then we learned how to depict this part of the dog in a cartoonish way.
7But don’t forget that this is just one of hundreds of lessons on my site. Using my simple lessons, you will be able to draw eyes of a person, and also learn how to depict different animals, for example, draw a cat in a simple style.
Hope you are happy with the result. Subscribe to me on social networks and leave your comments. If you found this tutorial on drawing dog eyes helpful, feel free to share it with your friends. Your support helps me create more easy and clear step-by-step tutorials for aspiring artists. Let me know if you’d like to see more lessons like this!

