How to Draw Green Arrow
Welcome to a unique artistic adventure where I’ll teach you how to draw Green Arrow, the emerald archer of the comic world, in a style that’s both charming and accessible. My tutorial is designed for ease and fun, breaking down the heroic complexity into simple, friendly shapes, especially tailored for young artists.
How to Draw Green Arrow: Basic Information
Stepping into the world of comic book artistry, I’m excited to present a lesson on how to draw Green Arrow. This character, known for his sharp wit and sharper arrows, will be simplified into a fun, manageable project. My goal is to make the drawing process approachable, particularly for young fans eager to bring their heroes to life.
In this tutorial, we’ll strip down the Green Arrow’s complex vigilante garb to its bare essentials, focusing on broad strokes and fundamental shapes. The hallmark hood and quiver, typically intricate, will be rendered in a style that’s straightforward, ensuring every aspiring artist can achieve success and feel a sense of accomplishment.
Let’s ready our pencils and capture the essence of Green Arrow. The steps I’ve developed will help you draw Green Arrow with confidence and flair. This isn’t just about mimicking an image; it’s about understanding the character and infusing your drawing with the energy and heroism that Green Arrow embodies.
Green Arrow Drawing Tutorial
Materials
- Pencil
- Paper
- Eraser
- Coloring supplies
Time needed: 30 minutes
How to Draw Green Arrow
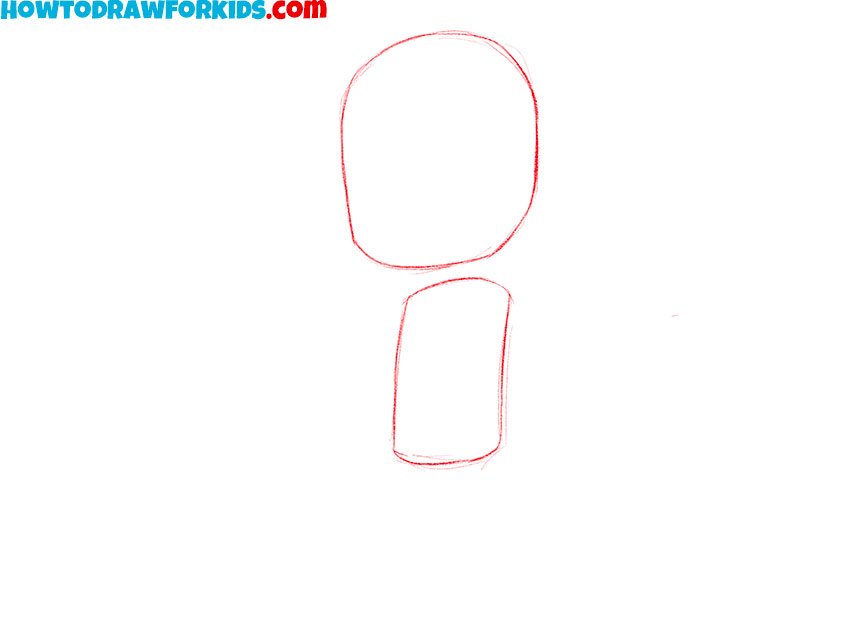
- Depict Green Arrow’s head and body
Draw an oval for the head and a rectangle for the torso, making sure that the proportions are balanced. The oval doesn’t have to be perfect; it’s just a guide for the shape of the head.
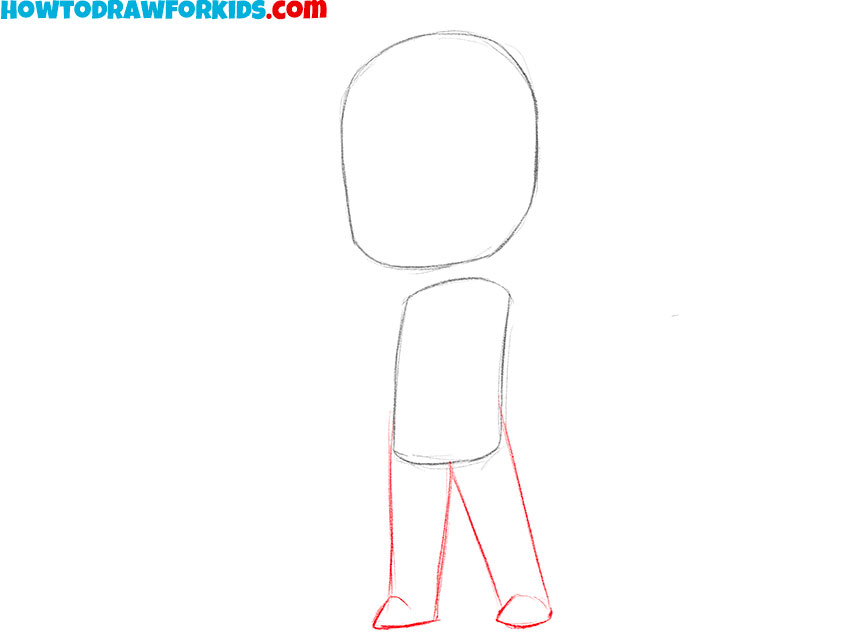
- Add the legs of the Green Arrow
Sketch two lines down from the torso to create the legs, giving a slight bend to suggest knees. These foundational lines are crucial as they define the stance and posture of the character.
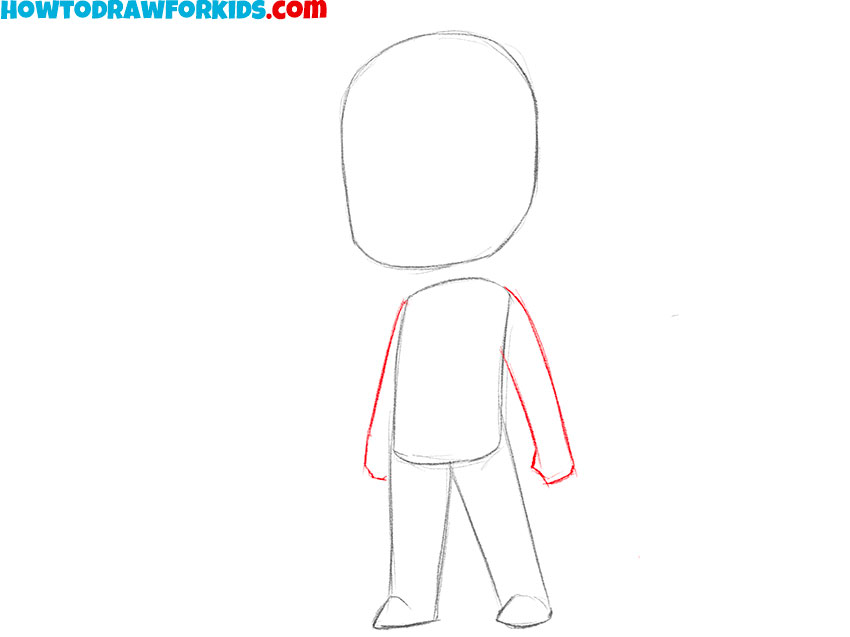
- Draw the arms
Due to the angle, Green Arrow’s arms have slightly different shapes. The hand closest to us looks more complete and clear. The arm behind us is slightly hidden by the body, so we see only one line.
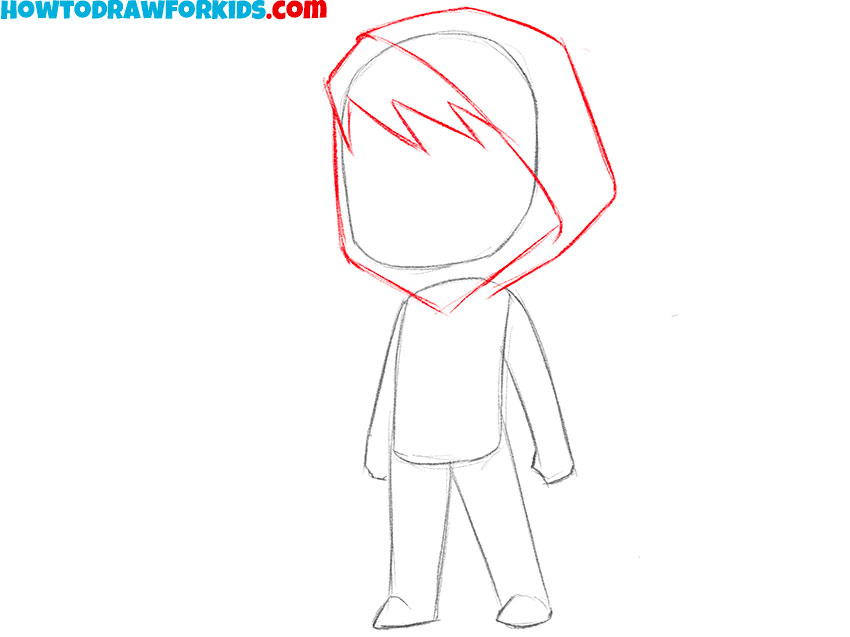
- Add the outline of the superhero’s hood
Outline a hood shape around the head, making sure it drapes naturally over where the face would be. Draw the hair peeking out from the front of the hood with jagged lines.
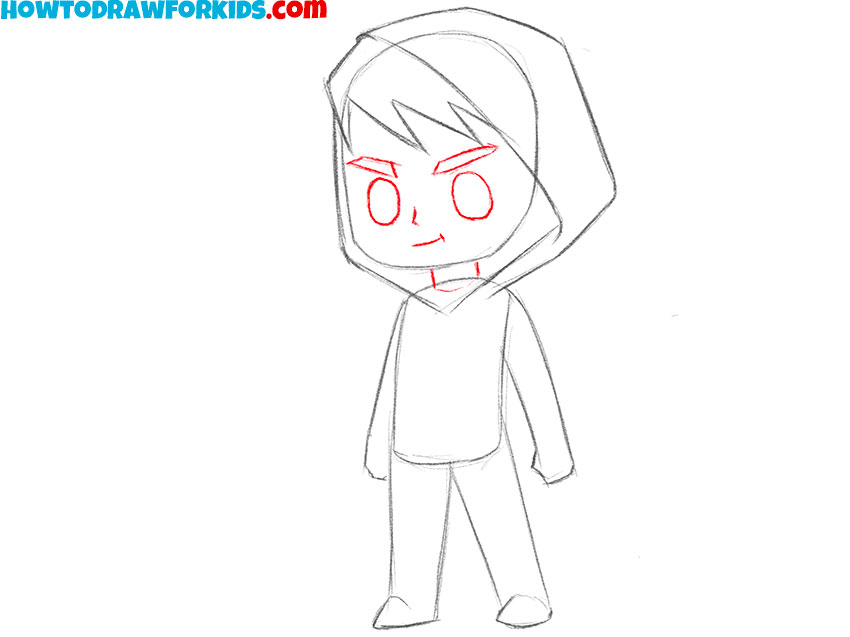
- Draw facial features
Sketch out large oval eyes. Add eyebrows slanted downwards towards the center to intensify the expression. Sketch the outline of the nose and a firm mouth.
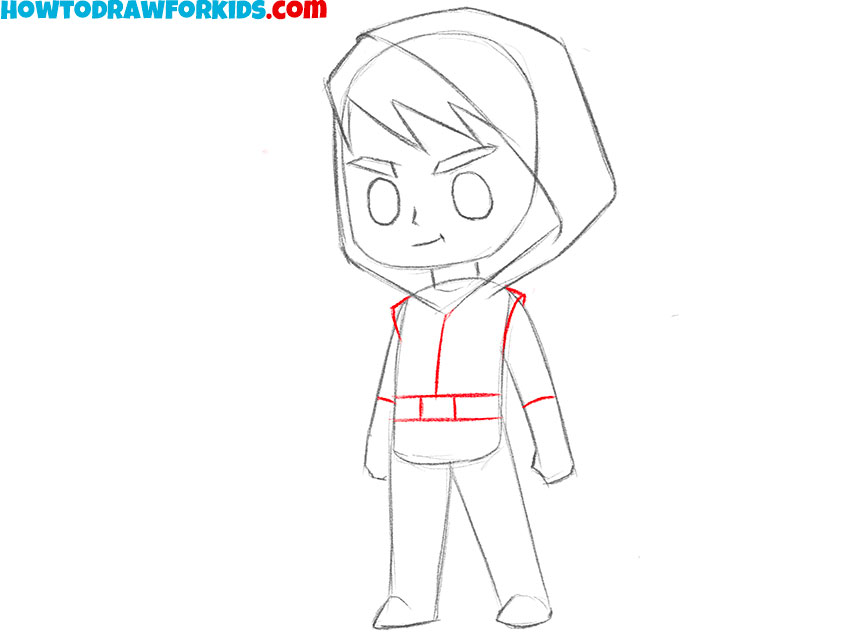
- Draw Green Arrow’s belt
Start drawing out the details of Green Arrow’s costume. Add flowing belt contours, bracelets and short sleeves as corners at the upper torso.
- Add a Quiver of Arrows
Develop the costume further by drawing the boots. Add the quiver slung over the shoulder, represented by a cylinder shape, and sketch in several arrows.
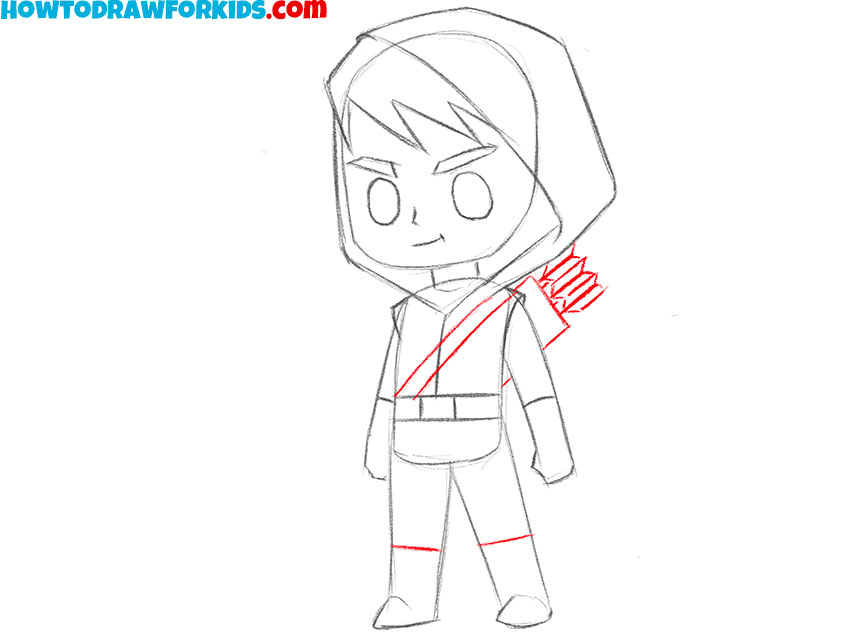
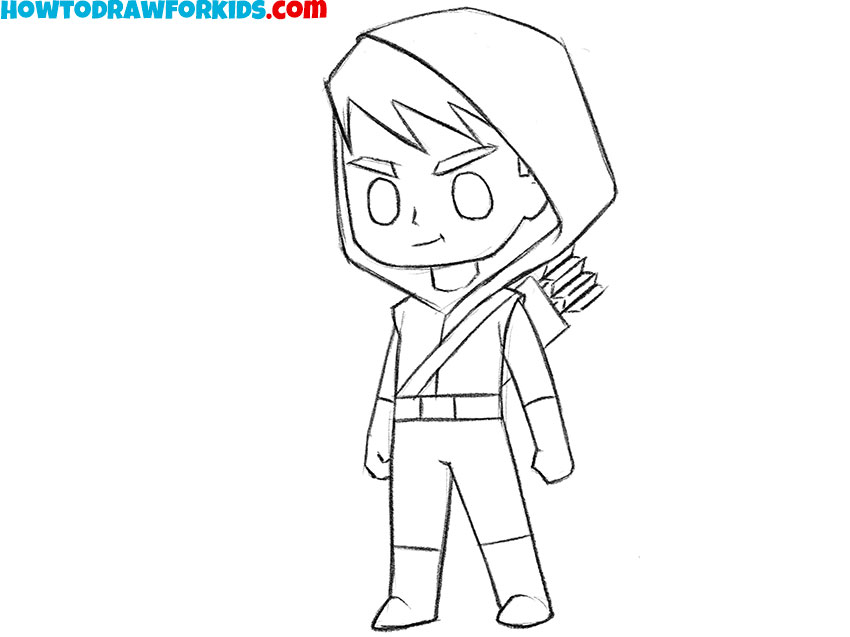
- Add the outlines of the character’s legs.
Clean up any excess sketch lines to prepare for the final step. Evaluate the entire image of Green Arrow before coloring, identify any inaccuracies and correct them.
- Color the drawing
Finalize the drawing by coloring your Green Arrow. Use shades of green for the suit – for example, you can add darker tones to create shadows and depth.

Watch the Full Video Tutorial
Additional Content
Accompanying our art lesson, I’ve carefully put together a free PDF file tailored for drawing Green Arrow. This document is meant to complement your learning, providing a compact version of the tutorial that’s ideal for offline practice, designed to be at your side whenever inspiration strikes.
The PDF is structured to guide you through each stage of the drawing process, outlining Green Arrow’s distinct features with clarity. It’s an at-a-glance manual that encapsulates the core techniques of the lesson, ensuring that you have the essentials on hand to practice anywhere, anytime.
By downloading this PDF, you ensure that the ability to draw Green Arrow is never out of reach. It’s a resource meant to be revisited, strengthening your skills with each use. Let this be a steadfast companion on your path to becoming adept at bringing comic book characters to life through your art.
Precision Tips for Your Green Arrow Drawing
As we lay down our pencils, closing the chapter on our Green Arrow drawing, it’s vital to cast an eye toward future growth. With each new project, our skills sharpen, much like the arrows in our hero’s quiver. Here are some tailored suggestions to help refine your art and enhance the techniques you’ve begun to develop in this lesson:
- Refine Your Line Work: Practice drawing clean, confident lines. Green Arrow’s costume, with its sleek design, is perfect for honing this skill.
- Experiment with Shading: To add depth to your Green Arrow drawings, experiment with various shading techniques, like cross-hatching or blending, to create the illusion of light and shadow.
- Incorporate Action Poses: Challenge yourself by drawing Green Arrow in different action poses. This will not only bring dynamic energy to your art but also improve your understanding of human anatomy and movement.
- Explore Color Usage: Green Arrow’s costume offers a unique opportunity to practice coloring within defined lines and experimenting with shades to create texture and depth.
- Try Different Mediums: Don’t limit yourself to pencils. Experiment with markers, ink, or even digital painting to see how different tools can affect the style and outcome of your drawing.
In pursuit of improvement, let’s remember that each stroke is a step toward mastery. Keep these tips as arrows in your artistic quiver, ready to be drawn whenever you embark on your next drawing quest. May your dedication to the craft bring as much joy and satisfaction as the vigilant watch of our emerald archer.
Steering Clear of Green Arrow Drawing Mistakes
In every artist’s quest to capture the likeness of a hero like Green Arrow, it’s natural to encounter a few stumbling blocks along the way. Here’s a compilation of frequent hurdles that you might face and how to gracefully leap over them:
- Overlooking Proportions: Even in stylized drawings, maintaining correct proportions is key. Green Arrow’s head should not be too large for his body, nor his limbs too long or short.
- Neglecting the Details: While simplicity is our mantra, certain details like the feathering of the arrows or the fold of the hood should not be ignored as they add character to our hero.
- Ignoring Posture: Green Arrow is known for his poised and ready stance. A common mistake is to draw him too rigid or without the natural curvature of the spine.
- Misplacing the Quiver: Often, the quiver is drawn either too high or too low on his back. It should sit comfortably between his shoulder blades, angled slightly.
- Flat Coloring: A vibrant character like Green Arrow deserves more than flat colors. Failing to add varying tones can result in a less dynamic drawing.
With attention to these common pitfalls, your path forward is clear, leading to drawings of Green Arrow that not only capture his likeness but his spirit too. Keep these notes in your quiver, ready to be used when you next face the drawing board. With practice and patience, your art will soon hit the bullseye every time.
Conclusion
Completing our Green Arrow guide opens the door to countless other artistic endeavors. On my site, you’ll find tutorials ranging from the tranquility of a water droplet to the festive sparkle of a disco ball. These lessons invite you to broaden your artistic horizons and embrace new challenges.
Don’t miss out on future artistic explorations – ensure you’re following my social media channels for all the latest updates and content previews. Your thoughts and suggestions are the heartbeat of our community, so please leave your comments and ideas for new lessons beneath this tutorial.