How to Draw Headphones
Now it’s time to learn how to draw headphones, one of the most popular and favorite devices among music lovers of all ages.

How to Draw Headphones: Introduction
Headphones come in many different types, ranging from quite archaic styles to modern designs. In this lesson, I’ll demonstrate how to draw headphones featuring a classic style, specifically with two ear pads connected by a headband across the top.
In my example, the headphones will be minimalistic, without wires or complex design elements. If you’d like, you can easily add logos, decorative patterns, or extra details later during your drawing process. This gives you the flexibility to personalize your drawing and practice creative additions as you learn how to draw headphones.
To achieve a realistic appearance, we’ll draw both sides of the headphones simultaneously. This approach helps in keeping both ear cushions equal in size and symmetrical in shape. Drawing both sides together makes it easier to maintain consistency, which is,very important for accurately representing symmetrical objects like headphones.
To avoid mistakes while drawing both sides, regularly check the symmetry of your headphones drawing. Pay close attention to the shapes, sizes, and angles on each side, carefully comparing them as you progress to maintain consistency and ensure that both sides remain symmetrical and accurate.
Headphones Drawing Tutorial
Materials
- Pencil
- Paper
- Eraser
- Coloring supplies
Time needed: 25 minutes
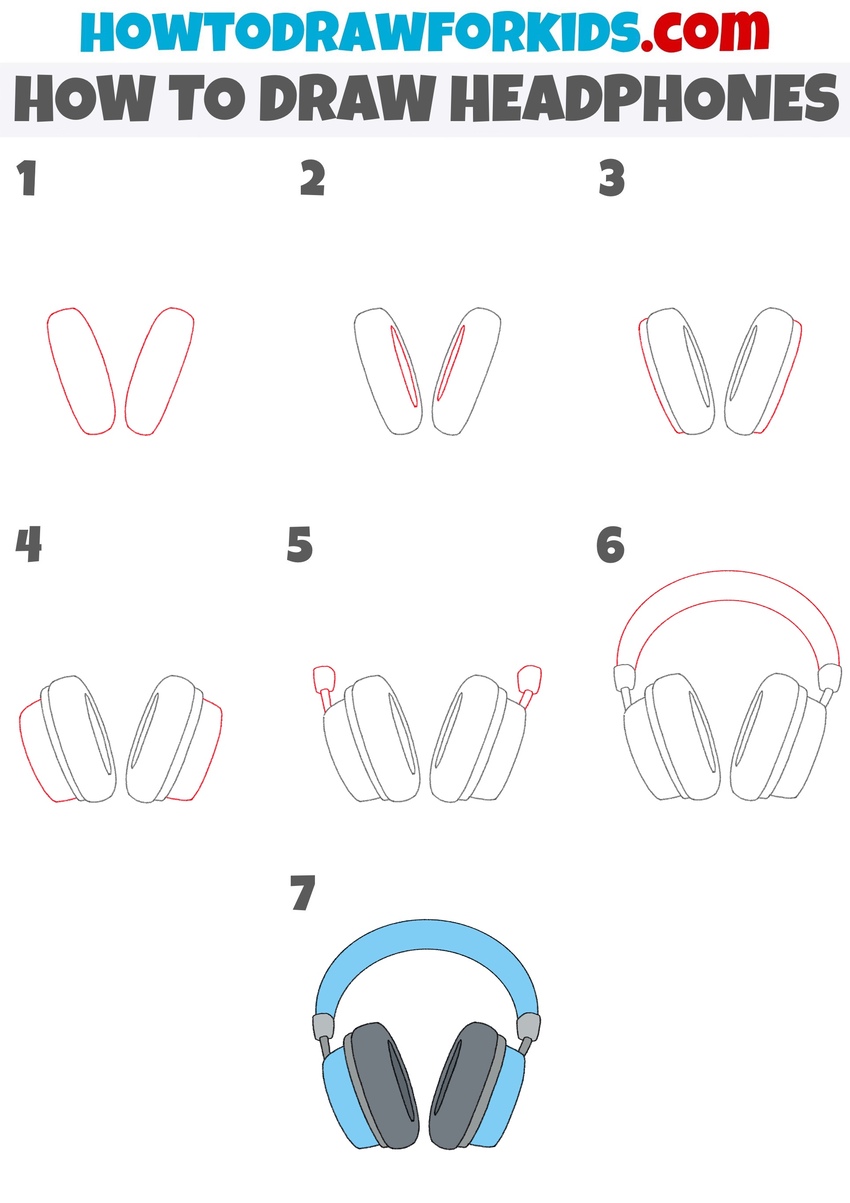
How to Draw Headphones
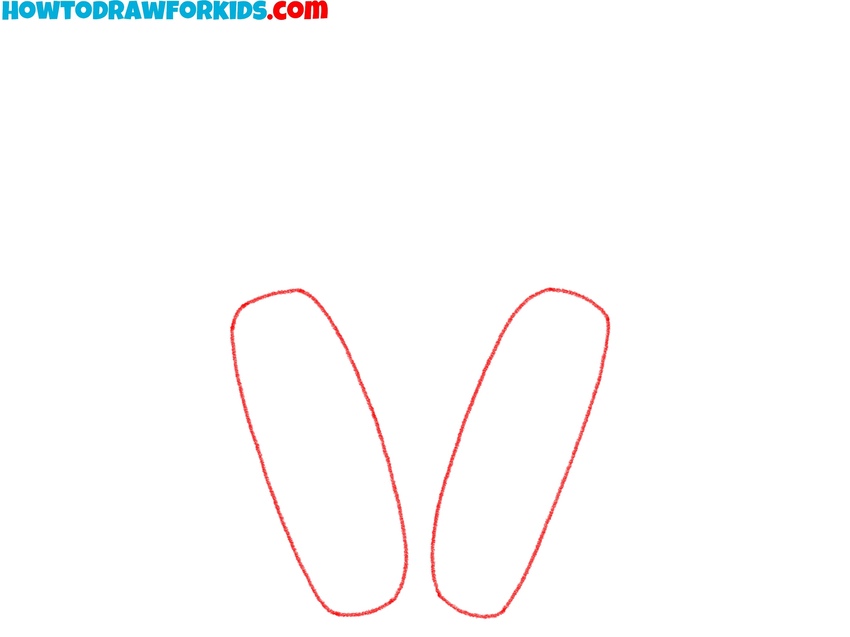
- Sketch the ear cushions.
Sketch two elongated oval shapes positioned diagonally toward each other. These shapes form the ear cushions, which are the part of the headphones that sit directly over the ears. Both shapes should be slightly tilted, mirroring each other to maintain symmetry. Keep the outlines neat, without excessive detail.
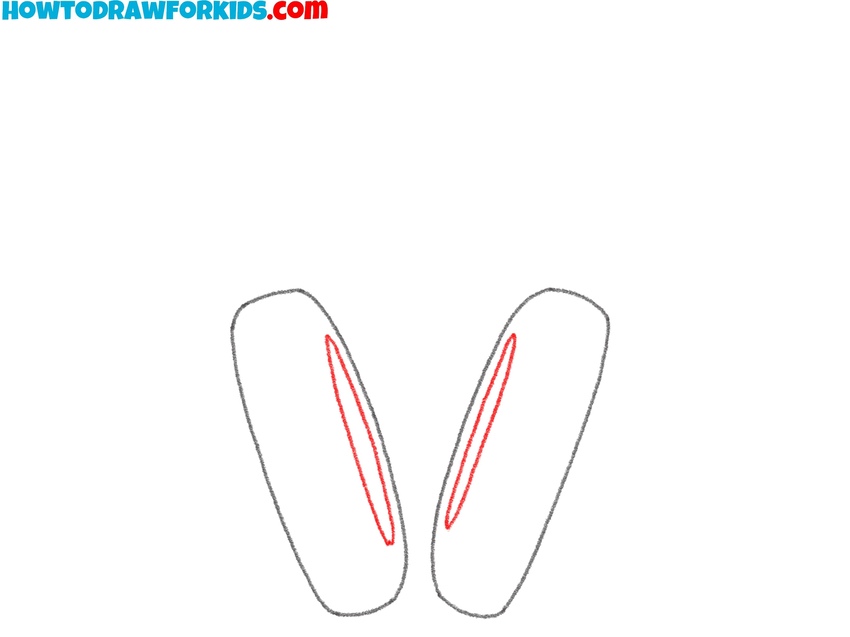
- Draw the inner parts of the cushions.
Next, add smaller ovals inside each ear cushion, clearly indicating the soft padding area. These inner shapes follow the outer ovals closely, maintaining an equal distance from their edges. Both inner ovals should match in size, shape, and positioning. Regularly check symmetry between the left and right sides.
- Add the middle part of the ear cups.
Draw curved lines along the edges of the ear cushions, clearly indicating the padding that separates the cushions from the outer sides. Maintain a consistent distance between the inner cushions and the newly drawn lines. Regularly check alignment and proportion to make sure both ear cups match accurately.

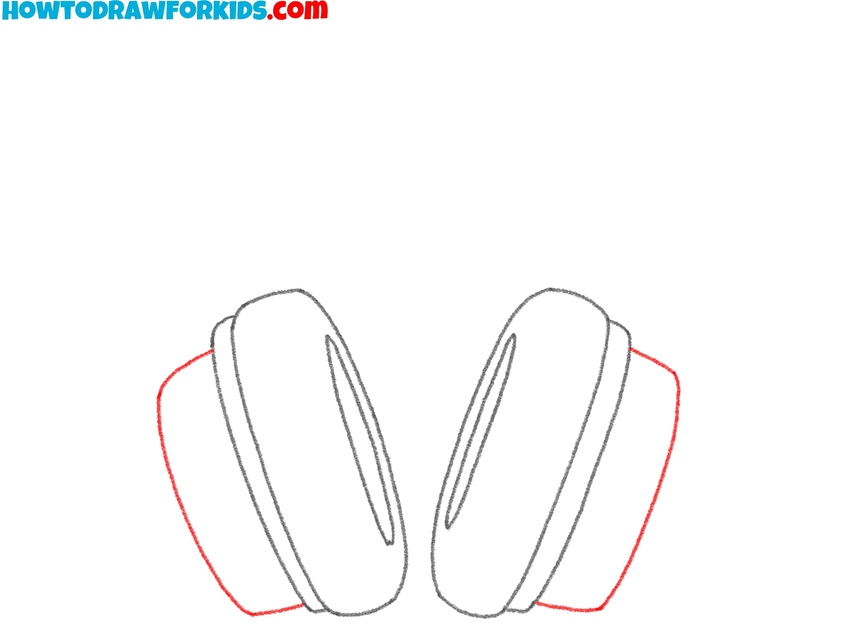
- Outline the outer sides of the ear cups.
In this step, carefully add thickness to your headphones by sketching the outer sides of each ear cup. Draw curved lines around the sides of the previously drawn shapes, showing volume. These side outlines will give the ear cups a three-dimensional appearance.
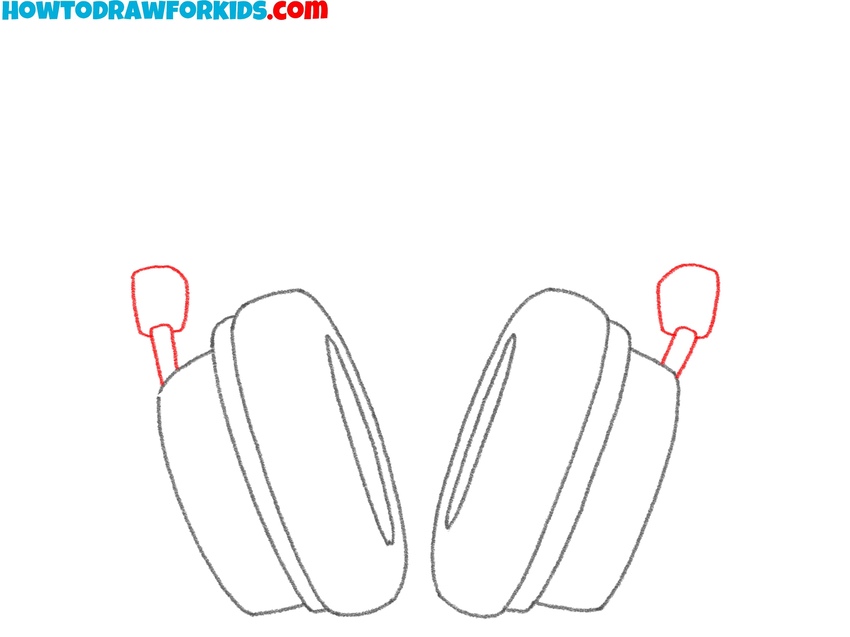
- Draw the headphones connectors.
Now draw small connectors on top of each ear cup, which attach the headband. Sketch these elements as short, slightly angled shapes ending with rounded rectangles. These small connector pieces clearly illustrate how the headband attaches to the ear cups. Both sides must match perfectly.
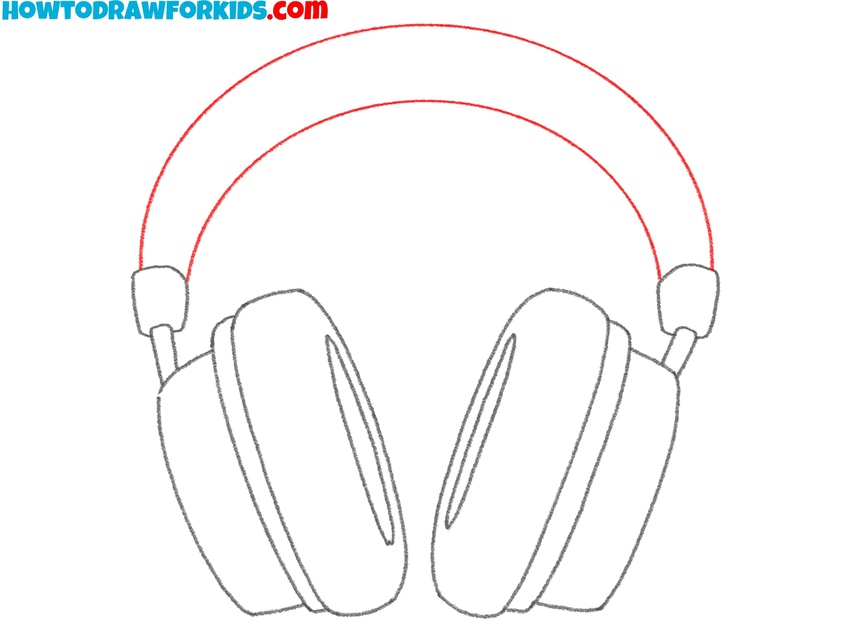
- Draw the headband.
Draw two smooth, rounded lines arching from one connector across to the other. This curved headband should appear simple and symmetrical. Regularly verify the curve’s smoothness and symmetry, adjusting the lines as needed. Avoid heavy or overly detailed outlines.
- Color the headphones.
Select suitable colors, such as shades of blue, grey, or other colors of your choice, for the headband and ear cups. Consider using slightly darker shades on sides or inner areas to make the drawing of headphones look more realistic.

How to Draw Headphones: Additional Tutorials
In this lesson, you’ve learned how to draw headphones using a classic, step-by-step approach. To further improve your skills and try different drawing styles, I suggest checking out two additional headphone drawing tutorials below. These extra lessons demonstrate alternative methods, from more alternative versions to the simplest method suitable even for preschoolers. Choose the tutorial that best matches your drawing preferences and continue practicing.
Alternative Headphones Drawing Tutorial
This tutorial on how to draw headphones shows a simpler approach with fewer details and clearer shapes compared to the previous tutorials. It creates the general structure first and then progressively adds necessary elements without complicating the drawing process. It noticeably differs by beginning with the headband and outlines each component in straightforward steps.
Begin by sketching the basic shape of the headband, creating a smooth curved line with a clear arch. Next, draw an inner contour parallel to this first outline, forming the padded portion of the headband. Continue by adding rounded ear cups, starting from one side, attaching them to the ends of the headband. Ensure that both sides are symmetrical in size and position.
Gradually complete each ear cup shape by connecting lines and outlining the edges. Draw additional smaller shapes on each side of the ear cups to illustrate cushioning. Finish the structure by adding curved connecting elements where the headband meets each ear cup. Lastly, color the headphones drawing with simple, clean colors, such as blue for the headband and gray for the cushions.

Headphones Drawing Tutorial for Preschoolers
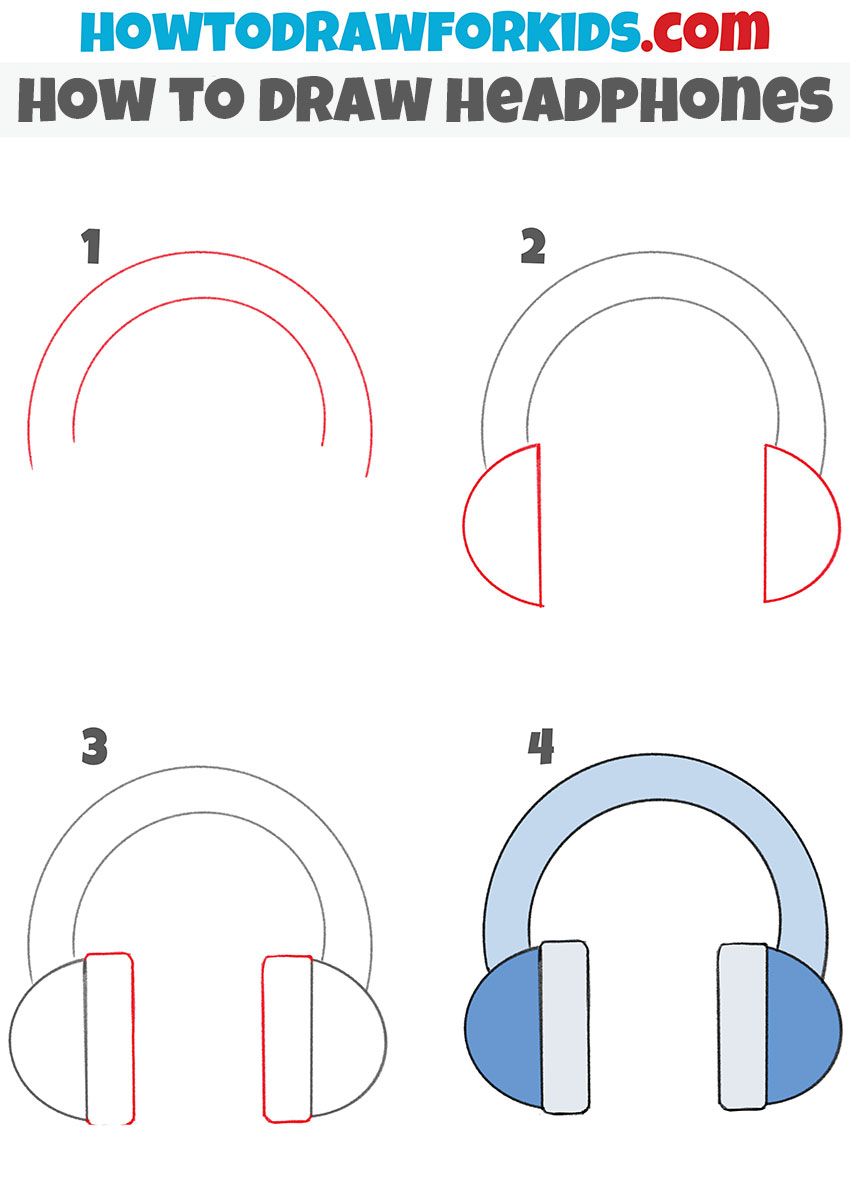
This method shows how to draw headphones in the simplest way. Unlike the first tutorial, this version significantly reduces details and simplifies shapes. It uses basic geometric forms, avoiding complicated curves and parts. The headphones are depicted in a flat, two-dimensional style with very minimalistic elements, which makes the process easy for young children to follow and replicate.
Begin by drawing the headphones with two large, parallel curved lines forming the headband. Make the lines neat and evenly spaced to represent the basic shape. Next, sketch two simple half-circle shapes, one at the end of each headband side, forming the ear cups. Keep these shapes identical in size and position. Then, carefully add rectangular shapes to each ear cup, representing the padding area that covers the ears.
Make sure both rectangles have the same proportions, and regularly check alignment for accuracy. Once all outlines are neat and symmetrical, color your headphones. Select gentle, bright colors like blue for the headband and ear cups, adding contrasting shades for the inner padding. This final drawing illustrates how to draw headphones using the easiest possible shapes.
Conclusion
Today we’ve learned how to draw headphones that have a classic, somewhat old-school appearance. Now, it’s time to further strengthen your drawing skills and practice creating symmetrical shapes. Try to draw a human head wearing headphones. While drawing, aim for the most symmetrical and accurate result possible by applying the skills you’ve learned today.
This additional exercise will help you practice symmetry even more effectively, reinforcing your understanding of balanced shapes. Remember, you can find various drawing tutorials on my website to continue practicing and improving your drawing skills.
I encourage you to take your time, check symmetry frequently, and enjoy the process as you further enhance your artistic abilities. Keep experimenting with different forms and details, building upon the foundational skills demonstrated in today’s lesson on how to draw headphones.