How to Draw Huggy Wuggy
Learn how to draw Huggy Wuggy with my step-by-step tutorial. Follow detailed instructions, enhance your art, and use practice worksheets to perfect your skills.
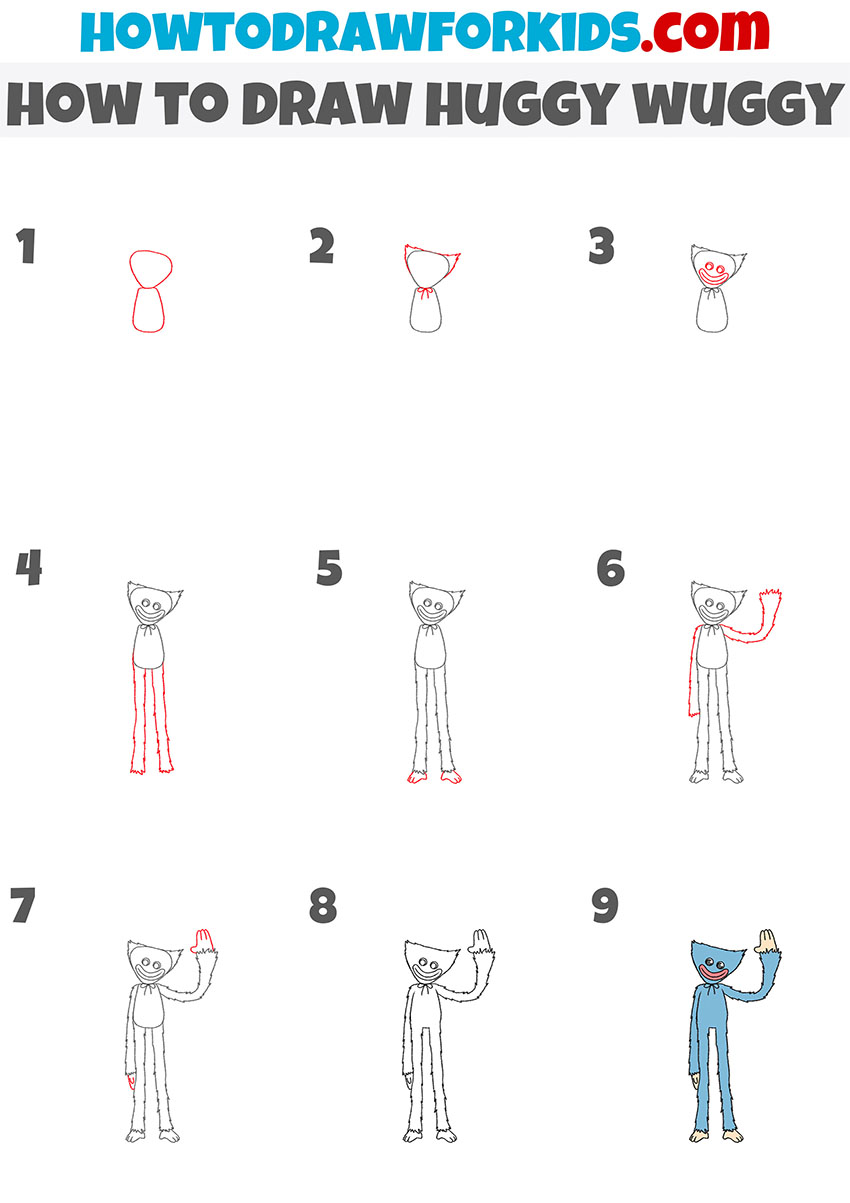
Basic Information: How to Draw Huggy Wuggy
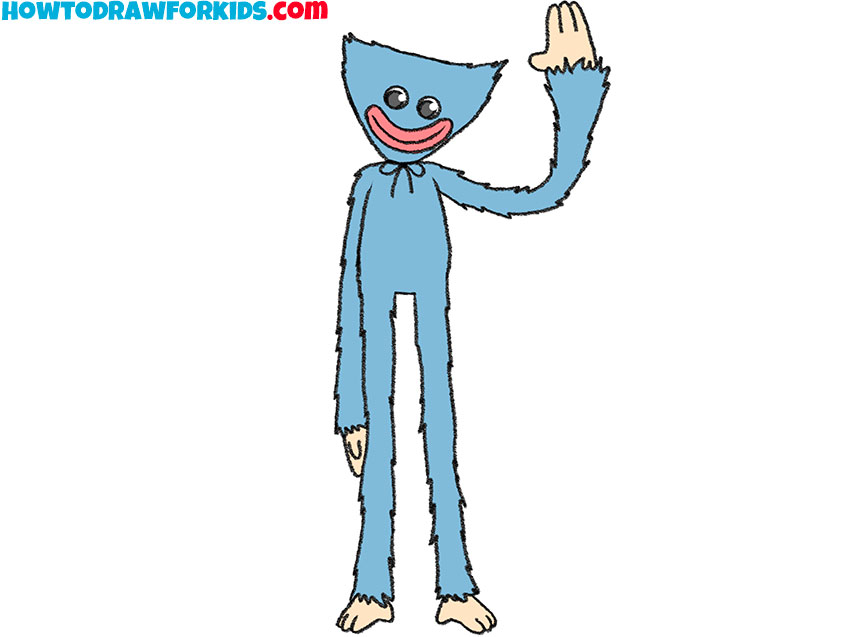
Today, I’m super excited to share with you a fun and easy way to on how to draw Huggy Waggy. With his long limbs and distinctive smile, this Huggy Wuggy drawing tutorial will be really enjoyable and interesting.
This character has a particular look, with his oversized head and wide, toothy grin that makes him stand out. In this Huggy Wuggy drawing tutorial, we’ll start with the basic shape of the head and body, and then add those signature long arms and legs.
At the end of the page, I’ll share tips on making your Huggy Wuggy drawing even more interesting and unique. Additionally, I’ll provide a PDF with extra materials, including the illustrations to the steps of the tutorial, coloring pages, tracing worksheets and a grid drawing worksheet.
Remember to capture the eerie vibe of Huggy Wuggy with his large, expressive eyes and his famous blue fur. By breaking down the process into simple steps, you’ll see how approachable drawing this character can be. So grab your pencils, and let’s learn how to draw Huggy Wuggy!
Huggy Wuggy Drawing Tutorial
Materials
- Pencil
- Paper
- Eraser
- Coloring supplies
Time needed: 35 minutes
How to Draw Huggy Wuggy
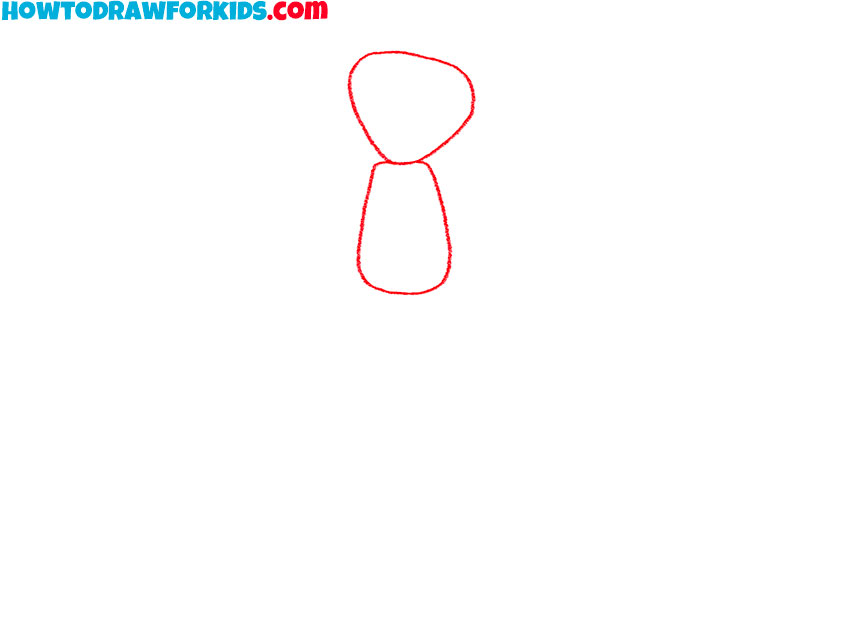
- Sketch the head and torso of Huggy Wuggy.
Draw a simple oval shape for the head, slightly flat at the top and pointed at the bottom for a unique look. Below the head, draw a larger, elongated oval shape for the torso. This foundational step helps establish the overall structure and proportions of Huggy Wuggy, setting the stage for more detailed features.
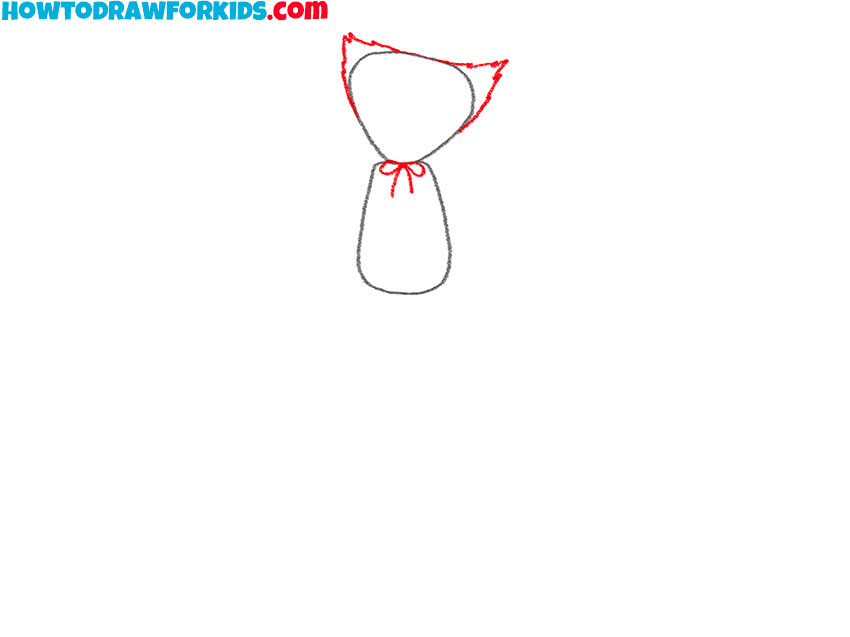
- Draw the ears and tie.
Draw two triangular shapes on either side of the head for the ears, ensuring they are pointy and slightly curved. Below the head, at the top of the torso, sketch a small bow tie by drawing two triangles connected at their points.
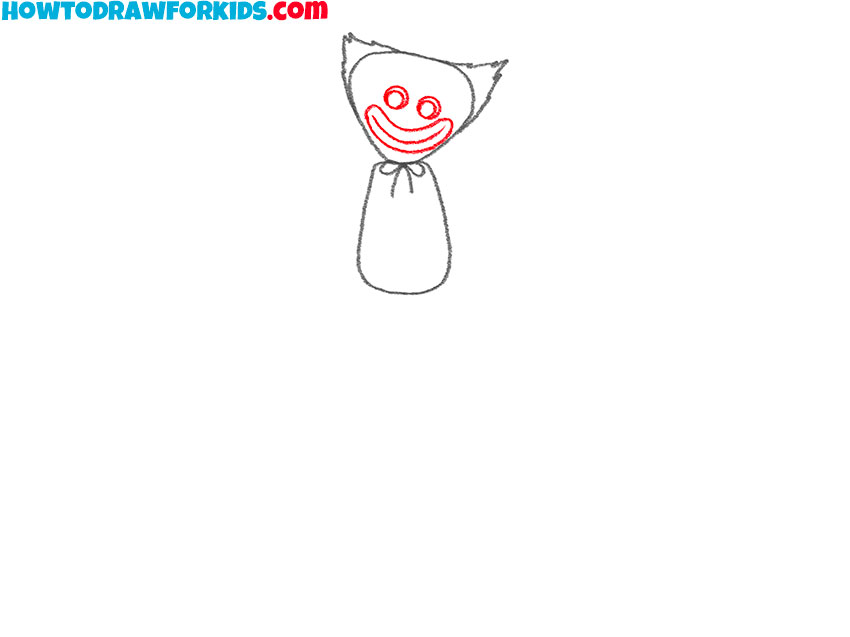
- Add the details of the face.
Draw two large, round circles for the eyes, positioning them near the center of the head. Inside these circles, add smaller circles for the pupils. Below the eyes, sketch a wide, smiling mouth. These facial features give Huggy Wuggy a creepy expression.
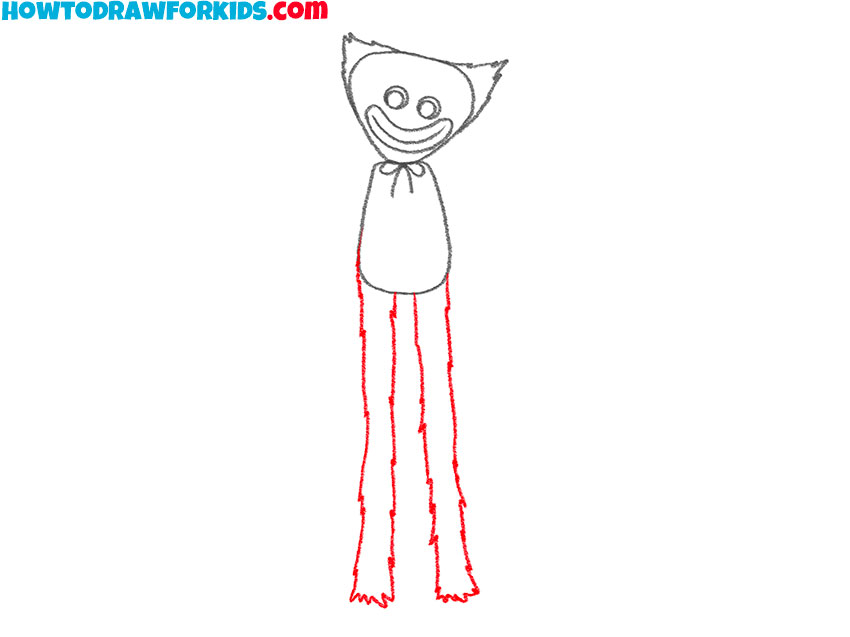
- Draw the legs of Huggy Wuggy.
Start from the bottom of the torso and draw two long, slightly wavy lines for each leg, extending downwards. The lines should be parallel and close together, giving the legs a thin, elongated appearance. The lines should be smooth, which gives the contours a shaggy look.
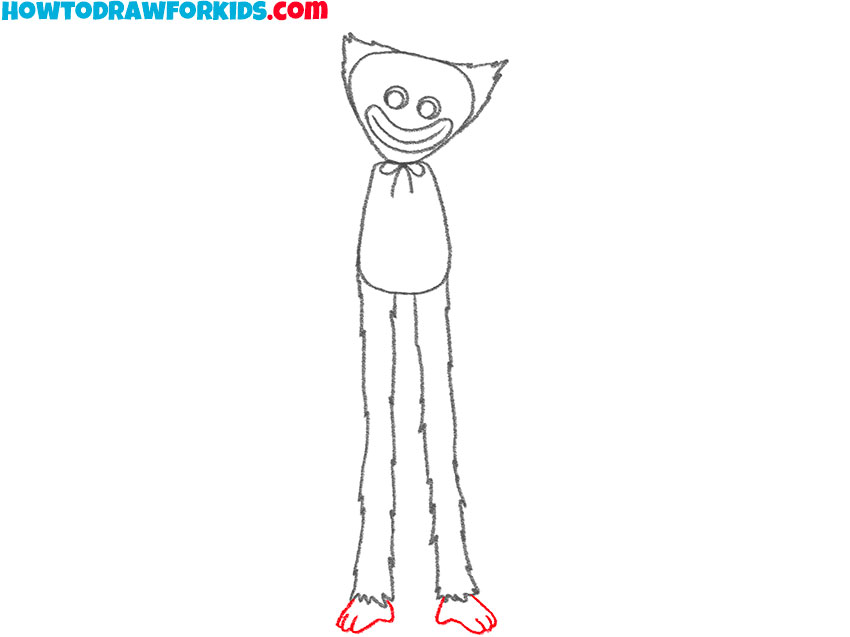
- Illustrate the feet.
Draw small shapes at the end of each leg to represent the feet. Huggy Wagga’s feet should look like hands. Overall, this character’s body should in many ways resemble that of a very lanky, skinny monkey. The feet should have a clear division into big toes and other toes.
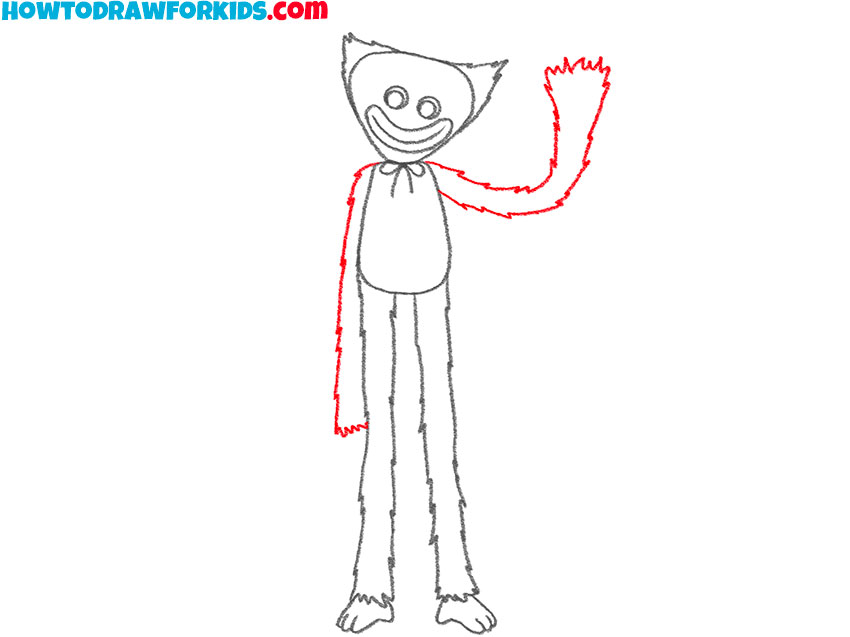
- Draw the arms of Huggy Wuggy.
Start from the shoulder area on the sides of the torso, drawing long, wavy lines extending outward for each arm. The arms should be slender and match the style of the legs, with a similar length and slight waviness to maintain consistency.
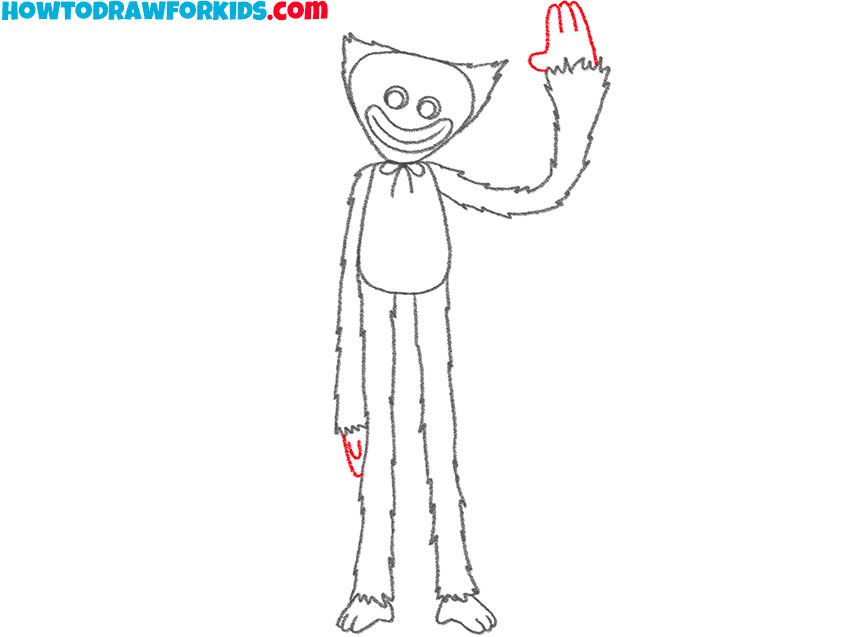
- Add the hands.
Now that you have the arms in place, it’s time to draw Huggy Wuggy’s hands at the ends of each arm. At the end of each arm, sketch hands by drawing rounded shapes to represent the palms. From these palms, extend four slightly curved lines outward to form the fingers.
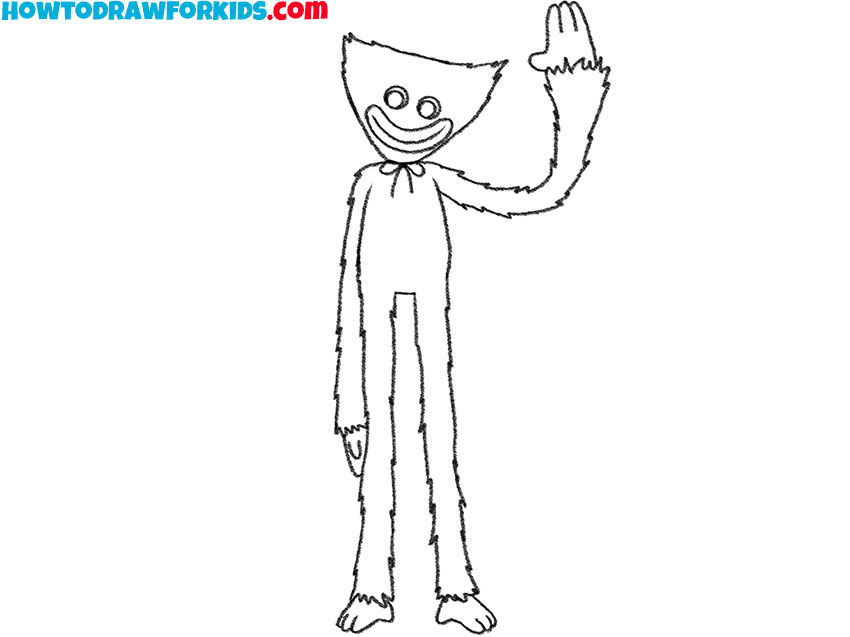
- Check the Huggy Wuggy drawing.
Take a moment to review the entire drawing, checking for proportion, symmetry, and consistency in the details. Look closely at the alignment and length of the limbs, the positioning of the facial features, and the overall balance of the character.
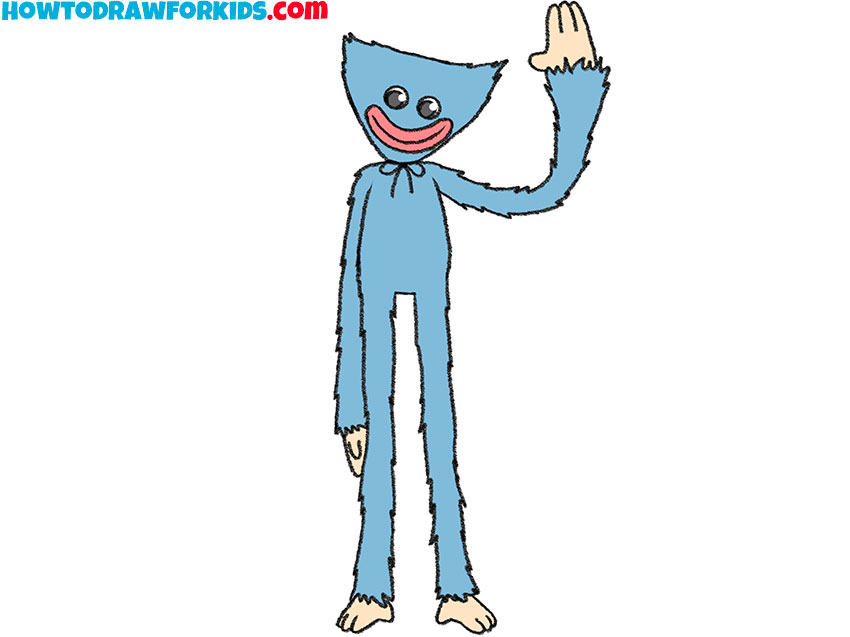
- Color your artwork.
Use a bright blue color for the fur covering the head, body, arms, and legs. This vibrant blue should be applied evenly. Use white for the eyes, black for the pupils and red for the lips to highlight these features and create contrast against the blue fur.
Additional Materials
I’d like to point out the opportunity to download a free PDF guide of my drawing lesson. Inside this guide, you’ll find a summarized version of the tutorial. Furthermore, this handy file can serve as a great practice tool. Also this PDF file includes a coloring page, a tracing worksheet, and a grid drawing worksheet.
These resources are created to help you practice and refine your drawing skills. The coloring page allows you to experiment with colors, the tracing worksheet aids in understanding proportions, and the grid drawing worksheet helps break down complex shapes.
Tips for Creating a Funnier Character
Even though Huggy Wuggy is often seen as a villainous character, it’s undeniable how many children adore him. Everyone wants to draw this character and everyone wants to make their drawing unique and interesting. That’s why I’d like to offer you some more info on how to make your Huggy Wuggy drawing even better.
For example you can add a detailed background to enrich your drawing. Consider creating a some environment that complements Huggy Wuggy’s drawing. You could illustrate a vibrant playroom filled with toys, a magical forest with towering trees and mystical creatures, or even an imaginative landscape with floating islands and colorful skies.
Introduce other characters or creatures interacting with Huggy Wuggy. These could be friends, family members, or fantastical beings. You might draw a cute, cuddly pet companion, or other characters from the same universe, engaging in activities together.
Equip Huggy Wuggy with various fun accessories. Think about adding a quirky hat, stylish glasses, or a cozy scarf. These small details can significantly enhance the character’s uniqueness. For example, a top hat can give Huggy Wuggy a sophisticated look, while a pair of goofy glasses can add a touch of humor.
Experiment with different poses to show Huggy Wuggy in dynamic action. Instead of a static pose, consider illustrating the character in mid-jump, dancing, or interacting with objects around them. Action poses can bring energy and life to your drawing.
Conclusion
As we come to the end of this Huggy Wuggy drawing tutorial, I truly hope you found it both enlightening and enjoyable. Tackling the unique aspects of Huggy Wuggy’s design might initially seem daunting, but with persistence and repeated practice, you’ll certainly see improvement.
Through this tutorial, you have learned how to draw Huggy Wuggy by following a series of detailed steps, starting with the basic structure and gradually adding intricate details. You’ve discovered how to create expressive facial features, add dynamic limbs, and incorporate texture for a realistic furry appearance. Additionally, you’ve explored creative ways to enhance your drawing by experimenting with backgrounds, accessories, and poses.
Don’t forget to check out other tutorials for interesting characters on my website. To stay updated on new releases, follow me on social media. Continue drawing, keep pushing boundaries, and above all, let yourself enjoy the drawing process.

