How to Draw Jupiter
Especially for lovers of space and exploring the depths of the universe, I have prepared two methods that will teach you how to draw Jupiter.

Now I will show you how to draw Jupiter. It is the fifth planet from the Sun in our solar system. Jupiter is huge, many times the size of our planet.
It is known that Jupiter rotates very quickly around its axis and a day on this planet is much shorter than a day on Earth, but one year lasts a very long time. Jupiter does not have a solid surface because this planet is made up of gas and liquid. When viewed through a telescope, Jupiter looks like a ball of white or cream color.
A closer look reveals that this planet is covered in white, red, brown, and orange clouds. It looks very nice. I think you will be interested in drawing this giant after you have learned some facts.
This lesson consists of nine simple steps that you can easily repeat. Try to draw a smooth outline of Jupiter, and you will draw the rest of the elements without much effort since arbitrary lines are allowed here.
Materials
- Pencil
- Paper
- Eraser
- Coloring supplies
Time needed: 20 minutes
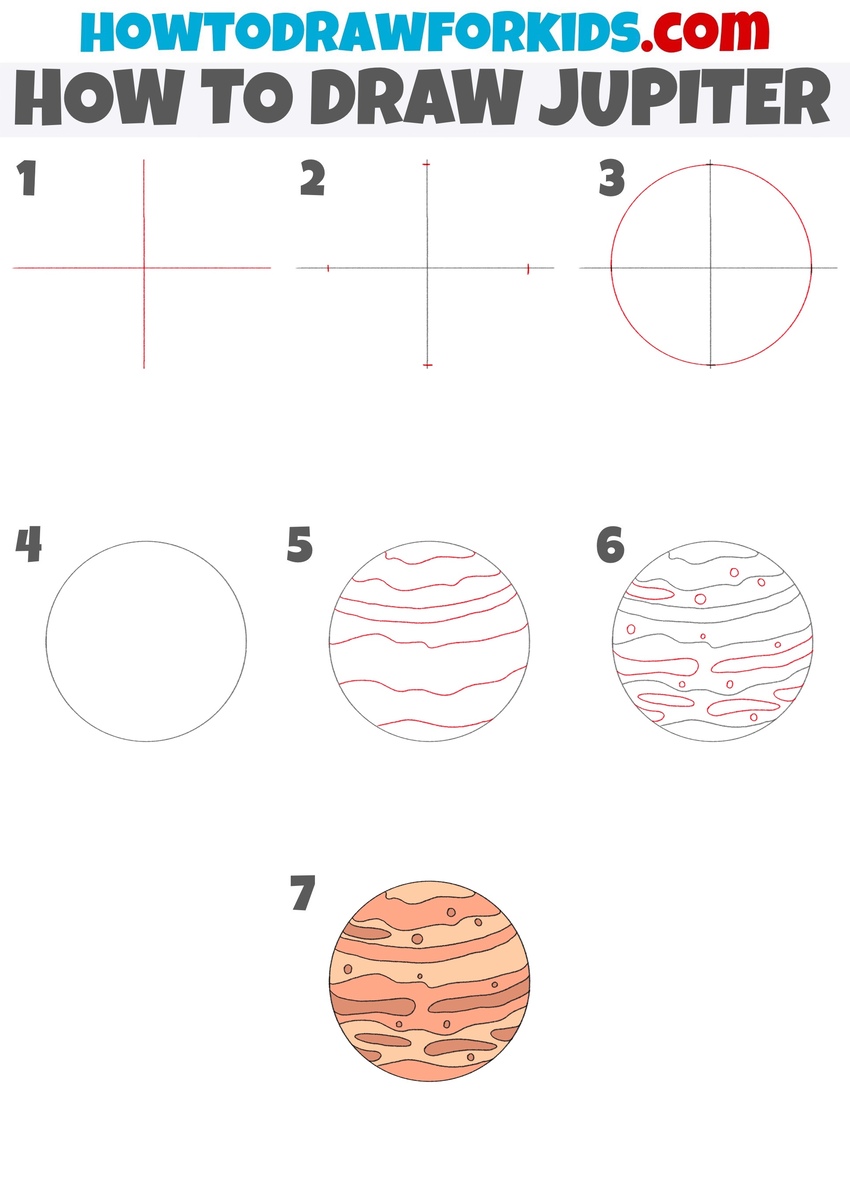
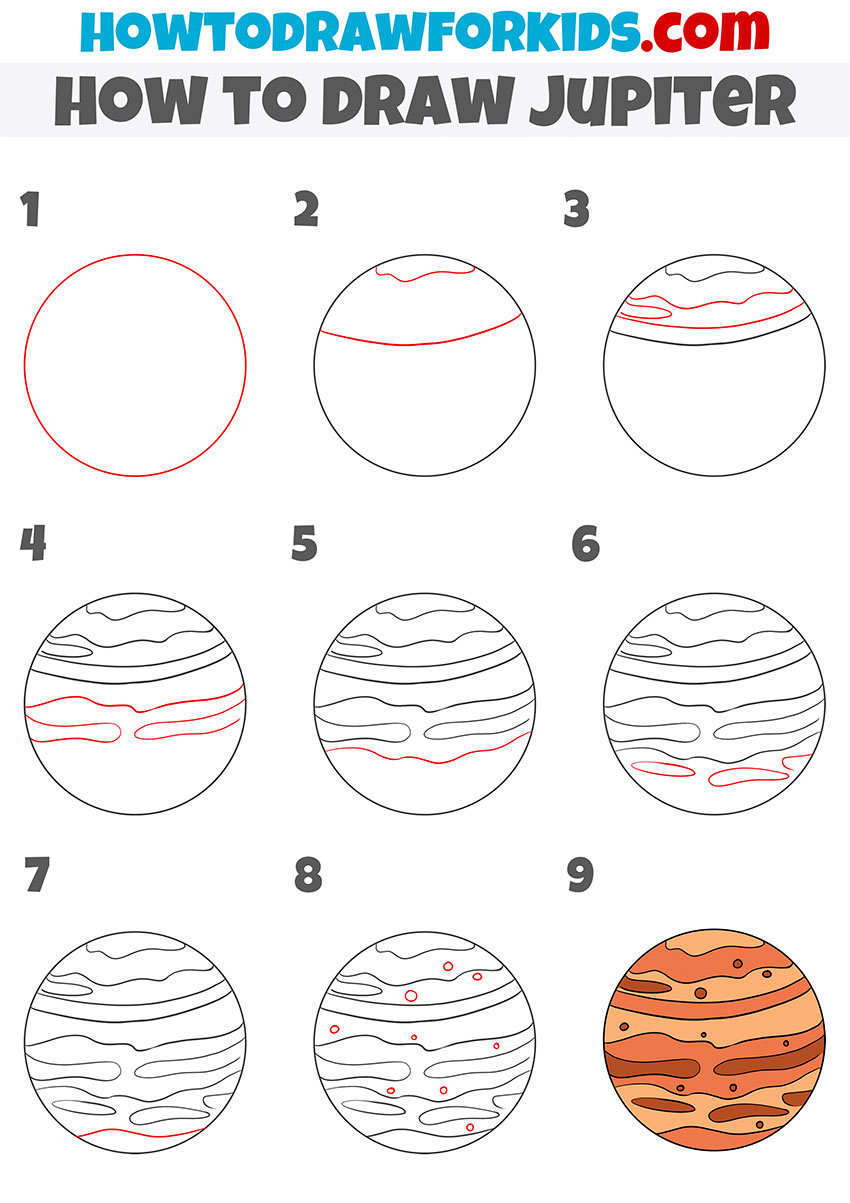
How to draw Jupiter step by step
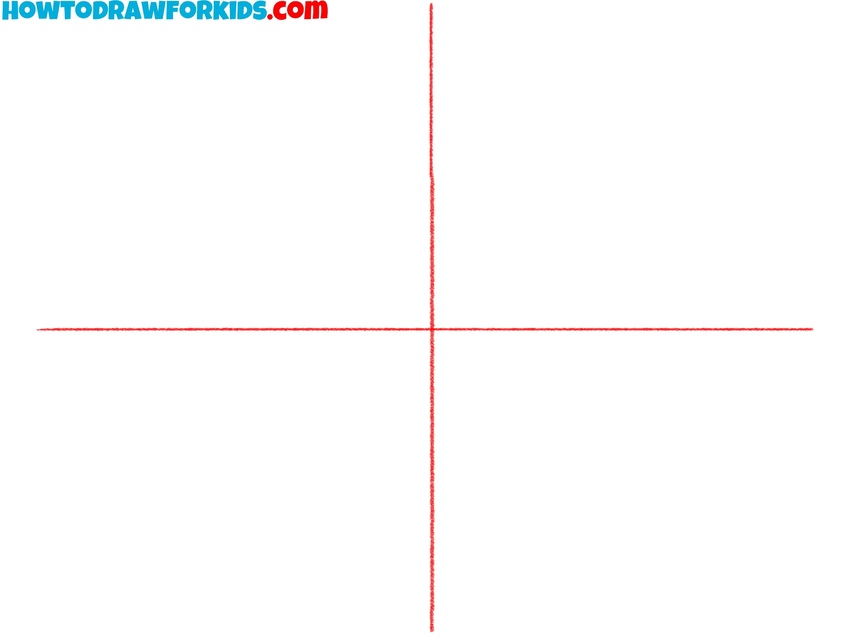
- Sketch the initial guide cross.
To draw the planet correctly, mark guides to give it a round shape. Draw one long vertical line and one long horizontal line that intersect at the middle, forming a cross. Make the lines light, straight, and equal in length so the circle will later touch them at four points.
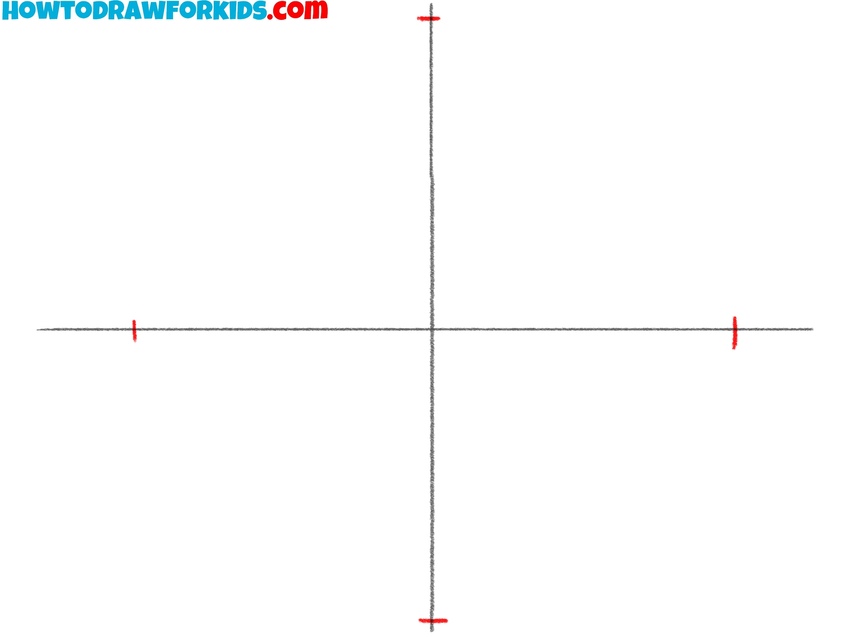
- Add the circle boundary markers.
Next, define the boundaries of the future circle. Add tiny tick marks or short dashes at the ends of the vertical and horizontal guides to indicate the four “touch points” of the sphere. These marks make it easy to keep the circumference even when you connect them. Confirm the spacing looks symmetrical around the center. If one arm of the cross appears longer, adjust now before committing to the round outline.
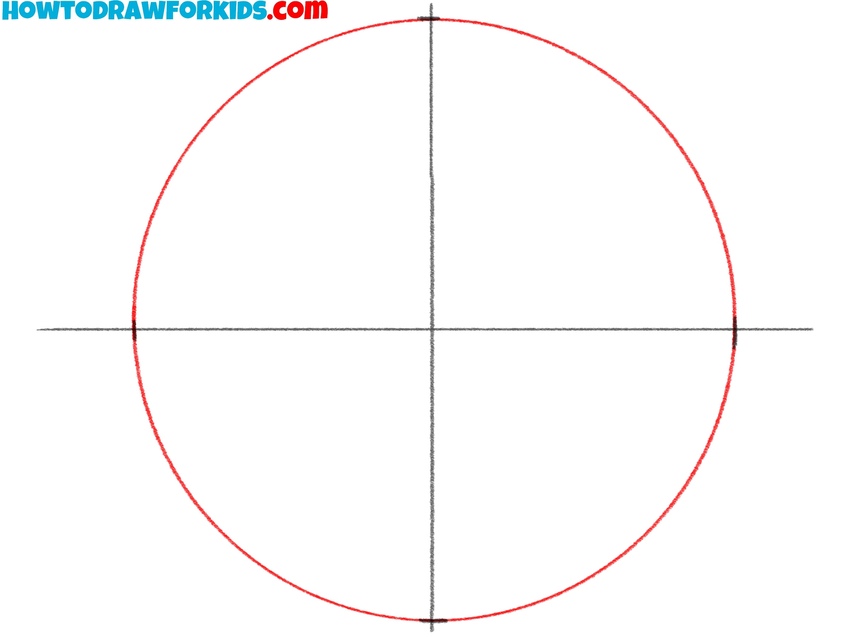
- Draw the main outline of Jupiter.
With guides ready, draw the disk of Jupiter. Sketch a smooth circle that passes through the four tick marks and gently touches the vertical and horizontal guide lines. Move your hand in a steady arc, turning the page if needed to keep the stroke comfortable. If the curve wobbles, sketch several light passes and select the best path.
- Clean the guides inside the planet circle.
Clear visual noise so details read cleanly. Erase the long vertical and horizontal guide lines that cross the circle, removing them completely from the interior and exterior. Also lift any extra tick marks that sit outside the final circumference. If a small gap appears on the outline, lightly redraw that portion to restore a smooth rim. After this clean-up, the drawing should show a single, crisp circle ready for surface patterns.
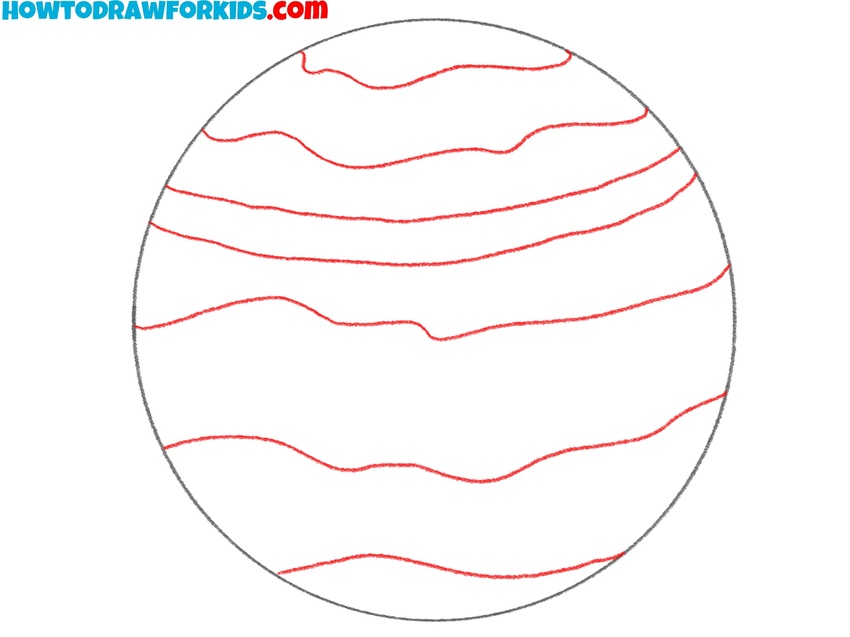
- Add the wide atmospheric bands.
Begin describing Jupiter’s weather system. Inside the circle, draw several long, gently wavy horizontal bands that wrap across the planet disk. Vary their spacing and thickness to represent the alternating dark belts and light zones seen on telescope images. Keep the curves subtle; they should follow the planet’s rotation lines rather than sharp zigzags.
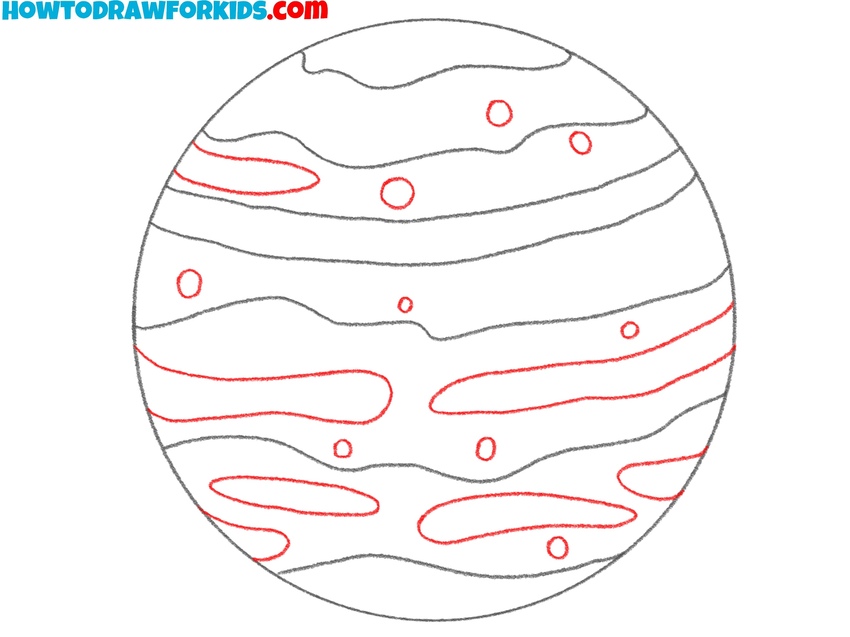
- Add storm spots and smaller bands.
Between and within the bands, sketch smaller meandering shapes: short broken lines, thin ripples, and scattered ovals of different sizes. Place a few round spots to represent cyclonic storms; vary their diameters so the surface looks interesting for the viewer.
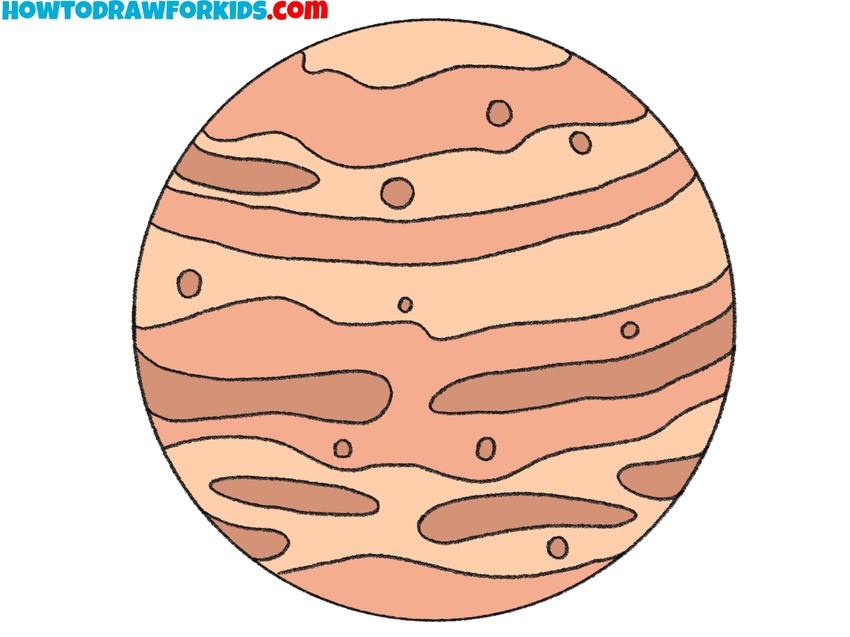
- Color Jupiter’s bands and surface.
Finish by applying color that matches the planet’s muted palette. Lay a warm base of pale beige or peach across the entire disk to unify the sphere. Over the base, shade the darker belts with soft browns or russets and leave the zones lighter, using cream and light orange. You can also add subtle gradients that darken toward the limb to represent curvature.
Easy Earth Drawing Tutorial
This additional Jupiter drawing guide demonstrates a simple way to depict the largest planet in the Solar System using curved lines and smooth patterns.
To sketch this version of Jupiter, create a large circle with a steady outline. Inside this circle, illustrate several long, slightly curved lines that follow the round shape of the planet.
Add more narrow and uneven lines above and below to show layers of clouds. Continue building up the structure with extra bands and shapes, varying the thickness and curvature of each one.
In one of the middle regions, you can draw a small oval or circle to represent the Great Red Spot. When the structure is complete, add a few small circular shapes across the surface to show storms. For coloring, use warm tones, for example, orange, brown, and beige.
Now you know how to draw Jupiter. I hope that you have received pleasant emotions and acquired useful skills.
Visit other guides about space, to learn how to draw Earth, other planets, starts and more related objects.
Write in the comments what other planets of the solar system do you know? What planets would you like to draw in the next lessons?


nice
Thanks!