How to Draw Kuromi
Learn how to draw Kuromi with my step-by-step tutorial. Train your art skills by focusing on proportions, symmetry, and details.

How to Draw Kuromi: Basic Information
Proportions refer to the size relationship between different parts of a drawing. Getting proportions right ensures that characters look balanced and realistic, even in stylized art. Kuromi’s design, with her large head and smaller body, is an excellent example for practicing proportions.
Expressions convey emotions and personality, making characters more relatable. Mastering drawing expressions is key to creating dynamic and interesting artwork. Kuromi’s facial features are expressive, offering a perfect study for artists learning to depict emotions.
Stylization allows artists to create distinctive, memorable characters. It involves exaggerating or simplifying features to convey personality, mood, or a specific artistic vision.
Kuromi is a perfect example of a stylized character. Drawing Kuromi helps artists understand how to use stylization effectively. By focusing on her unique proportions and design elements, artists can learn how to illustrate key characteristics to show the personality of their own creations.
Kuromi Drawing Tutorial
Materials
- Pencil
- Paper
- Eraser
- Coloring supplies
Time needed: 30 minutes
How to Draw Kuromi
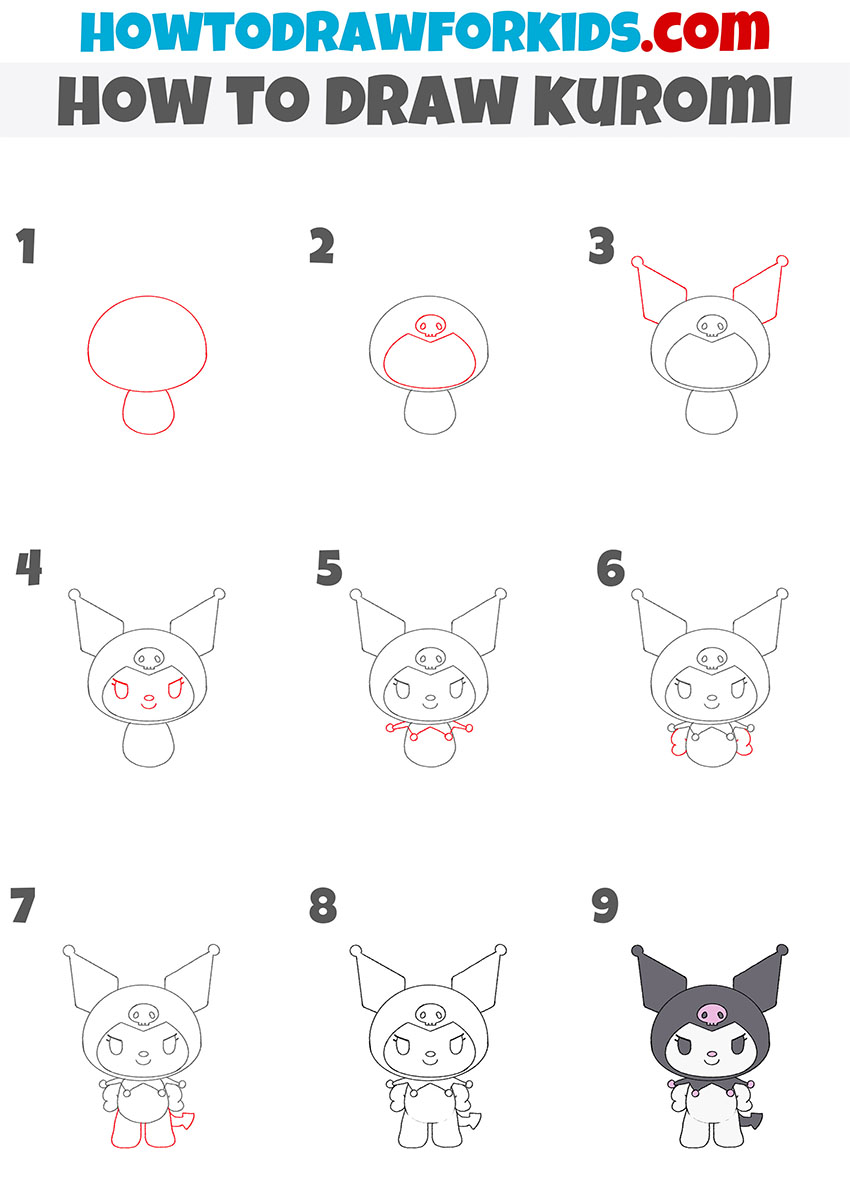
- Draw the base of Kuromi’s body.
Begin by drawing the basic shapes that form Kuromi’s head and body. Start with a large oval shape for the head, which resembles a mushroom cap. Below the head, draw a smaller oval to represent the body. These shapes will serve as the foundation for the rest of the drawing.
- Start drawing the hat.
Within the boundaries of the head, draw a precise outline for Kuromi’s face centered in the lower half of the head circle. At the forehead’s center, sketch a simple but iconic skull logo. This logo is distinctive to Kuromi, featuring a small skull that illustrates her mischievous and somewhat gothic theme.

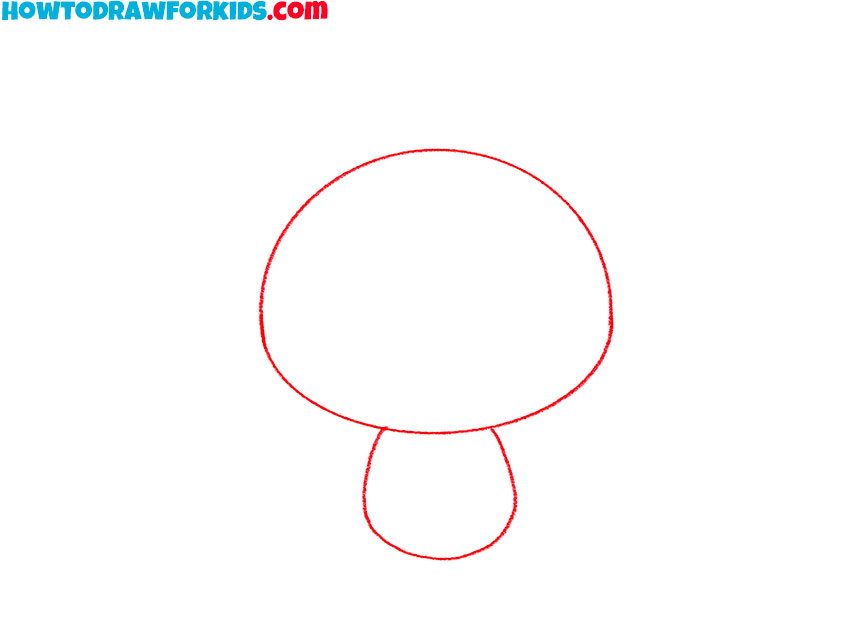
- Draw Kuromi’s ears.
From the top of the head, extend two long, curved ears. These should be pointed at the tips and wide at the base. This step is important as the ears are a significant part of Kuromi’s silhouette, contributing greatly to her recognizable and beloved form.

- Illustrate the facial features.
Detail Kuromi’s face by drawing large, rounded eyes with thick lashes pointing outwards. Include a small oval for the nose and craft a sly, mischievous smile. These facial features are central to Kuromi’s character, capturing the essence of her mischievous yet adorable nature.
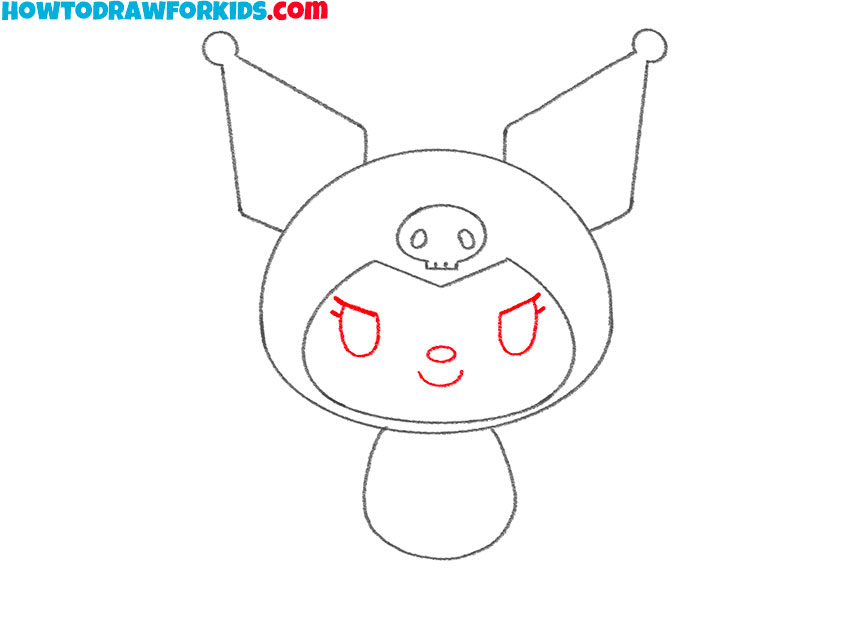
- Start drawing the costume.
Add Kuromi’s collar by drawing a ruffled edge around her neck. Start by sketching a series of small, curved lines around the base of her neck to create the appearance of fabric folds. At the end of the protruding parts of the collar, draw bells in the form of simple circles.
- Sketch out the arms.
Draw two small, curved lines extending from the sides of her body to represent her arms. At the end of each arm, sketch her hands, making sure they are proportionate to the rest of her body. The arms should be drawn perfectly symmetrically and mirror each other.
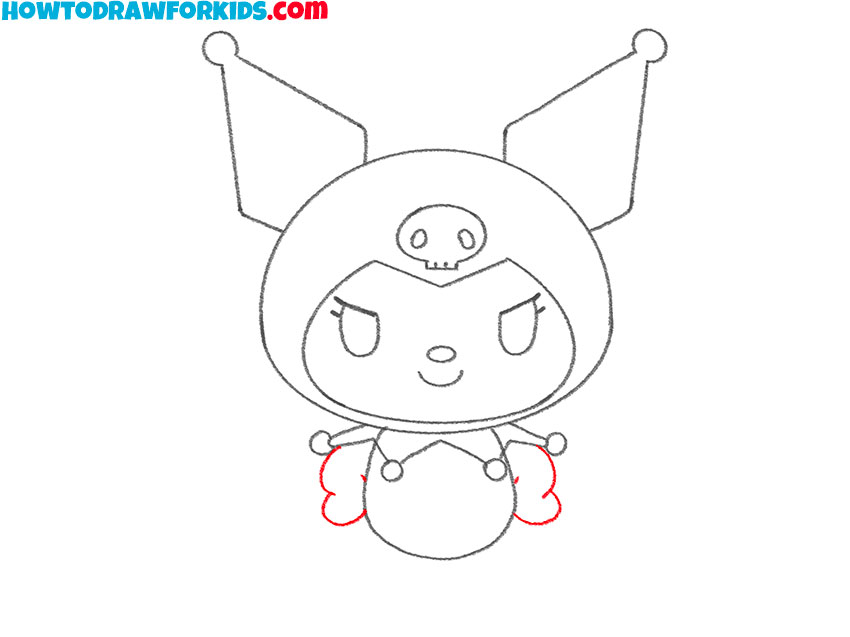
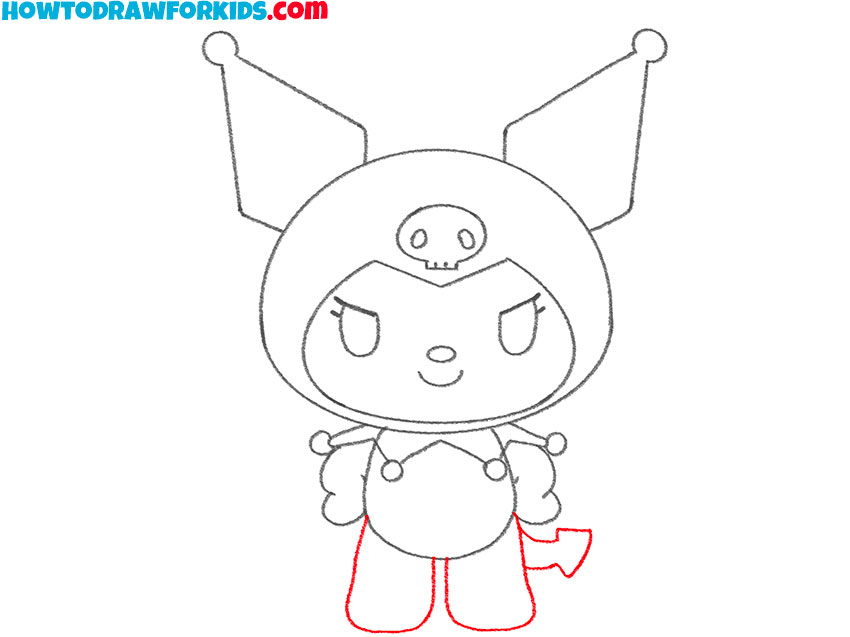
- Draw the legs and tail.
Proceed to draw Kuromi’s legs as short and plump, ending with small, rounded feet that support her cartoonish figure. Add a whimsical touch by including a small tail peeking out from behind her. The tail should have a pointed tip and curl slightly, suggesting movement.
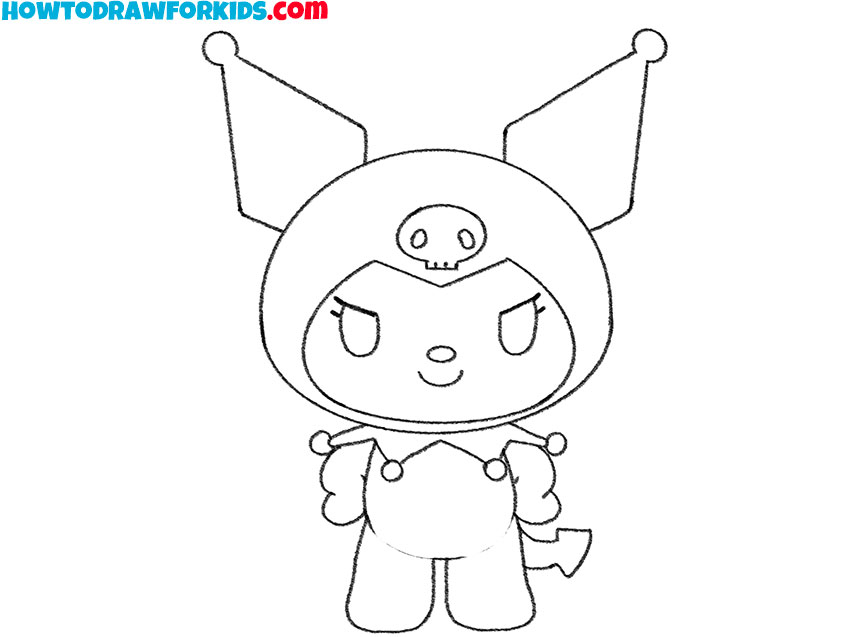
- Review the sketch and any inaccuracies.
Refine the entire outline of Kuromi, smoothing any rough edges and adding final details. Pay close attention to the shape of her ears, facial features, and clothing. Ensure that all elements are proportionate and symmetrically placed.
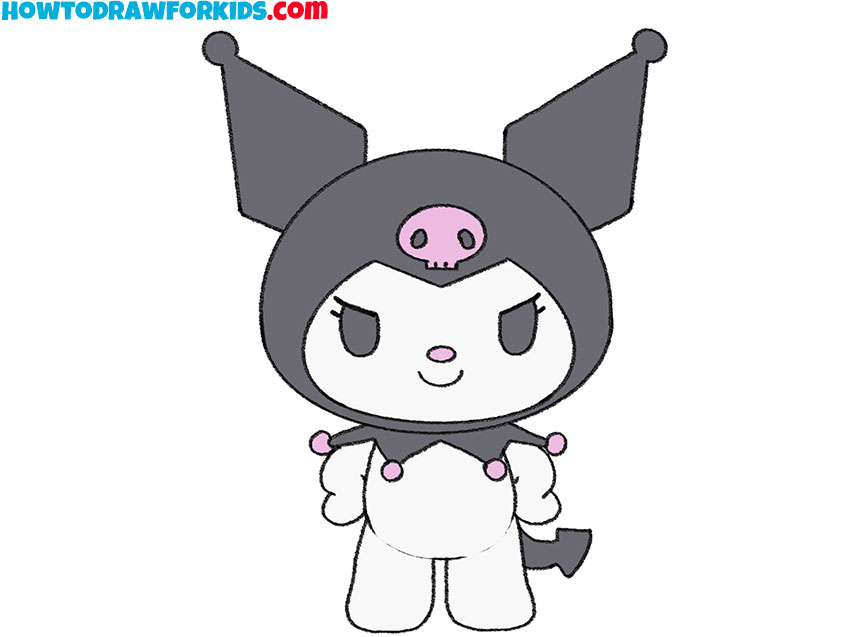
- Color your Kuromi drawing.
Use black for her hood and ears, pink for the skull and nose, and a light gray or white for her body. Make sure to color within the lines. You can add shading where necessary to give the drawing depth and dimension. Pay attention to the small details.
Additional Content
At the conclusion of this tutorial, a PDF file is provided to reinforce your learning and practice your skills. It includes a condensed tutorial summary for quick reference, a coloring page to refine your color application and shading techniques, and a tracing worksheet to improve your line work and build confidence.
Additionally, a grid drawing worksheet helps you break down Kuromi’s form into manageable sections for accurate proportions.
These resources are designed to reinforce the techniques covered in the tutorial, offering practical experience in drawing, coloring, and refining your artwork. Enjoy the process and keep practicing!
Learn How to Draw Kuromi in Even More Detail
To learn how to draw Kuromi more detailed, each phase of the learning process is essential. Below is an expert analysis of each stage, providing detailed insights into the intricacies of drawing Kuromi:
- Start by closely examining the character design. Pay attention to the proportion of her head to her body, which typically features a large head compared to a smaller body. Note the distinctive shape of her large bat-like ears, which have a significant impact on her silhouette. Observe her facial structure, including the placement and size of her eyes, nose, and mouth. Recognizing these proportions and unique features is very important for achieving a balanced and accurate drawing.
- Identify the fundamental shapes that compose Kuromi’s form. For instance, use a circle for her head, ovals for her eyes, a small oval for her nose, and triangles for her ears. The body can be represented by a slightly elongated oval. Starting with these basic shapes simplifies the drawing process and aids in maintaining correct proportions.
- Practice drawing precise and intentional lines. For Kuromi, this involves creating smooth, continuous curves for her head and facial features, as well as sharp, defined points for her ears and collar. Use varying line thickness to add depth. The quality of your line work significantly impacts the overall neatness and clarity of the final illustration. Clean, confident lines will make your drawing look more professional.
- Select appropriate hues that match Kuromi’s typical color scheme. Her standard palette includes black for her hat and ears, white for her face and body, and pink for accents like her skull accessory and inner ears. Ensure color consistency by using the same shades throughout the drawing. Apply the colors smoothly and evenly, and strive to stay within the lines to achieve a polished finish.
- Kuromi’s expressions are key to conveying her personality. Adjust the shape and position of her eyes, the curve of her mouth, and the tilt of her ears to reflect different emotions, such as happiness, mischievousness, or surprise. For example, wide eyes and a big smile can express joy, while narrowed eyes and a smirk can convey a more mischievous look. The subtle changes in these features can dramatically alter the overall expression and mood of the character.
- Choose a background that complements Kuromi’s character and enhances the overall composition of the drawing. A simple backdrop, such as a solid color or a minimalistic pattern, can keep the focus on Kuromi herself. Alternatively, a detailed scene, such as a gothic-themed environment or a whimsical landscape, can provide context and tell a story. Consider how the background elements interact with Kuromi and ensure they do not overshadow the main subject.
Conclusion
I’d also like to invite you to look at other drawing lessons on my website. For example, you can learn how to draw Hello Kitty.
I also want to remind you that I have a whole category dedicated to coloring pages and other activities for children. This category is regularly updated with new coloring pages. Visit often to stay updated and not miss out on any new additions.
Moreover, if you’re want to stay updated on new tutorials, tips, and artistic insights, please follow my social media accounts. Your support means the world to me, and it’s what motivates me to create more content that you’ll love.


i love it
i know its goated!!!
Thank you so much for these tutorials on how to draw.
it didnt work :<
I love kuromi