How to Draw a Snowflake
This tutorial will demonstrate you how to draw a snowflake in detail and how to create perfectly symmetrical patterns accurately.

How to Draw a Snowflake: Introduction
Winter is a season that often inspires creativity and artistic expression. This time, it inspired me to create a simple yet detailed tutorial on how to draw a snowflake.
Although snowflakes may seem like simple objects at first glance, they are not that easy to draw. From a distance, a snowflake appears as a white dot, but closer observation reveals a highly intricate geometric figure with numerous branches and arms.
To accurately depict these details, certain knowledge is required, which I will provide in this snowflake drawing tutorial. By following this lesson, you will learn how to create perfectly symmetrical patterns, whether they represent natural or man-made objects.
Additionally, I have included a second, alternative tutorial to demonstrate how two entirely different methods can lead to a similar result. The first tutorial focuses on clean, straight lines, while the second uses rounded lines and shapes. Both methods result in a complete snowflake drawing.
Snowflake Drawing Tutorial
Materials
- Pencil
- Paper
- Eraser
- Coloring supplies
Time needed: 30 minutes
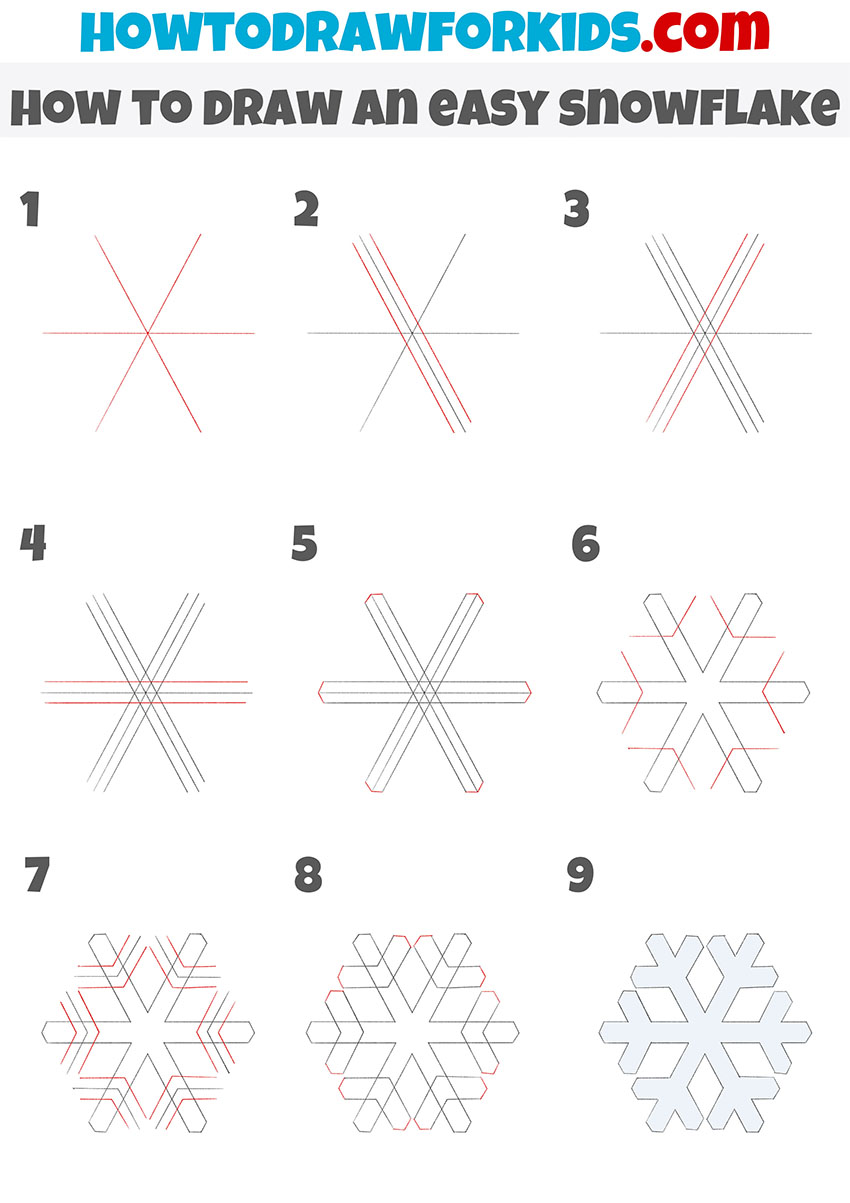
How to Draw a Snowflake
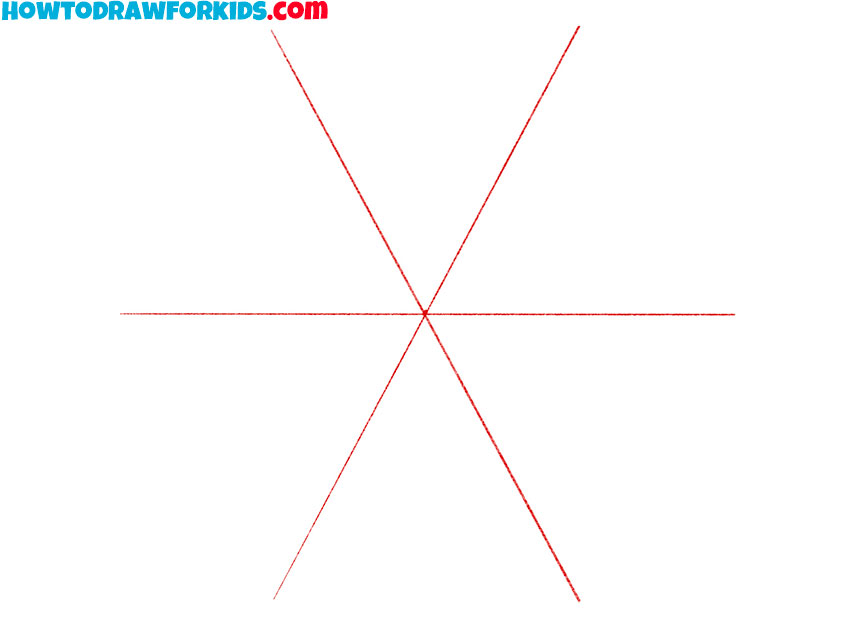
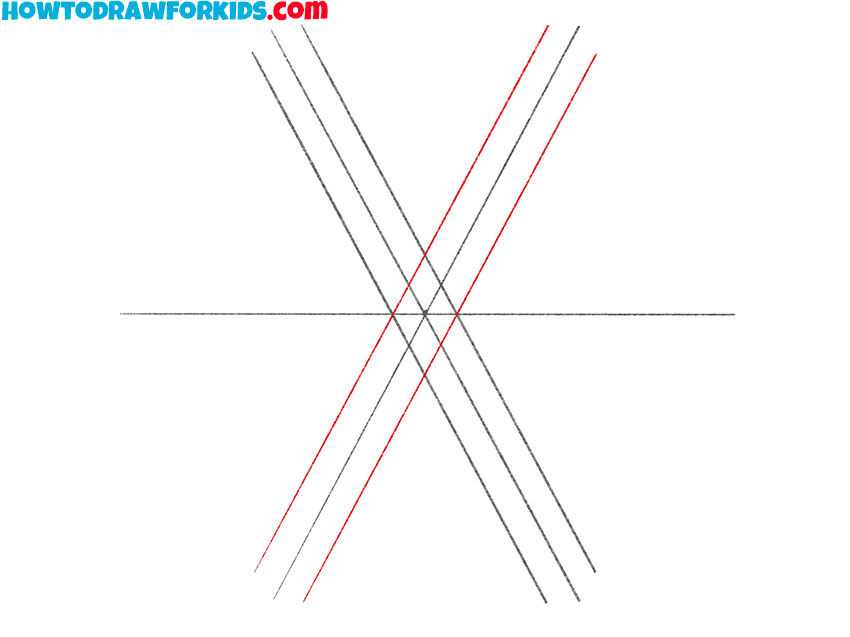
- Draw the base for the snowflake.
To draw a perfectly symmetrical snowflake, start by sketching three evenly spaced straight lines intersecting at the center to form a six-pointed star. This symmetry is very important for the classic snowflake pattern we aim to achieve.
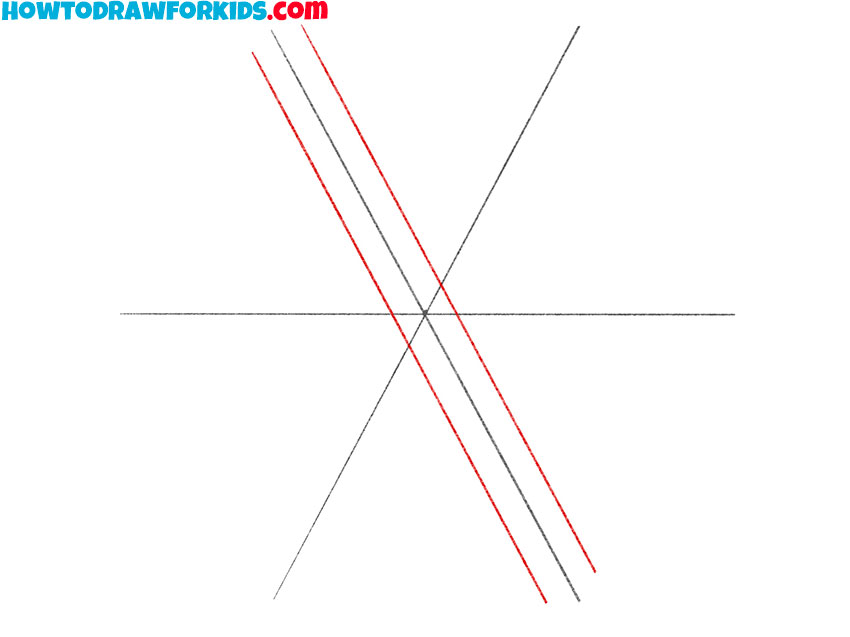
- Add thickness to the first arms.
Draw two parallel lines at the sides of one of the six radial lines of your star to create a thicker, more pronounced shape, improving the drawing dimensional appearance. These lines must be perfectly straight and parallel to each other.
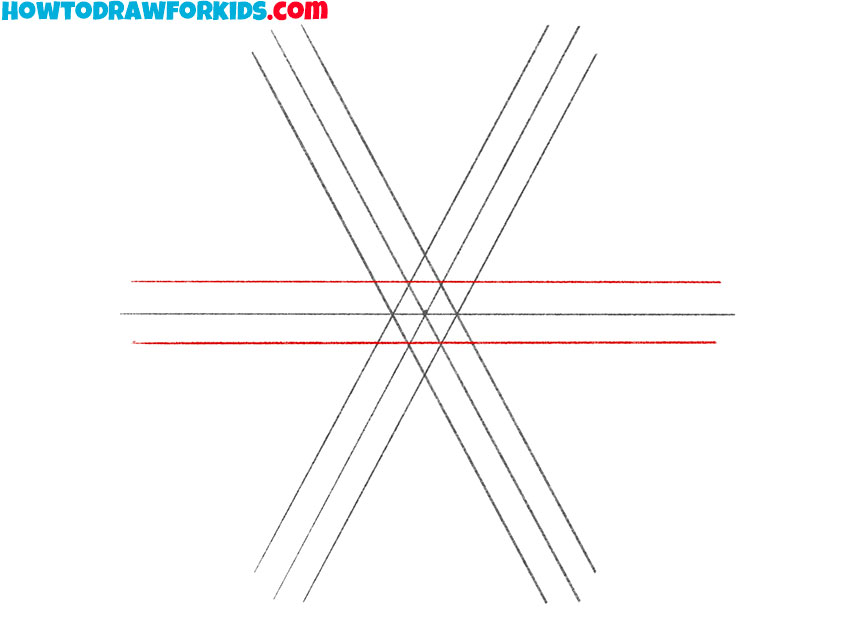
- Add thickness to the next rays.
Continue enhancing your drawing by adding two additional parallel lines adjacent to another beam, mirroring the placement of the first set to establish symmetry and intricacy in your snowflake. As in the previous step, these lines should have a perfectly straight appearance.
- Add thickness to the rest of the arms.
To build on the structure, add another set of parallel lines across the horizontal guideline. When drawing these straight lines, regularly check the outlines and accuracy of the forms. To do this, you can use a mirror and frequently rotate the snowflake drawing.
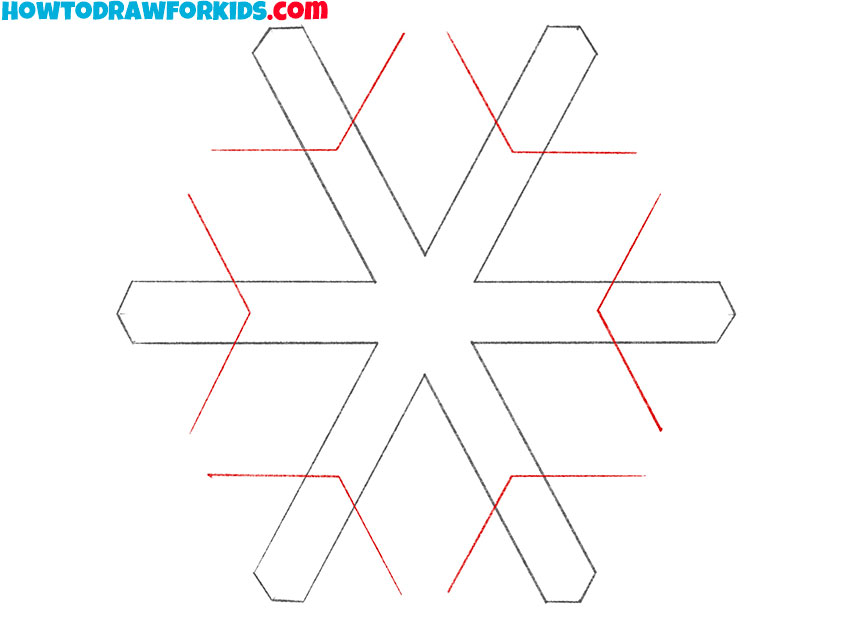
- Finish the ends of the rays.
Give the ends of each arm of your snowflake a finished look by sketching short diagonal lines to form pointed tips. These shapes will form the unique points of your snowflake. All the rays, or arms, of your snowflake should be the same length and size. Check this before moving on to the next step.

- Start sketching the smaller arms.
On each arm, draw small V shaped lines. These lines will form the basis of the snowflake’s intricate pattern. Focus on keeping the angles and placement uniform for all six arms. These branches Improve the overall design, giving the snowflake its recognizable look.
- Add thickness of the smaller arms.
Draw a set of additional outlines on the sides of the lines from the previous step. This will increase the thickness at the ends of the snowflake. It is essential to ensure that the size, angles, and placement of these details are consistent. To verify symmetry, use the techniques mentioned earlier.
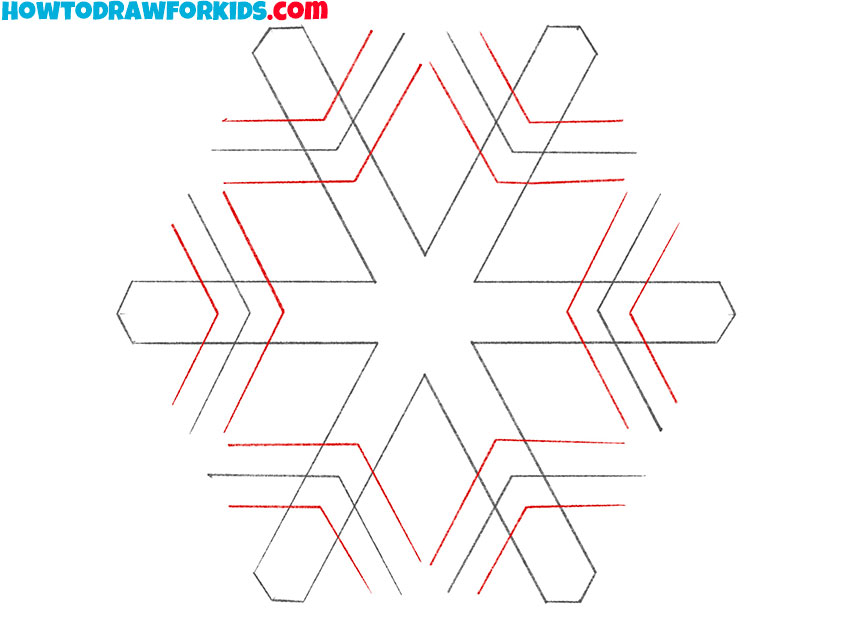
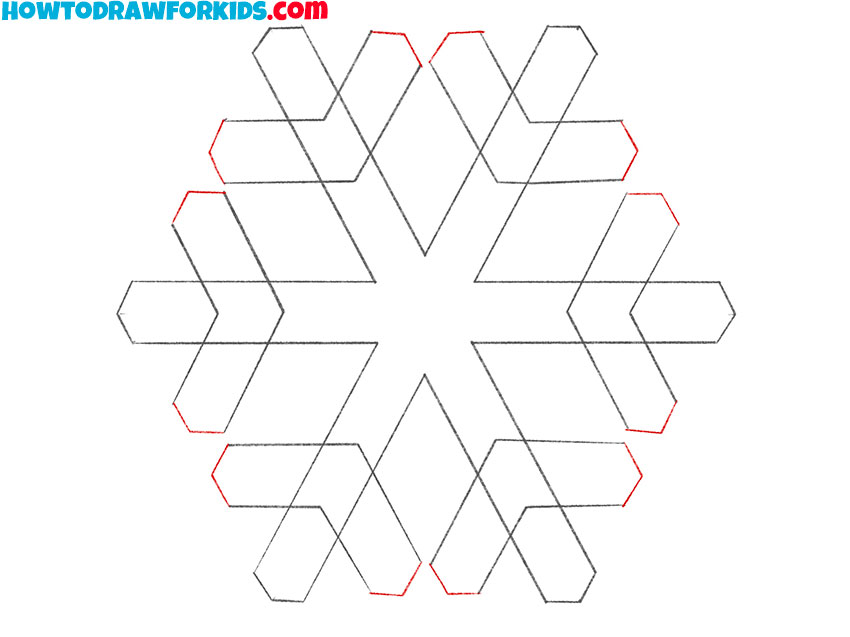
- Draw the ends of the smaller arms.
Add angled lines at the ends of each arm to create the intricate edges. These short strokes will finish creating the delicate points. Also, erase the guidelines from the first step, to give your drawing of a snowflake more finished and polished look.
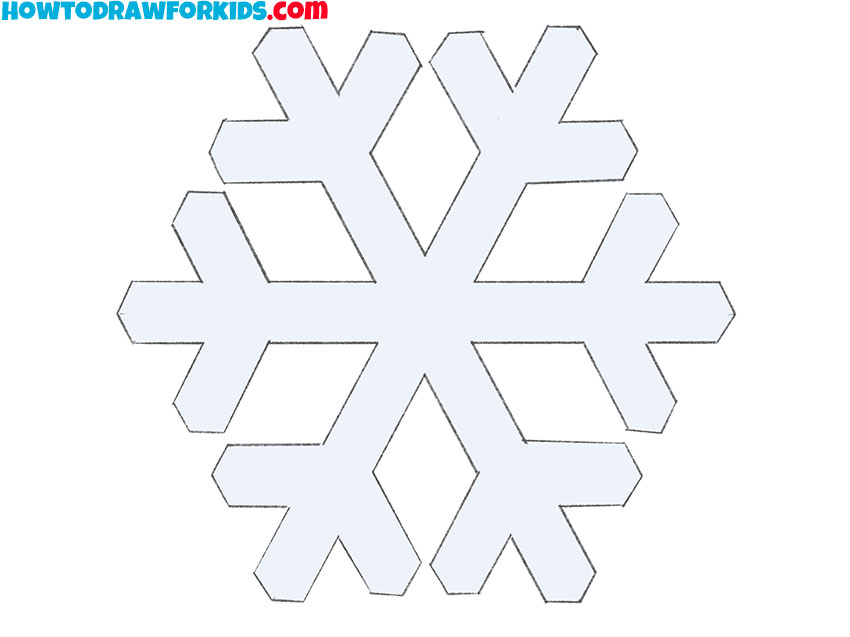
- Color the snowflake drawing.
Eliminate any remaining guidelines from the snowflake drawing and fill in the design with a soft light blue shade. You can add sparkle to your snowflake by drawing small white dots in random places. Alternatively, you can color the background light blue and leave the snowflake white.
Additional Content
I’ve prepared a PDF file containing a concise version of this drawing , which, importantly, is available for free. Furthermore, once you download this file, you’ll have the advantage of being able to draw even when offline. This accessibility ensures that you can enjoy drawing at any time, regardless of internet connectivity.
How to Draw a Snowflake: Alternative Technique
I have created an alternative method to draw a snowflake specifically for you. This new approach will provide additional practice and help improve your drawing skills. The main difference between this tutorial and the first one lies in the approach and initial structure.
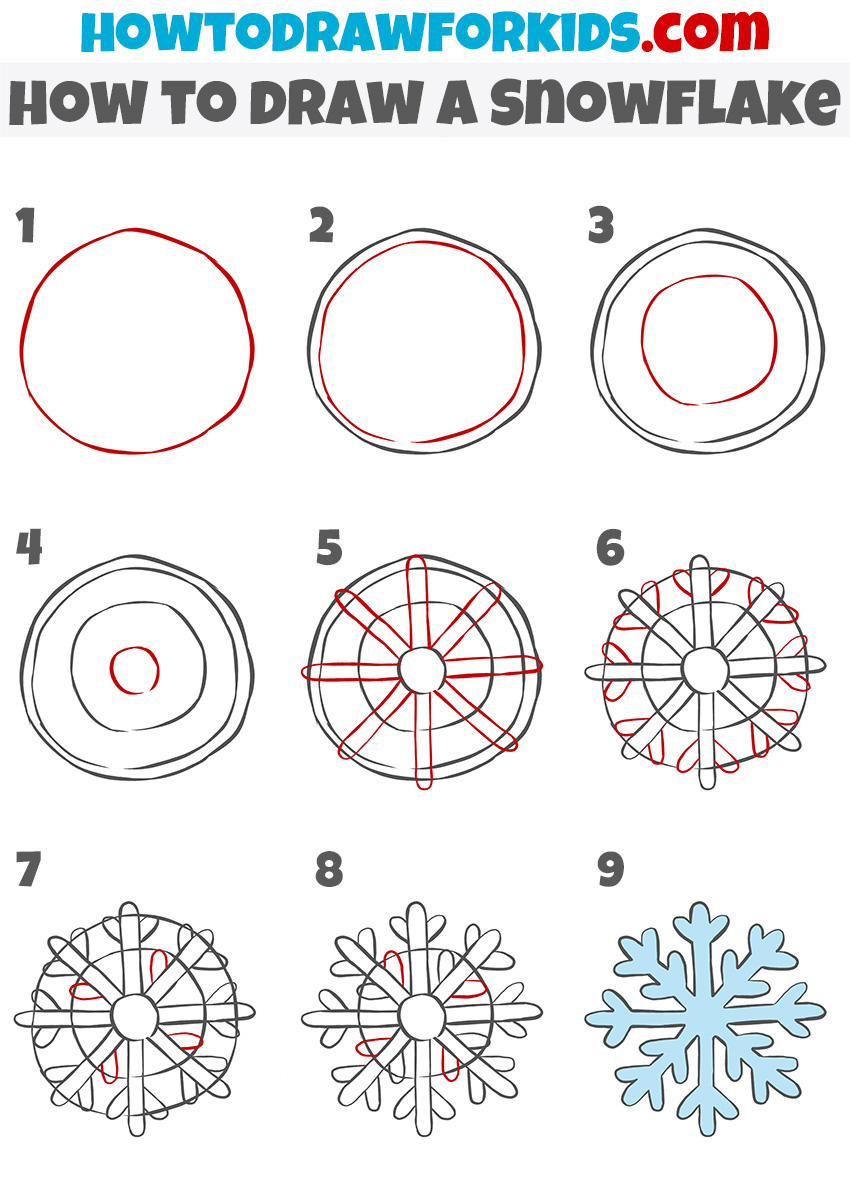
The first tutorial uses straight lines to create a geometric base, creating symmetrical arms with parallel lines. This tutorial, however, begins with concentric circles as a foundation, gradually adding radial lines and decorative elements to create the snowflake’s structure. The second method demonstrates circular symmetry over straight-line geometry, resulting in a more rounded design.
To draw a snowflake using this method, begin by sketching a large irregular circle as the outer boundary. Add a second, smaller circle inside the first, followed by a third, even smaller circle at the center. Continue by drawing a small circle in the very middle to act as the core. Next, draw straight radial lines crossing through the circles to divide the shape into equal sections.
Add curved and pointed details to the arms formed by the radial lines. Focus on the placement and angles of each element to maintain symmetry. Gradually refine the snowflake by erasing extra guidelines, smoothing the outlines. Finally, complete the snowflake by coloring it light blue or leaving it in pencil for a clean look.
Conclusion
This was a seasonal drawing lesson that demonstrated how to draw a snowflake using two entirely different methods. First, it was drawn using straight lines, and then a different approach was used, involving circles and smooth outlines. This illustrates that the same object can be created using entirely different techniques.
If you found this lesson helpful, consider visiting my other lessons. My site includes hundreds of tutorials that can help you draw almost anything. For example, you can learn how to draw a Christmas tree, a snowman, Santa, and other winter-related objects and characters.