How to Draw a Four-Leaf Clover
Drawing plants can be interesting, and in this step-by-step tutorial I’ll show you how to draw a four-leaf clover in a really simple way.
How to Draw a Four-Leaf Clover: Introduction
When drawing a four-leaf clover, there are several important elements to focus on that will help make your drawing more accurate and interesting. Pay special attention to the symmetry between the leaves. Since the four leaves need to look identical, maintaining balance and even spacing is very important.
One useful tip is to think of the leaves as heart shapes with rounded edges. The tops of the leaves should have a wide, smooth curve, while the base tapers to a narrow point where all the leaves meet at the center.
Another aspect to pay attention to is the overall shape of your four-leaf clover drawing. The stem, for example, should have a gentle, natural curve. Avoid making the stem too straight or rigid, as it should look like an organic extension of the clover.
While drawing a four-leaf clover, take breaks to step back and review the entire drawing for mistakes or uneven parts. This will allow you to make small corrections before finalizing the details. Another tip is to keep your strokes light at first. It’s much easier to adjust the shape and size of the leaves when the lines are light.
Four-Leaf Clover Drawing Tutorial
Materials
- Pencil
- Paper
- Eraser
- Coloring supplies
Time needed: 29 minutes
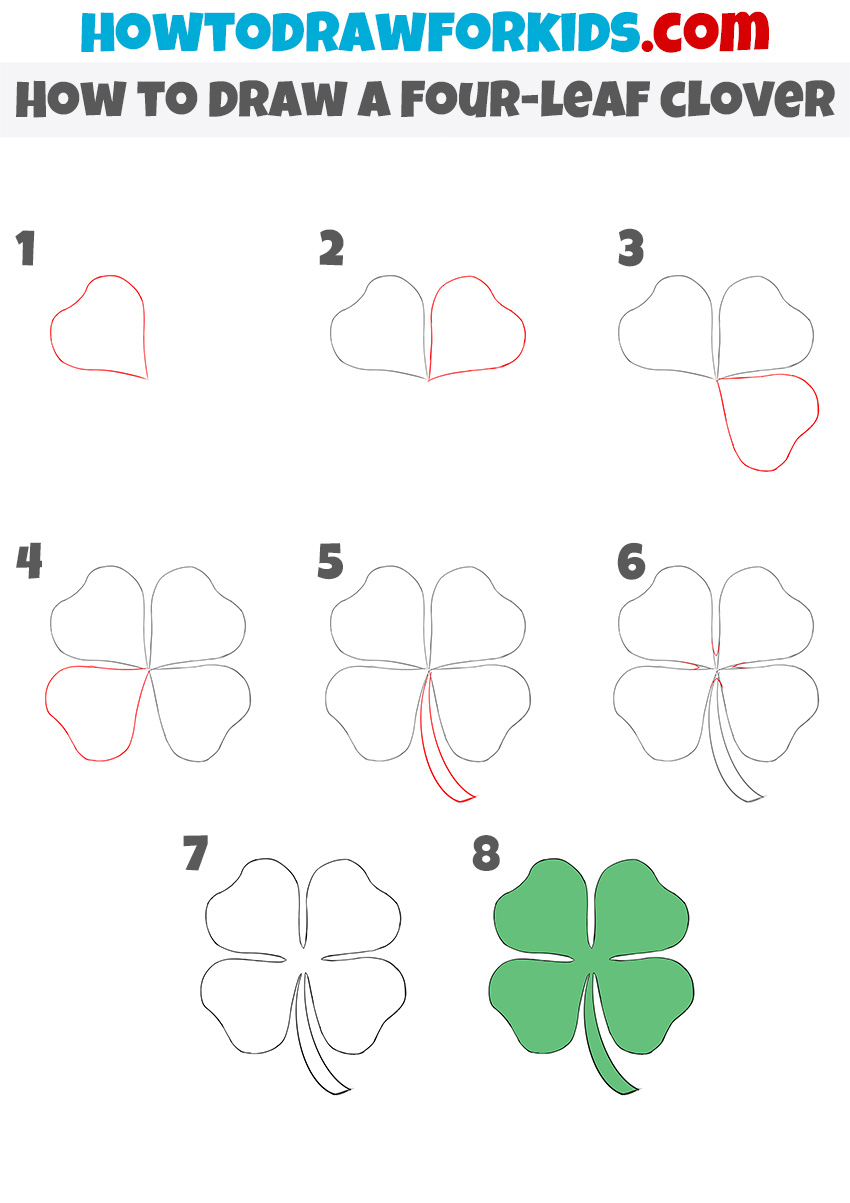
How to Draw a Four-Leaf Clover
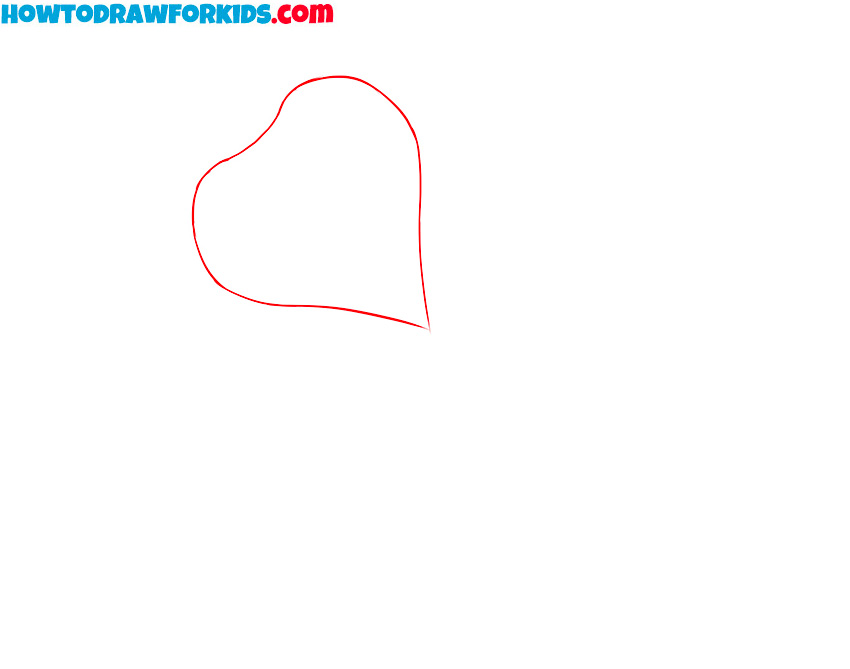
- Sketch the first leaf.
Begin your art by sketching the first leaf of the four-leaf clover. Draw the leaf in the shape of a heart, but with softer, rounded edges than a traditional heart. Keep the lines of your initial sketch really light to make adjustments easier in the next steps.
- Add the second leaf.
Like the first, the second leaf should resemble a heart with softly rounded edges. Place this leaf beside the first one. The shape of the second leaf should mirror the first, forming a symmetrical pair. Pay close attention to the base where the two leaves meet, as they should come together at a common point.

- Sketch the third leaf.
This leaf should sit on the lower right side of your four-leaf clover drawing, forming the bottom of the clover’s overall shape. Like the first two leaves, this one will also have a heart-like shape with rounded edges. Make sure the base of the third leaf connects at the same central point as the others.

- Complete the fourth leaf.
To complete the clover’s leaves, draw the fourth and final leaf in the bottom-left space. This leaf will be similar in shape to the others, rounding out the four-leaf clover. Like the other leaves, the base of this one should meet at the central point where all the leaves converge.

- Draw the clover stem.
After completing the leaves, it’s time to begin drawing the clover’s stem. Start by extending a curved line downward from the center where all the leaves meet. Make sure the curve is gentle and smooth, giving the impression that the stem is an organic continuation of the clover.

- Finalize the outline.
In this step, you will connect the leaves at the central part of the clover using curved lines. Starting from the base of each leaf, draw a smooth, curved line that follows the natural shape of the leaf. These lines will help define the structure of the clover and give it a more finished look.

- Refine the four-leaf clover drawing.
In this step, you’ll focus on erasing any extra guidelines and refining your four-leaf clover drawing to ensure it looks clean and polished. After erasing, review the outline of each leaf and stem to make sure they appear smooth and even.

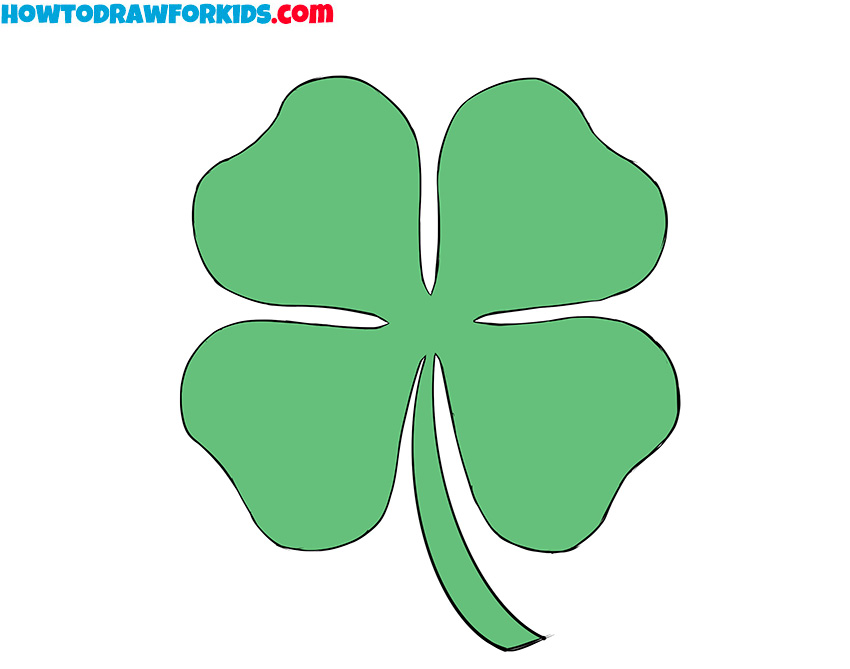
- Color the clover.
Traditionally, clovers are green, so choose a green shade to fill in the leaves. Be sure to color within the lines you’ve drawn, keeping the color even and smooth. Don’t forget to color the stem with the same green, making it blend naturally with the leaves.

Additional Content
If you ever need to revisit this tutorial, review the steps, or practice again, all the important information has been compiled into a single PDF for easy access. This PDF contains various helpful materials, including the drawing instruction, a coloring page, a tracing worksheet, and a grid drawing worksheet. These files are created to assist you in mastering the guide at your own pace. You can download the file for free and use it whenever you need it.
Conclusion
I hope this four-leaf clover drawing tutorial was helpful for you. There are many other tutorials available, such as my guide on how to draw planet Earth or the instruction on how to draw a plant with similar leaf shapes.
The skills you’ve learned here can be applied to other illustrations in future drawings. Also, consider subscribing to my YouTube channel for video guides. You can also follow me on Pinterest for announcements and additional resources. Visit my website often for more tutorials and exercises that cover a wide range of subjects and themes.