How to Draw Morty
This lesson will teach you how to draw Mort step by step in the simple and recognizable style of the famous animated show.

In this drawing lesson you will learn how to sketch Morty, and think you will enjoy drawing this character with this easy step by step tutorial. You don’t have to be a professional artist to complete this drawing.
So, Morty is one of the two main characters of the American comedy sci-fi animated series Rick and Morty.
This character is probably known to you as a young teenager who is very impressionable, vulnerable and good-natured. Morty is always ready to help others as he is helpful and friendly.
Materials
- Pencil
- Paper
- Eraser
- Coloring supplies
Time needed: 30 minutes
How to draw Morty step by step
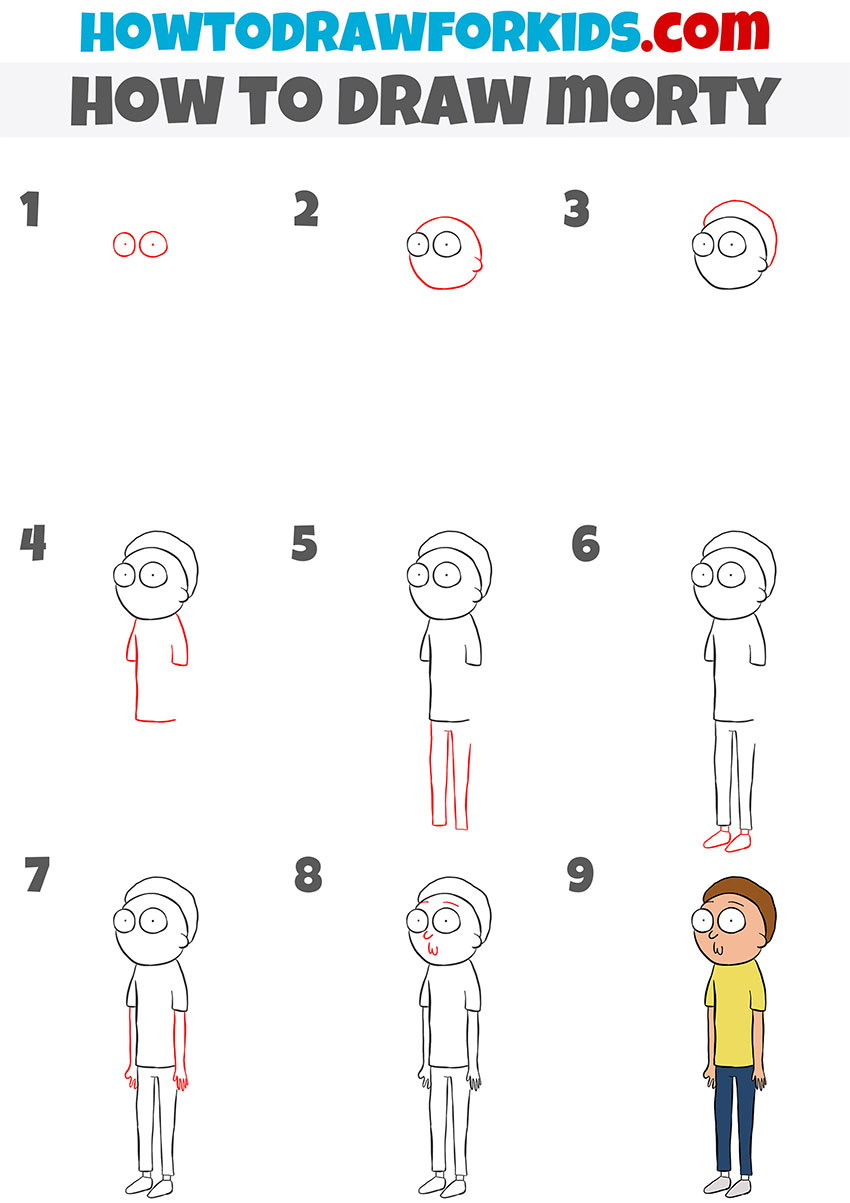
- Sketch the round eyes close together.
Start with the eyes because in many cartoon illustrations begin with this part of the face. Mark two large, simple circles side by side, touching slightly, to draw the cartoon eyes. Add small round pupils near the inner edges. Keep both pupils at the same height.

- Draw the circular head of Morty.
With eye size created, enclose them with Morty’s round head. Draw the cartoon face shape as a near-perfect circle. On the right, add a short curved line to hint at the ear contour. If you need a guide, sketch a light centerline running vertically.

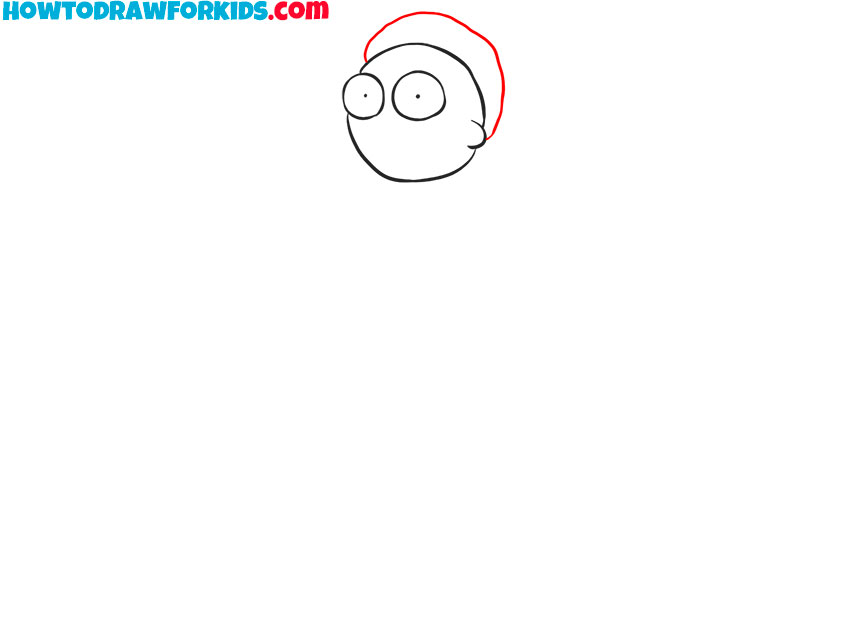
- Sketch the curved hairline.
Before moving to the body, define Morty’s distinctive hair shape. Draw a second curved line wrapping around the back and top of the head to create a “cap”. This band is thicker at the top and thinner near the sides.
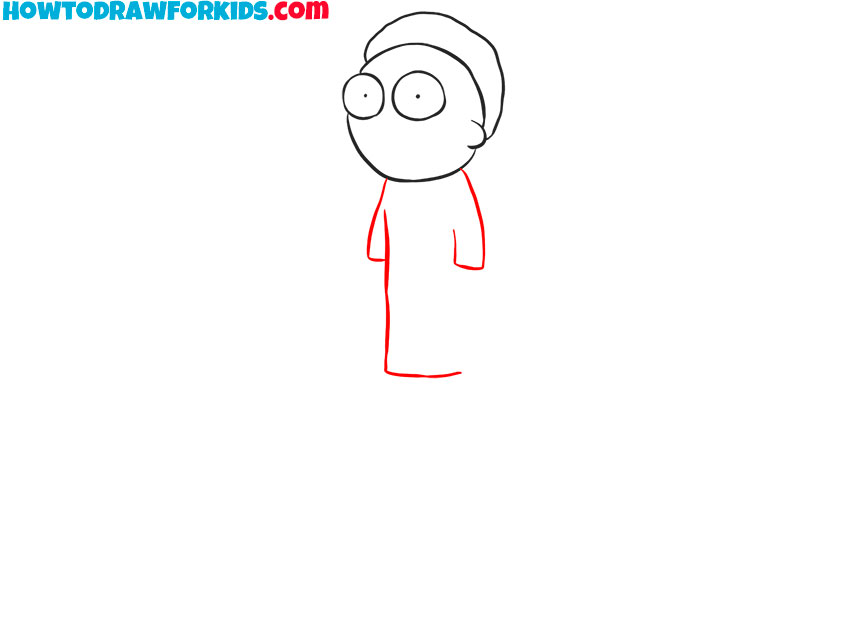
- Draw Morty’s basic shirt shape.
Continue sketching the character with a simple shirt shape. From the head, sketch a long, straight torso. Add a short sleeve on the near side as a tiny tube attached to the torso. Next, sketch the second sleeve of the T-shirt as a simple tube on the opposite side.
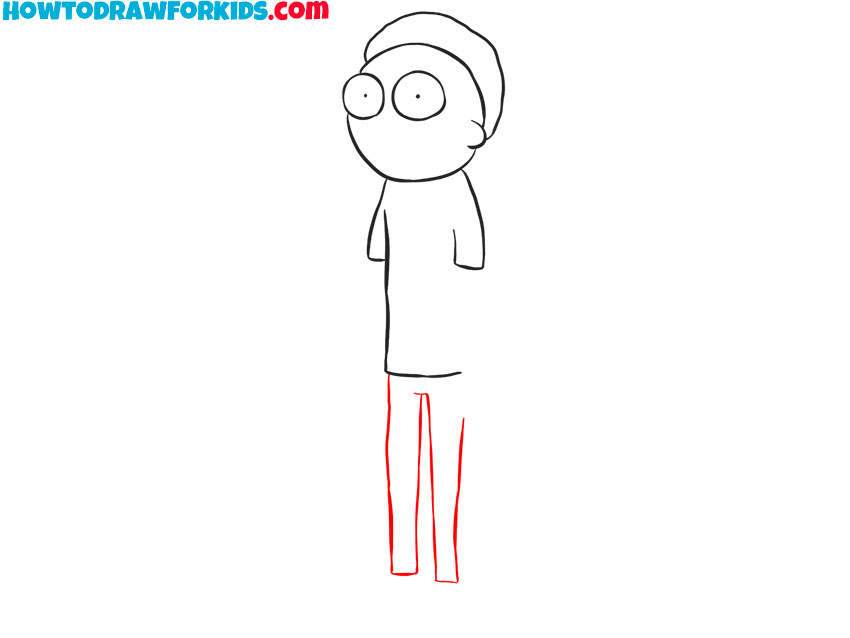
- Sketch Morty’s long, narrow legs.
Now, from the bottom of the shirt, draw two long, parallel shapes that extend downward, leaving a narrow gap between them. Keep each leg slightly tapered at the ankles. Keep the lines of the legs straight to match the show’s design.
- Sketch the small cartoon shoes.
Complete the lower silhouette, sketching sneakers of Morty. Draw two rounded, boat-like shapes attached to the leg bottoms, letting the near shoe overlap slightly. Keep everything minimal.

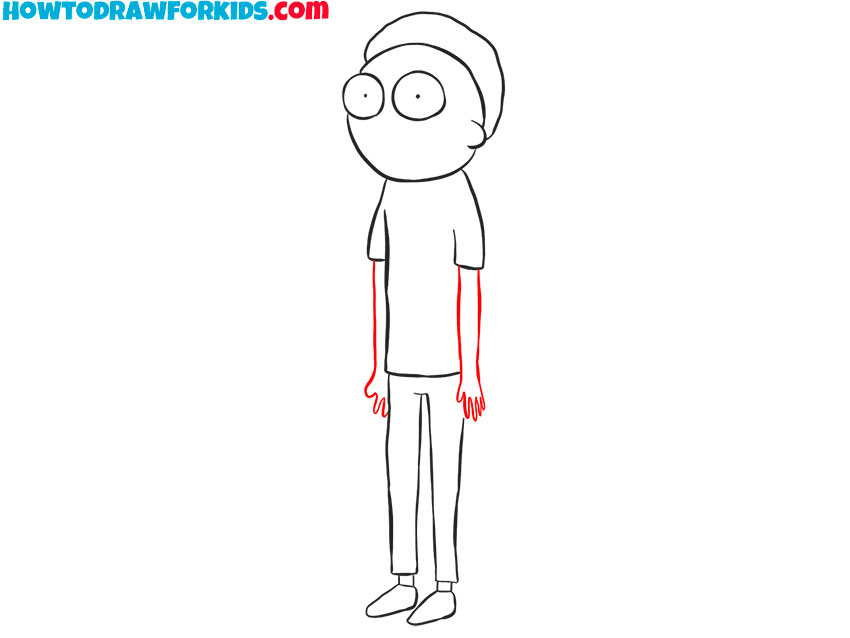
- Draw Morty’s long hanging arms.
Morty’s arms hang straight and look a bit too long, which is part of the style. From each sleeve, draw a narrow, straight arm reaching nearly to mid-thigh. Finish with small, simple hands: outline the palm as an oval and add short lines for fingers grouped together.
- Add cartoon facial features.
Add the minimal facial features, then erase guides. Draw the nose as a small curved line between the eyes, slightly off-center toward the near side. Under it, sketch a short W-shaped mouth. Add a tiny line above each eye to represent the eyebrows.

- Add matching colors for all parts.
Finish the drawing of Morty with flat, even color. Paint the hair of the cartoon character with a medium brown and the skin with a warm peach tone. Keep the eyes white with dark pupils. Color the T-shirt a bright yellow and the pants a deep blue; use light gray soles on the sneakers.

I have created a PDF file with a short version of this lesson, as well as useful additional materials. You can download and print this file so as not to lose this drawing lesson and return to it at any time convenient for you, even without an Internet connection.